This project reminds us of what we can do with a joystick, in this case we will do it to turn on lights and warn us with lcd (we will not deceive you unless you change the code)
este proyecto nos recuerda de lo que podemos hacer con un joystick en este caso lo haremos para prender luces y que nos avise con lcd (no lo engañaremos a menos que cambienos el codigo)
Interactive Joystick Control with Visual Feedback
This bilingual project (English/Spanish) demonstrates how to translate physical analog movement into digital feedback. By using a standard 2-axis joystick, we can control a set of LEDs to represent direction and provide textual updates on a 16x2 LCD screen.
Hardware Interface Details
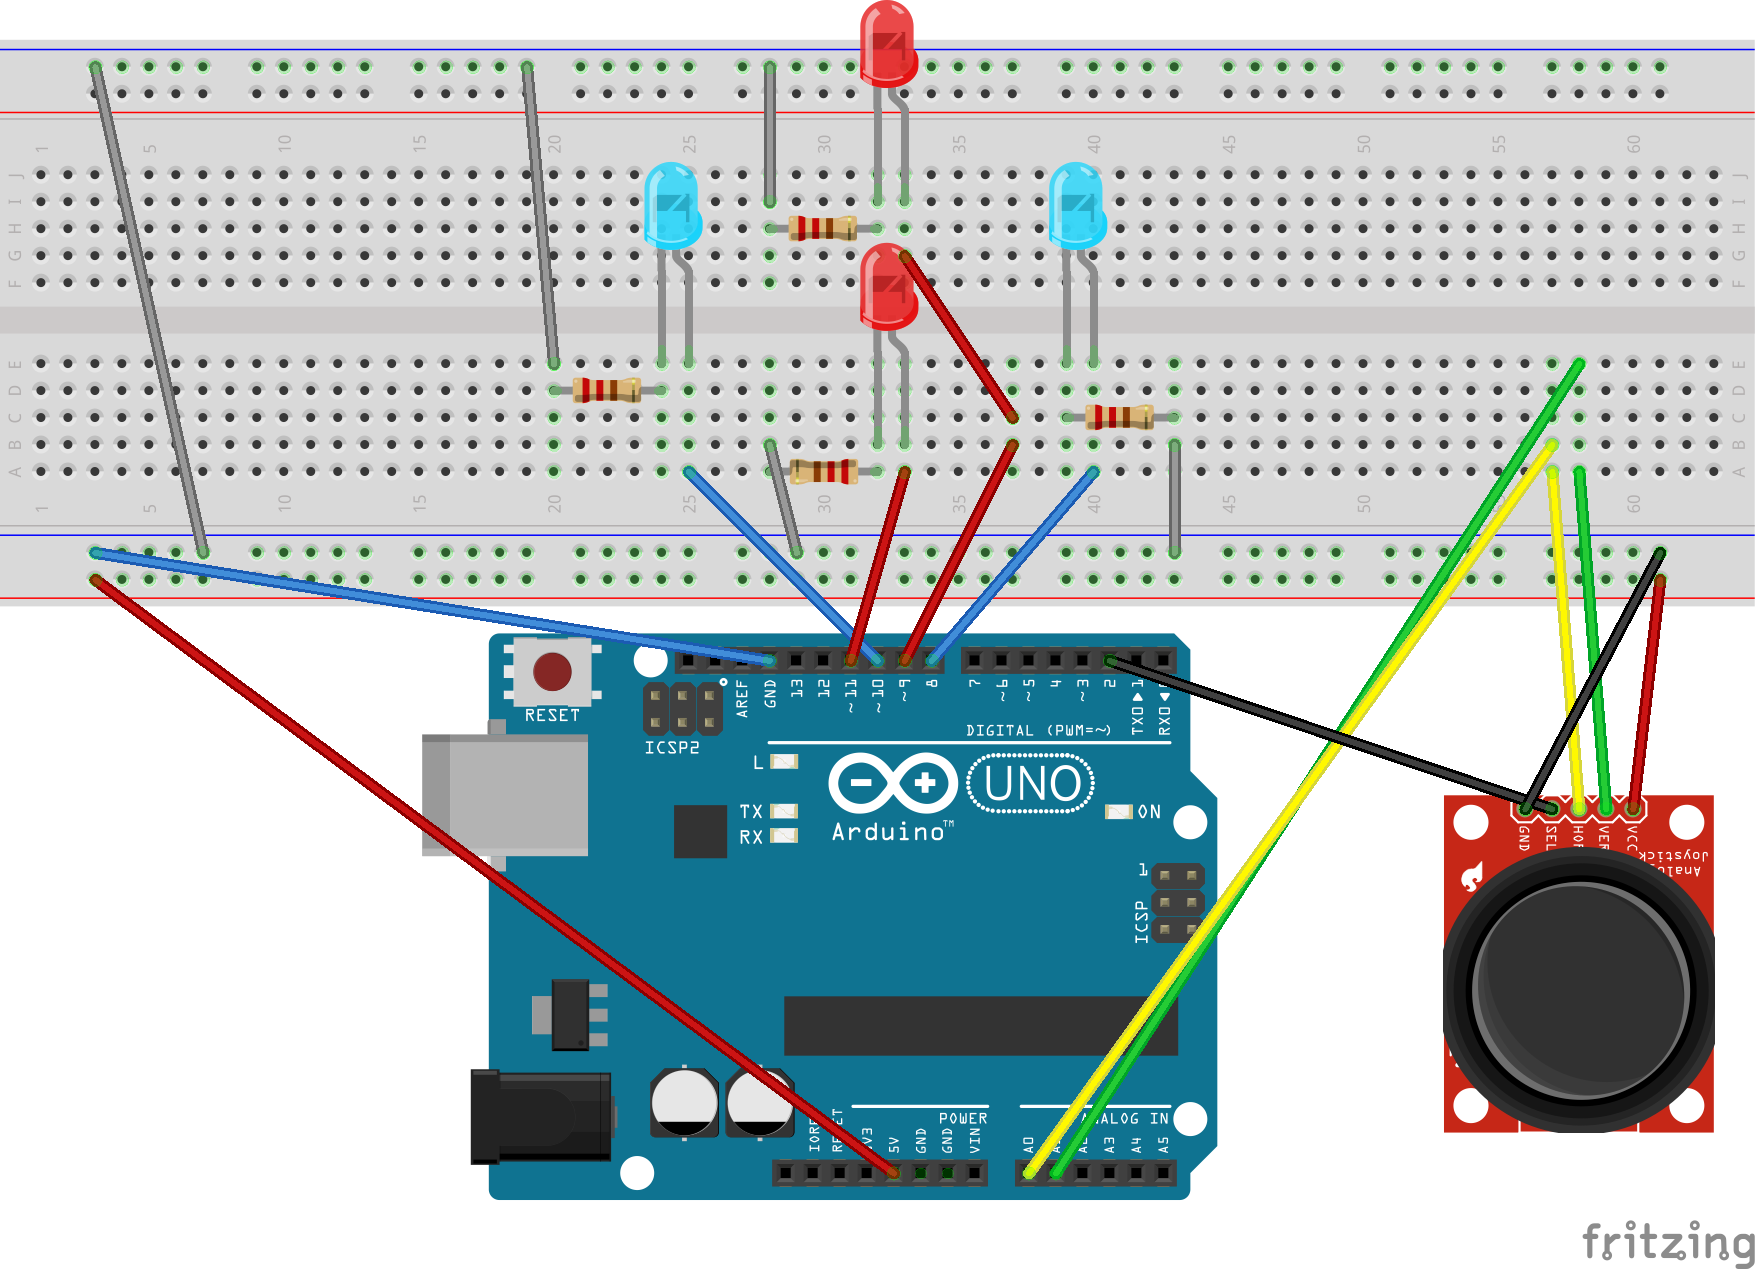
- Analog Joystick: This component contains two potentiometers for the X and Y axes, along with a momentary push-button (SEL). Movement produces an analog voltage between 0 and 5V, which the Arduino converts into a value between 0 and 1023.
- I2C 16x2 LCD Display: Utilizing the I2C protocol, this display shows the current action or direction (e.g., "Moving Up", "Pressed").
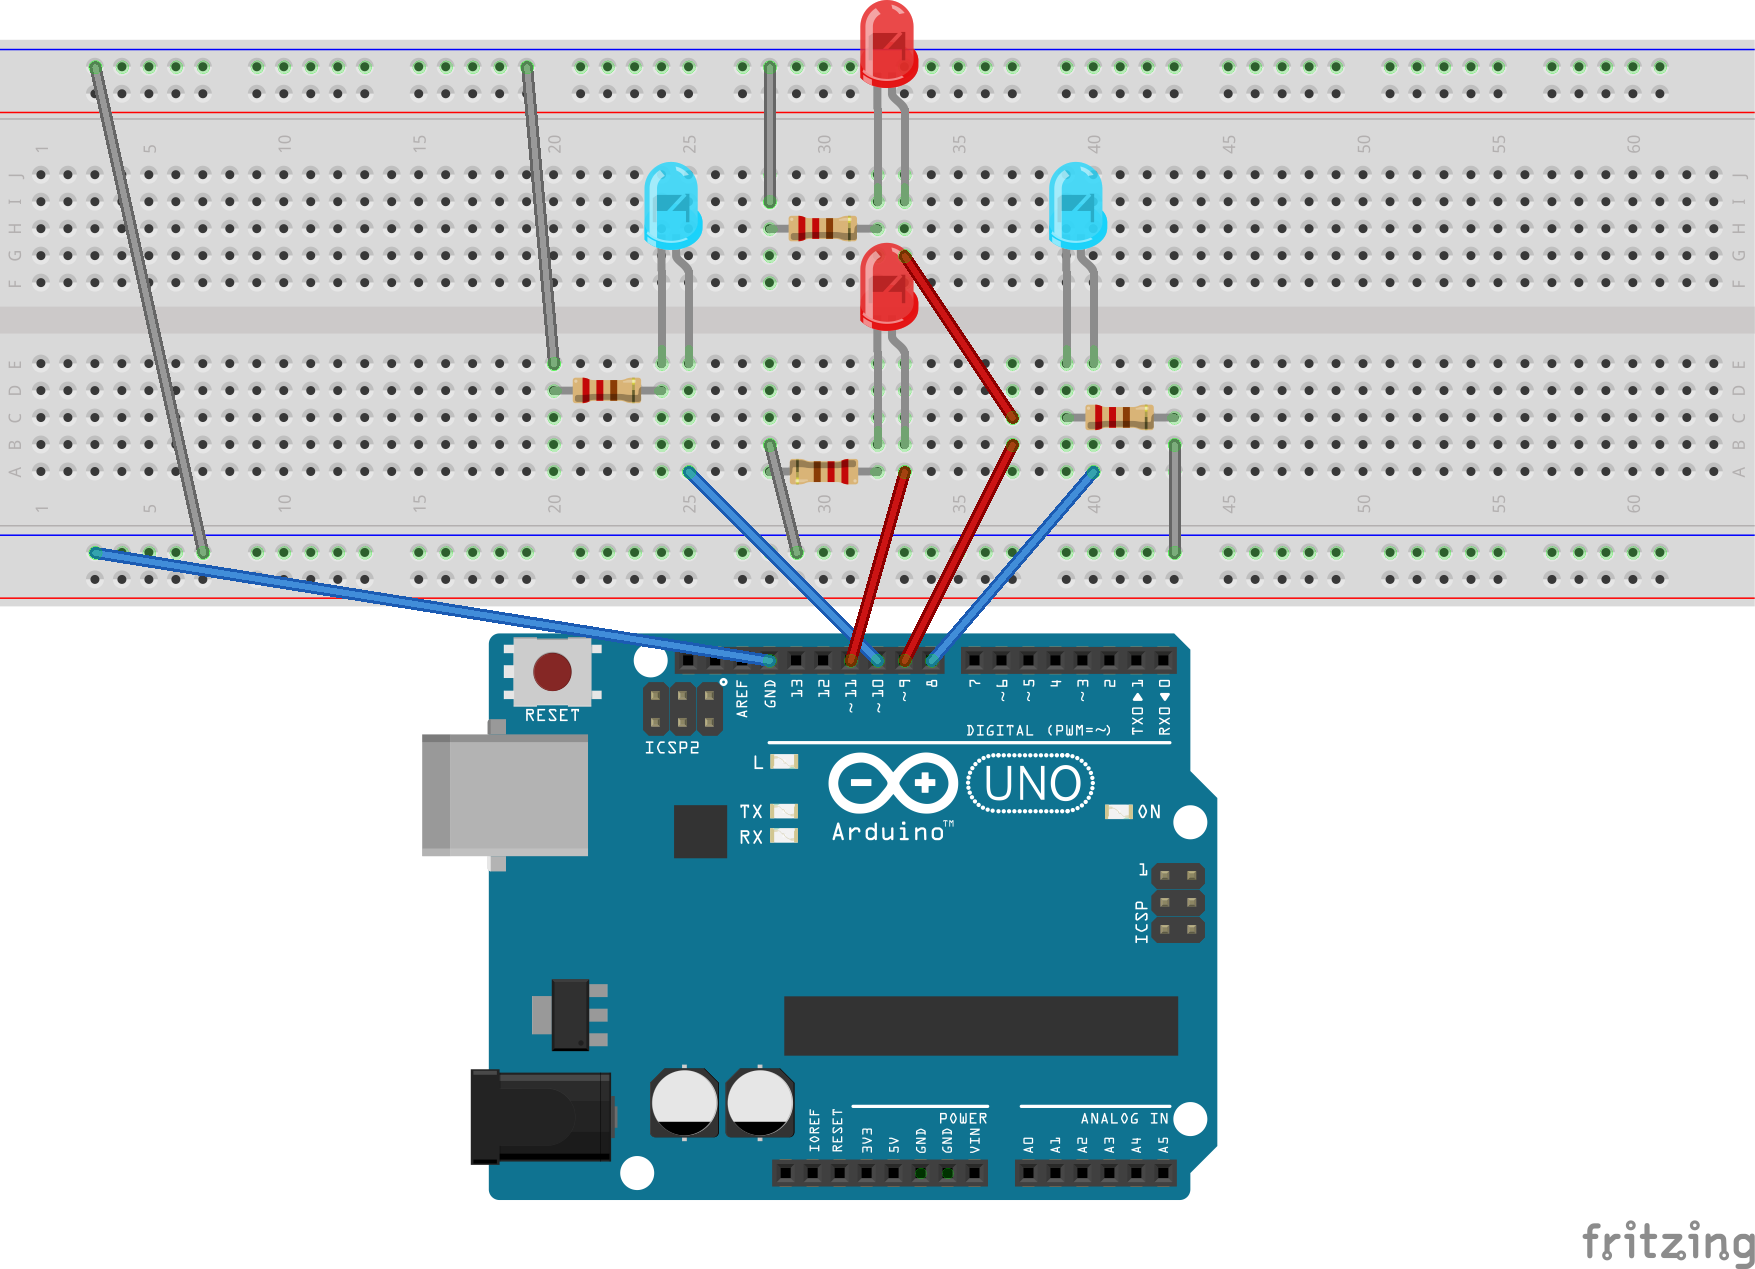
- Directional LEDs: Four LEDs (Red, Blue, Green) are arranged to represent Up, Down, Left, and Right. They light up based on the joystick's position.
Working Logic and Arduino Pin Mapping
- Input Sensing: The Arduino reads Pin A0 (Vertical) and A1 (Horizontal). If the value is far from the center (approx. 512), the code determines which direction the stick is pushed.
- Visual Logic:
- Moving Up (A0 < 200) -> Turn on LED at Pin 9.
- Moving Down (A0 > 800) -> Turn on LED at Pin 11.
- Moving Left (A1 < 200) -> Turn on LED at Pin 10.
- Moving Right (A1 > 800) -> Turn on LED at Pin 8.
- Display Update: The text on the LCD is updated whenever a change in the joystick state is detected, keeping the user informed of the current operation.
Como armar How to arm:
1. ride the lights
pin 11 to the bottom 9 to the top left one to pin 10 and the right to pin 8
el pin 11 al de abajo el 9 al de arriba el de la izquierda al pin 10 y el derecho al pin 8
2. the joystick at 5v to positive, gnd to negative, vert or x to A0, horz or y, to A1 and sel to pin 2
2. el joystick a 5v a positivo, gnd a negativo, vert o x a A0, horz o y, a A1 y sel a pin 2