This project would help you to monitor/spy and control the bot at the same time from your PC so that you don't need to go out and do it on your own. A simple example for the application of this project could be to manipulate the bot as a waiter to server tables, while the actual waiter controls the bot from a computer. This may help to deal with the current COVID - 19 pandemic situation.
This project was inspired by car driving games, the way most of them use WASD keys on the keyboard for the car movement. This project utilizes PuTTY, a really awesome Serial Monitor with Serial over Network and continuous key input functionality(Sends key input to the Serial Device until pressed).
You can very easily attach your smartphone on the Bot and use any IP webcam apps and connect it to your PC to remotely have a visual aspect of the Bot and Control it at the same time. Ex : DroidCam is available for both Android and iPhone; https://www.dev47apps.com/
Project Perspective
Keyboard Controlled Wi-Fi Bot/Spy Bot is an innovative and creative 2WD robot project. By using a specialized hardware setup and high-performance WiFi module, you'll learn about wireless control and real-time Python-based command execution.
Technical Implementation: Wi-Fi and Python
The project focuses on creating a high-performance and reliable keyboard-controlled robot:
- Communication layer: The NodeMCU ESP8266 acts as a WiFi client that listens for incoming TCP/UDP commands from a local network.
- Control Interface layer: A simple Python script on your computer captures your keyboard presses (W, A, S, D) and sends them to the NodeMCU's IP address.
- Actuation layer: The NodeMCU interprets the commands (e.g., 'F' for forward, 'S' for stop) and sends them to an L298N Motor Driver, which powers the two DC Motors.
Hardware Infrastructure
- NodeMCU ESP8266: The "brain" of the bot, managing the WiFi connection and coordinating motor driver signals.
- L298N Motor Driver Module: Providing the high-current control needed to drive the two DC motors forward, backward, left, or right.
- 2WD Robot Chassis: The physical frame that houses the NodeMCU, driver, and battery.
- 7.4V Li-Po Battery: Provides a high-capacity and portable power source for the motors and ESP8266.
- Micro-USB Cable: Use to program the NodeMCU directly from your computer for power and code.
- Jumper Wires: Connect all the components together.
Measurement and Execution Loop
The Wi-Fi bot is designed to be very user-friendly:
- Initialize WiFi: SETUP the NodeMCU to connect to your local WiFi network and print its IP address.
- Keyboard Capture: Use a Python script to detect whenever a key is pressed or released on your computer's keyboard.
- Transmission Loop: The script sends the key character to the NodeMCU's IP address in real-time.
- Execution: The NodeMCU receives the character and triggers the L298N driver to move the motors accordingly.
Important Notes
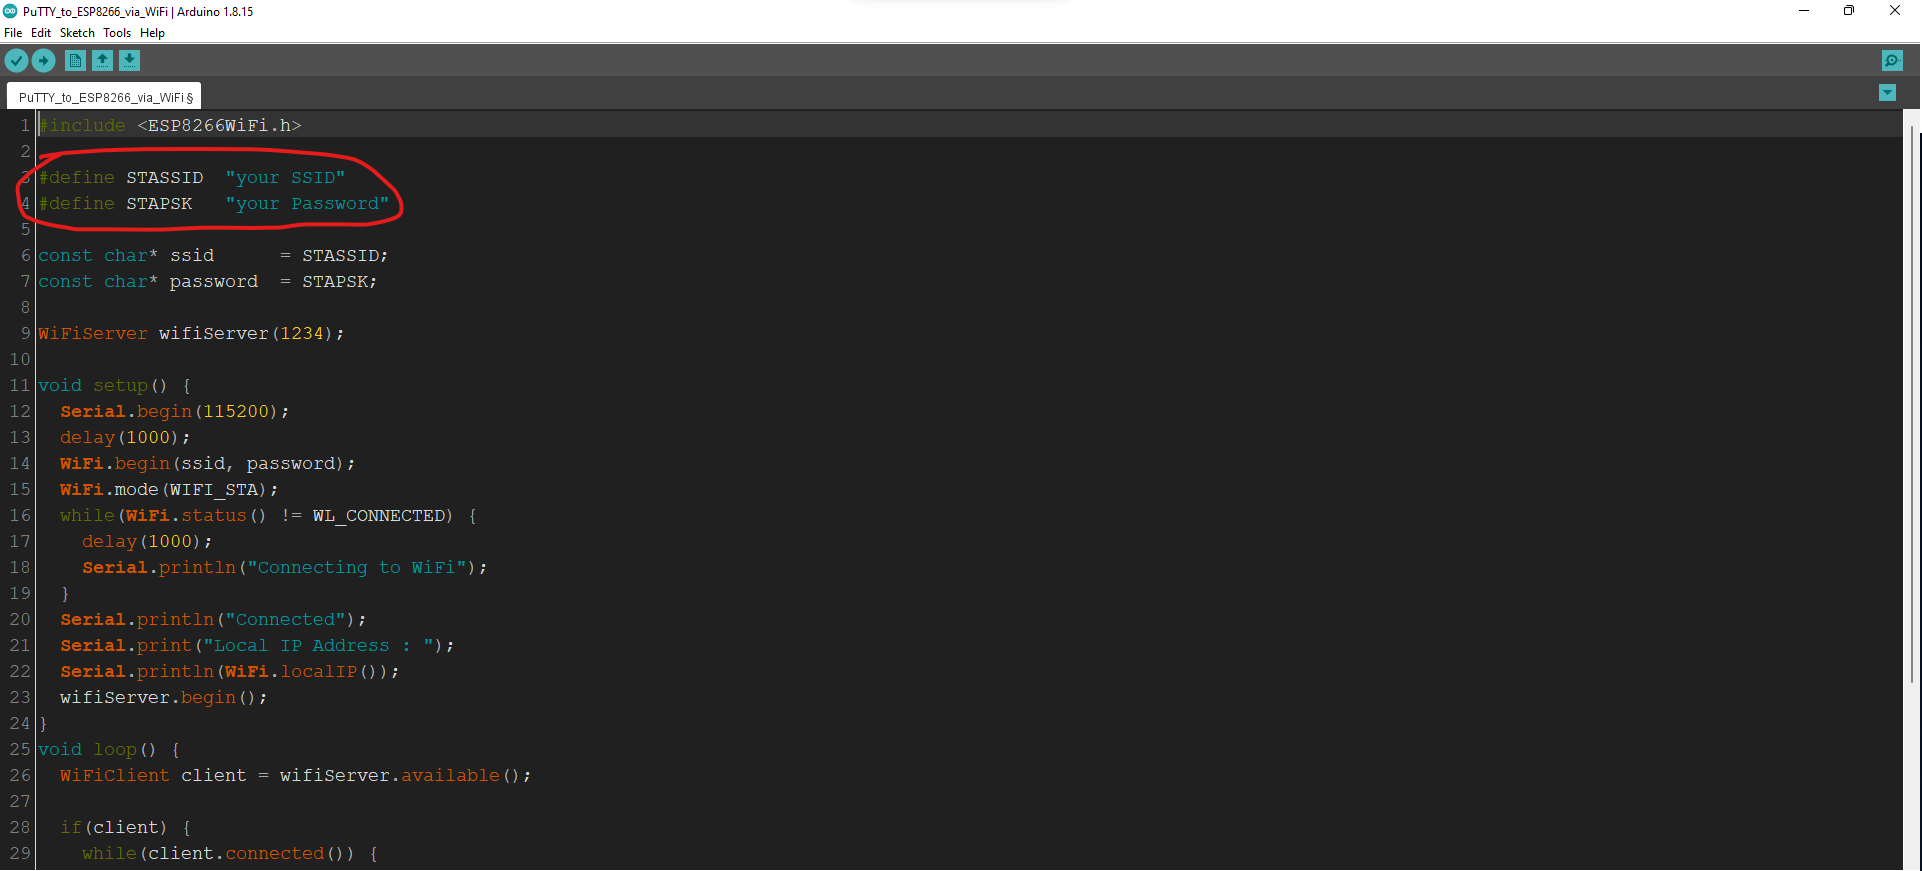
Change the SSID and Password to your the respective details of your Wi-Fi network to which ESP8266 will connect.
#define STASSID  "your SSID"
#define STAPSK   "your Password"
Steps to configure PuTTY
Step 1 :
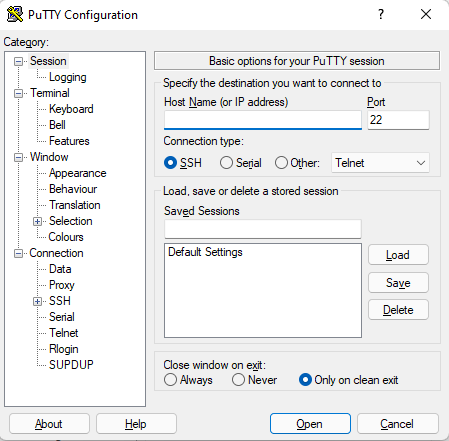
Download PuTTY from this link : https://www.putty.org/
and then install it.
Open PuTTY and this is how it would look like.
Step 2 :
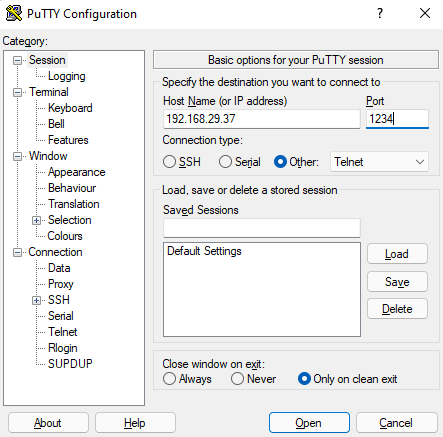
After uploading the ESP8266 code at the bottom, use the local IP Address listed by ESP8266 on the Serial Monitor.
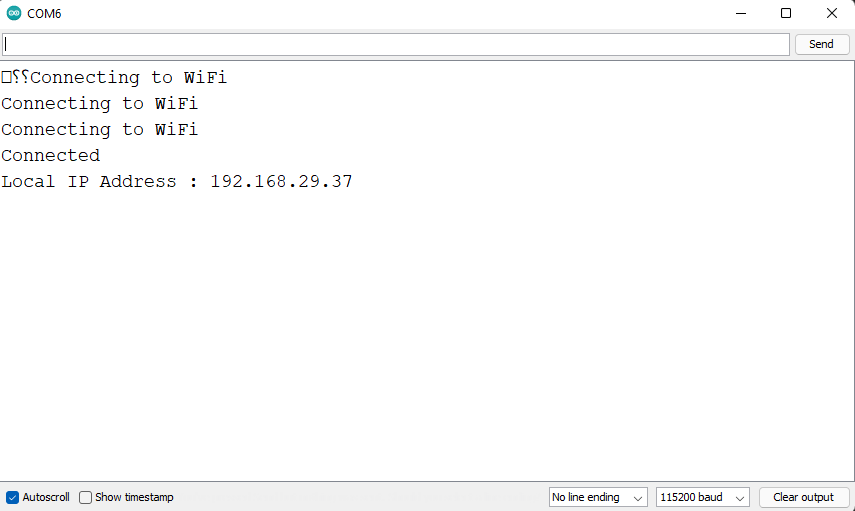
Use this IP Address in the Host Name (or IP Address) text box in PuTTY, as in this case I'll put 192.168.29.37 because that is the IP Address of my ESP8266 on my Home Network.
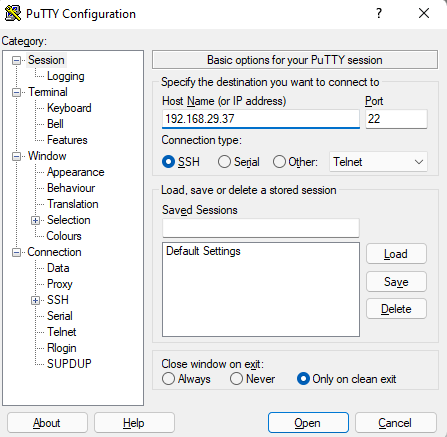
Now by default in the Source Code, the port number is 1234 but you can change it to any unused port on your network.
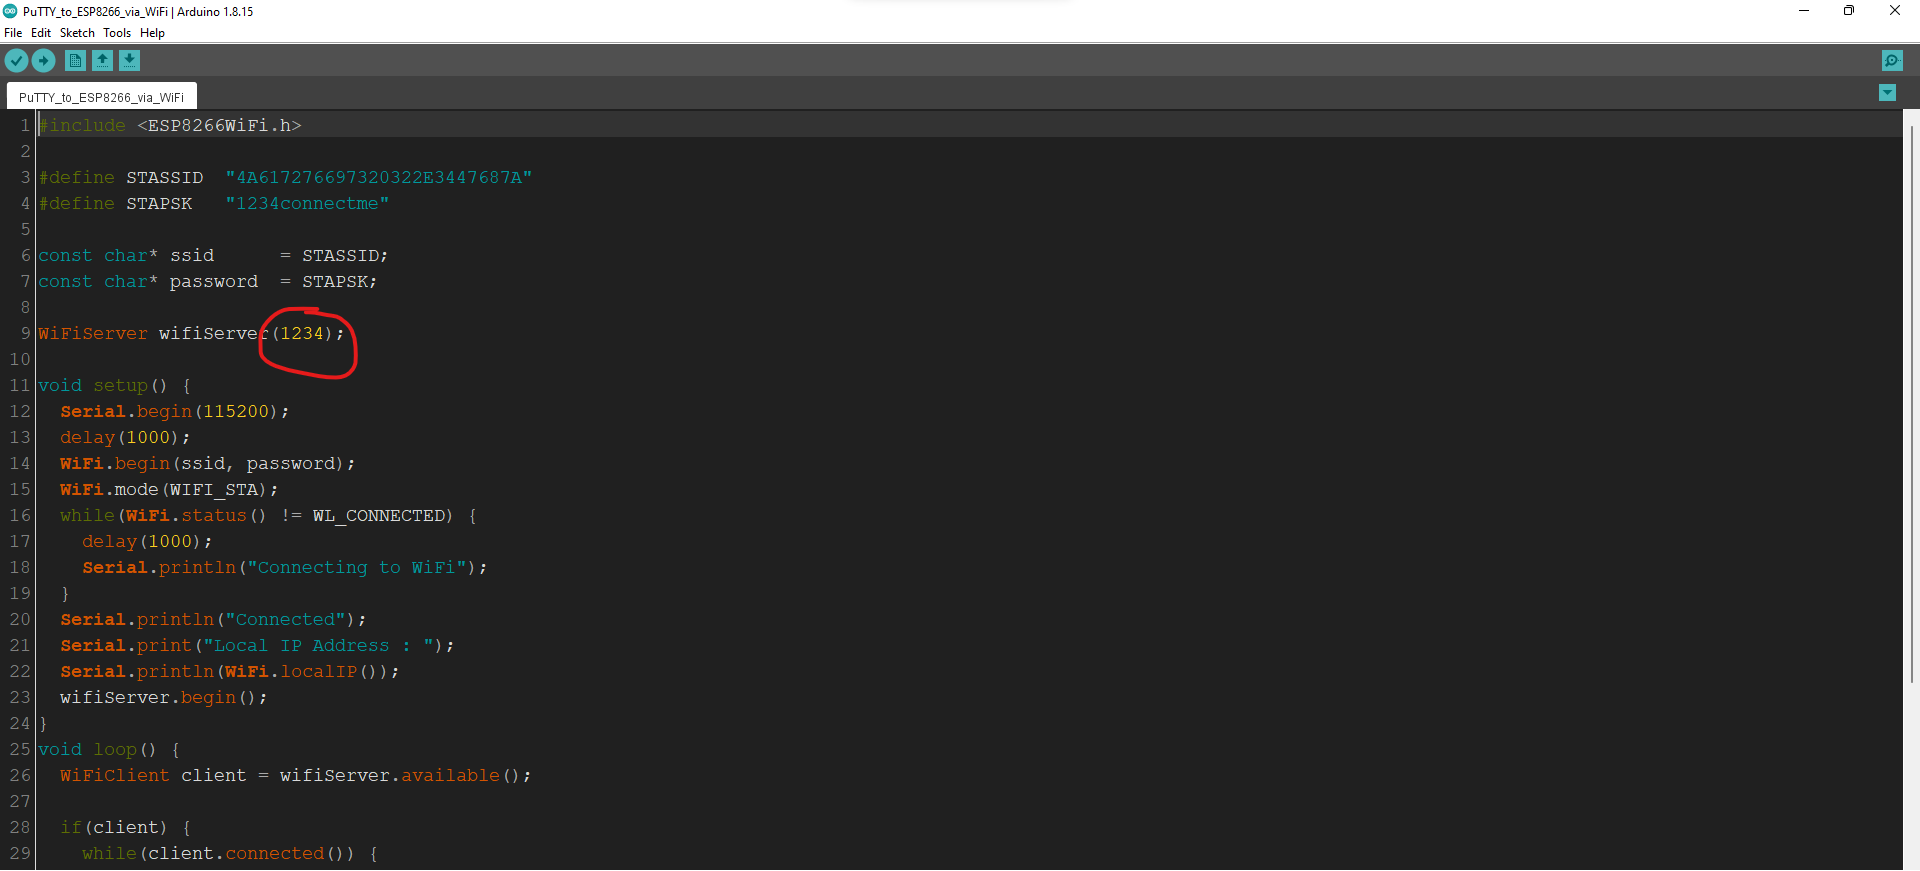
Enter the default port number or your desired port number in the Port text box of PuTTY.
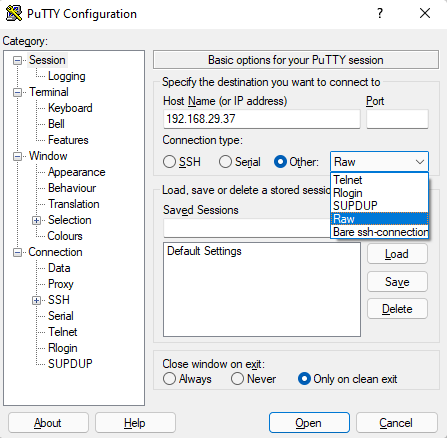
Step 3 :
The connection type used in ESP8266 Wi-Fi server library is Raw so we need to change the connection type in PuTTY to Raw.
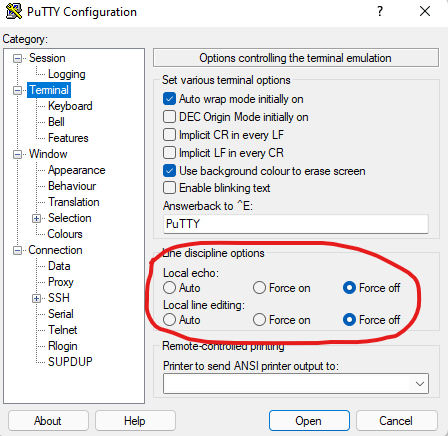
Step 4 :
This next step will enable Continuous Key Input. For that, head over to Terminal Category and set Local Echo and Local Line Editing to Force off.
You can also save all these settings by making a profile on the first page and this part is done.
Future Expansion
- OLED Status Dashboard Integration: Add a small OLED display to the bot to show the current WiFi signal strength and battery level.
- Spy-Cam Integration: Add a small ESP32-CAM module to stream real-time video back to your computer for a true "Spy Bot" experience.
- Cloud Control Registration: Connect the bot to a cloud server to allow for remote control over the Internet.
- Advanced Velocity Profile Dashboard: Create a graphical interface in Python to control the bot's speed and monitor its sensors visually.
Here are few pictures of the Bot dismantled :
Hope you like this project.
Keyboard Controlled Wi-Fi Bot/Spy Bot is a perfect project for any electronics enthusiast looking for a more interactive and engaging robotics tool!