Hey guys...
I am back with a new project.
In this project I made a LCD game using Joystick module using arduino Uno.
This project is all about game. You can play this game with your kids or you can make this project for your college projects.
Just watch the whole video if you don't understand anything.
Project Perspective
LCD Gaming is a fundamental and innovative bridge into modern electronics development. By focusing on the essential building blocks—the joystick module and a Character LCD—you'll learn how to create and play your own custom games using specialized software logic and a robust hardware setup.
Technical Implementation: XY-Input and Pixel Manipulation
The project reveals the hidden layers of simple motion-to-pixel interaction:
- Identification layer: The Joystick Module acts as a high-resolution interaction device, measuring the exact X and Y coordinates to control your game-character movement.
- Conversion layer: The Arduino uses its analog Pins (A0, A1) to receive the joystick's position as voltage values, which are then converted into digital data for gaming logic.
- Visual Interface layer: A 16x2 LCD Display provides the visual feedback for your "Retro Game" status (e.g., character position or score).
- Processing Logic layer: The Arduino code follows a "frame-refresh" strategy: it constantly interprets the
analogRead()inputs and updates custom-character locations on the LCD to provide a responsive gaming experience. - Communication Dialogue Loop: Coordinates can be sent to the Serial Monitor during initial calibration to verify the joystick's status in real-time.
Hardware Infrastructure
- Arduino Uno: The "brain" of the project, managing high-speed analog sampling and coordinating the LCD output.
- Joystick Module: Providing high-precision and reliable control for your arcade mission.
- LCD Display (16x2): Providing clear and playful visual feedback for your game.
- Breadboard: A convenient way to prototype your gaming-electronics circuit and connect all components without soldering.
- Micro-USB Cable: Used to program your Arduino and provide the primary power source for your digital game controller.
Connections
- Gather all the components.
- Connect LCD and POT on breadboard as shown.
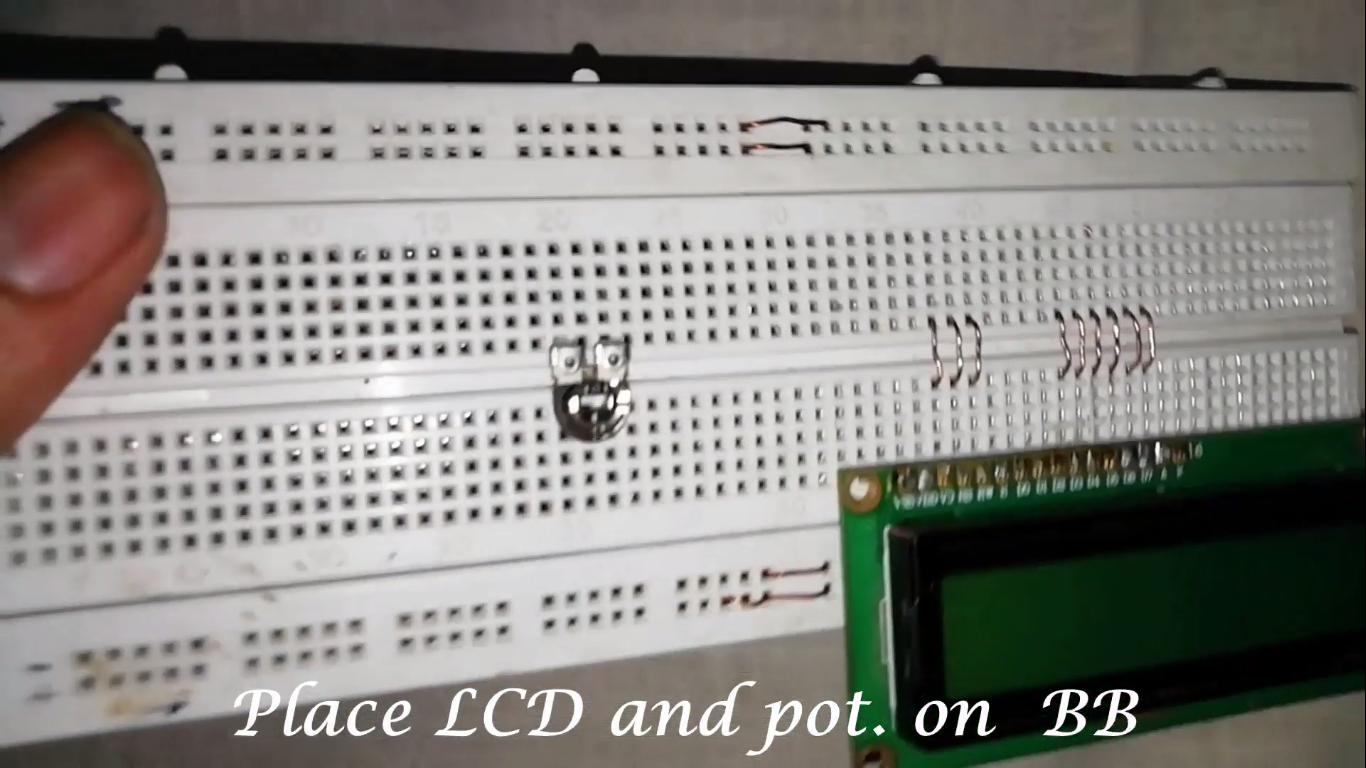
- Connect some small wires from LCD as shown above.
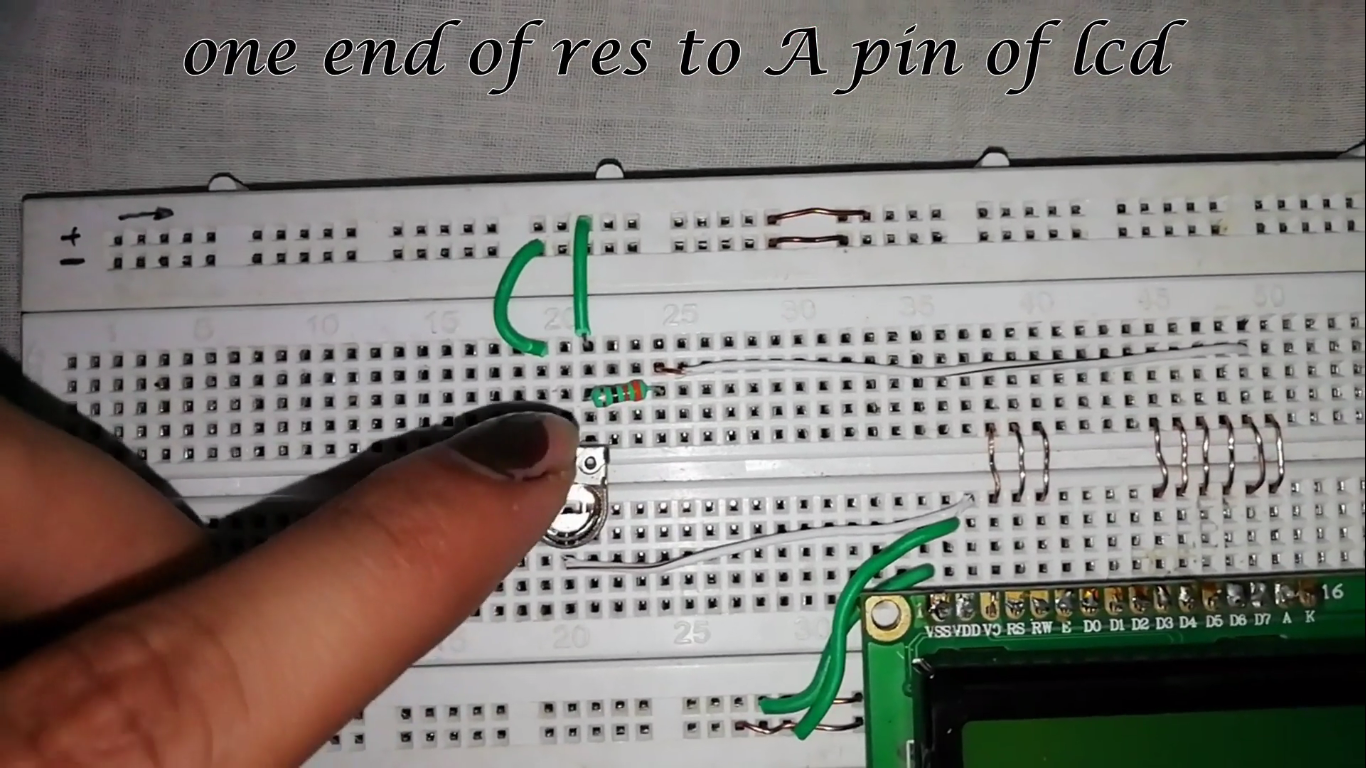
- Place a 330 ohm resistor to one end of POT and connect other end of resistor to A pin of LCD as shown.
- Connections as below:
LCD to Arduino
- Vss -> GND
- Vcc -> +5v
- Vo -> middle pin of POT
- Rs -> Pin 11
- RW -> GND
- E -> Pin 9
- D4 -> Pin 6
- D5 -> Pin 5
- D6 -> Pin 4
- D7 -> Pin 3
- A -> resistor one end and connect that end of pot to +5v
- K -> pot second end and that end to GND
Joystick to Arduino
- Vcc -> +5v
- GND -> GND
- X-axis -> Pin A0 (Analog Pin 0)
- Y-axis -> Pin A1 (Analog Pin 1)
[!TIP] Use the Potentiometer to adjust the LCD contrast to ensure the game character is clearly visible during high-speed movement!
Future Expansion
- OLED Identity Dashboard Integration: Add a small OLED display to the arcade base to show a "High Score" or other game stats.
- Multi-sensor Climate Sync Synchronization: Connect a specialized "Piezo Buzzer" to perform higher-precision "Game Sounds" during actions.
- Cloud Interface Registration Support Synchronization: Add a specialized web-dashboard accessible via smartphone over WiFi/BT to precisely track and log your total score history.
- Advanced Velocity Profile Customization Support: Add specialized "Multiplayer Mode" (Two Joysticks) to the code to allow the game to support additional players automatically.
LCD Gaming is a perfect project for any science enthusiast looking for a more interactive and engaging arcade tool!
Please follow me and please subscribe my youtube channel for more projects.. Thanks.. Subscribe.. Likes.. Follow.....