hello everyone i'm happy to share a really cool project i had to make for a school project. I hope y'all like it. And feel free to ask questions. Since it is my first project hub please give me tips and suggest things i need to change.
This project was the last project i made on my school the teachers asked what i wanted to make and i could choose everything i wanted. I started brainstroming and suddenly a idea popped i my mind from a project i had seen on youtube. the link to the original video:
and also the guy i based my code on en got extra inspiration:
(17) 3D Digital Clock - YouTube
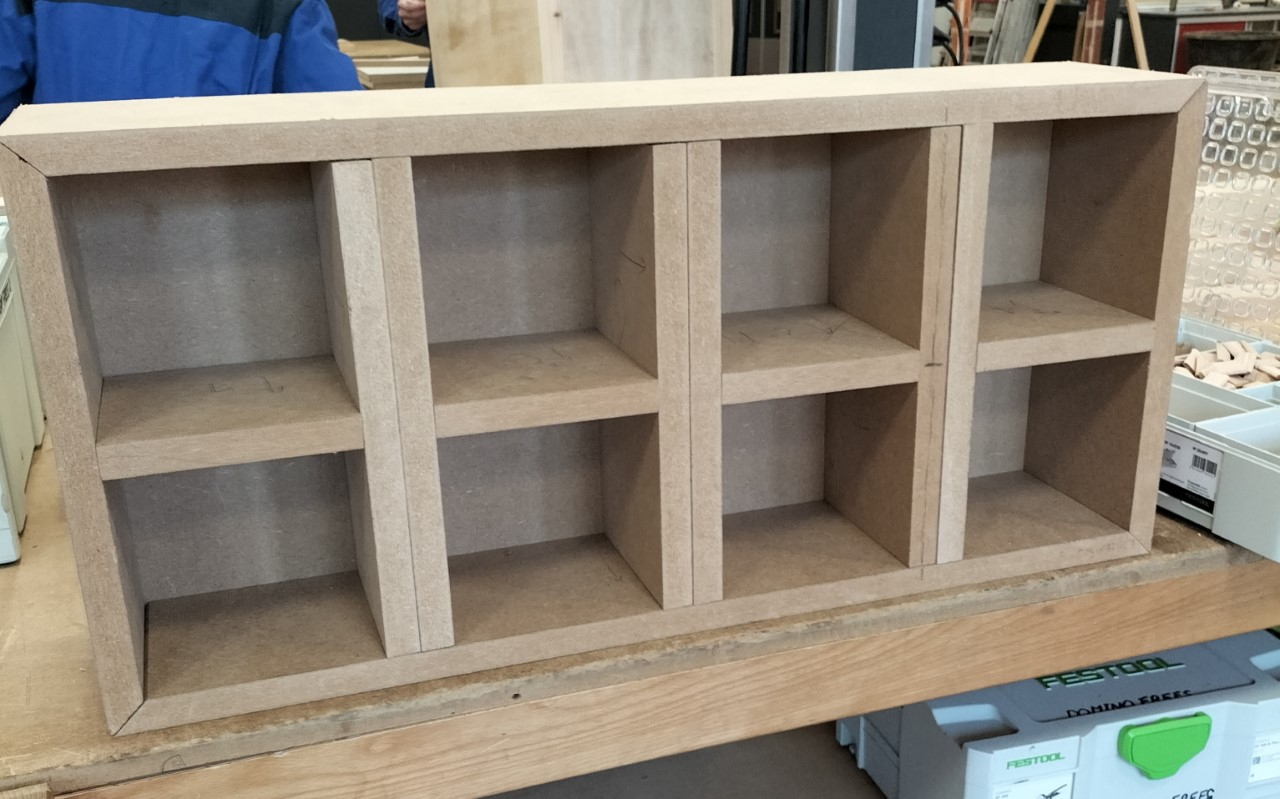
So this was the base for my project. I started sketching and ended up with the included sketch(it's not perfect but it gives you a good idea of the dimensions). Then i started selecting wood. I chose MDf with a thickness of 22 millimeter. MDf is easy to work with and it is cheap. Here you can see the base of the cupboard:
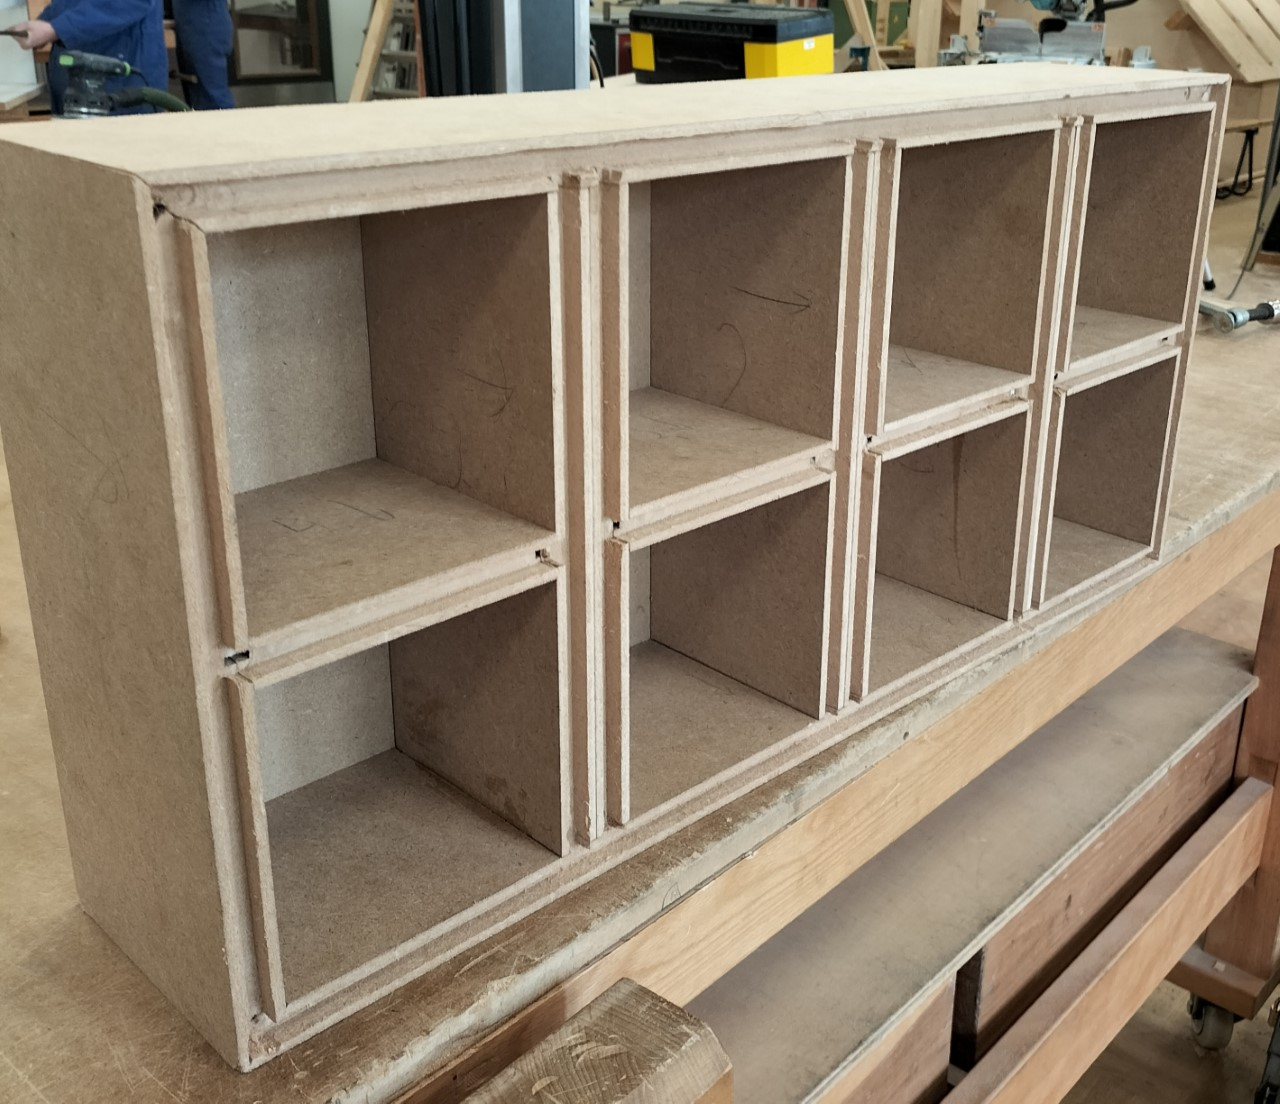
Then i started milling slots where i could insert the ledstrips. The slots are 1 centimeter wide and 1 centimeter deep. Here is the result:
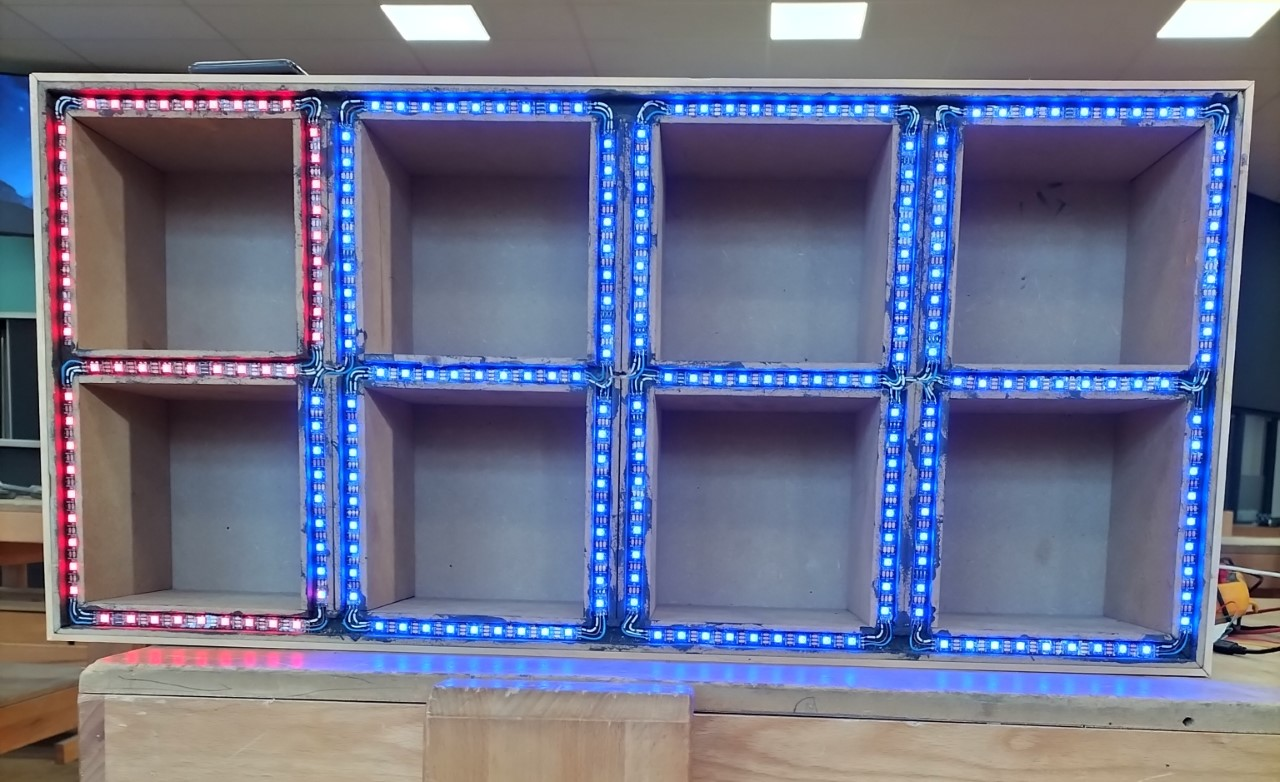
then i inserted the ledstrips which looks somthing like this:
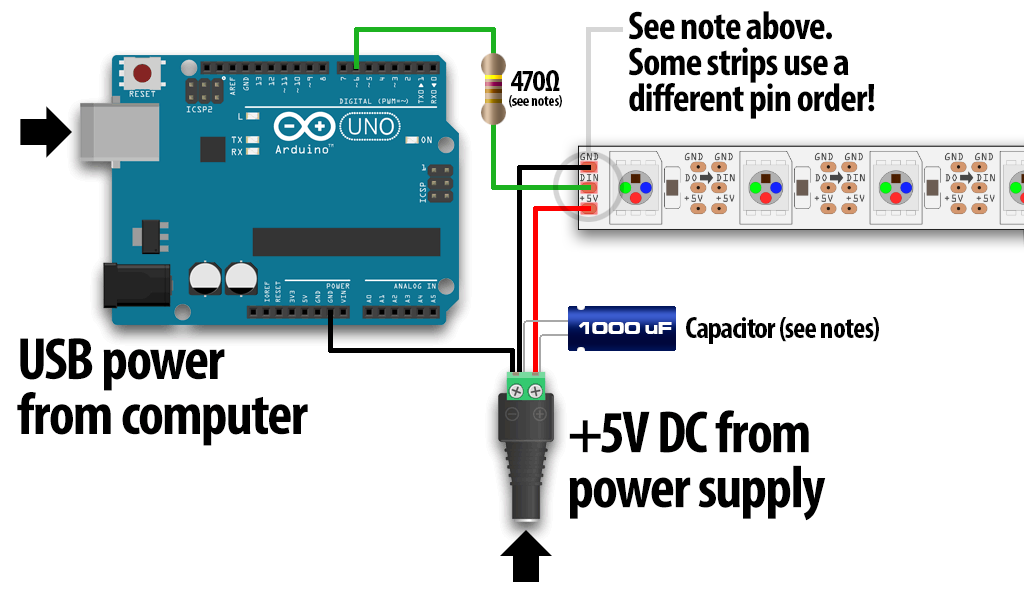
This scematic uses a arduino uno but the connections for the esp8266 are the same. Also this scematic uses a 470 ohm resistor but anything between 200 and 500 is fine. Same for the capacitor u can also use a 100 uf capacitor.
Scematic:
Then came the interesting bit. I wanted to put a plexiglass plate because that gives a nice effect and protects the ledstrips from getting damaged. Luckily my school has a laser cutter so i draw the shape of the cupboard and lasered it. If you want to recreate this but don't have a laser you could also use a jigsaw thats a lot cheaper. Here you can see the plexiglass mounted. I used double sided tape to mount the plexiglass to the cupboard. So that if ever the ledstrip would break i can easily take the plexiglas off and repair it.

then i programmed the clock and the project was finished. I got an example code from a teacher of my school. I used an esp8266 d1 mini to connect to the wifi and get te realtime. I milled a slot in the back to fit al the electronics in this is also where esp8266 is placed. I then drilled a hole from the back to the front to fit the wires that connect to the ledstrip. On the back i also made a hook so you can mount the clock to the wall. Because the clock gets real time it shows the exact time with a marche of 2 seconds. I also coded that every 10 minutes the color changes.
The Brain: WiFi-Synced Time (NTP)
Instead of relying on a battery-backed RTC module that might drift, the clock uses an ESP8266 D1 Mini.
- NTP Protocol: Upon booting, the ESP8266 connects to your home WiFi and reaches out to a Network Time Protocol (NTP) server. This ensures the clock is always accurate to within 2 seconds of the official time.
- Color Dynamics: The software is programmed to shift the color of the display every 10 minutes, keeping the room's atmosphere dynamic and fresh.
- Power Management: With 300 LEDs possible, a $10\text{A}$ power supply is critical. The circuit follows strict Adafruit NeoPixel standards, including a $1000\mu\text{F}$ capacitor to smooth power and a resistor to protect the data line.
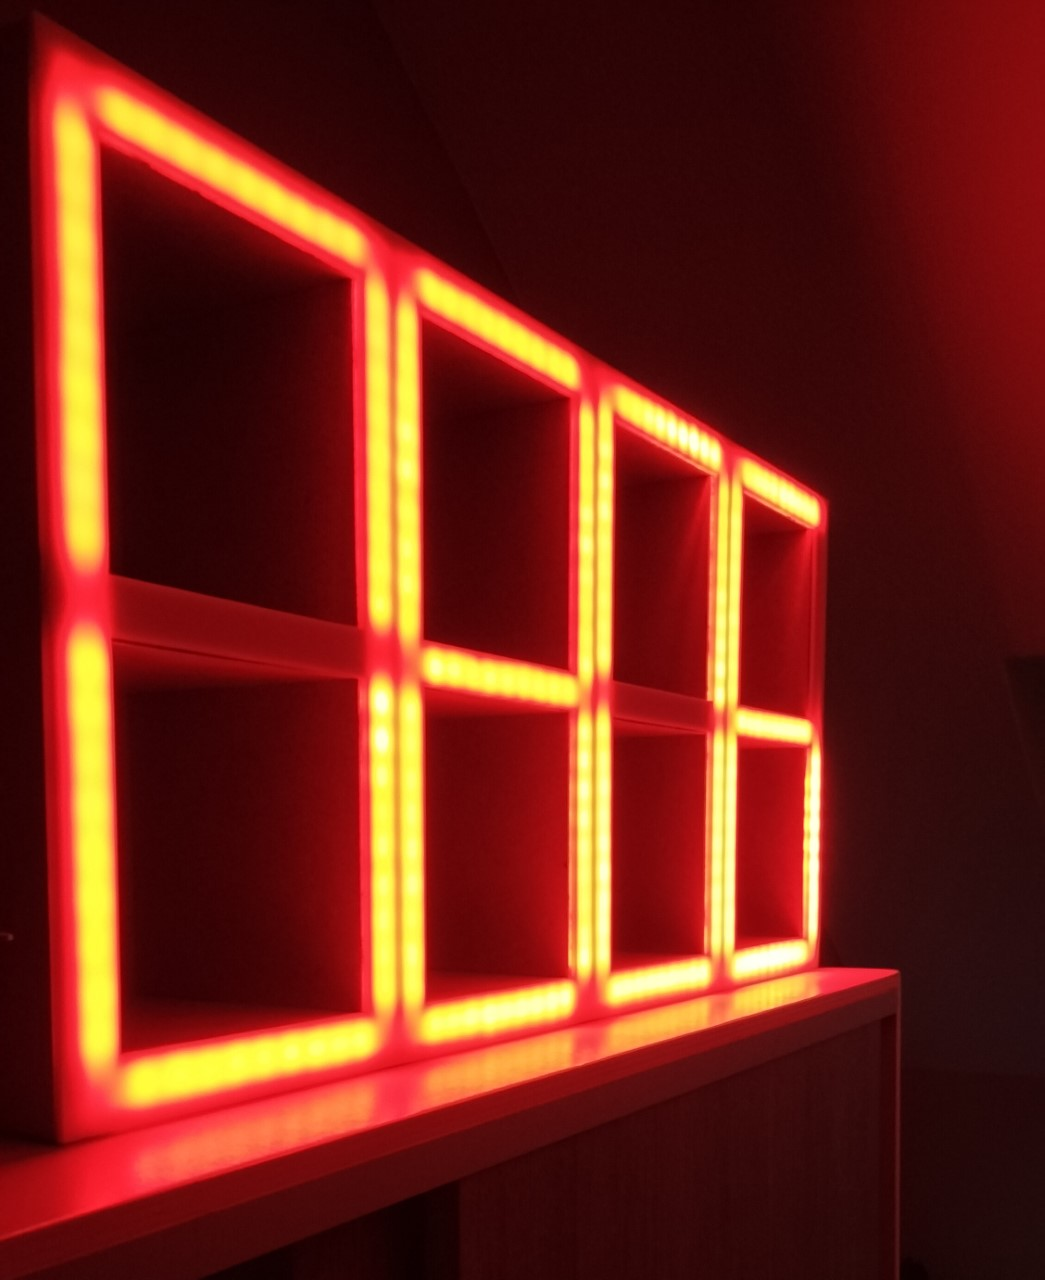
Here are some final foto's:


strengths of the clock:
- fun project
- handy clock in your room
- fun to watch
weaknesses of the clock:
- because some ledstrips are close together it's sometimes hard to see the time.
- some colors are discolored because i used white plexiglas. For Example yellow is almost the same as orange.
future:
In the future i am planning to use an esp32 instead of an esp8266. Then create an app for the clock. With the app i want to control the color, and maby display custom bytes an texts.
Future Perspectives: IoT Expansion
While currently a standalone WiFi clock, the creator plans to upgrade to an ESP32 to add specialized app control. This will allow for custom text scrolling, color picking via smartphone, and "Smart Alarm" integration. Even in its current state, the LED Strip Cupboard Clock is a masterclass in how DIY technology can elevate modern home aesthetics.
Conclusion:
I hope you all like my project because i do. I learned a lot from this project and every bit of making it was fun. I would like to see you people recreate my idea and mostly that you make your own version of it.