Have you ever experienced the desire to turn off the light from the comfort of your bed, without the hassle of getting up and moving around? If you have, Then this project is the best solution.
Wiring:
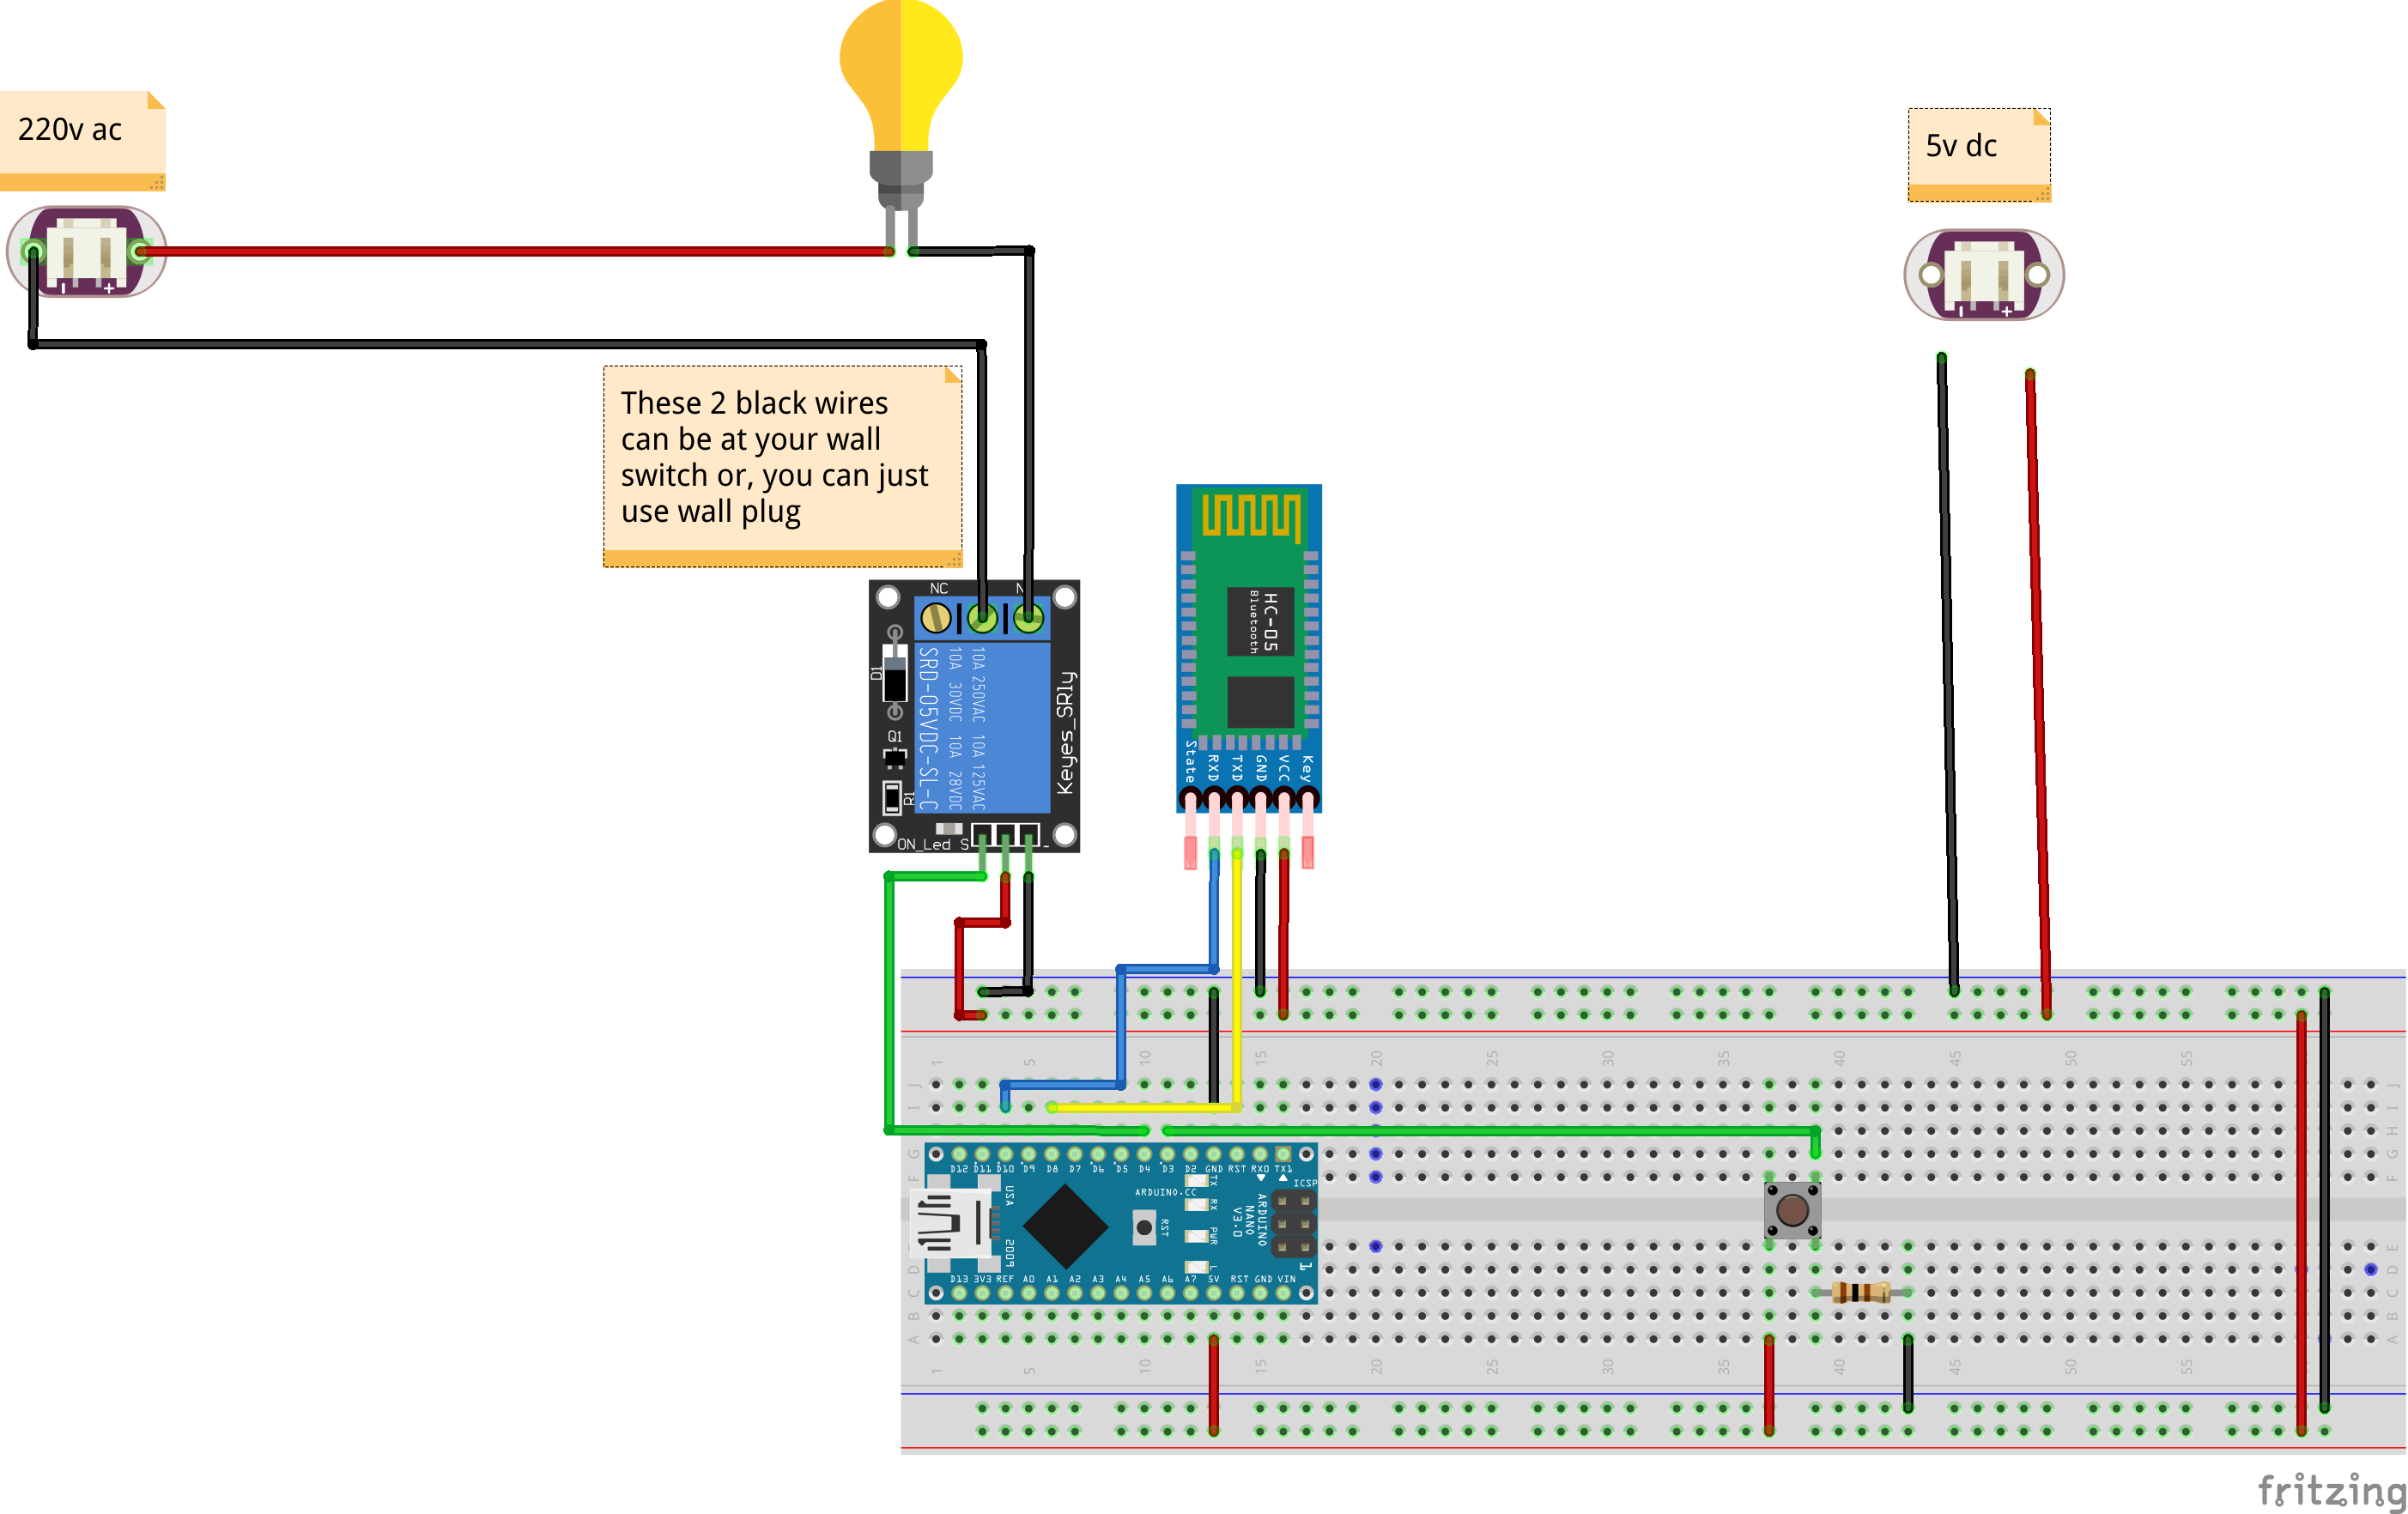
When it comes to the wiring aspect, each wall switch is equipped with two wires that are essential for sending power to the light and activating it. To achieve this, we have incorporated a relay into our design, which functions as an automated switch. Essentially, when power is received by the relay, it establishes a connection between the two wires, turning the light on. Conversely, when the relay is switched off, the connection is severed, and the light turns off.
Methods of activating the relay:
There are two primary methods for activating the relay.
Firstly, we have a physical button that can be pressed to trigger the relay, effectively controlling the light.
Alternatively, we have implemented wireless functionality by leveraging Bluetooth technology. This means that the relay can be activated wirelessly using a Bluetooth signal.
Power source:
To power the entire circuit, we have modified a USB cable by separating the positive (+) and negative (-) wires. These wires are then connected accordingly, and the USB cable is plugged into a standard 5-volt USB charger, providing the necessary power for the system to operate smoothly.
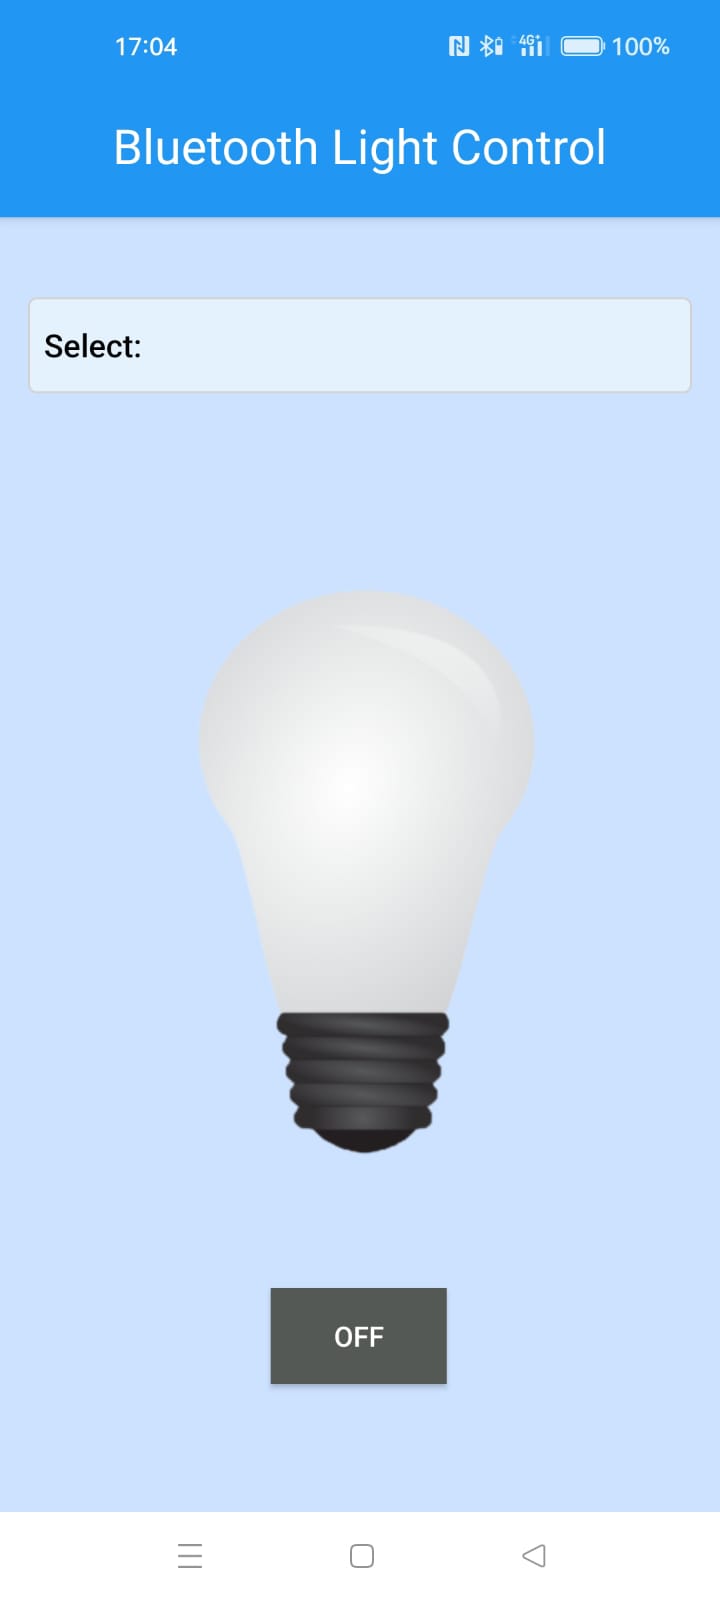
Bluetooth functionality:
In order to utilize the Bluetooth functionality effectively, we have developed a customized Bluetooth application specifically for this project. However, if you have a preference for a different app, it's worth noting that the command to turn the relay on is "1#", while the command to turn it off is "0#". This gives you the flexibility to control the light switch according to your preferences.
The App
My dedicated app allows you to select the desired Bluetooth device for connection, and with a simple click of the on or off button, you can conveniently control the light switch. You can find the application package (APK) in the project download files, enabling you to easily install and utilize it.
Connecting to the wall:
Before mounting the components on the wall, there are a couple of important steps that need to be completed. First and foremost, all the wires need to be soldered together to reduce their overall size, making it possible for them to fit inside the wall. Once the connections have been soldered to the Arduino Nano, the existing wall switch needs to be removed. Following that, the two wires from the wall switch should be connected to the middle plug and the normally open (NO) plug on the relay. Once all the connections have been secured, the components can be safely tucked away inside the wall. For added protection and stability, it is recommended to use tape to cover and secure everything in place.
Warning:
It is crucial to exercise caution when working with high power, as it can be extremely dangerous. Therefore, it is imperative to ensure that the fuse is turned off before proceeding with any tasks related to the light switch installation.
GitHub:
If you are interested in exploring the project further, you can find more detailed information and resources on our GitHub repository under the name Bluetooth light switch .
EXPANDED TECHNICAL DETAILS
Hands-Free Interior Automation
This project provides a retrofittable solution for wirelessly controlling household lighting using a smartphone and Bluetooth technology.
- Secure Serial Pairing: Uses an HC-05 or HM-10 (BLE) module. The Arduino listens for encrypted character strings (e.g.,
OFF,ON,DIM). Upon a match, it triggers a 5V Relay module to switch the 220V AC light circuit. - Manual Override Hub: Features a physical button input; the Arduino uses a "State Toggle" logic, allowing the light to be controlled both via the smartphone app and the physical wall switch without conflict.
Visual Interface
- State Telemetry Dashboard: The Arduino sends the current light status (ON/OFF) and the total "Active Time" back to the Bluetooth terminal every 30 seconds.