Single Tube Nixie Display - IN-8-2 Nixie Tube
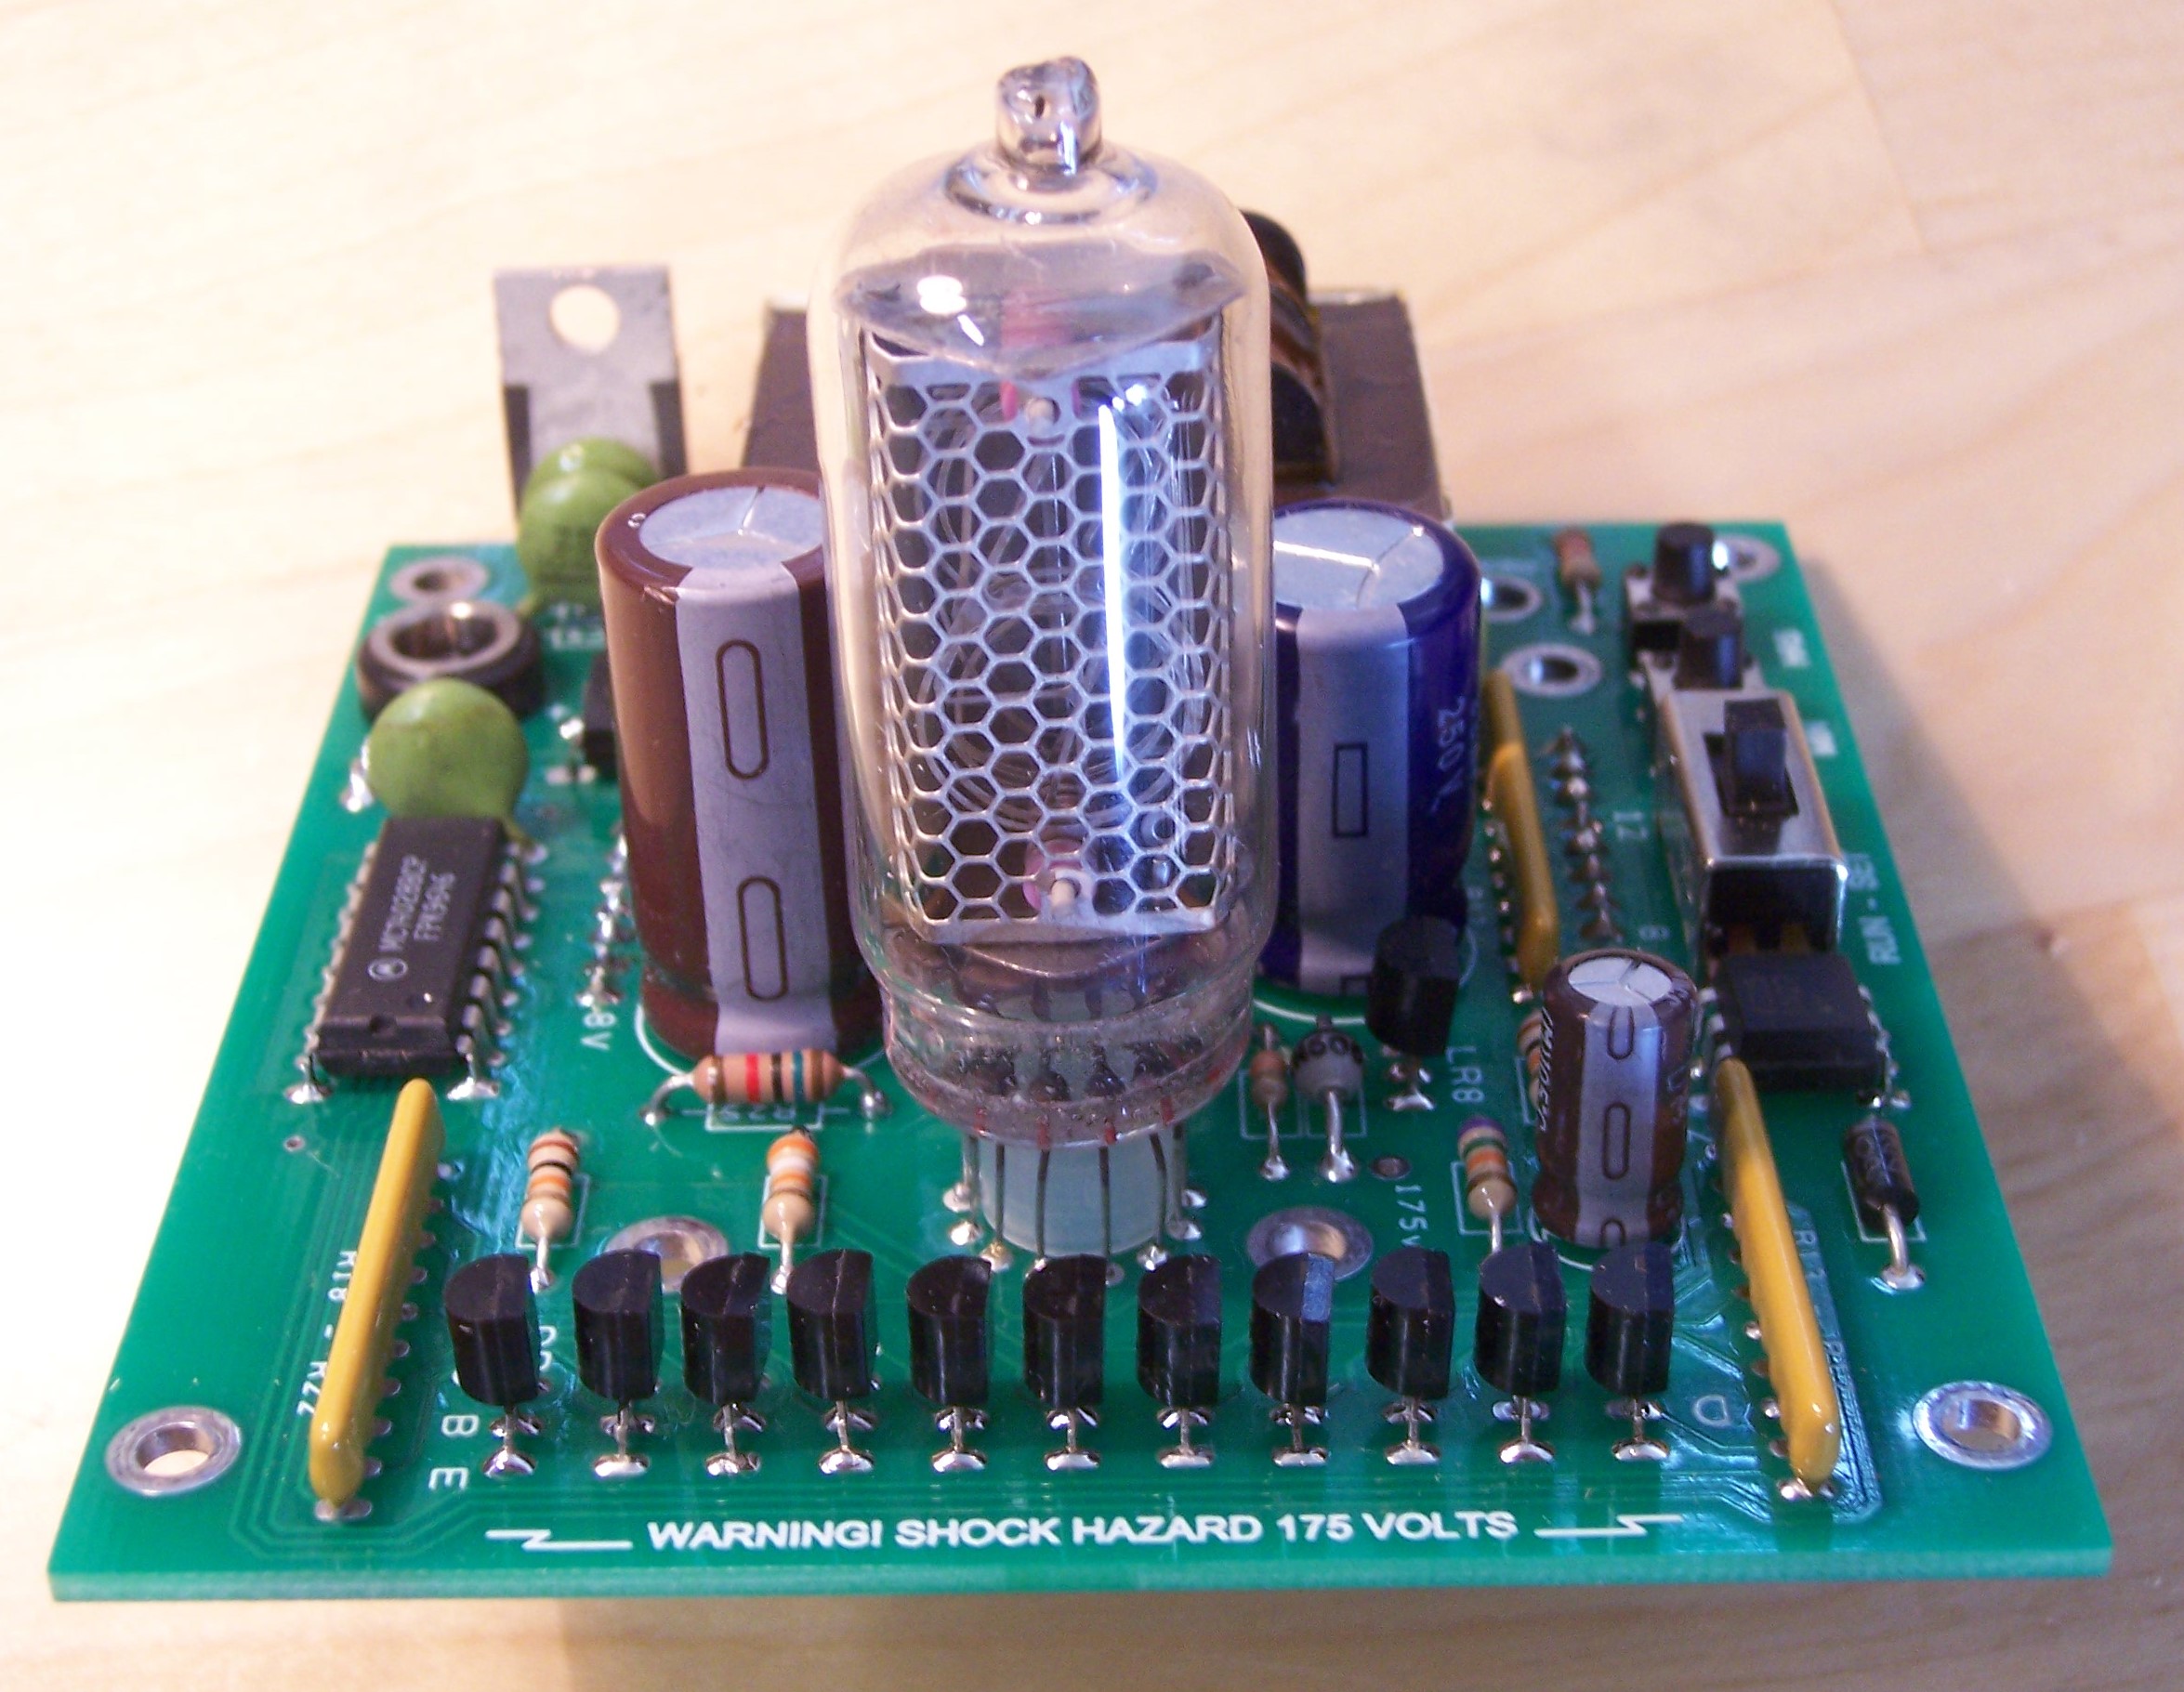
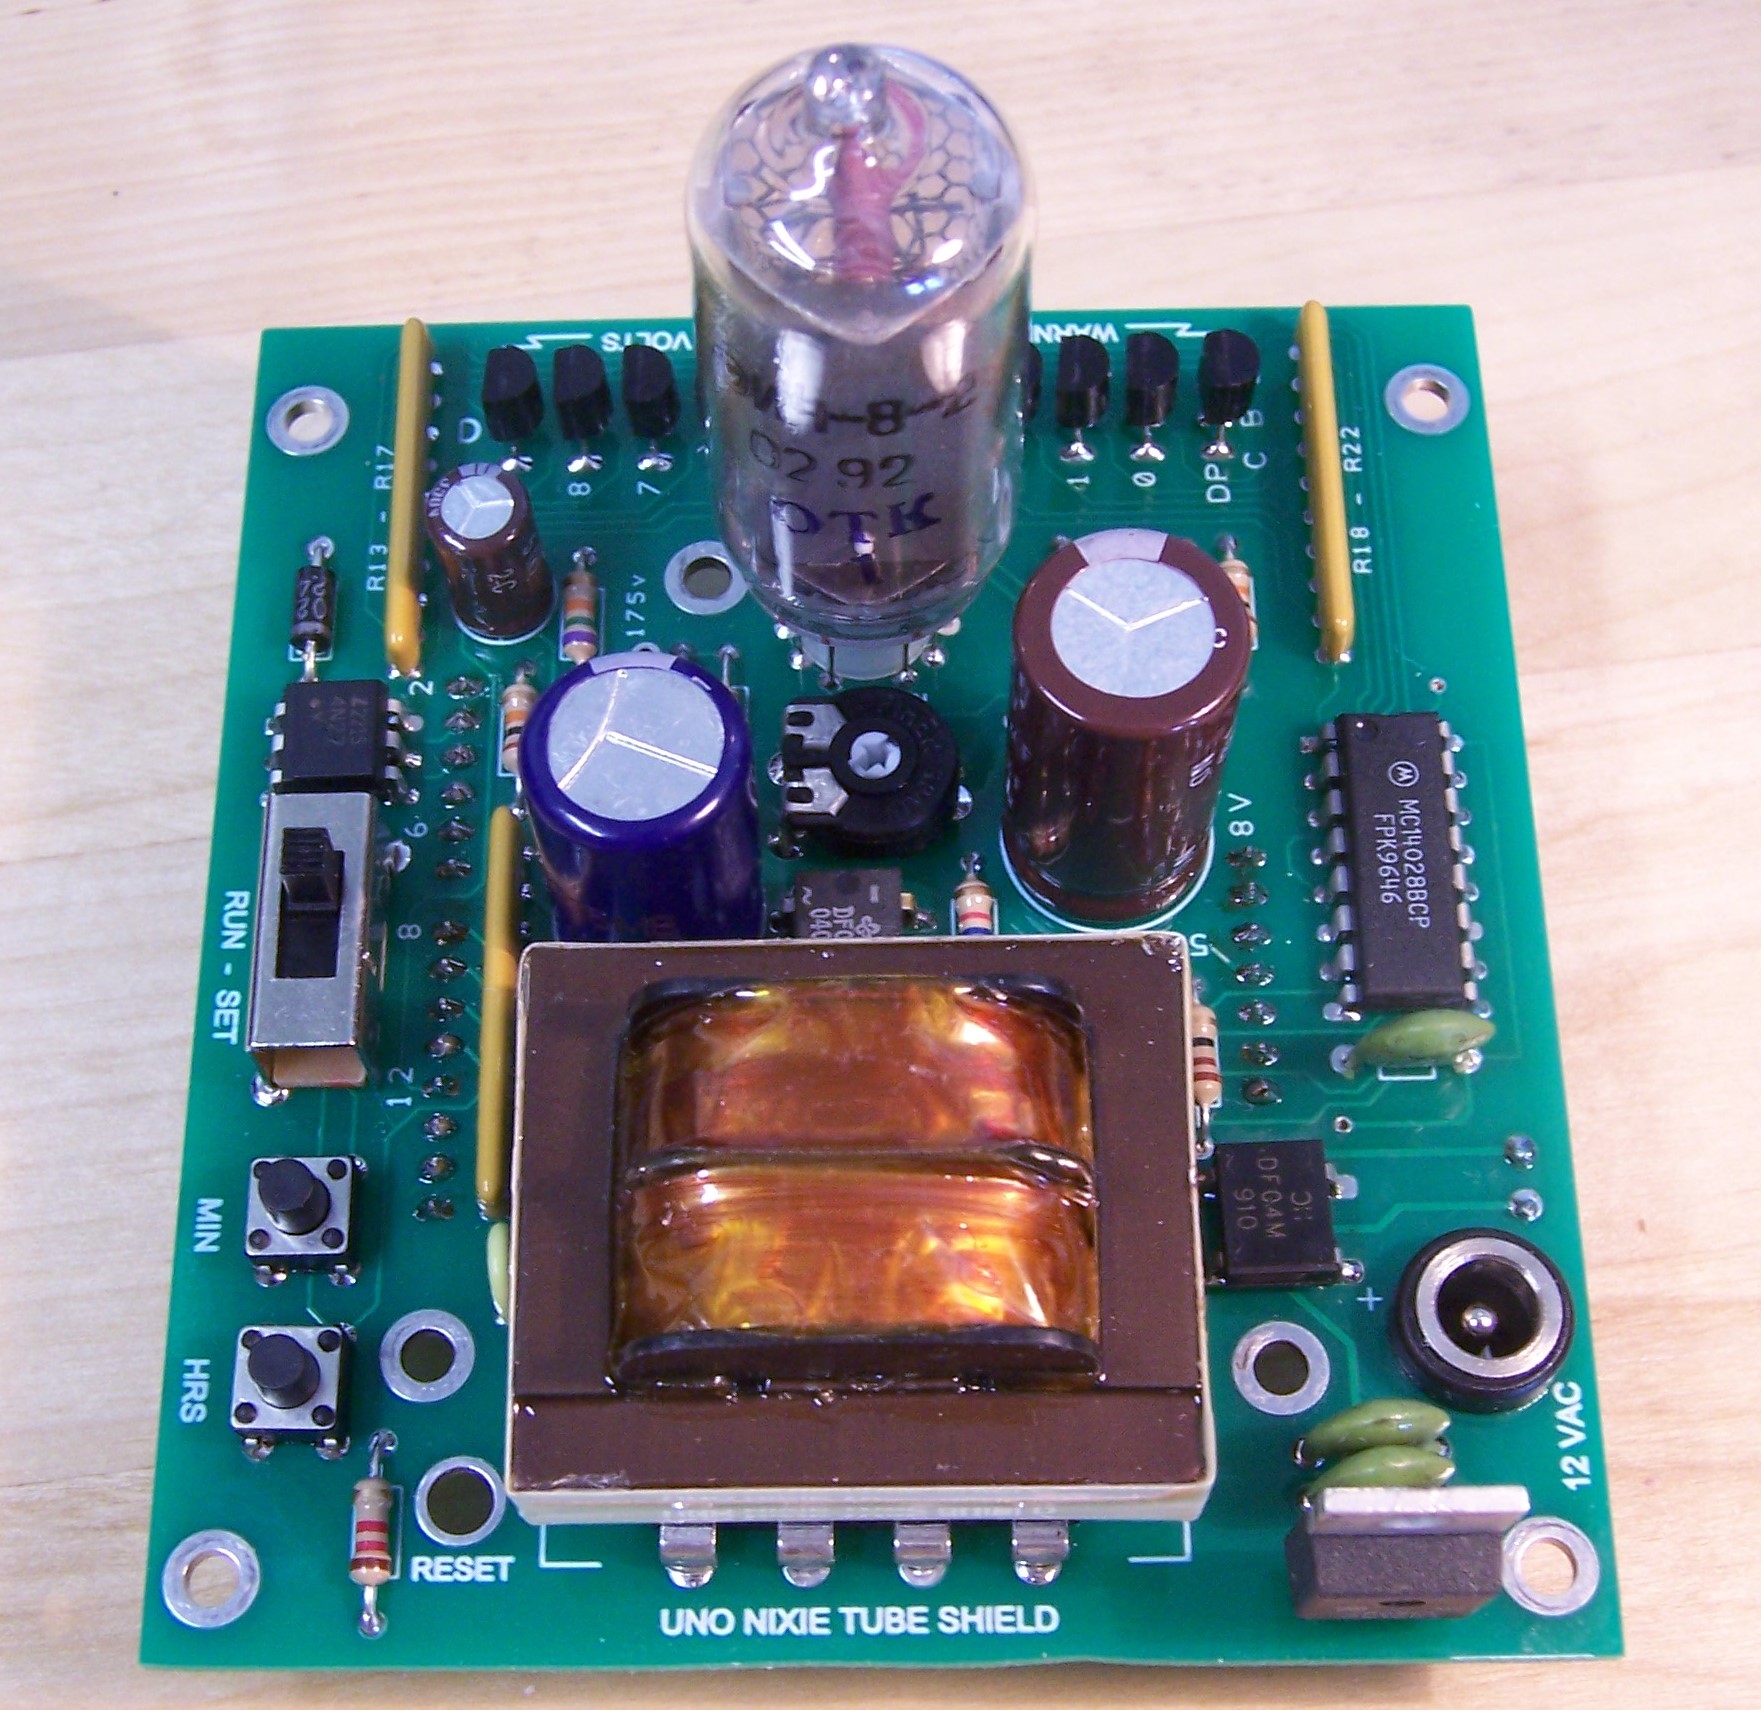
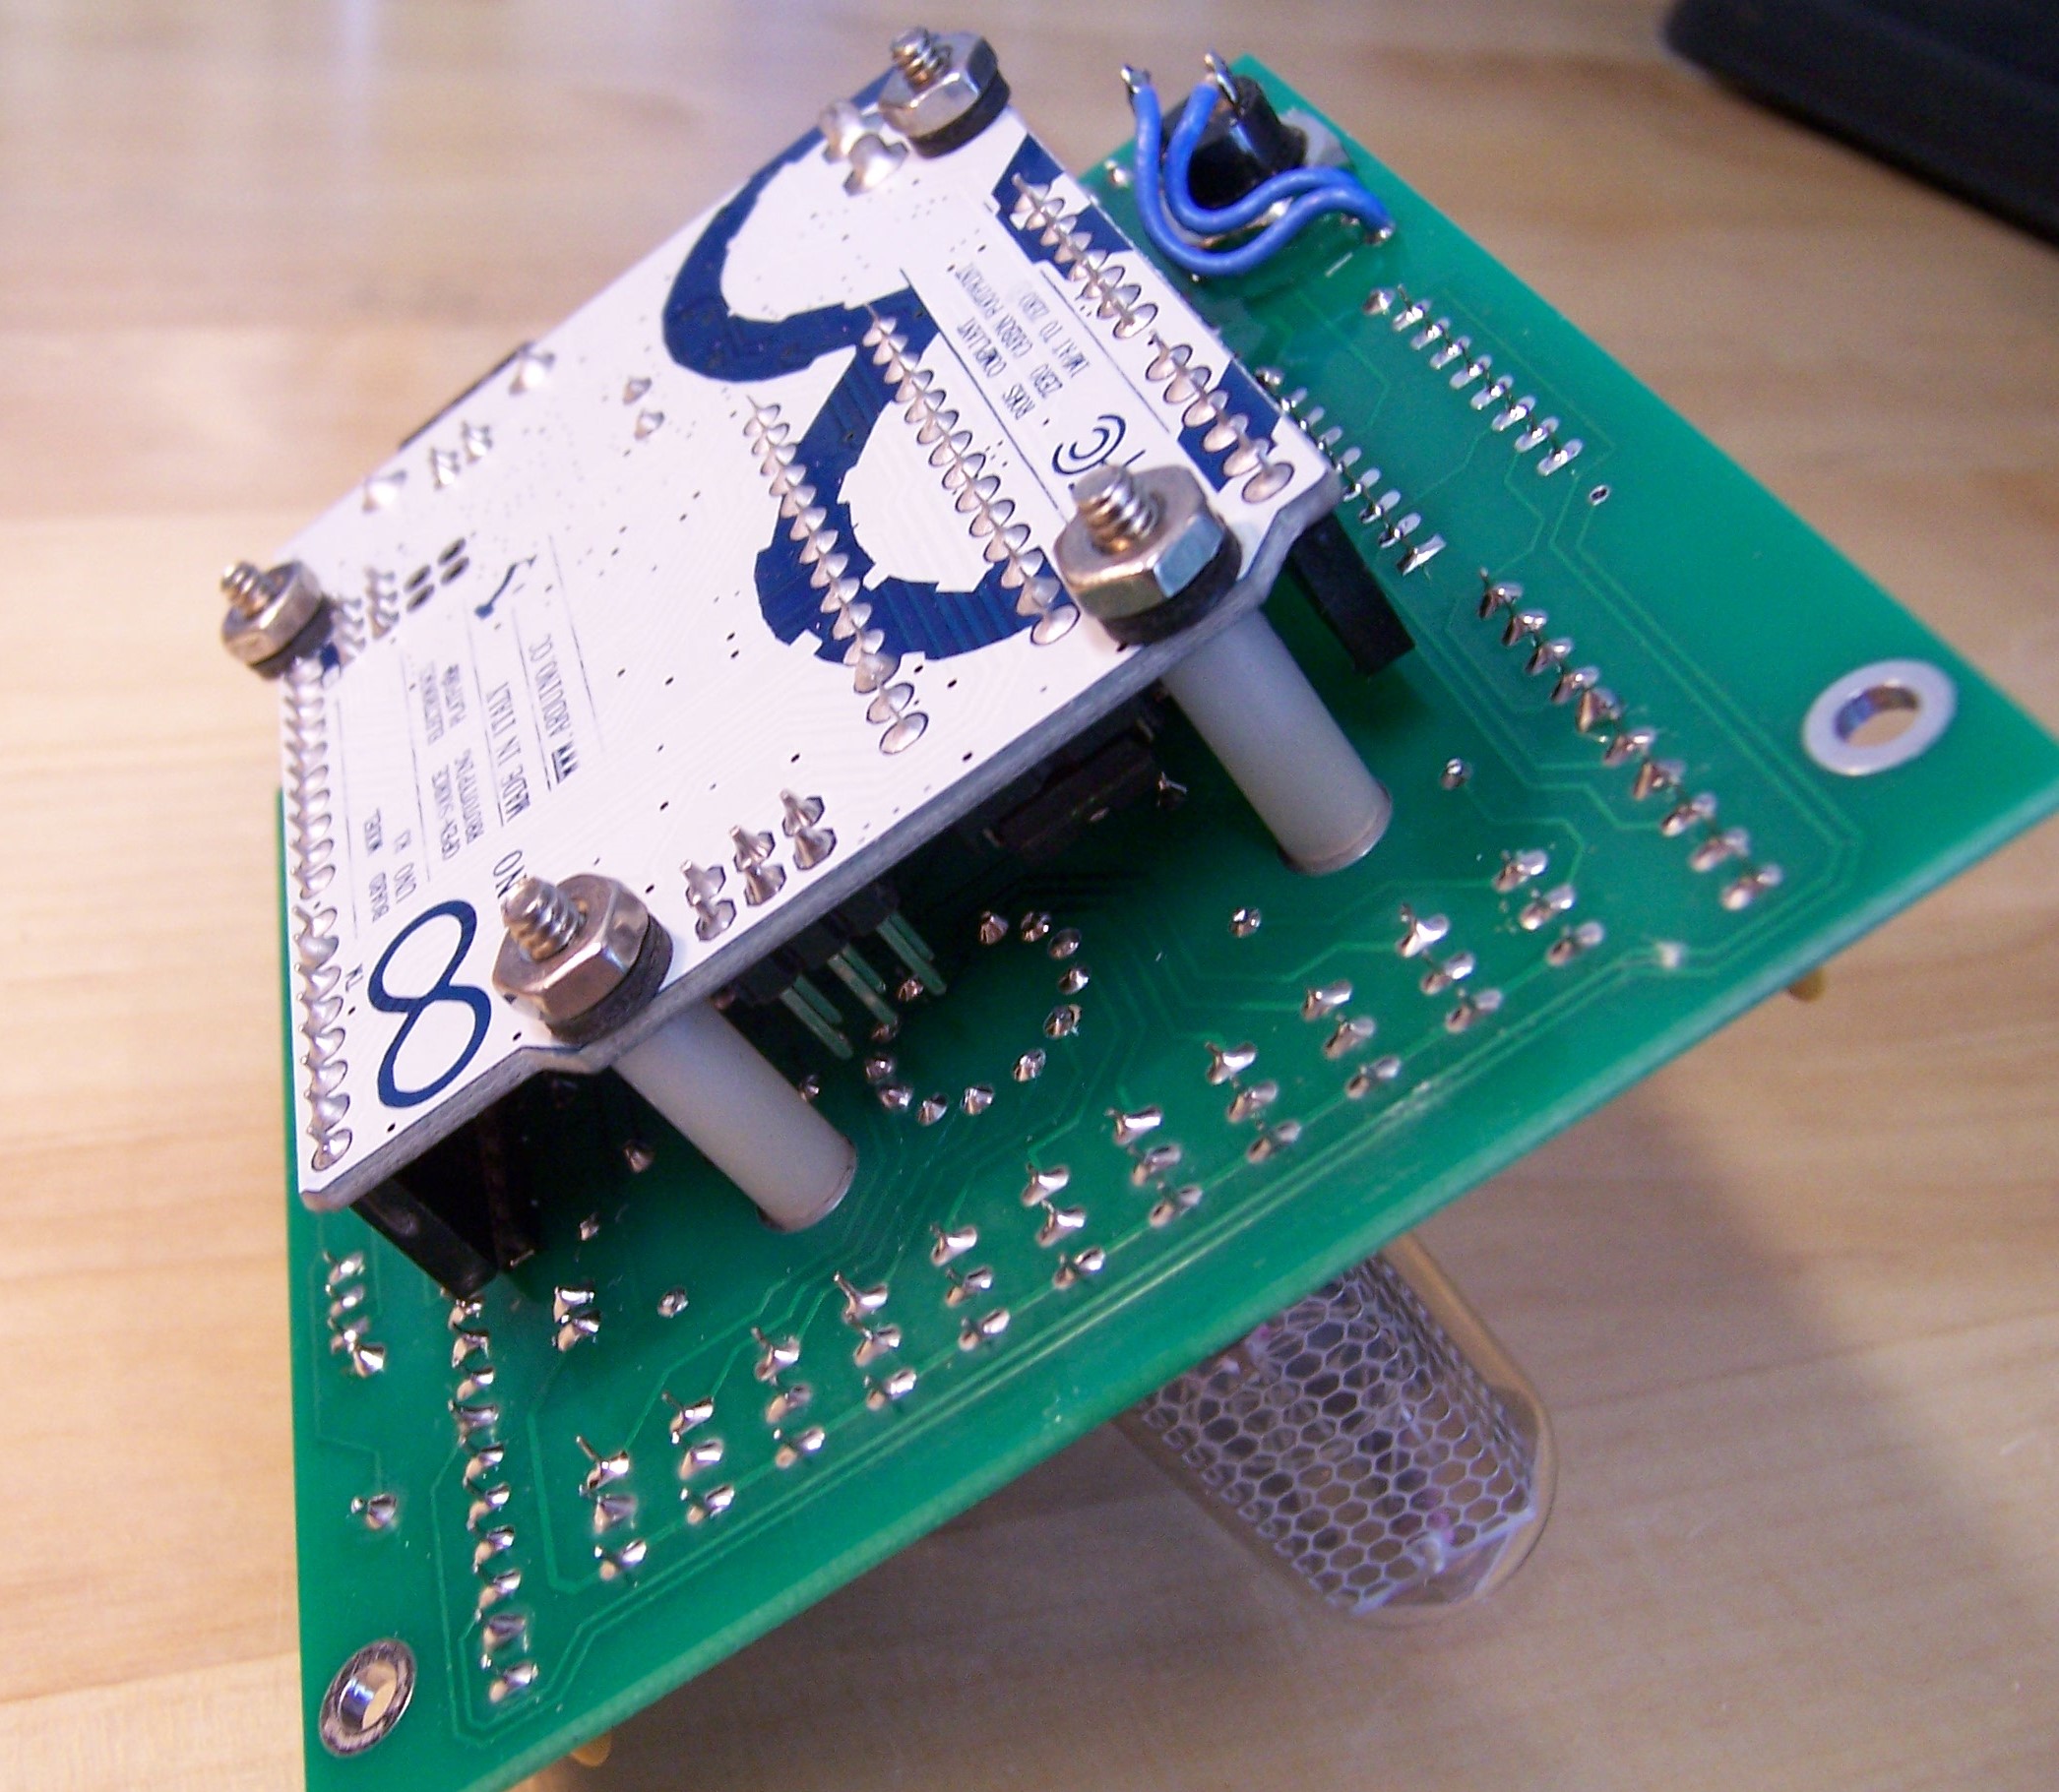
I designed a single-tube nixie tube display that interfaces with the Arduino UNO computer board. This UNO shield features a single IN-8-2 nixie tube. The board was designed with the intent of creating a single-tube nixie clock but could be used for any other application needing a digital display.
A word of caution... Nixie tubes are not low voltage devices like LEDs. They operate at elevated voltages that pose a shock hazard. Because of the operating characteristics of the IN-8-2 nixie tube, this board has voltages of 175 volts DC and 200 volts AC. If you are not comfortable and/or experienced with the safety measures required at such voltages, then this project might not be for you.
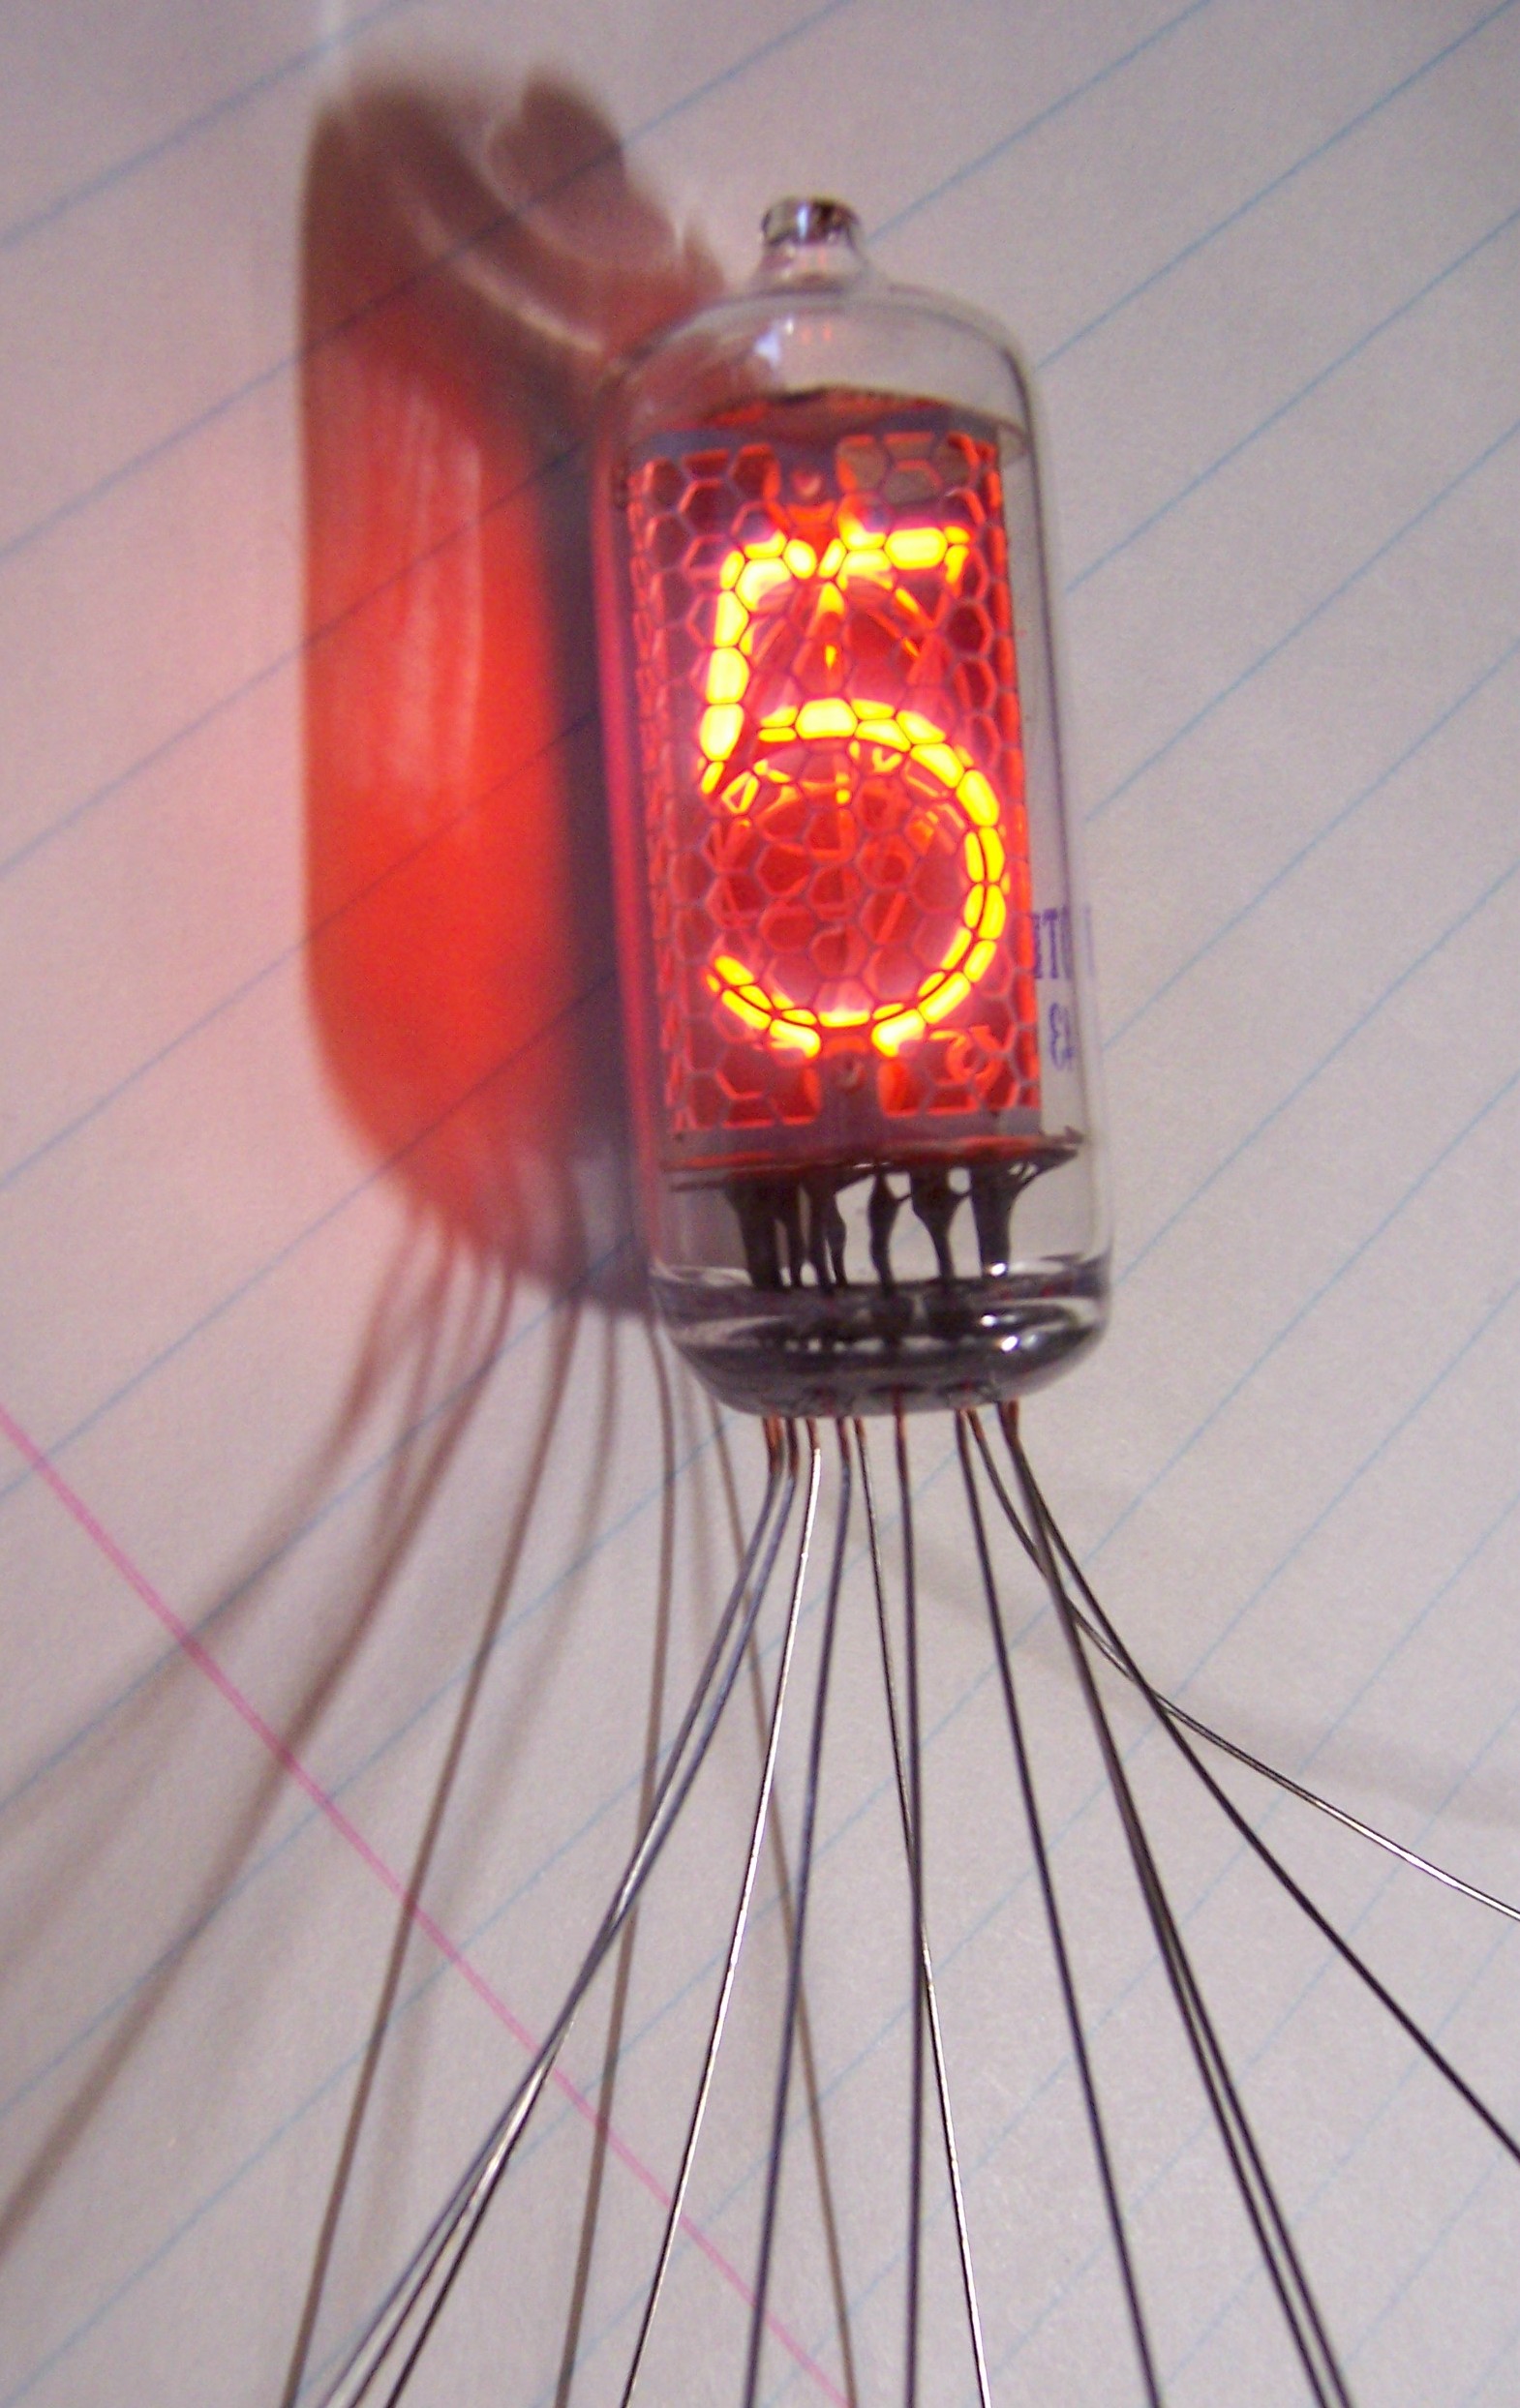
This design requires a power input of 12 volts AC (NOT DC) using a plug-in 12-volt AC, 500ma adapter. On-board power supply circuitry provides +8 volts DC to power for the UNO and +175 volts DC power for the nixie tube. The high voltage supply is a robust transformer-based design. Note that the DC input connector on the UNO board cannot be used. There is also an on-board 60 Hz signal that provides accurate timing via UNO input 2 (Interrupt INT0). The IN-8-2 nixie is a very nice display with 17mm (.708") high digits and distinctive “2” and “5” digits (“5” is not an upside down “2”). It is bright and easily visible form across a room. There is also a right-hand decimal point. The PC board has two push buttons and a slide switch. These are intended for clock setting purposes.
Available from me are blank PC boards (for experienced builders) or completed boards with all components and a 12-volt AC wall plug adapter. Or build your own from the full schematic provided here. Also available is my UNO code that runs this display as a clock. Please feel free to contact me for any questions.
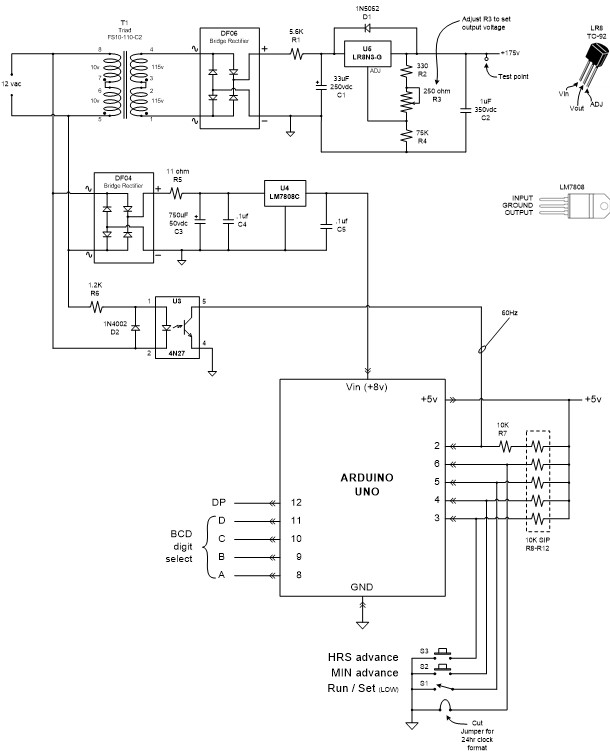
Schematic:
Technical Deep Dive: High Voltage Operation
The Nixie Tube UNO Clock project marries vintage Cold War technology with modern silicon. A classic IN-8-2 Nixie tube doesn't use LEDs. It uses a high-voltage electrical arc moving through low-pressure neon gas to illuminate physical metal numbers inside a glass vacuum tube.
The High Voltage Dilemma (170V DC)
An Arduino Uno runs entirely on 5 Volts. A Nixie tube literally will not strike its neon plasma at anything less than 170 Volts DC.
- If you accidentally bridge the 170V line to the Arduino's digital pin, the ATmega chip will be destroyed.
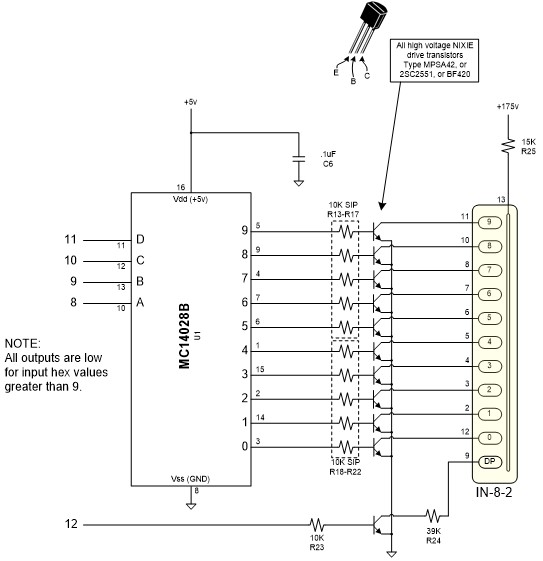
- The K155ID1 Driver Chip: You cannot use standard transistors to turn on the Nixie tube digits. This design uses a specialized BCD-to-Decimal decoder like the K155ID1 (or SN74141). This chip is engineered to safely interface low-voltage logic with high-voltage loads.
- The Arduino outputs a tiny 4-bit binary signal (e.g., `0-1-0-1` to mean "Digit 5") at 5V.
- The driver chip interprets the 5V signal and safely connects the corresponding Nixie tube cathode pin to Ground, completing the high-voltage circuit and lighting the digit.
Power Supply Architecture
Creating 170V+ from a 12V AC adapter requires a High Voltage Boost Converter. The schematic shows a transformer-based design. You must carefully route the high-voltage traces on the PCB. If a 170V trace runs too close to a 5V logic trace, an electrical arc could jump the gap and damage the circuit.
Programming Notes:
SETUP:
pinMode must be set as INPUT for 2, 3, 4, 5, and 6.
pinMode must be set as OUTPUT for 8, 9, 10, 11, 12, and 13.
To make use of the 60Hz timing signal on input 2, it can be used for an interrupt.
As part of setup, add:
attachInterrupt (0, [routine name that services the interrupt], RISING)
OUTPUTS:
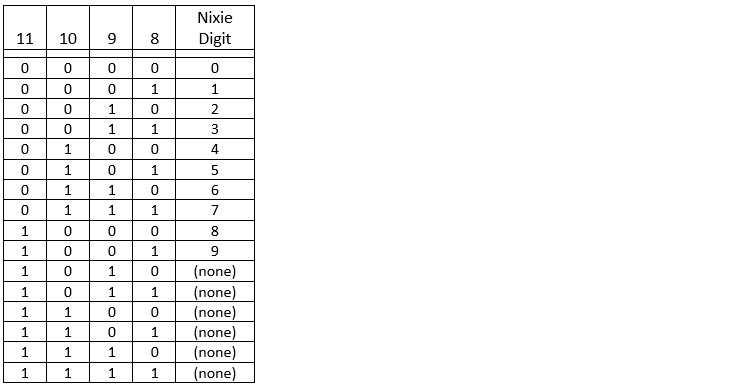
The digits in the nixie tube will be displayed as a function of the hex value (0 through 9) for output pins 8, 9, 10, and 11. Where 11 is the most significant digit and 8 is the least significant digit. See table below. Note that for hex values greater than 9, the nixie will be off (blank).
The decimal point in the nixie tube is turned on and off via output 12. It is independent of the nixie digits and will be ON if output 12 is HIGH and OFF if output 12 is LOW.
INPUTS:
The 12-volt AC input power is attached to the LED (input side) of a 4N27 opto-isolator. The transistor output of the opto-isolator is a 60Hz square wave signal and is connected to input 2.
The push button switch labeled “HRS” is connected to input 3. It is normally HIGH and will go LOW when the button is depressed.
The push button switch labeled “MIN” is connected to input 4. It is normally HIGH and will go LOW when the button is depressed.
The slide switch “RUN-SET” is connected to input 5. It is HIGH in the RUN position and LOW in the SET position.
A jumper wire, located near the transformer between the two push buttons, is connected to input 6 and is LOW with the jumper wire in place and HIGH if the jumper wire is cut or not installed.
Required Components
- Arduino Uno
- IN-8-2 Nixie Tube (or similar).
- K155ID1 or SN74141 Driver IC (or equivalent as per schematic).
- High Voltage Power Supply Components (as detailed in the schematic).
- An absolute respect for High Voltage safety!