I'm into all kinds of arcade type machines, and I was gifted this unique Pachinko Arrange Ball and assumed it would be easy to fix and get parts for. I was wrong. Luckily it is a simple enough machine I thought I would try one of these Arduino things to give it some new life. Still a work in progress, but this is my first Sketch and Arduino project. Maybe a little overly ambitious but through some trial and error and some help from the Arduino & Pachitalk community, I've got a good amount of the way in a matter of hours. Well OK, maybe like 12 hours. I do have some background in PLC's but not much computer programming. I still have some logistical hurdles but just a matter of troubleshooting now...
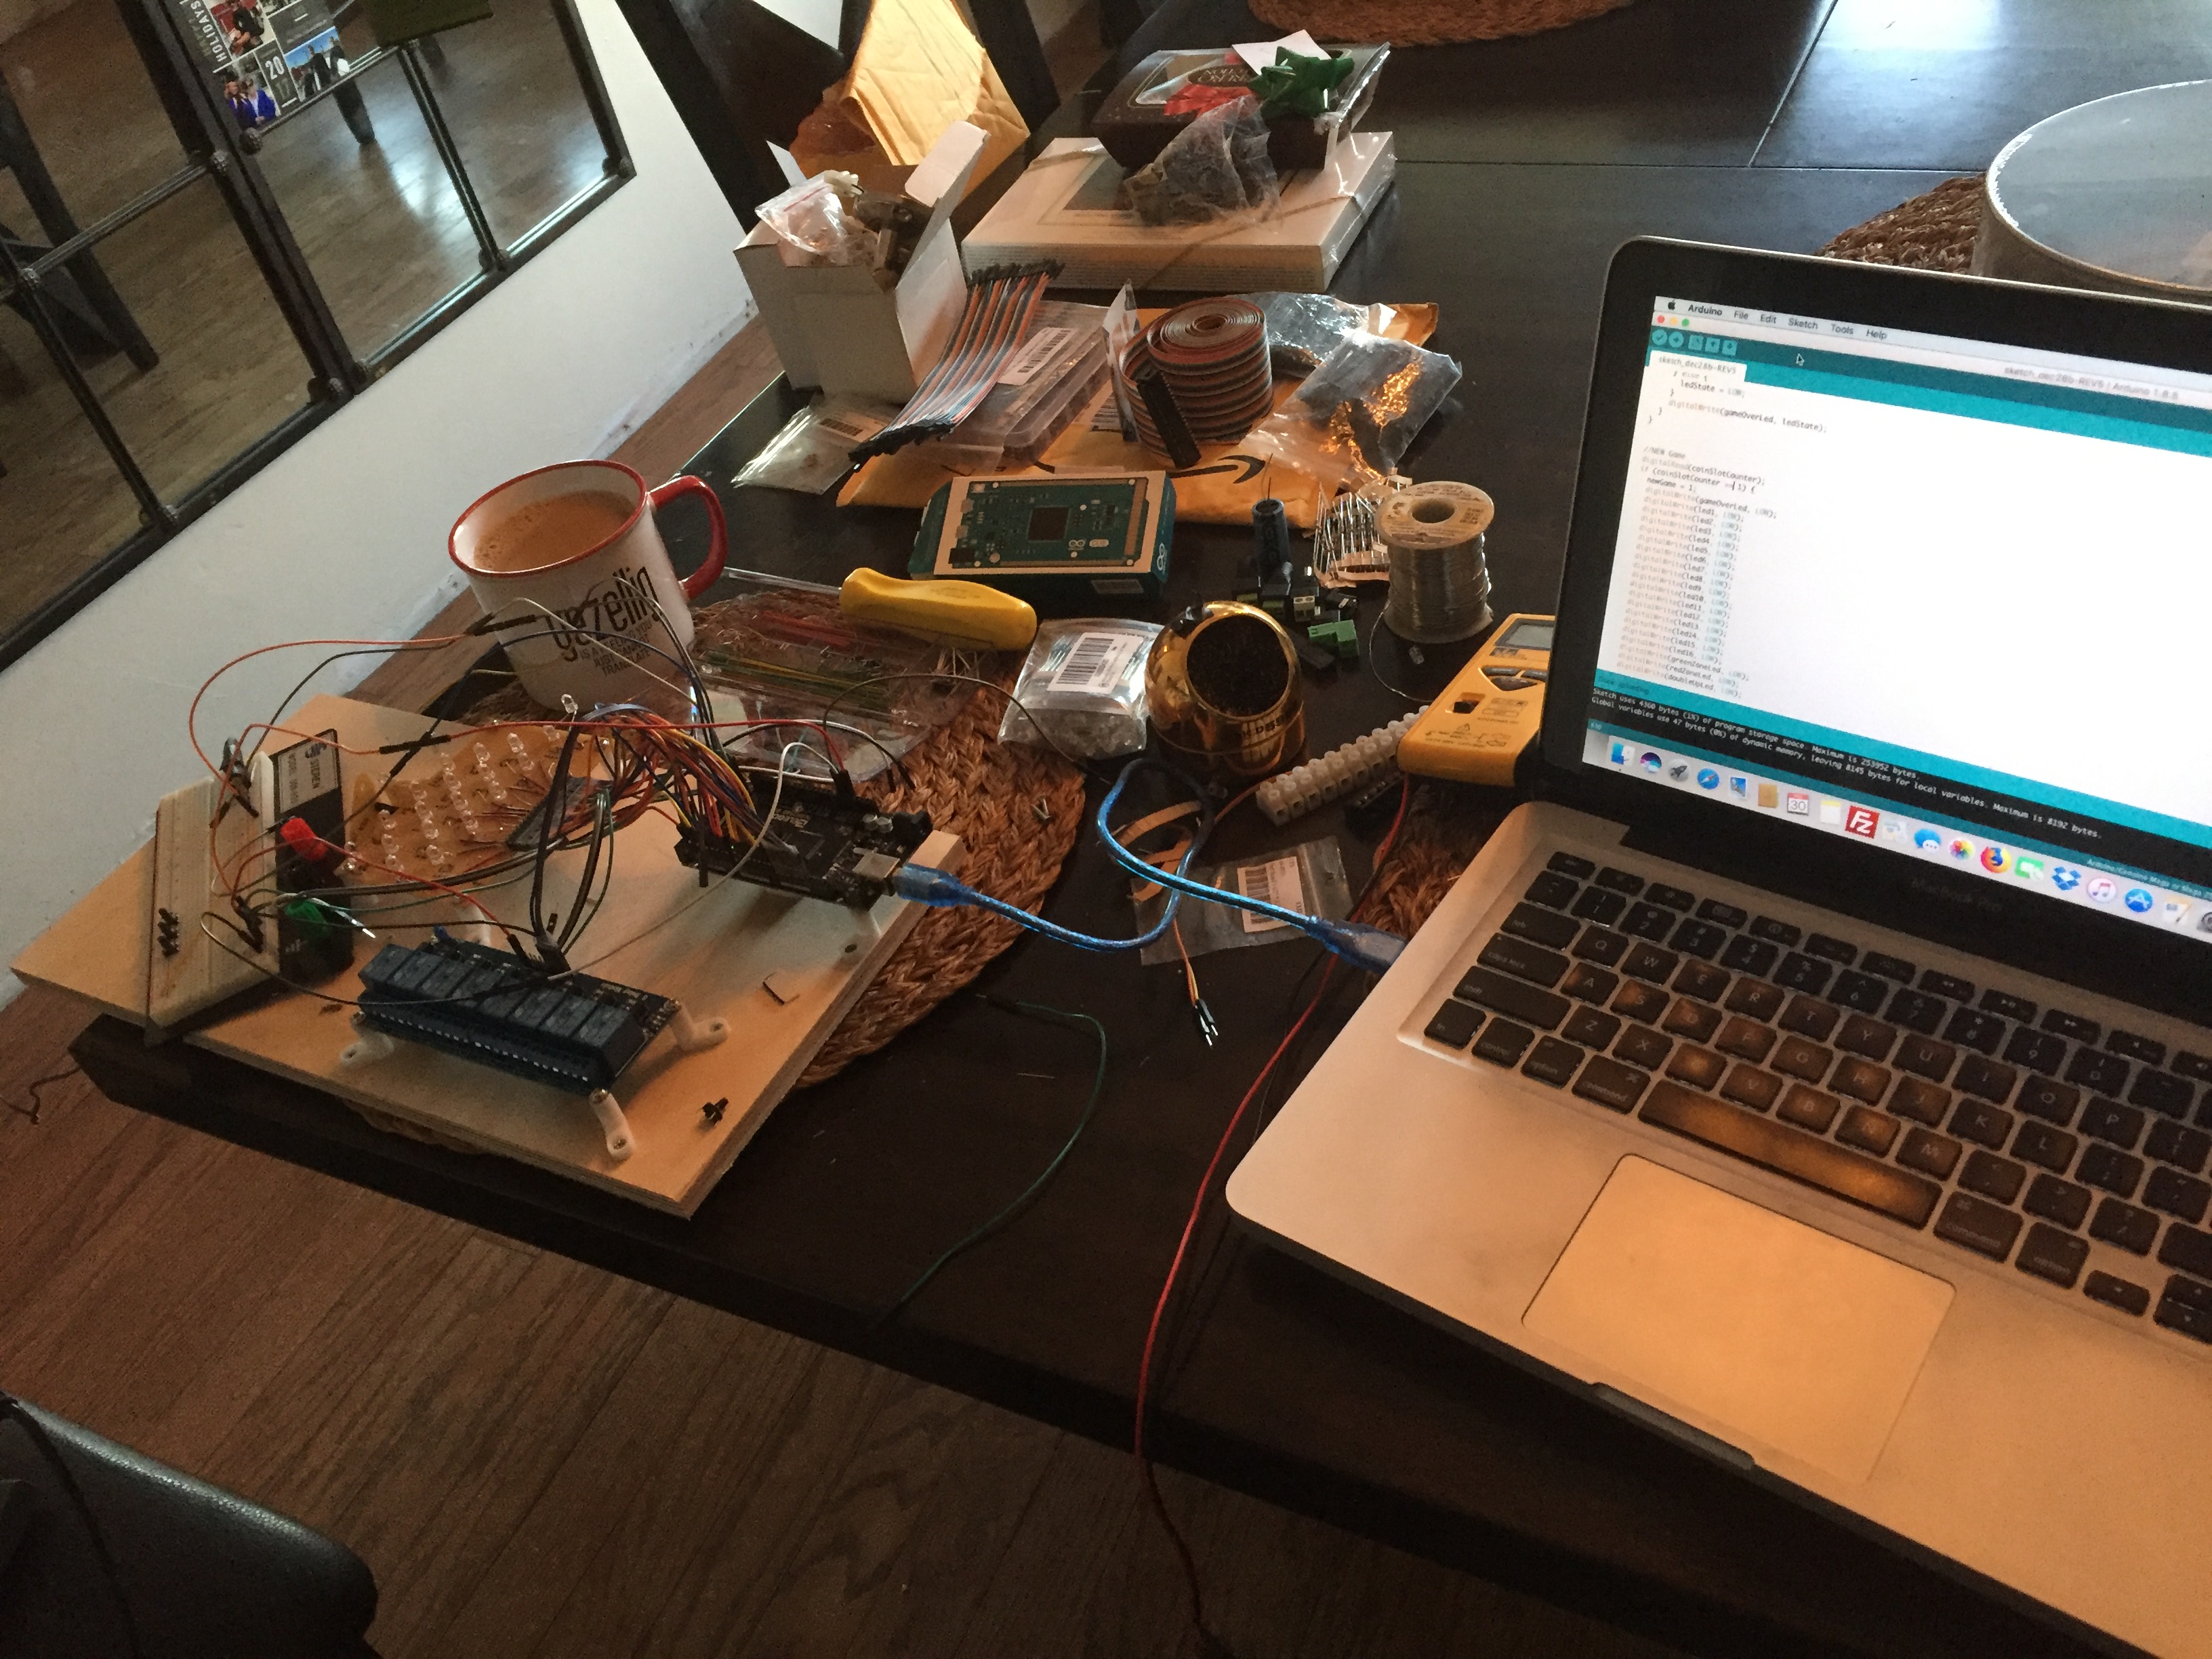
Here I'm checking how the 8 SPDT relay board I bought works. I though I could test this without load right off the Arduino, however I could only get the LED's on the relay board to light up. Apparently I could no source enough power off the Arduino for the relay coils. Once I sourced power for the Relay board from my power supply it worked fine. The built in OPTO couplers keep it safe for the Arduinio. I really only needed 3 Relays to power 3x 110vac Solenoids but there was only about $1 difference And I had plenty of room, now I have some spares...
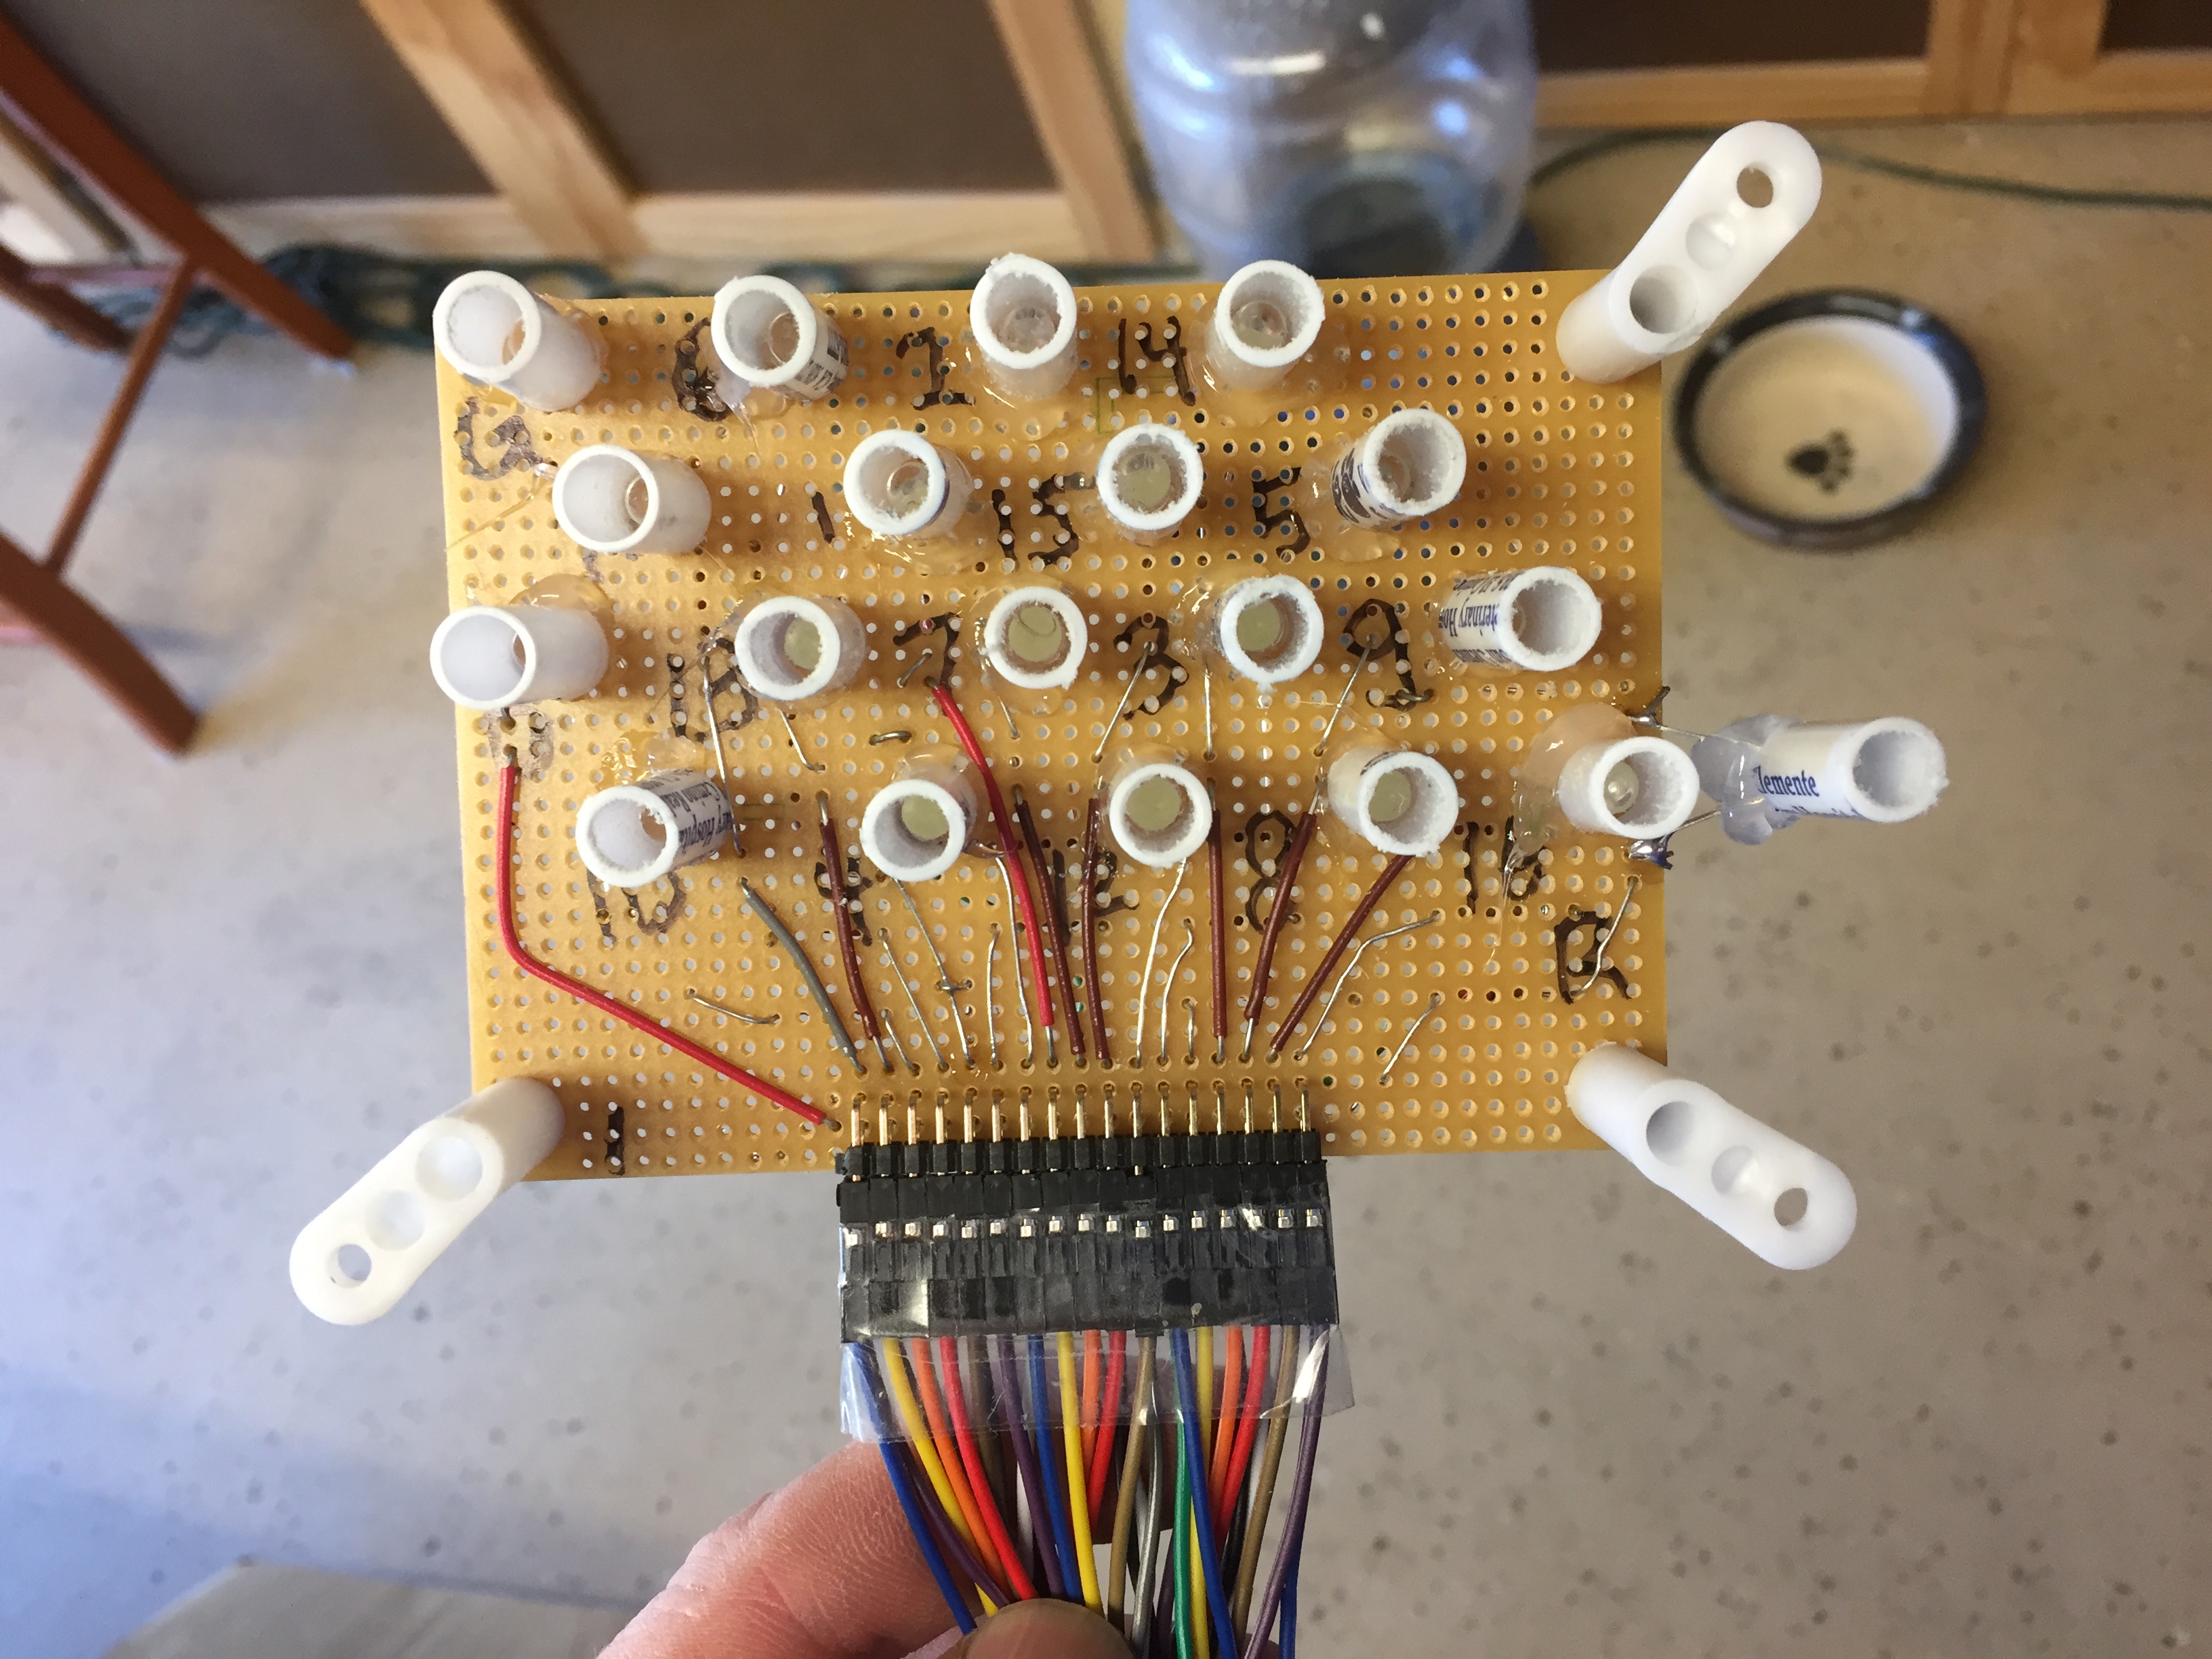
The original lamp board had tiny incandescent indicators. Because of their age they were varying in intensity and the connection method to make them serviceable was also failing after so many years. So I was getting intermittent light or flickering. My solution was 2-fold. Upgrade to LED, the Arduino could power directly and rethink the way the lights are triggered.
Originally the lamps were just in series with the switches. This would be fine but the conditions of the switches are also not 100% anymore. Also, like my pinball's, I wanted to have a lamp test built into the program. This means I had to wire the LED's separately from the switches. Which in this case was convenient because the switch array was plugged into the lamp board and it has the same pin pitch as the Arduino Headers. I have one LED hanging off the side because that was the widest board I had laying around. I used some ball point pens and cut them in sections to help shield and focus the light. LED's with a series 220ohm resistors are wired directly to the Arduino. I added an output test to the "setup" section to run once when the machine is powered. The output test cycles the lamps in order, as well as "Low Coin" & "Game Over" lights. I thought the "Low Coin" & "Game Over" would be bright enough with a single LED, but I ended up with 3 in each to light up nicely. I also added 2 "Ball Chute" LED's. It's very hard to tell how many balls you have left when you get low, plus I had 2 left over...
The output test also cycles the 3 relays for the coin rejection solenoid, ball release solenoid and payout solenoid. I have the ball release commented out, because I personally don't want it to release all the balls every time I power up. I did however leave the payout solenoid in the test so it ejects 1 coin on power up. So I at least have 1 coin to play when I power up, or cycle power. The coin rejection in my coin mechanism needs some TLC, and I'm not sure the original intent, but I wrote the program so that if the machine was low on coins in the coin storage for payout at the end of game, it would not allow a new game by engaging the rejection solenoid and flashing the low coin light.
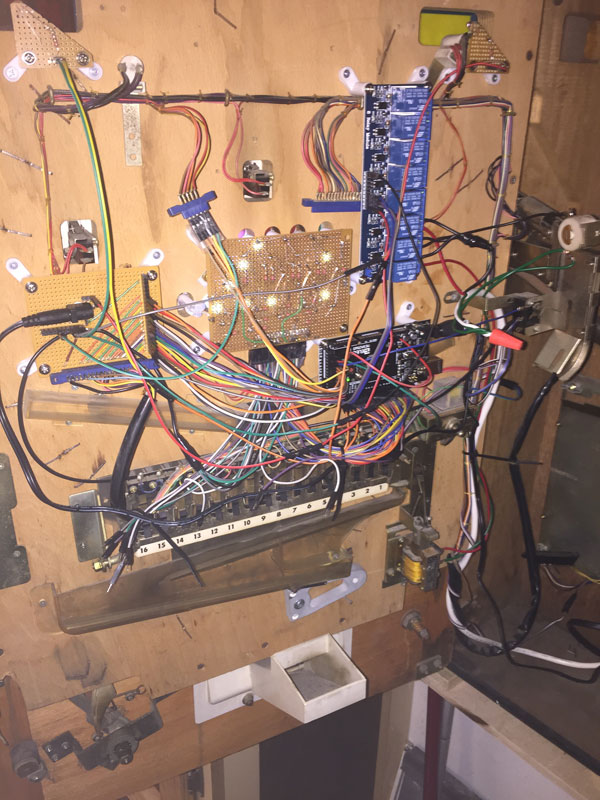
Back to the switches and the second fold of folds I mentioned above. The switches all still work, but the weight of the balls and condition of the contacts made them less then 100% reliable. I could have done a simple digitalRead(sw1) of the switch and digitalWrite(led1) to light them up, but this proved to give me still some jittery lights. Instead I ended up assigning a variable ss1 (Switch State 1) to each switch, so if the switch is closed it assigns a value of 1. If the variable == 1 then the corresponding light goes on (19 switches and LED's for the play-field). When a new game is started the variables are reset to = 0, turning the lights back off. This also improved the scoring at the end of the game, because I could use the same variable instead of reading the value of the switch.
I still have some ghosts, but I think they are related to the order of events and maybe some delays needed. I will be editing the code as I go. Currently this is a proof of concept and is working.
I know the code is excessively long & possibly redundant in parts, I would appreciate any creative criticism and suggestions. I jumped in writing it in array's and what I though made sense, had it under 200 lines, but I couldn't get it to work right and just wanted to see it work, so I wrote it out what I'll call long hand...
Update [01/03/2018] I have worked out most of the bugs in my sketch and was able to play, score and payout as I believe the original machine was intended. I think I may be using this as my test bed to further my knowledge of the programming but considering a week ago I never had programmed an Arduino before I'm pretty proud of my self. I also have to credit the examples built into the software and the great documentation and community support.
EXPANDED TECHNICAL DETAILS
Retro Arcade Logic Reconstruction
This restoration project uses a modern Arduino to replace the aging, faulty mechanical relays of a vintage Japanese Pachinko "Arrange Ball" machine.
- Solenoid & Switch Matrix: The Arduino monitors the scores of physical switches triggered by falling balls. It then drives the machine's original mechanical solenoids via a Relay or MOSFET expansion board.
- Historical Logic Logic: The firmware replicates the complex winning-logic and "Bonus" sequences of the original vintage hardware, preserving the classic gameplay experience while modernizing the reliability.
Digital Scoreboard
- LED/LCD integration: Adds a modern hidden display to show current player high-scores and game stats without altering the machine's classic exterior aesthetic.