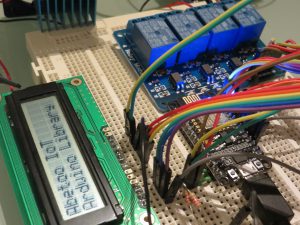
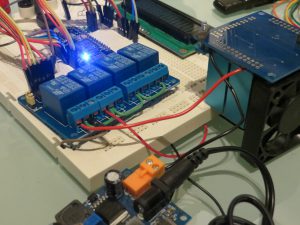
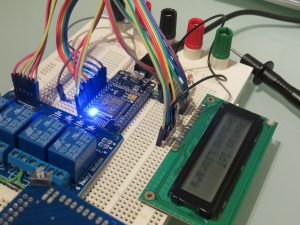
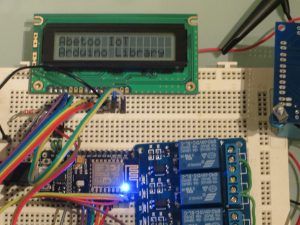
This is another example project of the Abetoo IoT Framework. In this case an application for remote control of an arduino-based circuit from an android app. The arduino board used is based on the popular module esp8266. The main goal of the application is to control a Peltier element, a Fan and to show messages sent from the android app. A board with relays is used to activate/deactivate both the Peltier element and the fan. A LCD is used to show the messages received.
Project Perspective
Peltier Controlled From An Android App is a fundamental layout for anyone just starting their journey with thermoelectric cooling and mobile app interaction. By using a specialized hardware setup and high-current driver, you'll learn about basic thermal management and Bluetooth-based control.
Technical Implementation: Thermoelectric and Control
The project focuses on creating a reliable and high-performance temperature control system:
- Thermoelectric layer: Using a Peltier Thermoelectric Module (TEC1-12706), the Arduino can create a temperature difference between two sides, allowing for cooling or heating by reversing the current.
- Mobile Control layer: A custom-built Android App connects to the HC-05 Bluetooth Module on the Arduino, allowing for remote temperature monitoring and control.
- Driver and Power layer: Because Peltier modules require high current (up to 6A), an L298N Motor Driver and a high-current 12V Power Supply are used to safely manage the load.
Hardware Infrastructure
- Arduino Uno: The "brain" of the project, managing the Bluetooth connection and coordinating the Peltier module's cooling and heating cycles.
- Peltier TEC1-12706: The thermoelectric device that transfers heat between its two sides based on current direction.
- L298N Motor Driver: Effectively isolates and controls the high-current Peltier module using safe, low-voltage control signals from the Arduino.
- Heat Sink and Fan: Essential for dissipating heat from the Peltier's "hot" side to prevent overheating and damage.
- Micro-USB Cable: Use to program the Arduino directly from your computer for power and code.
- Jumper Wires: Connect all the components together.
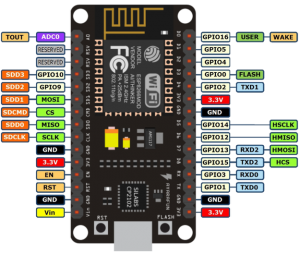
PinOut of the NodeMCU V3 board (esp8266 + usb-232):
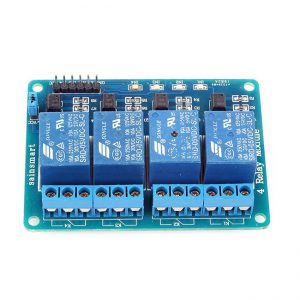
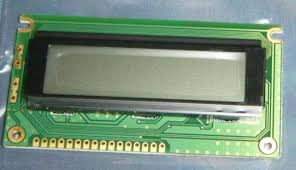
In the schematic is also used a Relays PCB and a LCD:
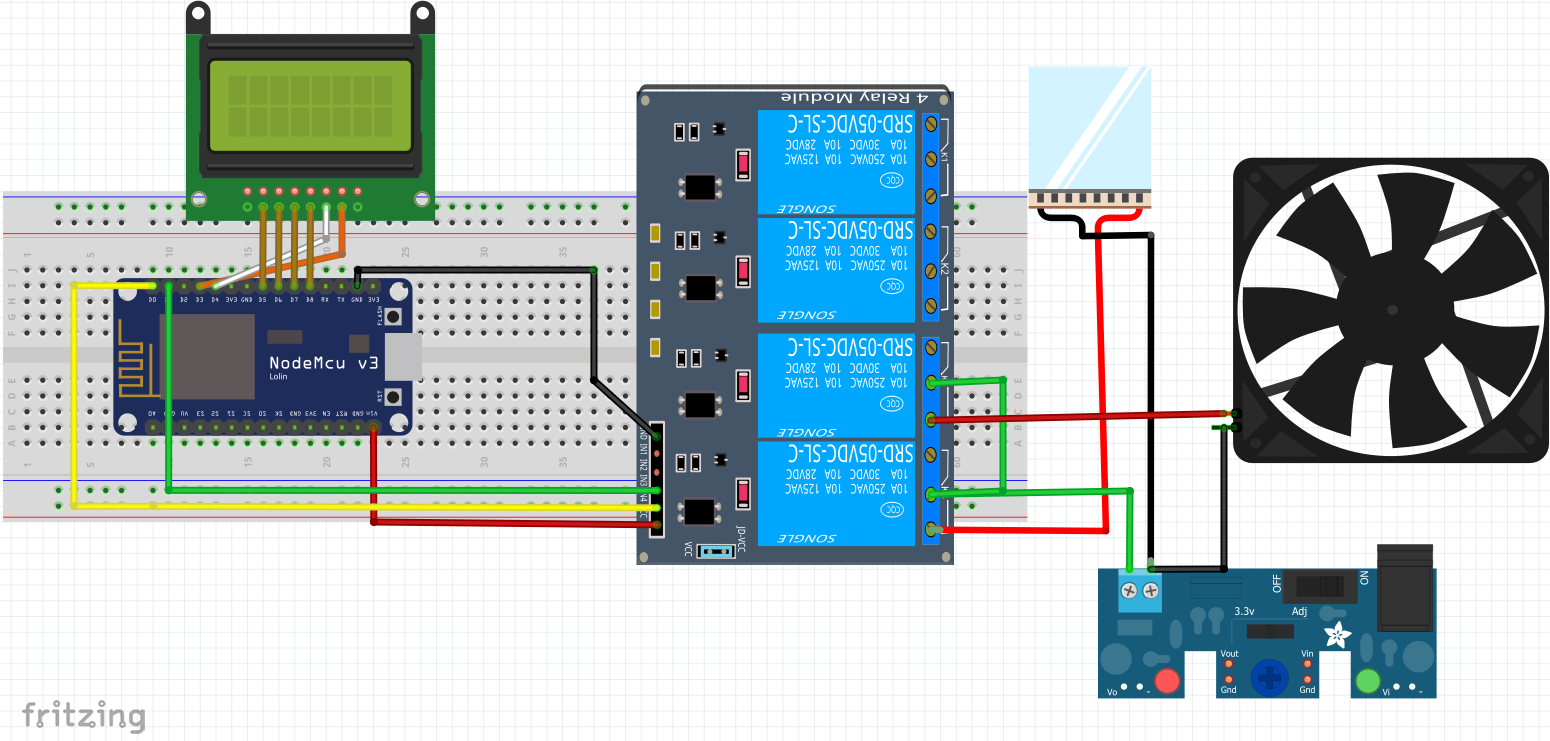
Fritzing of the whole project:
Android App and Selection Loop
The temperature control process is designed to be clear and efficient:
- Initialize Bluetooth: SETUP the Arduino to communicate with the HC-05 module and wait for a connection from the Android app.
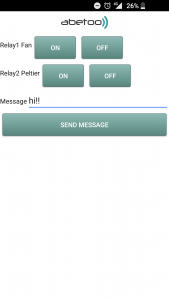
- App Interface: Use a custom-built Android App to set the desired Peltier mode (OFF, COOL, HEAT) and power level.
- Serial Transmission: The app sends a specific command character over Bluetooth (e.g., 'C' for cool, 'H' for heat).
- Execution: The Arduino interprets the command and triggers the L298N driver to send the appropriate current to the Peltier module.
And here are the results:
Future Expansion
- PID Temperature Control Incorporation: Add a DS18B20 temperature sensor and use a PID (Proportional-Integral-Derivative) algorithm for precise and stable temperature management.
- OLED Status Dashboard Integration: Add a small OLED display to show the current Peltier mode and real-time temperature readings from both sides.
- Cloud Logging Sync Support: Add a WiFi module (ESP8266/ESP32) and link to a cloud dashboard for remote thermal monitoring and reporting.
- Advanced Thermal Shield Support: Design and 3D-print a custom cooling chamber to house the Peltier and its heat sinks for a more professional-looking system.
Peltier Controlled From An Android App is a perfect project for any electronics enthusiast looking for a more interactive and engaging thermal control tool!