Some years ago, Arduino was manufacturing this table lamp kit. The kit is now out of production, but here's the tutorial to build it from scratch.

You can choose to control the lamp in multiple ways, my software and hardware implementation allows you to switch on the lamp trough hand gesture, change the brightness with a potentiometer, and change the LED colors using a simple button.
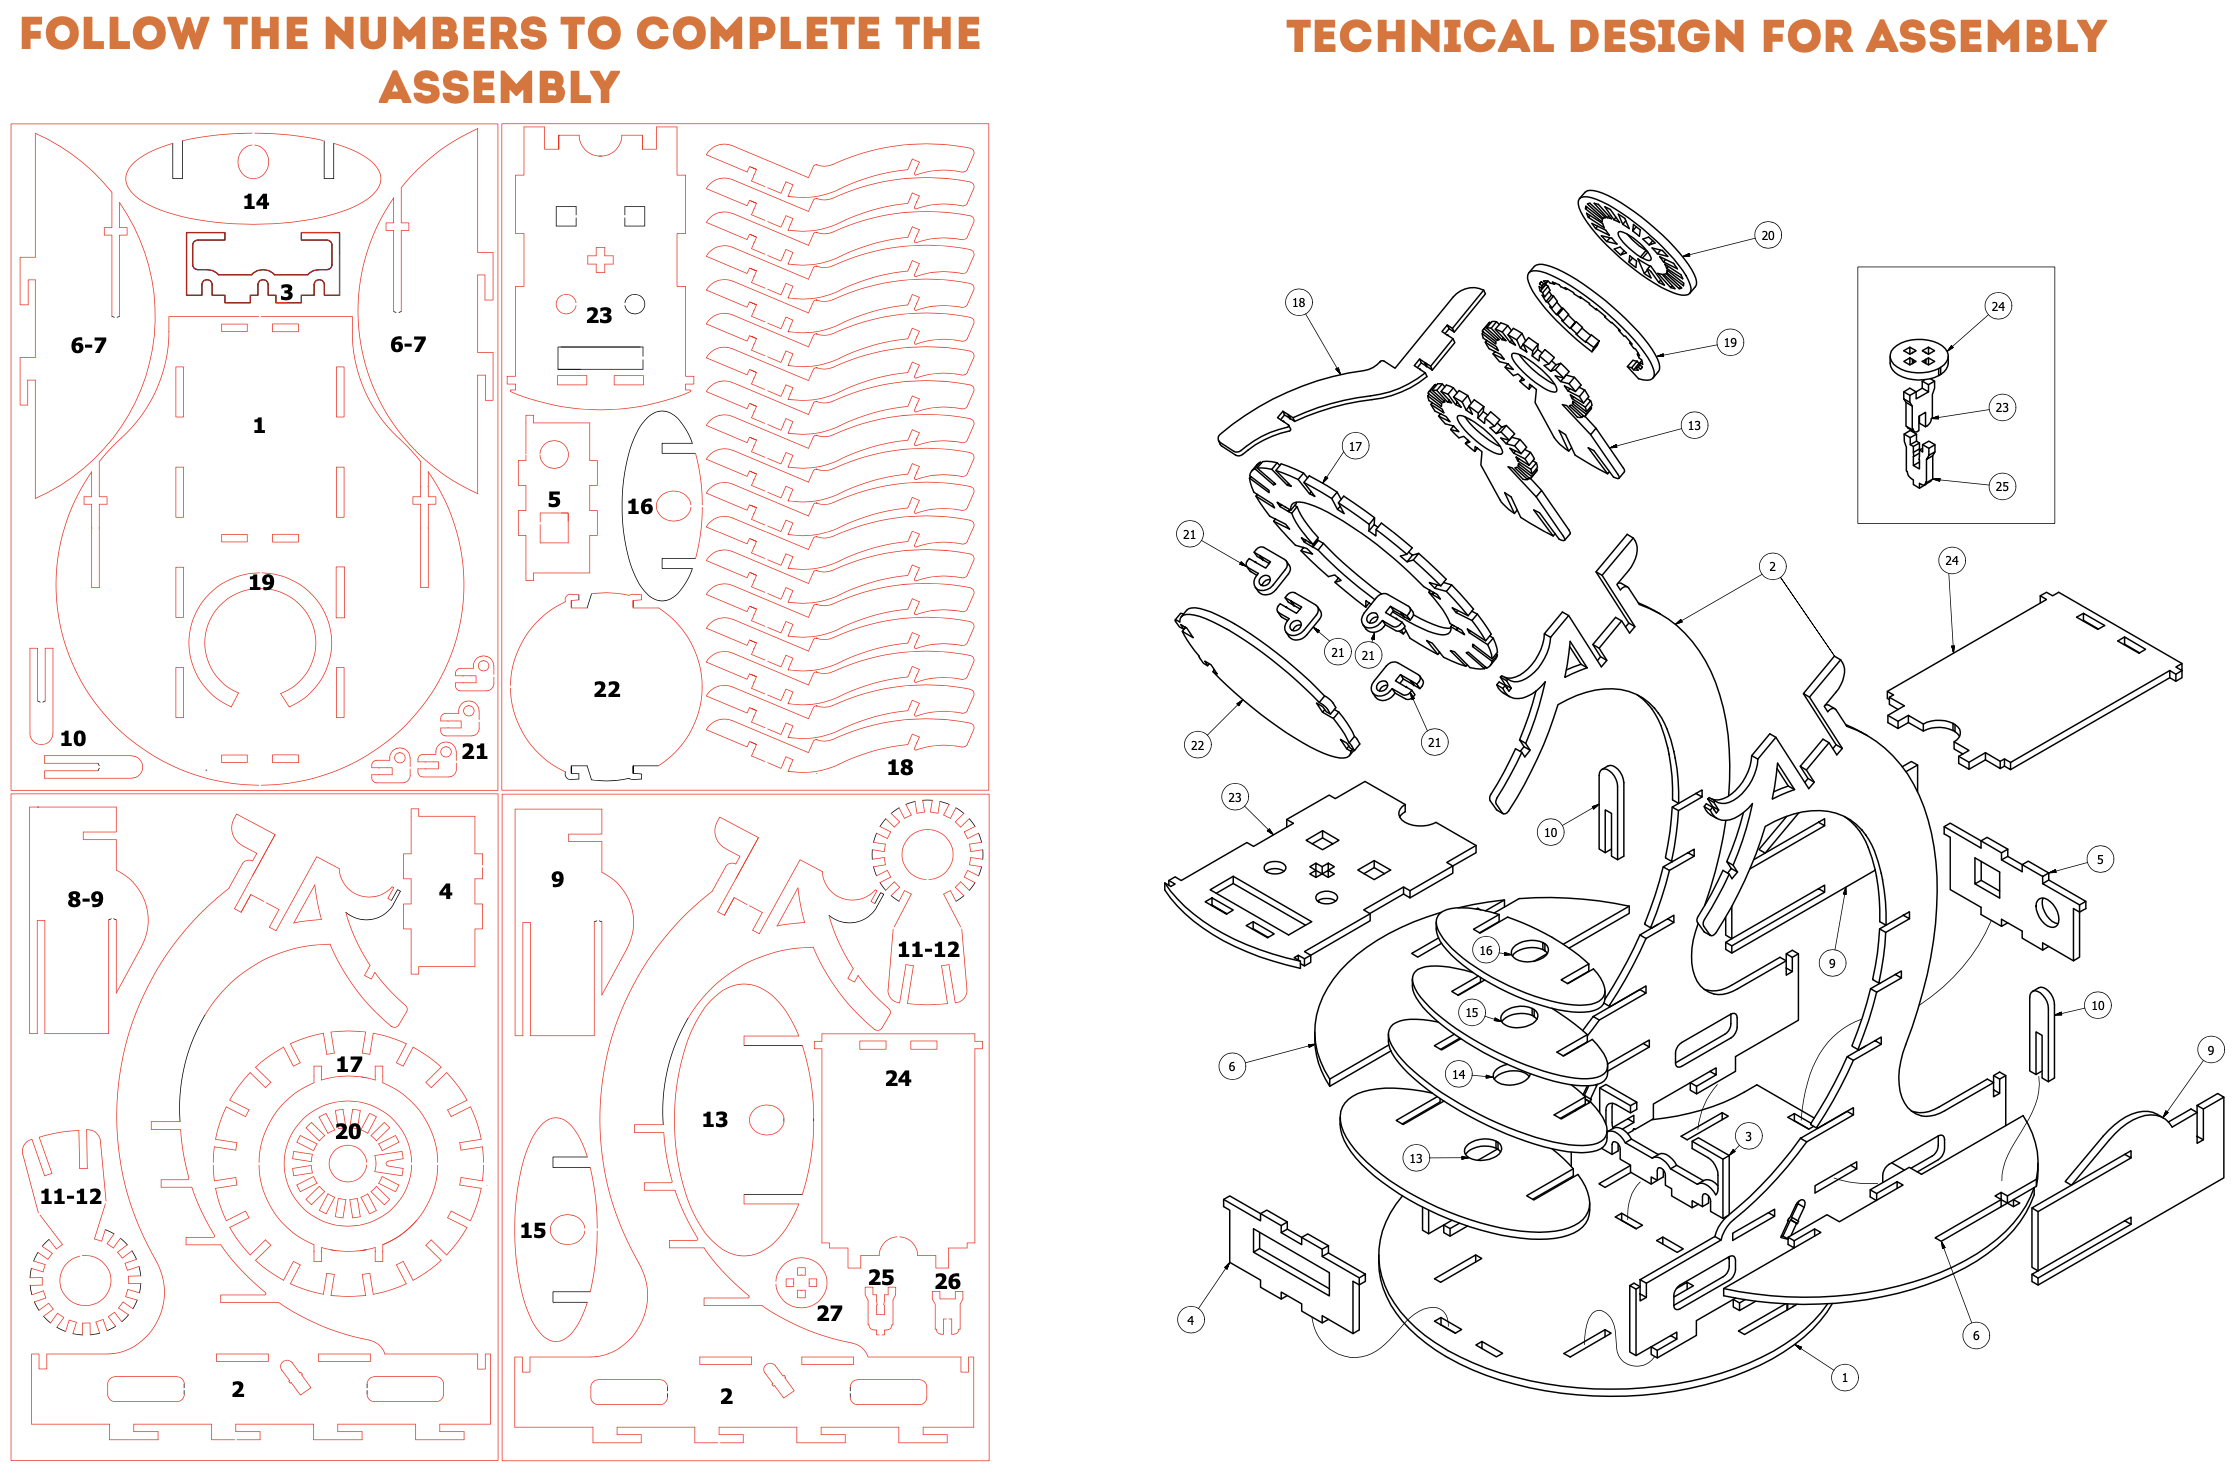
First of all, you need to assemble the lamp structure. The plexiglass is 3mm thick.
Build the circuit. You could start with a simpler version with a switch only, then add other components later. Be sure to find the right position in the breadboard for the components that needs to be inserted in the base holes. Customize colors and behavior.
Upload the code on the Uno and start playing with your lamp!
EXPANDED TECHNICAL DETAILS
Edge-Lit Kinetic Art
This project uses the physics of light refraction in acrylic to create a stunning, custom-etched LED table lamp.
- Capacitive Touch Switching: Instead of a mechanical button, the Arduino uses a TTP223 capacitive touch sensor hidden under the base. One touch cycles through color modes, and a long-press adjusts the brightness.
- PWM Color Mixing: Manages a high-brightness Common Anode RGB LED. The firmware uses 8-bit PWM fades to create smooth "Breathing" transitions between colors, enhancing the interior aesthetic.
Construction
- Diffused Light Hub: Explains the use of sand-blasted plexiglass to capture and diffuse the LED light across the entire surface of the etched pattern.