This is a very simple project that takes the temperature from a TMP36 sensor and displays it in Celsius and Fahrenheit on a 16x2 LCD display. This is a perfect project if you have the Arduino Starter Kit because it supplies all the components needed.
The Parts
All the parts you need are listed above. I am using an Arduino Uno but you can use whatever Arduino you want.
The Build
The schematic you will need to build this project is below.
The Code
The code you will need is also below. You can download it or you can use the Arduino Web Editor to upload it to your Arduino.
Now Use It!
All you need to do now is provide power to your Arduino and this is what you should see on the LCD screen:
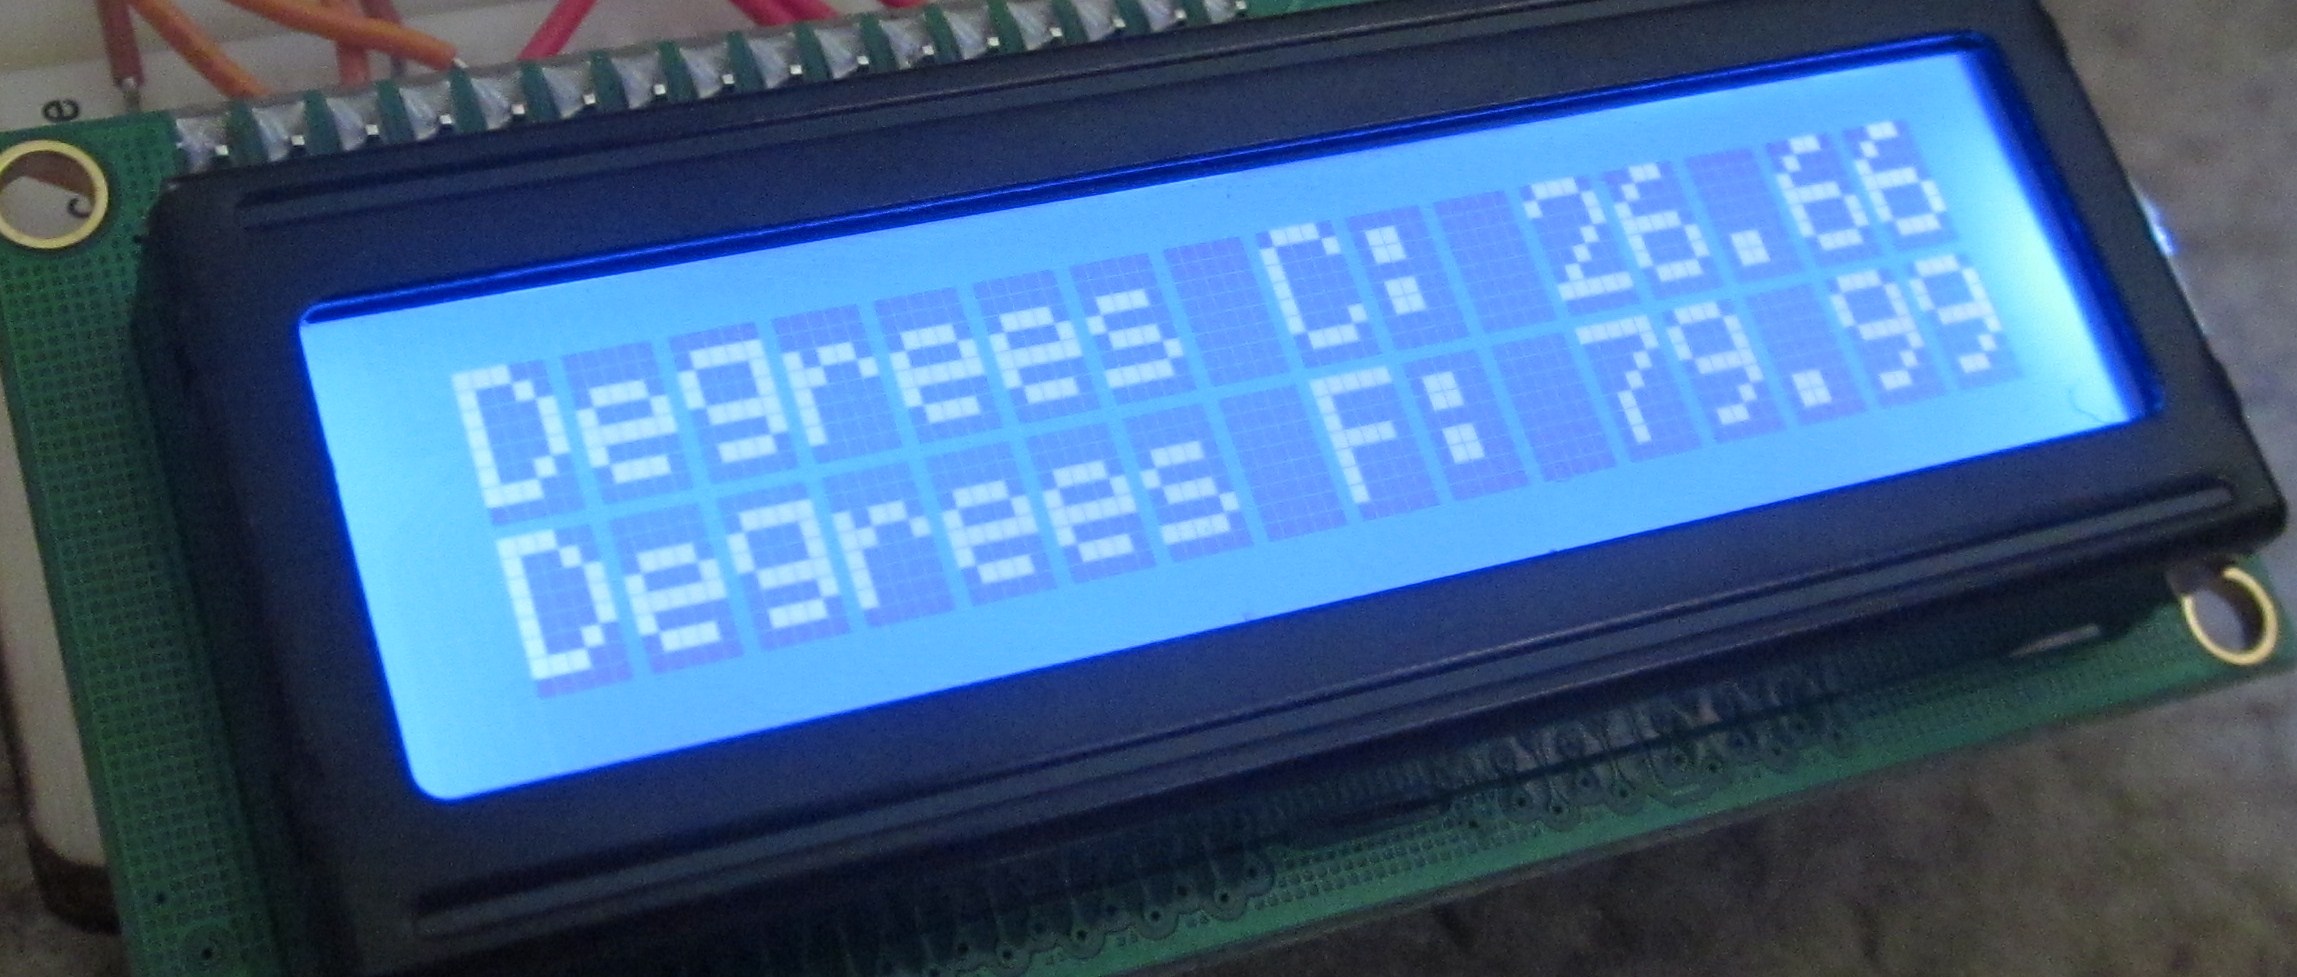
The display updates every 1.5 seconds.
NOTE: I know I didn't use a potentiometer so I could adjust the contrast. You can add one if you want to.
EXPANDED TECHNICAL DETAILS
Handheld Thermal Diagnostics
This compact, battery-powered station provides real-time ambient monitoring for laboratory, industrial, or home HVAC analysis.
- Precision Digital Sensing: Uses the DS18B20 One-Wire sensor, known for its 0.5°C accuracy and high-speed digital output. The Arduino interprets the 64-bit unique sensor ID, making it easy to swap sensors or add more to the same bus.
- Low-Power LCD Rendering: Displays current temperature (°C/°F) and the 24-hour High/Low record on a 16x2 I2C LCD. The system uses a "Button-Activated Backlight" to save energy while on battery power.
Reliability
- Sensor Error Handling: Includes a checksum validation in the firmware; if the sensor is disconnected or faulty, the LCD displays a "Sensor Error" alert instead of incorrect frozen data.