If you are searching for what are PWM pins in an Arduino board? Then this is the right place.
-PWM pins are digital pins on each Arduino that can give a variable amount of power that matches your needs. And they are usually used on some motors like the servo motors, and any actuator that you want to control the power given to it.
But in this project, I am going to show how to control a LED brightness using a potentiometer.
This project is made for beginners so I am going to use a block coding software that is more easier to use than Arduino IDE. It is called mBlock.
So, Let's start:
The first step is the wiring and here is the wiring diagram.
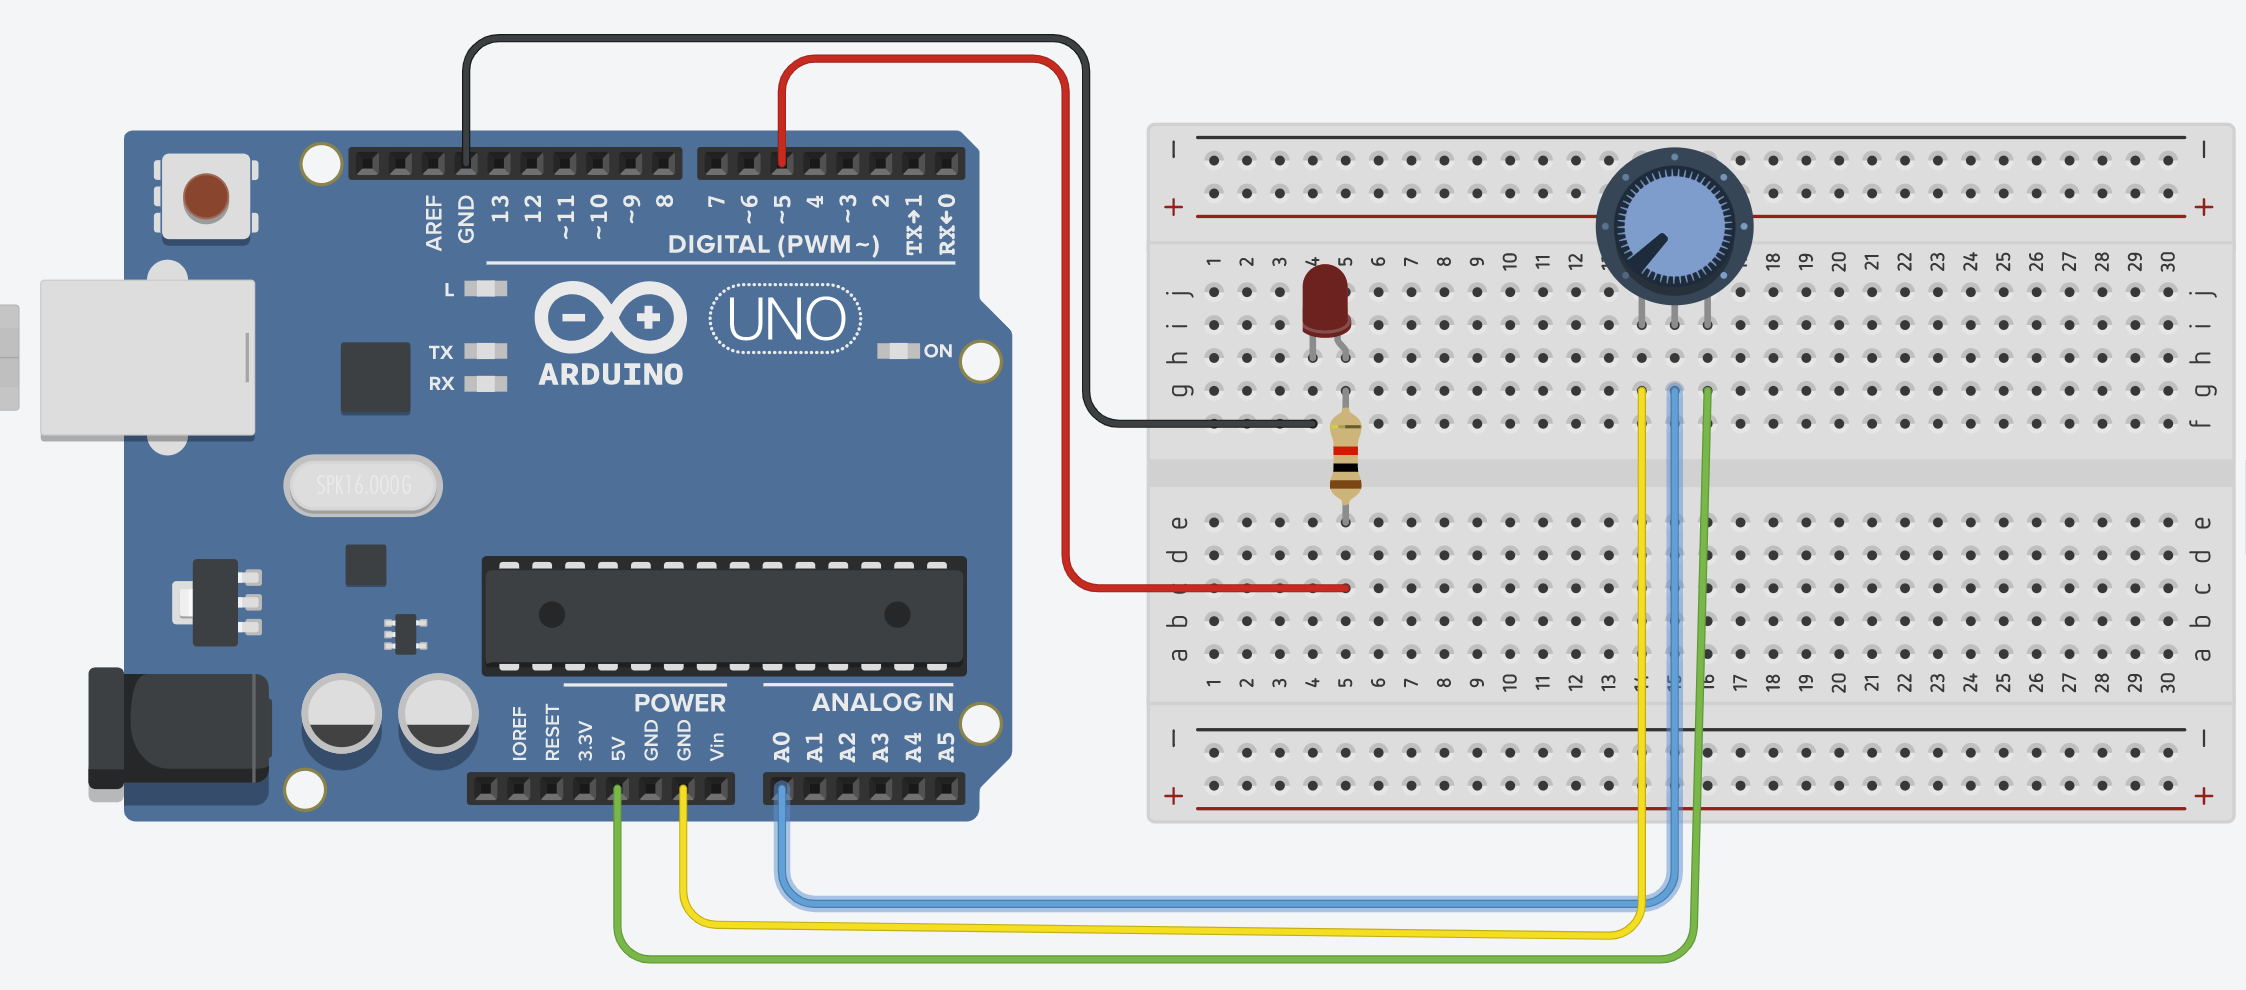
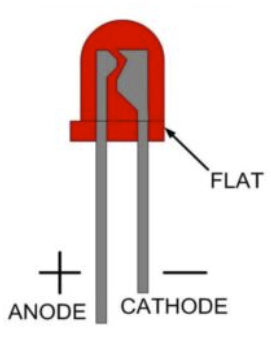
You need to connect the anode to digital pin 5 and the cathode to GND pin like this:
And then the potentiometer: the both pins on the sides are the same, one needs to be connected to the GND and the other to the Analog pin A0.
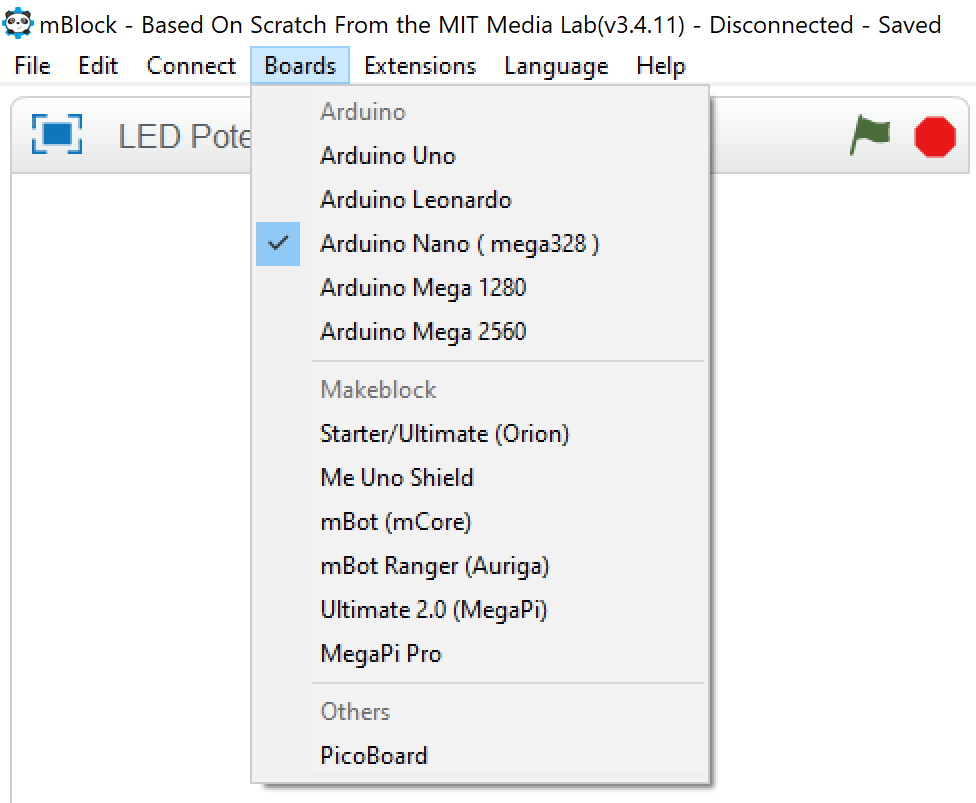
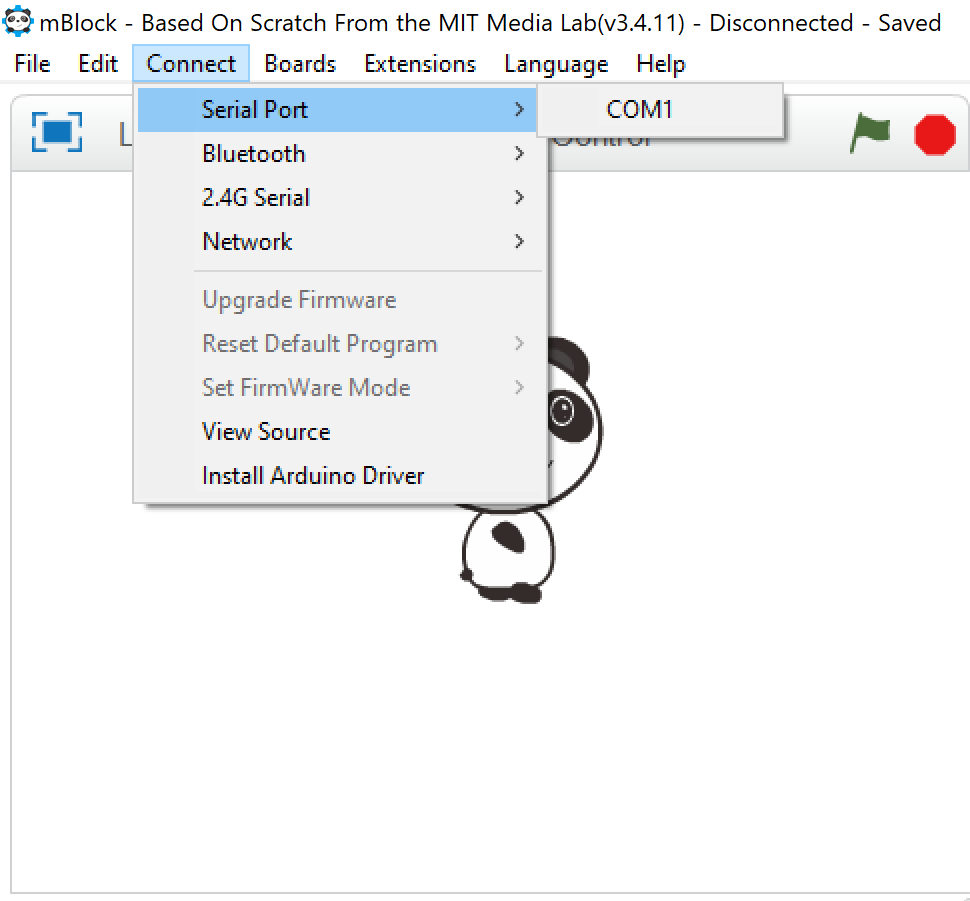
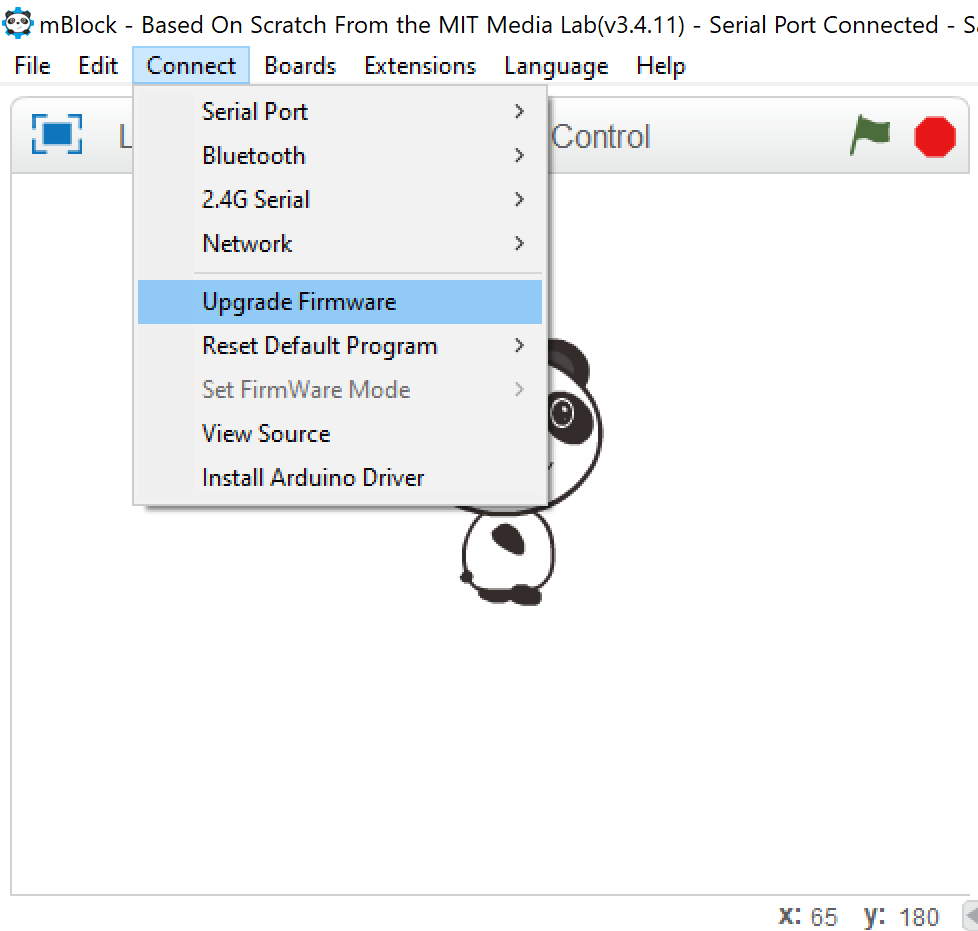
After wiring we need to code our board. So, First download mBlock(v3.4.11) from the mBlock website. And then follow these steps:

EXPANDED TECHNICAL DETAILS
Analog-to-PWM Signal Translation
A fundamental electronics project exploring the relationship between continuous analog voltage and digital pulse width modulation.
- ADC Quantization Pipeline: The Arduino captures the 0V-5V signal from a 10kΩ potentiometer via its 10-bit ADC. The firmware maps the resulting 0-1023 digital value to an 8-bit (0-255) PWM range.
- mBlock Visual Programming: Designed using the mBlock block-based environment, making it ideal for young learners to understand how real-world physical inputs can be mathematically "Scaled" to control hardware outputs.
Hardware
- Linearity Compensation: Includes a small code offset to ensure the LED reaches "Total Dark" at the bottom of the potentiometer's travel, accounted for internal resistance offsets in cheap components.