Datacasting Home Weather: The NodeMCU + Firebase Stack
Traditional weather stations display data on a small local screen, but the Private Real-time Weather Station project enables global monitoring by syncing local data to the cloud. Using the NodeMCU (ESP8266), this project captures ambient light, temperature, and humidity, and pushes that data to a Google Firebase database, allowing it to be visualized on any smartphone or computer with zero latency.
The Connectivity Bridge: NodeMCU to Firebase
The choice of NodeMCU is perfect for this IoT application due to its integrated WiFi:
- FirebaseArduino.h Library: This project utilizes a specialized library that simplifies the communication between the ESP8266 and the Firebase REST API. Instead of complex JSON manual requests, the user can simple call
Firebase.setFloat("temp", value);. - Instant Synchronization: Firebase’s "Real-time Database" uses WebSockets under the hood. As soon as the NodeMCU updates a field in the database, every connected client (your web app) updates instantly without needing to refresh the page.
- No-Cost Hosting: By using Firebase's "Spark" plan, a hobbyist can maintain a personal weather station for free, with enough bandwidth for 100 simultaneous connections.
Custom Sensor Fusion
The station relies on two primary sensors to paint a picture of the home environment:
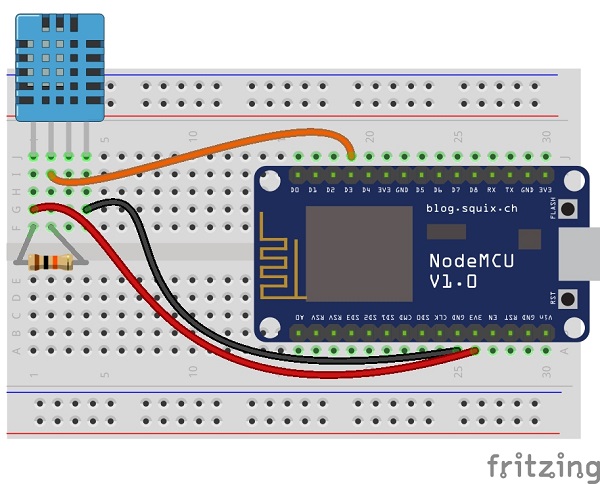
- DHT11 Digital Sensor: Measures humidity (20-90%) and temperature (0-50°C). While a basic sensor, the project demonstrates how to use the DHT.h library to handle the specific timing required by its single-wire communication protocol.
- LDR Light Sensor: An analog light-dependent resistor is used to measure atmospheric brightness. By using a 10k ohm resistor to create a voltage divider, the NodeMCU’s A0 pin translates the light level into a percentage, reflecting whether it's currently day or night indoors.
Building a Modern Web Dashboard
A key part of this project is the Front-End Development. The author provides a guide to creating a custom dashboard using HTML, CSS (Bootstrap), and JavaScript:
- Firebase SDK Integration: The web app includes a small JavaScript snippet (
app.js) that subscribes to the database. - Live Data Injection: Using
dbReflight.on('value', ...)the web page listens for changes and dynamically injects the new temperature or humidity values into the HTML without a page reload, providing a "Streaming" data experience. - Cross-Device Accessibility: Because it's a web-based dashboard, your weather station is accessible from any browser in the world, once you have the unique URL.
In this project we will be building a personal weather station for home use. We will be using an ESP8266 based board, i.e. NodeMCU. We will be monitoring light, temperature and humidity. For this, we will be using an LDR and a DHT11 sensor.
This project consists of three parts:
1. Collecting data from the sensors.
2. Sending the data to an online database (Google Firebase in our case).
3. Displaying the data stored in the database on a web app.
----------------------------------------------------------------------------------------------------------------------------------------------------------------------------
1. Collecting Data
We will be using a light detecting resistor (LDR) to get values of atmospheric light. Connect the LDR to A0 pin of the NodeMCU as shown in the schematic.
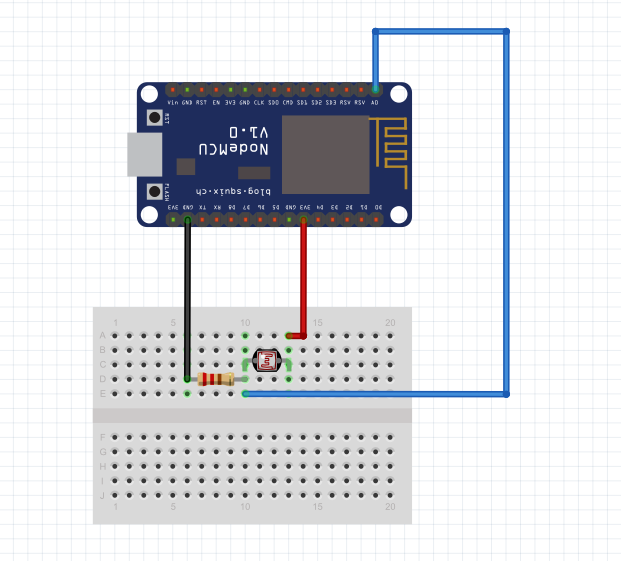
We will be using a light detecting resistor (LDR) to get values of atmospheric light. Connect the LDR to A0 pin of the NodeMCU as shown in the Schematic.
The DHT11 sensor is used to measure the humidity and temperature. We use the DHT.h library here. Make the following connections:
Vcc ==> 3v
Gnd ==> Gnd
Data ==> D3
----------------------------------------------------------------------------------------------------------------------------------------------------------------------------
2. Sending Data to Firebase
To upload data to firebase we need to connect to the internet first and then access firebase. For this we need to use the following two libraries:
1. ESP8266WiFi.h
2. FirebaseArduino.h
Once connected to the wifi network as per the code we can now use the functions of FirebaseArduino.h library to upload data.
The sensor data is stored in light, temp and hum variables of float type.
So we will use setFloat() function to upload the value to the real time database of firebase. See the code to understand it better.
Firebase.setFloat("light", light);
 // handle error
 if (Firebase.failed()) {
     Serial.print("setting /light failed:");
     Serial.println(Firebase.error());
     return;
 }
Once our data is uploaded we can display it on a web app in real time and access it from anywhere in the world.
----------------------------------------------------------------------------------------------------------------------------------------------------------------------------
3. Displaying Data on the Web App
Click here to see my web app.
This is were you can get really creative. If you are familiar to HTML and CSS then you can make user own UI. I used Bootstrap to create mine. For those who are new to web here is the code for a very basic UI (I'm not providing my code here as that would be spoon feeding and I want you guys to build your own UI. Trust me it is fun!)
Step 1:
Paste this code in notepad and save it as index.html in a folder lets say web at any desired location.
<html>
<head>
 <script src="https://www.gstatic.com/firebasejs/5.8.4/firebase.js"></script>
 <script src="https://www.gstatic.com/firebasejs/5.8.5/firebase-app.js"></script>
 <script src="https://www.gstatic.com/firebasejs/5.8.5/firebase-database.js"></script>
</head>
<body style="background-color: #4d4d4d;">
       <ul>
         <li><h1>LIGHT</h1>
         <pre id="light" style="font-size:24px;"></pre></li>
         <li><h1>TEMPERATURE</h1>
         <pre id="temp" style="font-size:24px;"></pre></li>
         <li><h1>HUMIDITY</h1>
         <pre id="hum" style="font-size:24px;"></pre></li>
       </ul>
 <script src="app.js"></script>
</body>
</html>
Step 2:
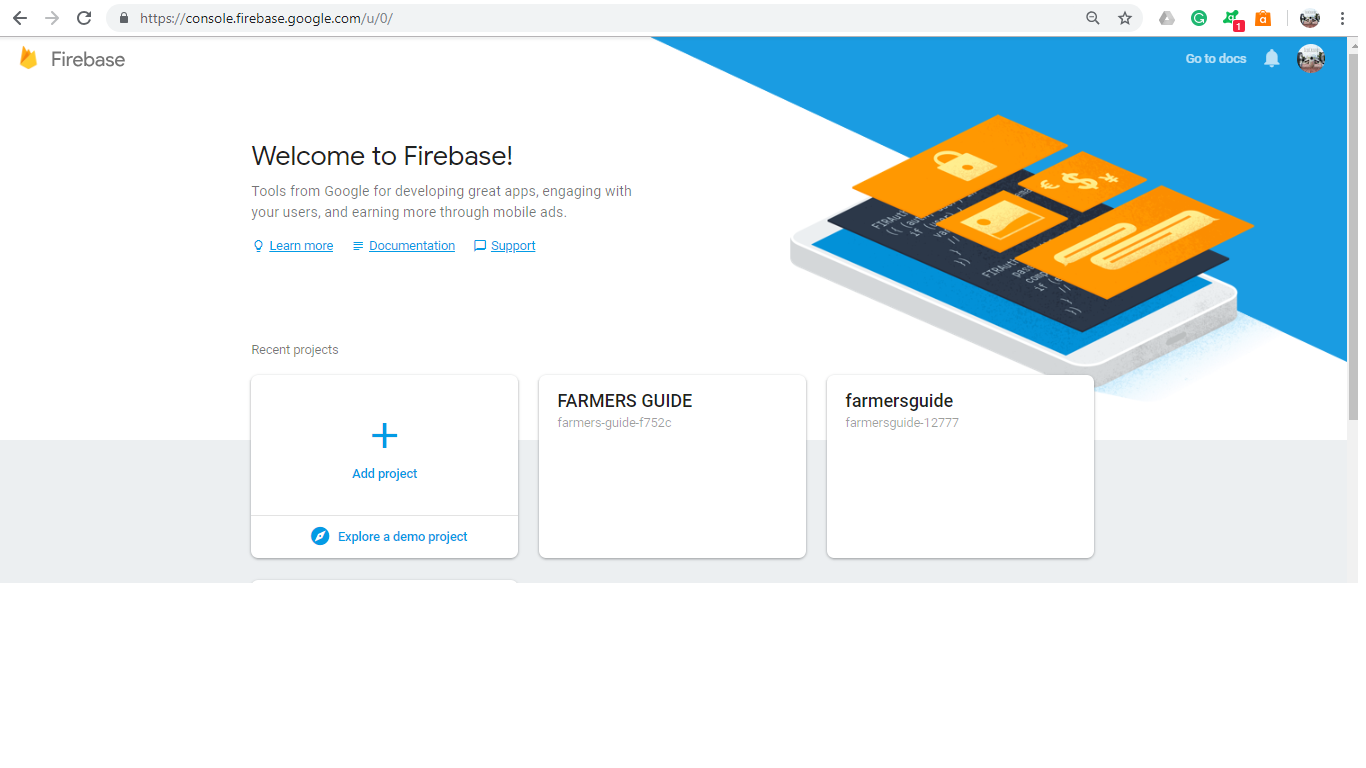
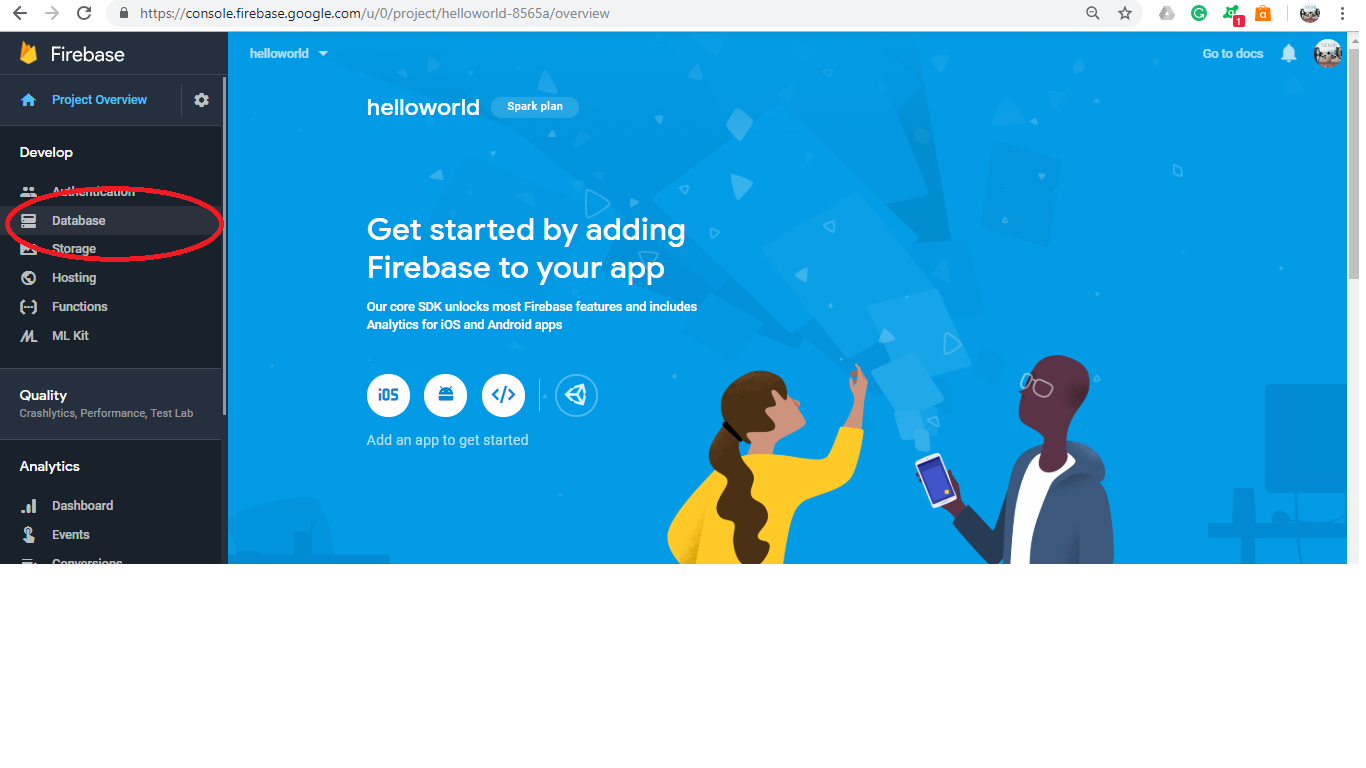
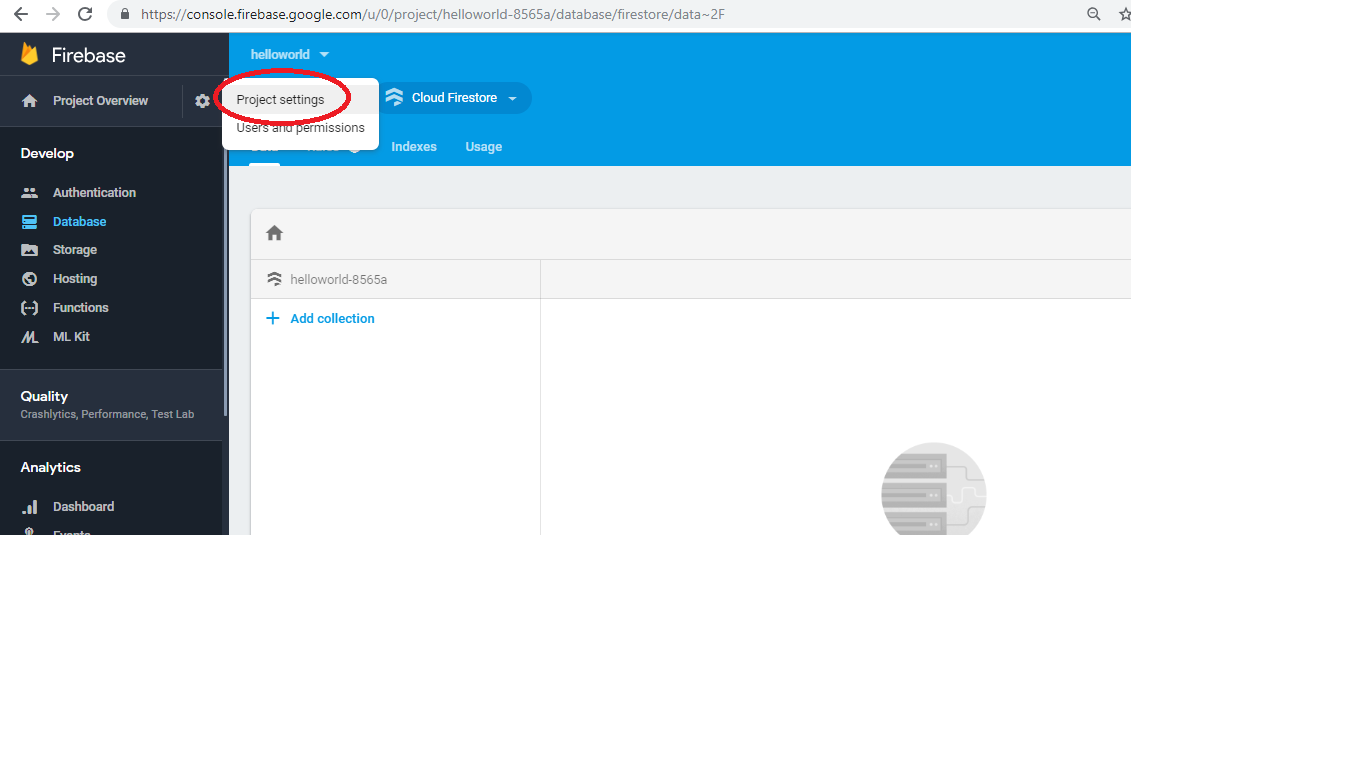
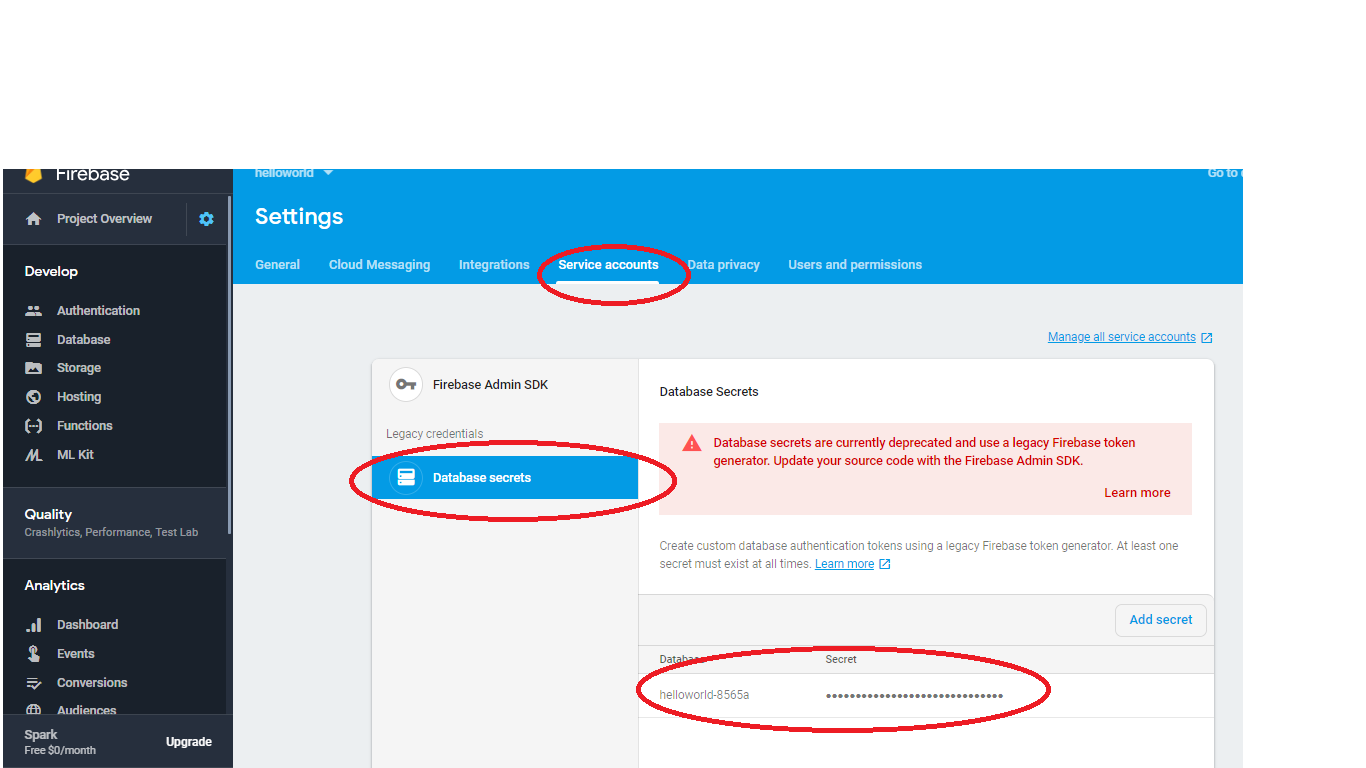
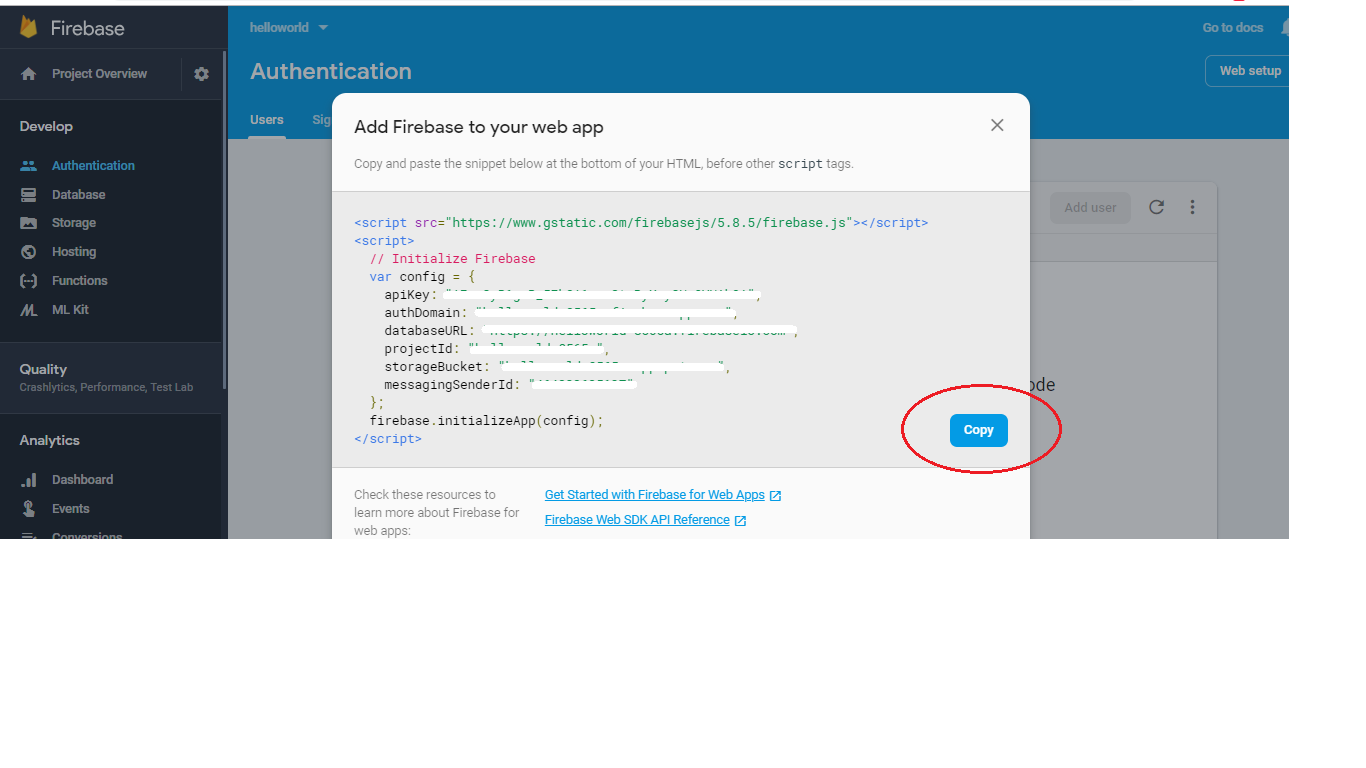
Create a database in firebase. Open Firebase website. Login with your Gmail account. Create a realtime database by clicking on database. Then follow the direction in the images to get you secret key.
Step 3:
Copy and paste the below code in notepad and save it as app.js in the same folder in which you saved index.html file.
(function() {
// Initialize Firebase
var config = {
firebase.initializeApp(config);
//Get element
const prelight= document.getElementById('light');
//Create refences
const dbReflight= firebase.database().ref().child('light');
// sync logs cahnges
dbReflight.on('value', snap => {
prelight.innerText=JSON.stringify(snap.val(),null,3);
});
const pretemp= document.getElementById('temp');
//Create refences
const dbReftemp= firebase.database().ref().child('temperature');
// sync logs cahnges
dbReftemp.on('value', snap => {
pretemp.innerText=JSON.stringify(snap.val(),null,3)+"° C";
});
const prehum= document.getElementById('hum');
//Create refences
const dbRefhum= firebase.database().ref().child('moisture');
// sync logs cahnges
dbRefhum.on('value', snap => {
prehum.innerText=JSON.stringify(snap.val(),null,3)+" %";
});
}());
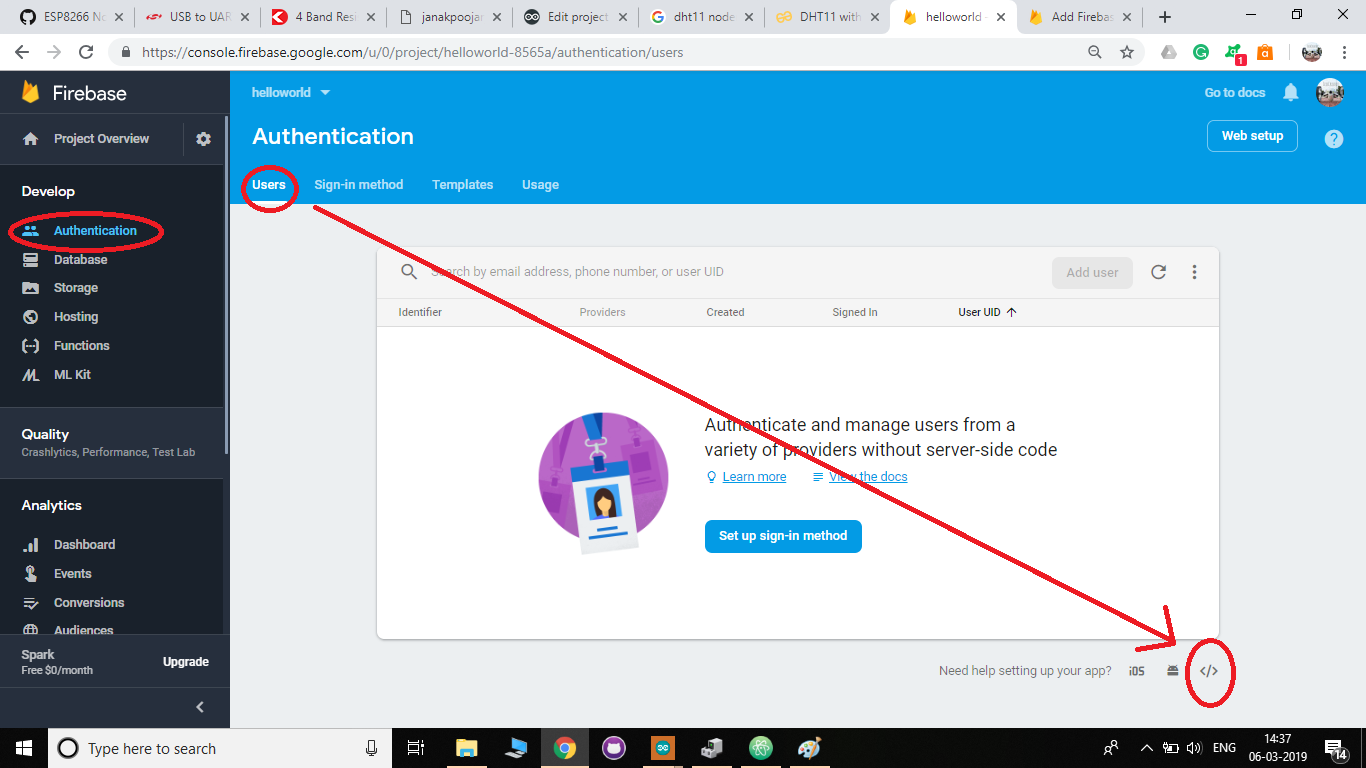
You have to change the values inside var config as per your database.
Once this is done you are all set to go.
Upload the code on to your NodeMCU, make connections and power up the board. It will start uploading data to Firebase.
--------------------------------------------------------------------------------------
NOTE: DON'T FORGET TO CHANGE YOUR WIFI SSID, WIFI PASSWORD, SECRET CODE, AND HOST NAME IN THE.INO FILE.
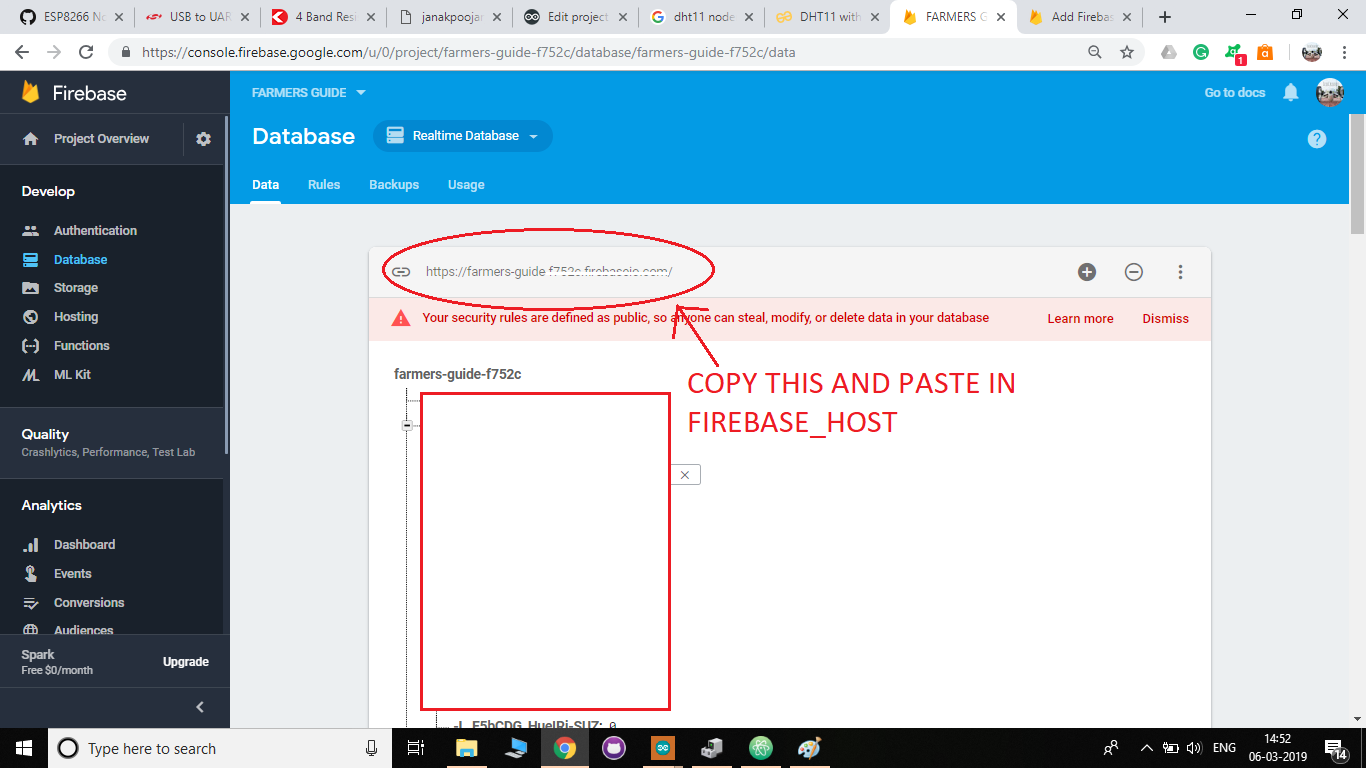
#define FIREBASE_HOST "YOUR DATABASE LINK"
#define FIREBASE_AUTH "SECRET CODE"
#define WIFI_SSID "YOUR SSID"
#define WIFI_PASSWORD "YOUR PASSWORD"
--------------------------------------------------------------------------------------
Once this is done just open the index.html file to see your data in real time.
I hope you guys understood this project. Thank you for reading this tutorial. If you got any doubt or queries then do drop a comment in the comment section.
Best of luck!