Every birthday is special. So that the party is remembered, the table decoration plays an essential role. To support the balloons, confetti and streamers, I've considered an electronic variant with Arduino technology.
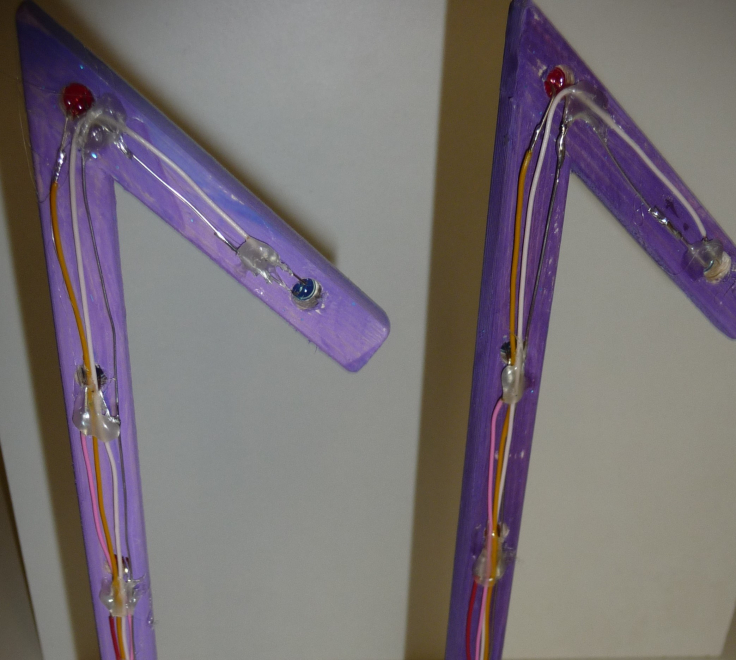
My family is used to place the birthday year on the table. So far, these numbers were mostly made of paper, cardboard or wood. I wanted to surpass that time. The idea was directly pretty clear. It should be an 11 with different LEDs that are flashing.
At the beginning I wanted to take a simple bistable flip-flop and let the LEDs flash alternately. But I quickly rejected that. Who likes it when it only blinks all evening?
So it was clear that the project needed also a bit of programming. The Arduino Uno suits perfect for this. It offers the necessary numbers of outputs and programming is easy.
Technical Implementation: LED Arrays and Effects
The project reveals the hidden layers of simple celebrating-to-light interaction:
- Identification layer: Eleven 5mm LEDs (Red and Yellow) act as the colorful eyes of the project, arranged in the shape of the number "11."
- Visual Interface layer: The Arduino uses its digital output pins (2 to 12) to pulse each LED in a predetermined sequence.
- Sequential Steering Loop: The Arduino code follows a specialized "celebratory" strategy: it uses a
switch()orfor()loop to cycle through several unique flashing patterns (e.g. "Blink," "Fade," "Alternate," "Sequence"). - Energy Interface layer: A 4-Slot AA Battery Holder and a Toggle Switch provide portable and self-sufficient power for any party.
- Output layer: Using
digitalWrite()oranalogWrite(), the Arduino provides a high-performance driver for each point of its "Special Day" check.
Hardware Infrastructure
- Arduino Uno: The "brain" of the project, managing the high-speed timing loops and coordinating the blinking tasks.
- 5mm Colored LEDs: Providing high-definition visual feedback for each of the light effects.
- Resistors (220 ohm): Essential for limiting current through the LEDs and preventing damage to the digital pins.
- AA Batteries & Switch: Providing a high-power and portable power source for the decoration.
- Breadboard: A convenient way to prototype the celebratory circuit and connect all components without soldering.
- Micro-USB Cable: Used to program the Arduino directly from a computer for power and code.
Symbolically, each LED is connected in this simple way directly to the pin via a resistor:
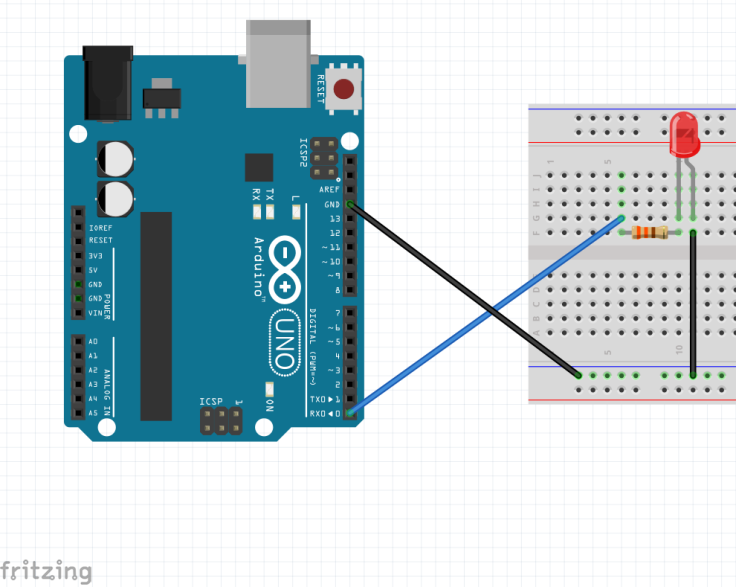
But you must not be fooled. If you use all the outputs, you have to handle a lot of wires. The resistors of the LEDs are placed on a small board, which also contains a plug for the Arduino. As a result, there is only one wire to the individual LEDs.
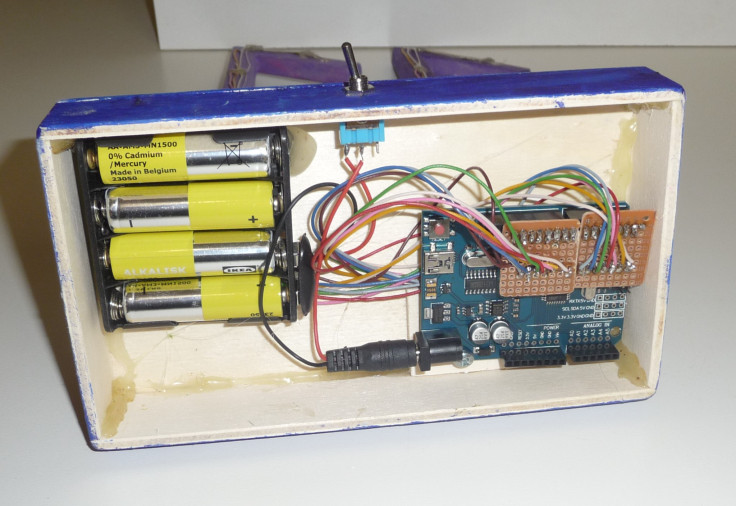
The wire to GND is connected from LED to LED.
The power supply is implemented via 4 x 1.5 V batteries, which can be set on and off by a switch.
Celebration and Interaction Step-by-Step
The birthday light process is designed to be very efficient:
- Initialize Hardware: Correctly seat the eleven LEDs in a number pattern on a board or breadboard and wire each resistor.
- Setup High-Power Sync: In the
setup()function, define the eleven pins asOUTPUTand the serial port at 9600 bps. - Execution Loop: The Arduino constantly performs several high-performance loops and updates the flashing effect in real-time.
- Visual Feedback Integration: Watch as the custom LEDs automatically become a rhythmic visual signal, pulsing and following the birthday patterns.
Light-Effects
How the LEDs are switched on an off, is decided by your on imagination. The effects I used can you watch in this video.
The Source-Code
The effects are stored in the voids Effect1 to Effect5.
Future Expansion
- OLED Identity Dashboard Integration: Add a small OLED display on the decoration base to show an "Age Countdown" and "Party Status" (Celebratory/Relax).
- Multi-sensor Climate Sync Synchronization: Connect a Sound Sensor (Microphone) to have the "11" flash when the party guests "Sing" or "Clap" successfully.
- Cloud Interface Registration Support Synchronization: Add a WiFi module (ESP8266/ESP32) and link to a cloud dashboard to precisely track and log celebratory habits from a smartphone wirelessly over WiFi.
- Advanced Velocity Profile Customization Support: Add a small slider or potentiometer to manually adjust the LEDs' "Flash Rate" or "Pattern Speed" on the decoration.
Project 11 is a perfect project for any science enthusiast looking for a more interactive and engaging party tool!
Have fun with the next birthday party.
PS: Wenn Sie diesen Artikel in deutsch lesen möchten, schauen Sie doch auf techpluscode.de.