
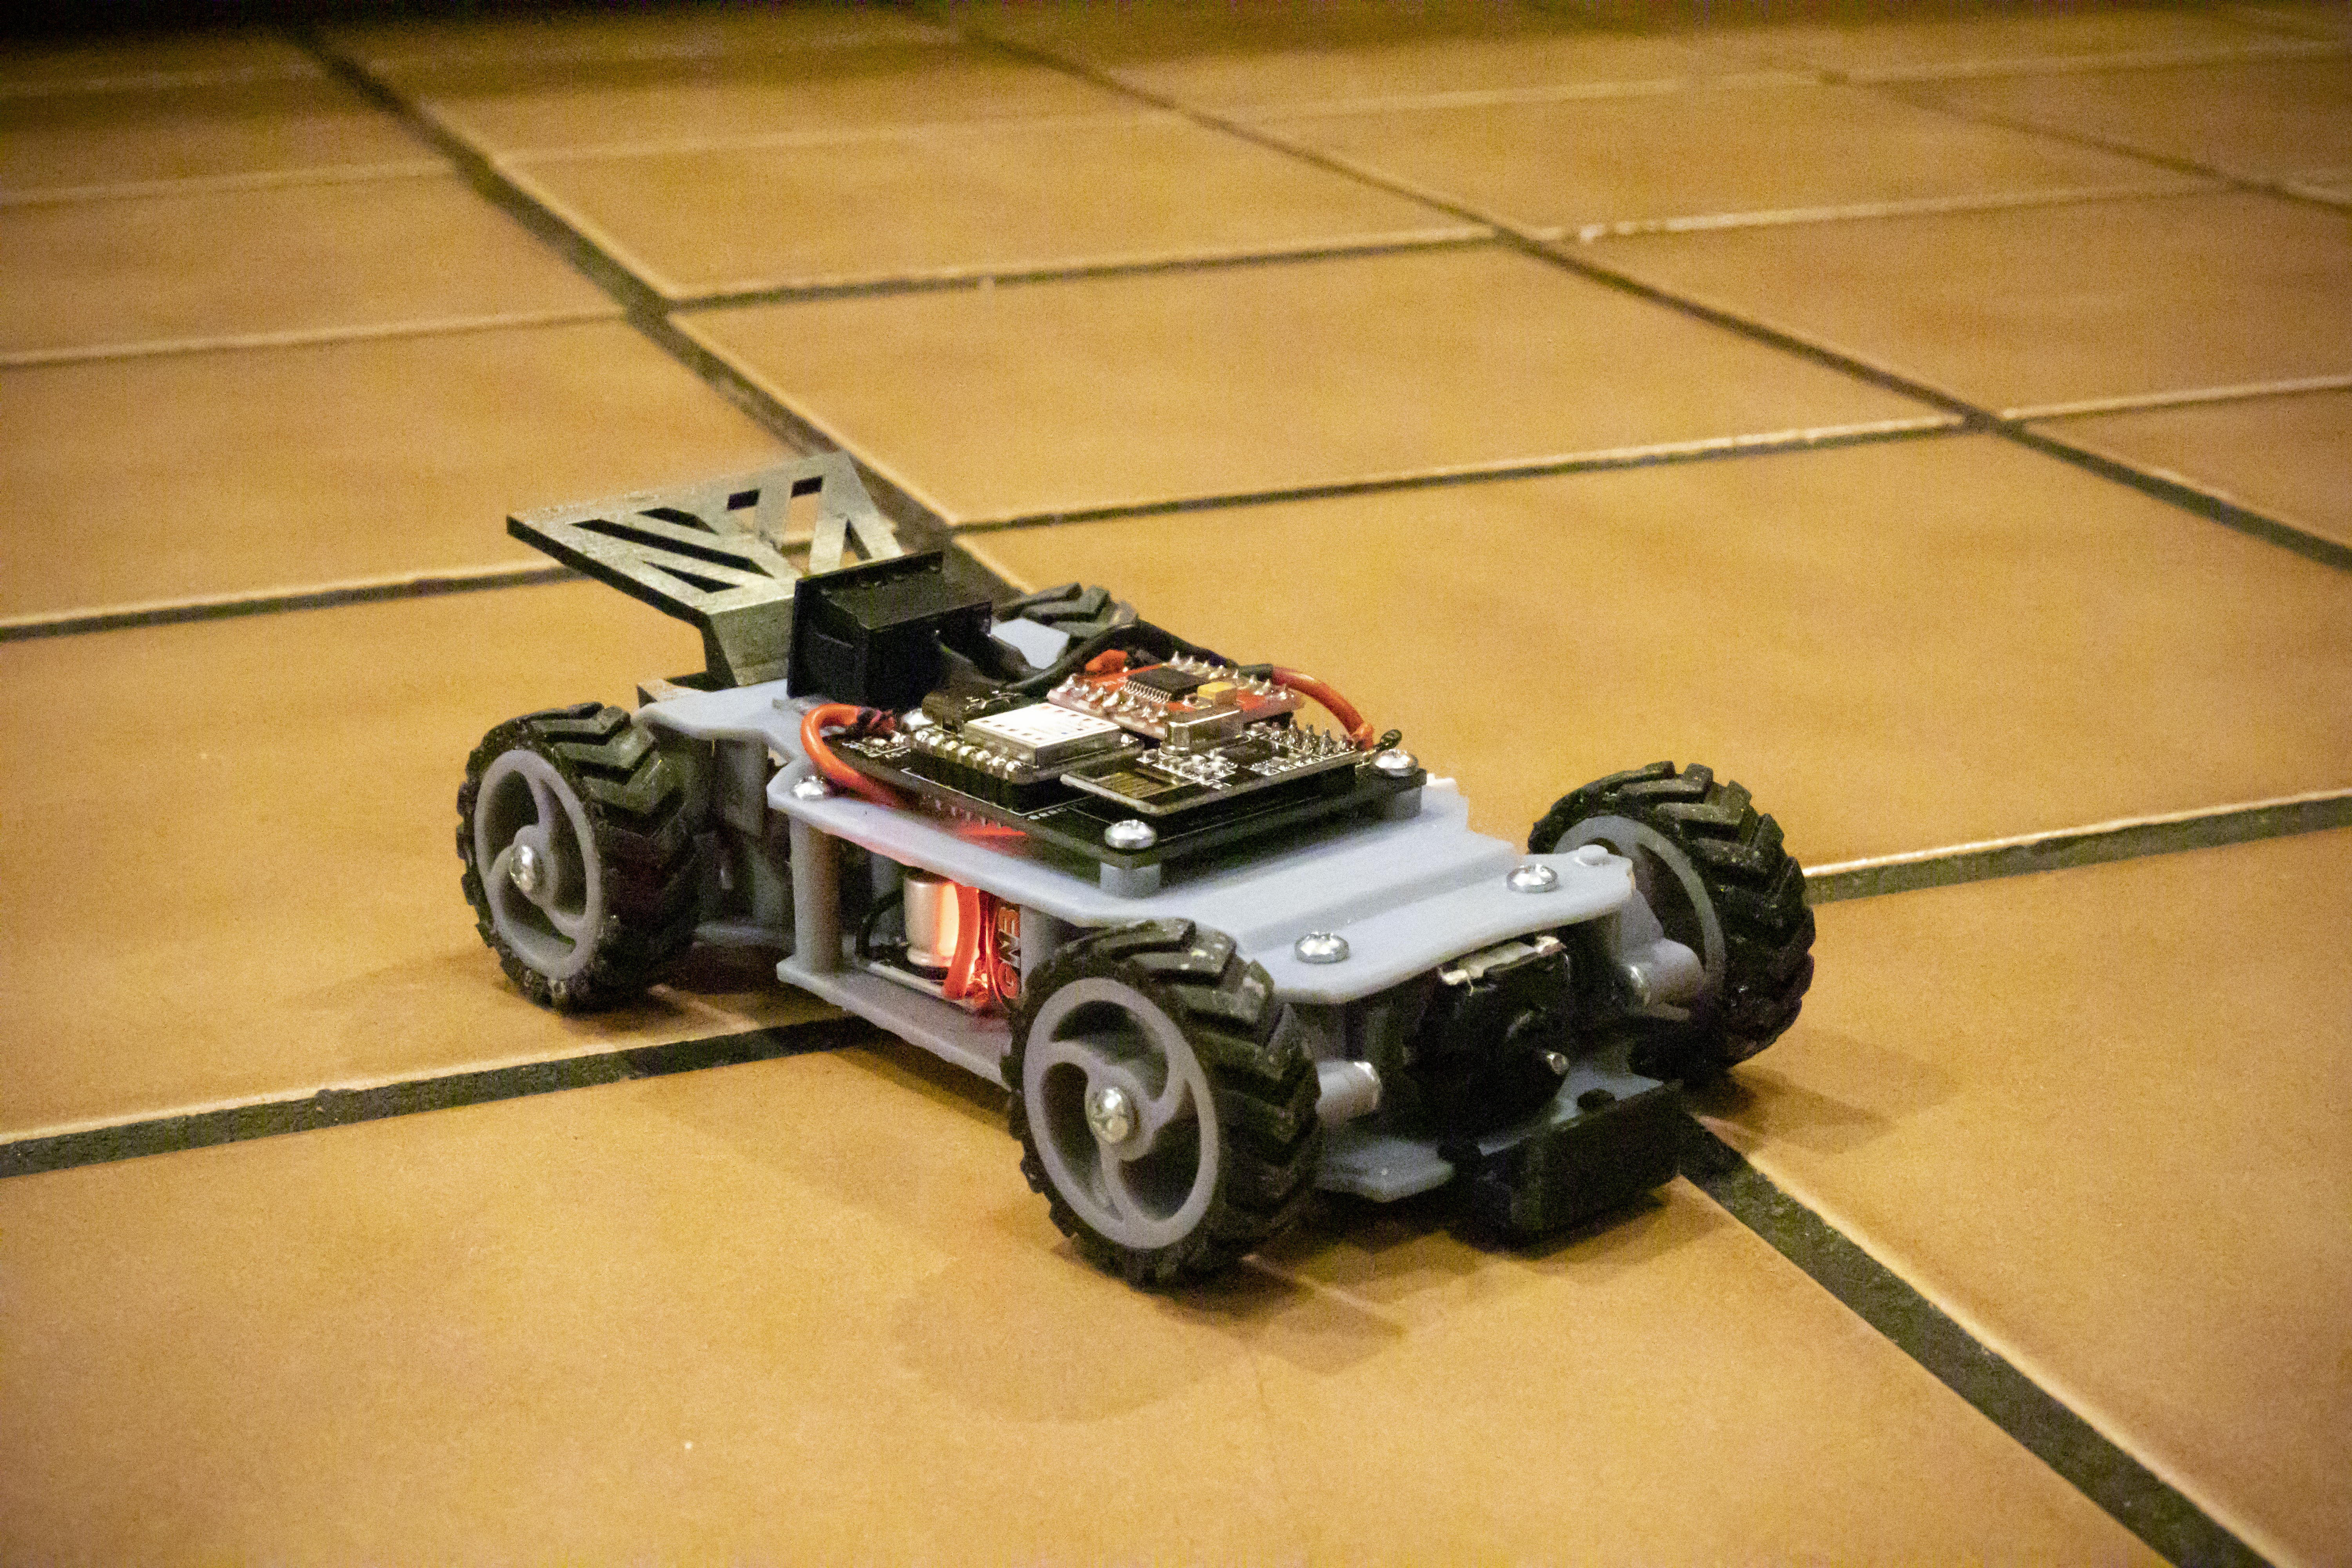
A lot can happen in a few weeks with enough resin and persistence. The first version of my 3D printed Arduino-based RC car is complete. This project started when I hacked my kid’s broken RC Car. I have now created RC_Car_RP (Rack And Pinion). All of the files for this project can be found on Github here. A bill of materials and build video are to come.
#define projectObjectives;
- A small footprint – My benchmark is to be able to print the car on an Original Elegoo Mars Resin bed, ideally with few (or no) supports.
- Simple design – I am trying to minimize the number of parts.
- Highly adaptable parts and electronics (Arduino) – My original prototype fit on one single 5x7cm protoboard. The next model, RC_Car_SS, will include servo steering.
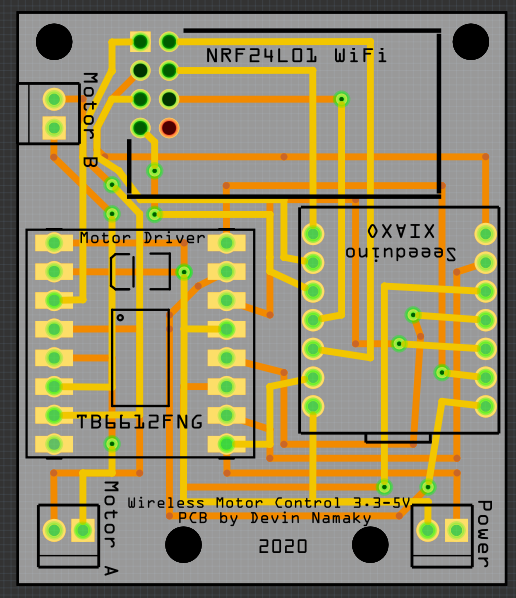
- Easy to Build – To make wiring easier and further decrease size, I created the RC_Car_RP PCB.
#define projectConstraints;
- Car body width will not be less than 55 mm (so as to accept Seeeduino PCB, 5×7 protoboards, Double Feather setups, and Nano breakouts).
- Car body length will not be less than 110 mm (gives room for steering motor, 130 style drive motor, and enough space to accept all the boards I just mentioned regarding width).
- All components must individually fit in the dimensions of the original Elegoo Mars Resin Bed when printed flat (max = 68 mm x 120 mm). Note that the max Z height of the Mars is 150 mm, but we want the option to print as flat as possible and will favor that orientation to decrease materials, time required and print failures. (Although, I acknowledge we are actually shooting to print with supports at about a 20 to 30 degree angle, which will decrease deformation.)

theController();
This car receives from a controller, the design of which I am including the project on Github and will hopefully provide a dedicated post for in the future.
There are two joysticks. Joystick data can be processed a variety of ways. In this version the left joystick y-axis controls F / R, and the right joystick x-axis controls L / R. The right joystick push button is used to control the max motor speed. This is useful if you want to run the car indoor vs outdoor or simply don’t want to strip your gears or crash into a wall with too much power depending on the power setup you choose.
theElectronics();
A Seeeduino XIAO is used. A TB6612FNG Motor driver occupies PINs 0 thru 5 on the XIAO. The Wireless nRF24L01 SPI is on 8 thru 10, and CE / CSN are pins 6 and 7 on the XIAO.
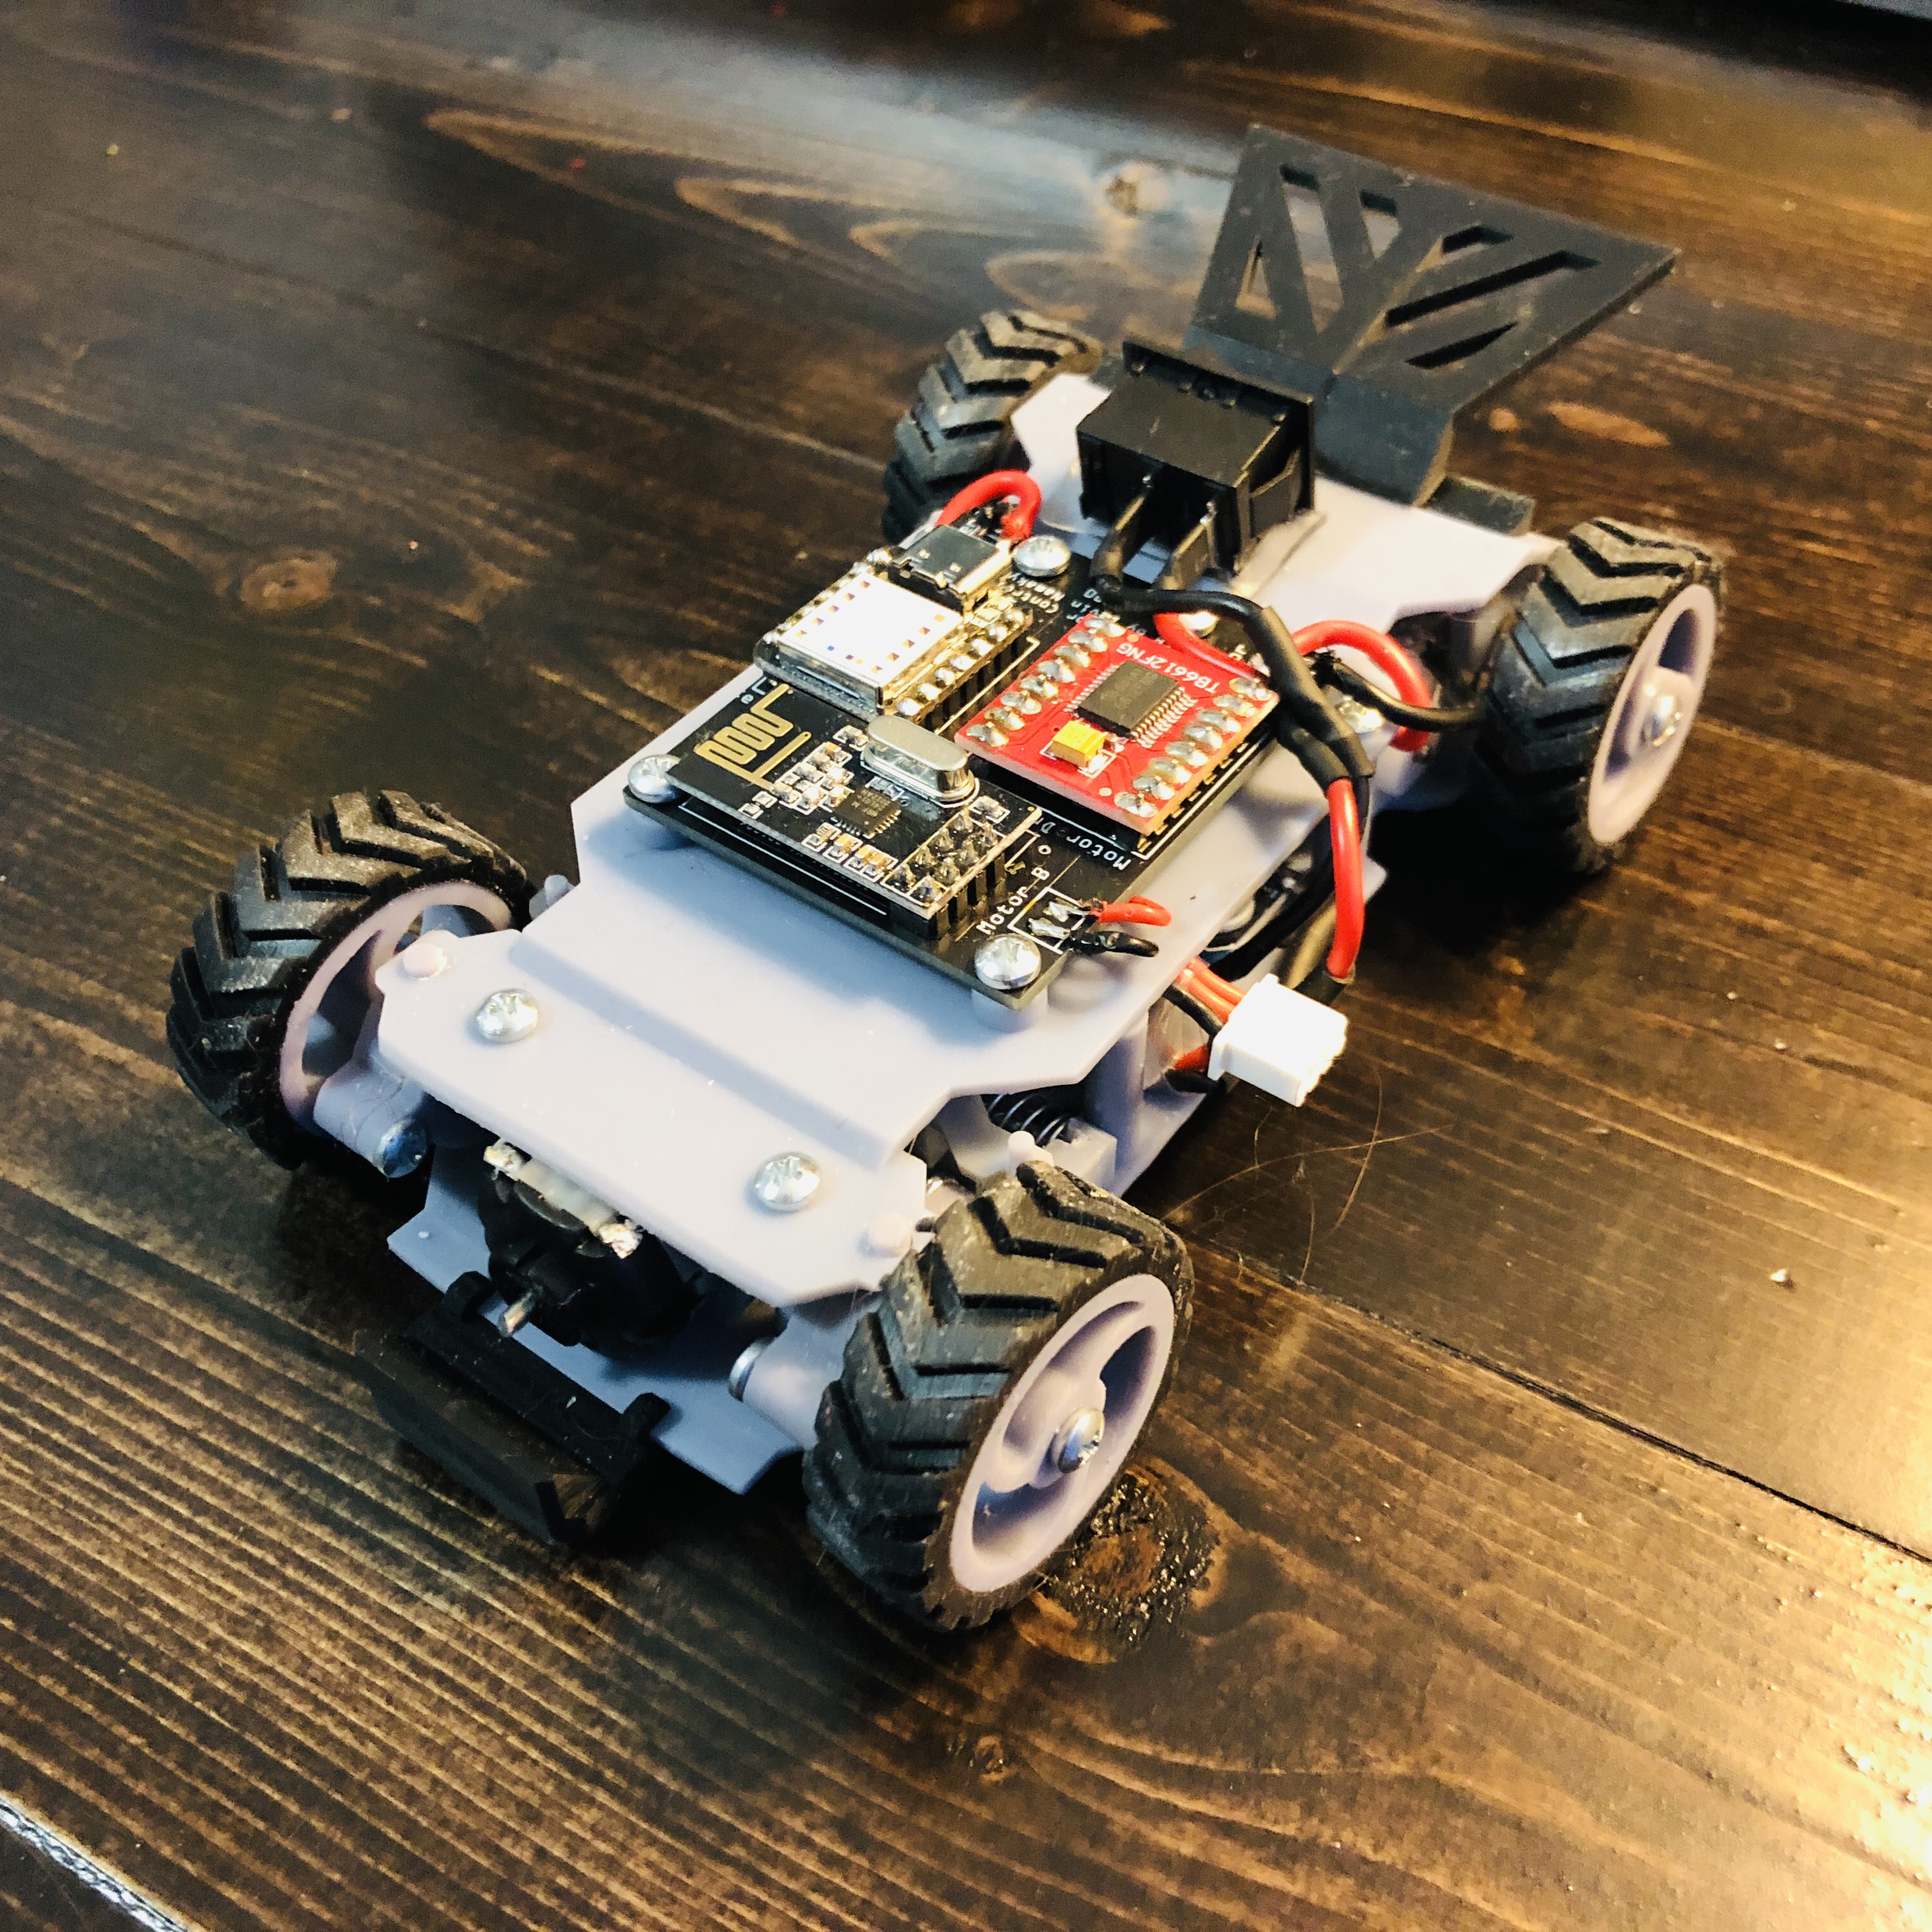
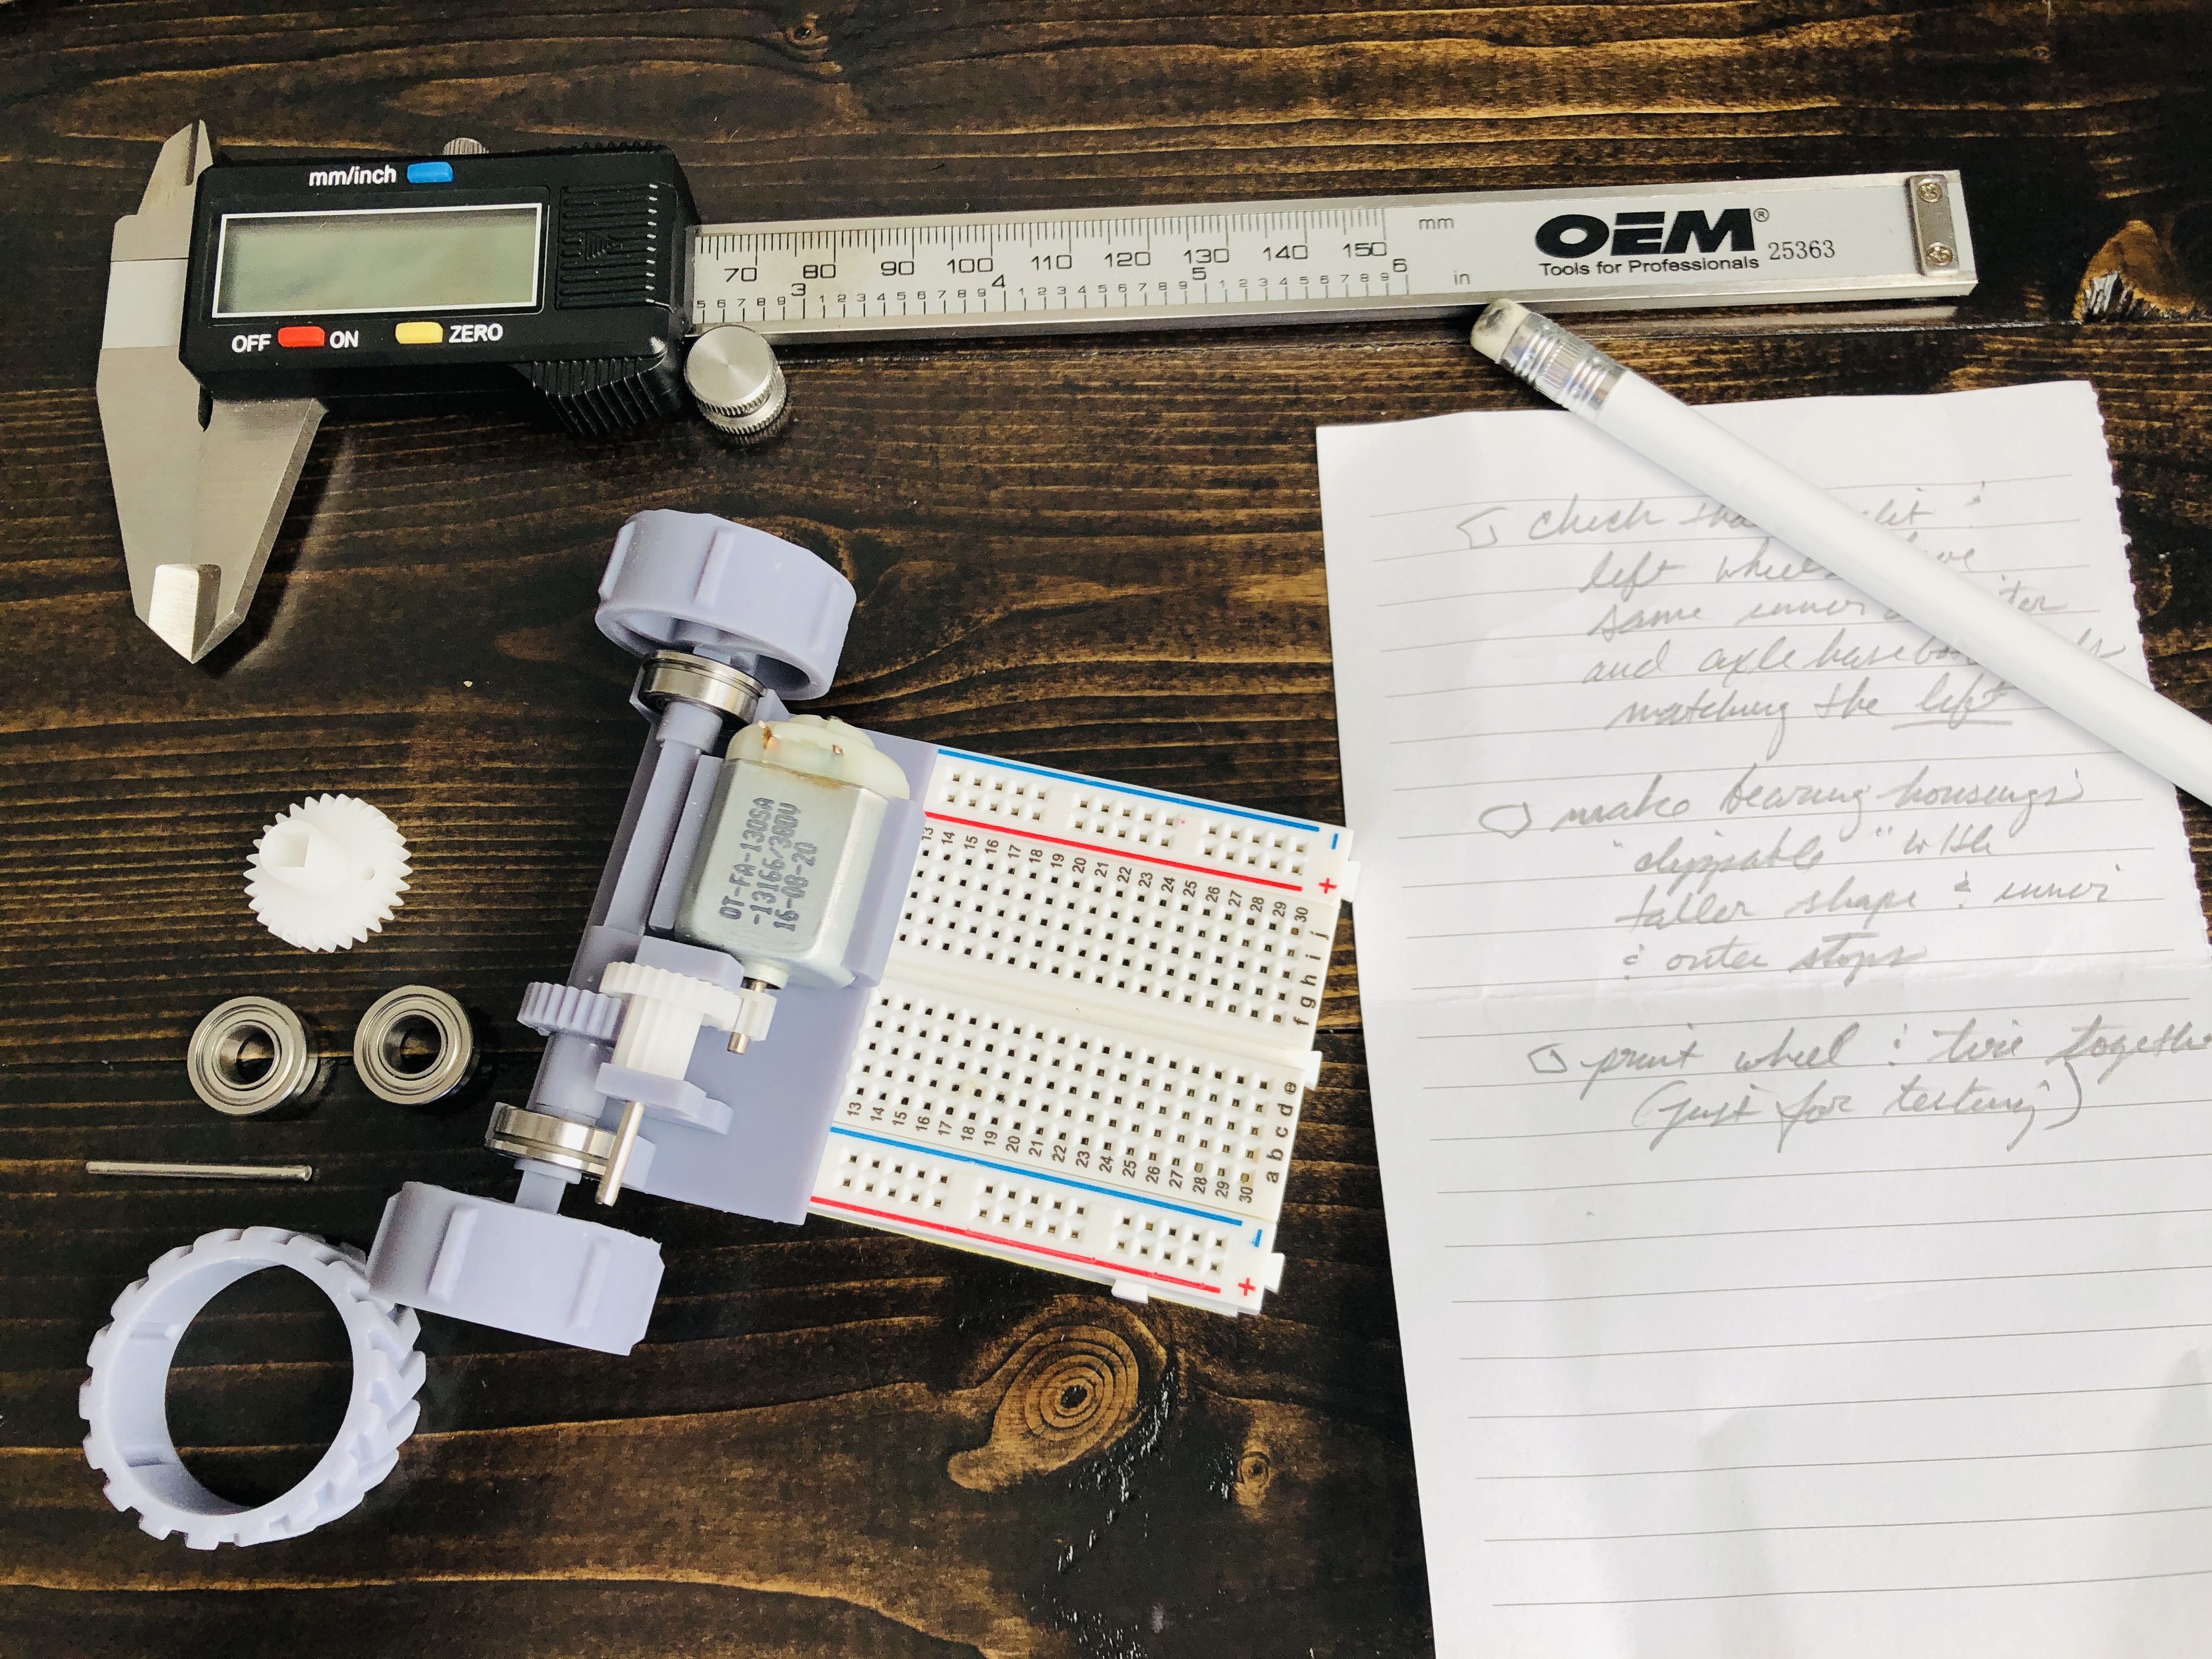
This version is driving with two standard hobby 130 style DC motors, one for drivetrain and one for steering. The steering DC motor uses rack and pinion for steering in this first version. This allows the most commonly available and cheapest hobby parts to be used.
Power setup is a 7.4V Lipo with 300 mAh capacity. This also allows the battery to fit on the lower plate with the step down unit. The battery runs on a toggle switch to a LM2596 to drop everything to 5V. The 5V is wired separately to the Seeeduino and the motor driver.
The power system is another highly modifiable trait of this car obviously. I am looking with the future version to power the entire system with 4 x AAA rechargeable batteries if I can fit them, which would also give 5 volts without the need for a step converter.
rackPinionSteering();
The rack and pinion steering system has been difficult to implement for several reasons, but after many prototypes I got it to work. It uses two metal rods of 2 mm in diameter (standard hobby rods) and two springs. The rack gear slides along both of the rods, and the springs push against the rack gear from each side to re-center it.
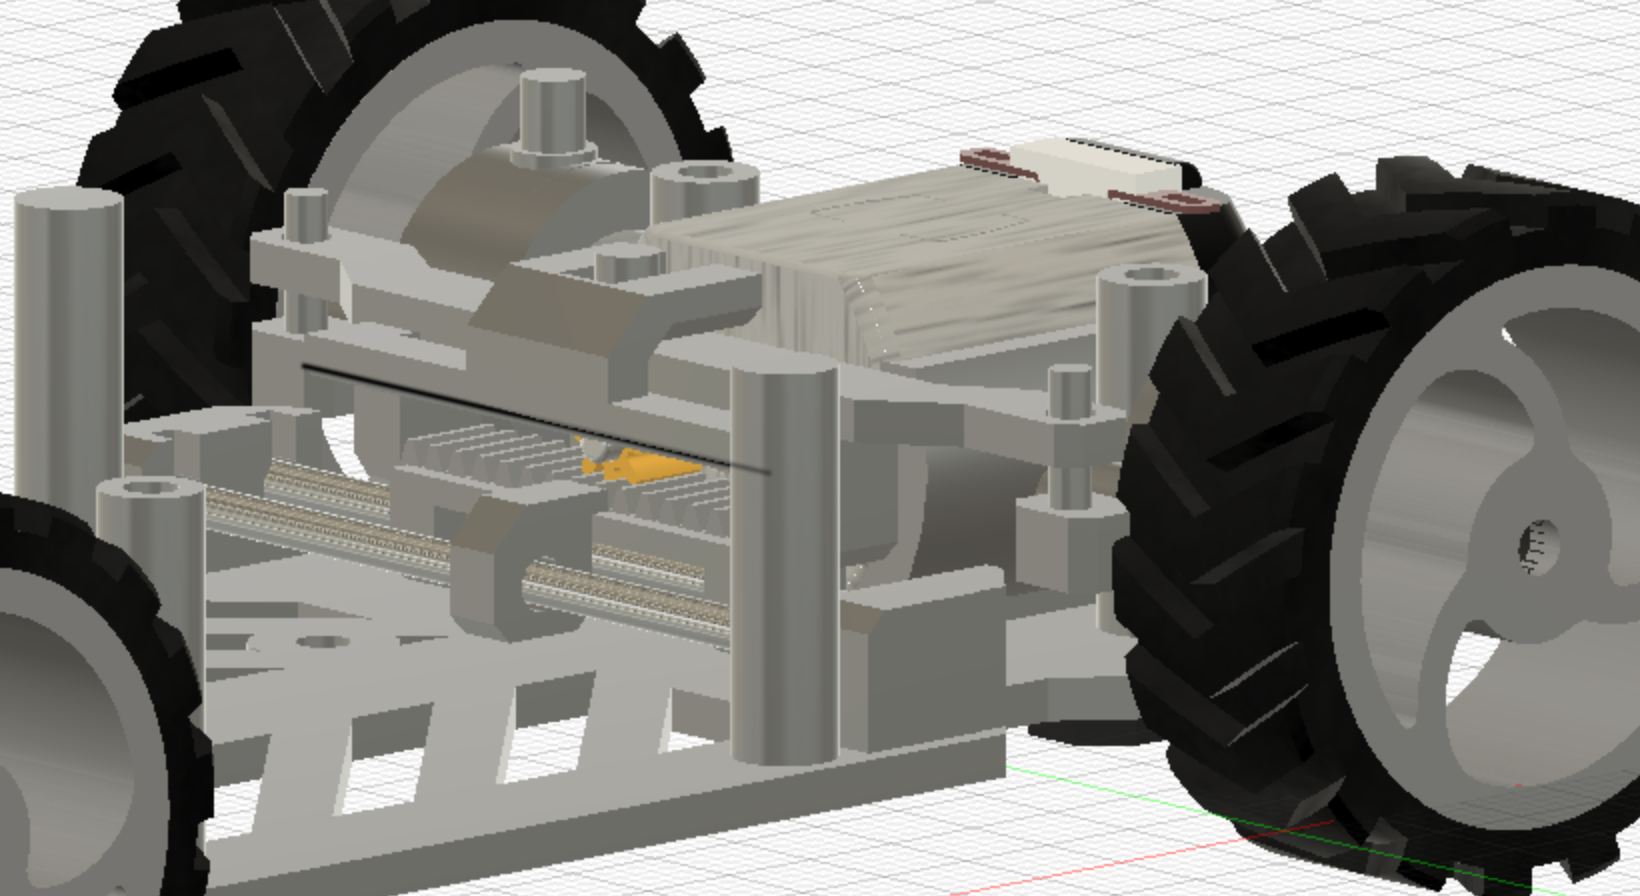
The rear gear system is 0.5 module. It uses the standard 8 tooth spur gear that comes with most 130 hobby motors. The middle gear converts from 12 teeth to 26 teeth, and the rear axle gear has 28 teeth. The middle gear is supported by a short 2 mm standard hobby pin.
3DPrinting();
I used the original Elegoo Mars resin printer to print the car. Contrary to popular belief, you can absolutely print robust car parts, even on a resin printer. For many of the parts I used standard resin, especially if they were non-critical like the spoiler.
For parts where strength is needed and for the gears there were two approaches I took that worked. One option is to use ABS-like resin, which I found acceptable. The other is to mix flexible or strength resins to the standard resin. I found 30% of Sirayatech Tenacious mixed with 70% of Standard Shine Tough Grey worked well and I favored that approach. For the standard resins, ABS-like and even the blend you can use pretty normal exposure and support settings if you limit the Tenacious to 30%.
Lastly, the TIRES! I used Wanhao Rubber-like resin, and best of all it came in black. In truth, I would disagree that the resin is “rubber-like” regarding flexibility. It’s pretty inflexible unless you are printing thin, but it did provide enough flex to be able to print the tire separately and slip it over the wheel. The best part is that it provided a rubber-like texture and so it did provide grip and in the end worked well.
The Wanhao took me four tries to successfully print as I had no real guidance. I found that I had to use 300% of normal standard resin exposure for the bottom layers, and 400% of normal exposure time for the remaining layers. My lift distance was 7 mm, bottom lift speed was 25 mm/min, lifting speed was 40 mm/min, and retract speed was 40 mm/min.
The rubber-like resin also needs robust support. I had to double the diameter of my medium supports and the amount of contact depth, and I had to add large supports throughout the model. I think with good support I could probably back off on the exposure times a bit. The rubber-like prints take a very long time.
Micro-Manufacturing: Resin Printed RC Car
Most Arduino cars use flimsy acrylic chassis kits bought online. The RC_Car_RP elevates the mechanical engineering by utilizing SLA Resin 3D Printing. Resin printers cure liquid photopolymer with UV lasers, allowing for the creation of incredibly microscopic, structurally complex drivetrains and suspension arms that standard FDM printers cannot replicate.
Custom Gearboxes & Steering
Because you are printing the parts in high-detail resin, you no longer rely on pre-built generic gearboxes.
- The Drive Axle: You print an exact 1:12 scale differential and pinion gear. You mate this mechanically to a high-speed N20 DC Gear Motor.
- The Steering Geometry: Standard Arduino cars often use "Tank Steering" (sliding). This project uses a real rack and pinion system, as shown in the image above. A future version could implement Ackermann Steering by printing custom steering knuckles and tie rods, where a micro-servo pushes the linkage to turn the front wheels at mathematically correct offset angles to prevent tire scrubbing during cornering.
The Dual-Radio Control System (nRF24L01)
You do not use Bluetooth for a fast RC car; the range is terrible. This project uses a custom Transmitter Remote and an embedded Receiver inside the resin chassis, both built around the nRF24L01+ 2.4GHz radio transceiver.
- The transmitter reads the analog stick values, packages them into a struct payload, and transmits them.
- The car receiver catches the payload, maps the Y-axis variable to the motor driver PWM speed, and the X-axis variable to the steering motor control.
Fabrication and Hardware
- SLA Resin 3D Printer (e.g., Elegoo Mars or Anycubic Photon) and Tough Engineering Resin.
- Arduino Nano (x2) for Transmitter and Receiver halves (or a Seeeduino XIAO as used in this build).
- nRF24L01+ Radio Transceiver Modules (x2).
- High-Speed N20 Micro Metal Gear Motor or standard 130-style motors with an L298N/TB6612FNG Driver.
- Micro Servo (SG90) for future servo-steering versions.
kidsLikeIt();
Given that I designed and built this entire car (and the controller), one of the best feelings comes from the kids actually wanting to play with this thing. It was raining the day we first tested it, but “indoor mode” seemed to be working well.
futurePlans();
Hopefully I will get around to redesigning the car with servo steering. I think this could decrease the footprint further to fit AAA batteries and use an Adafruit Feather system.
I will be adding a bill of materials and a build video. Be sure to follow the Github.