I've been building this project as a way to learn computer vision. And I suppose because I have a death wish against my feet.
I've been documenting the build progress on my YouTube channel: https://www.youtube.com/channel/UCcT3iGeJJfpGU1QehvG48tg/videos
If you want to see the final testing watch this video, and then below I'll put more details about the build process.
Project Overview
The "Lego Caltrop Deployer" is a humorous yet technically sophisticated exploration of Computer Vision (CV) and Mechanical Engineering. The goal of the project is to track a human's feet in real-time and automatically deploy Lego bricks into their walking path. While intended as a "death wish against feet," the project demonstrates critical engineering concepts: real-time object tracking using OpenCV, Serial communication between Python and Arduino, and a custom mechanical firing mechanism utilizing 3D-printed gears and high-torque servos.
I started with CAD like most my projects, and ended up with an assembly of the design in SolidWorks:
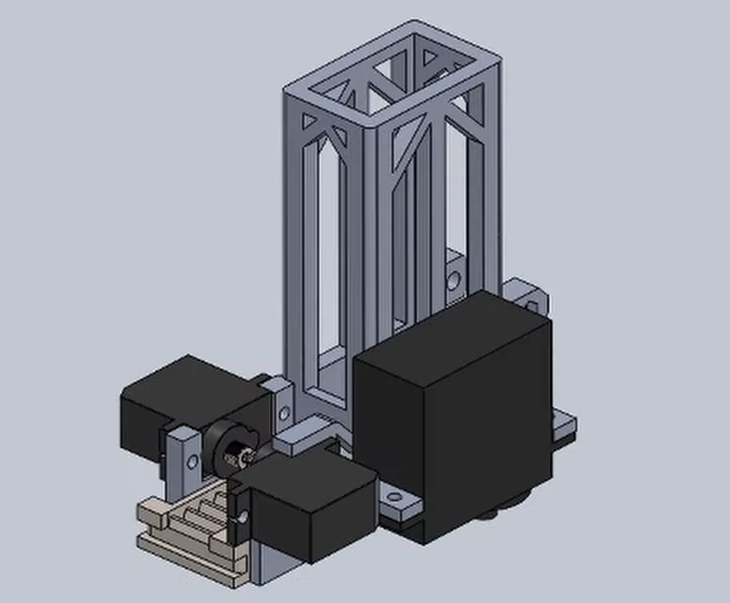
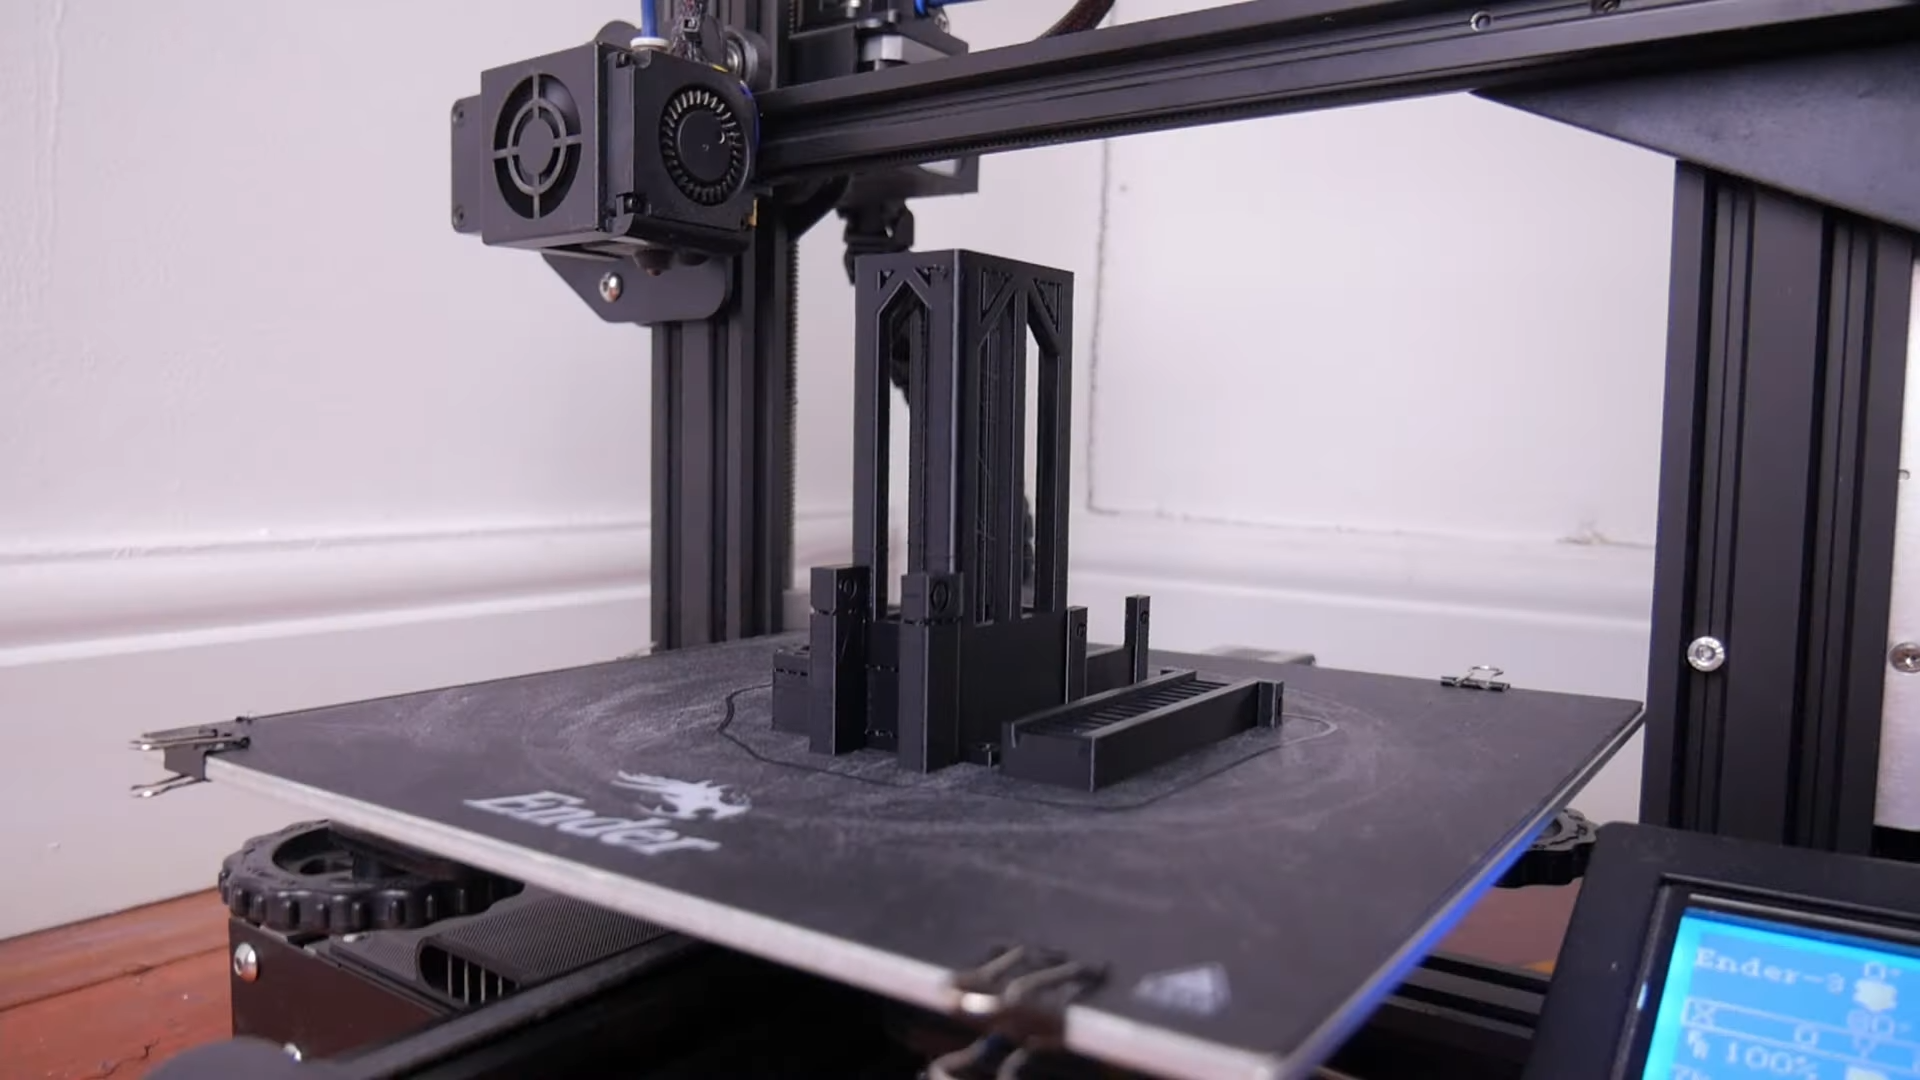
I then printed it and assembled it. (What I don't show in the video is several failed prints and mistakes in my design where I was slightly off with the fit between the servos and the body)
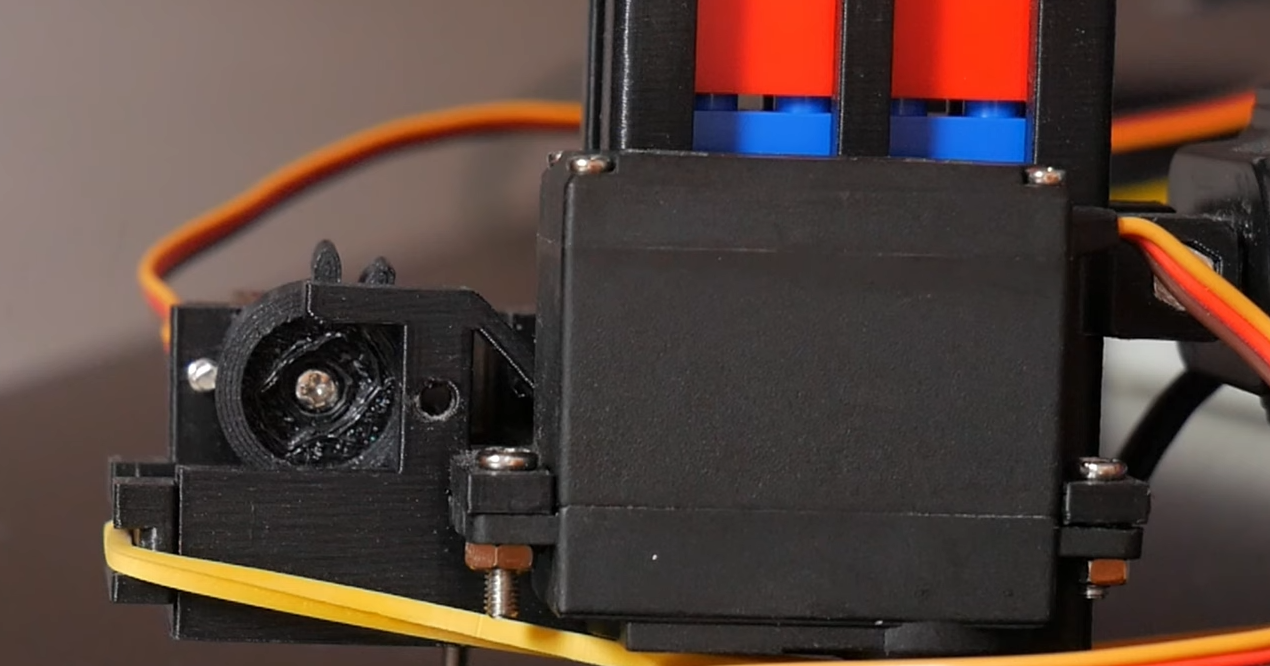
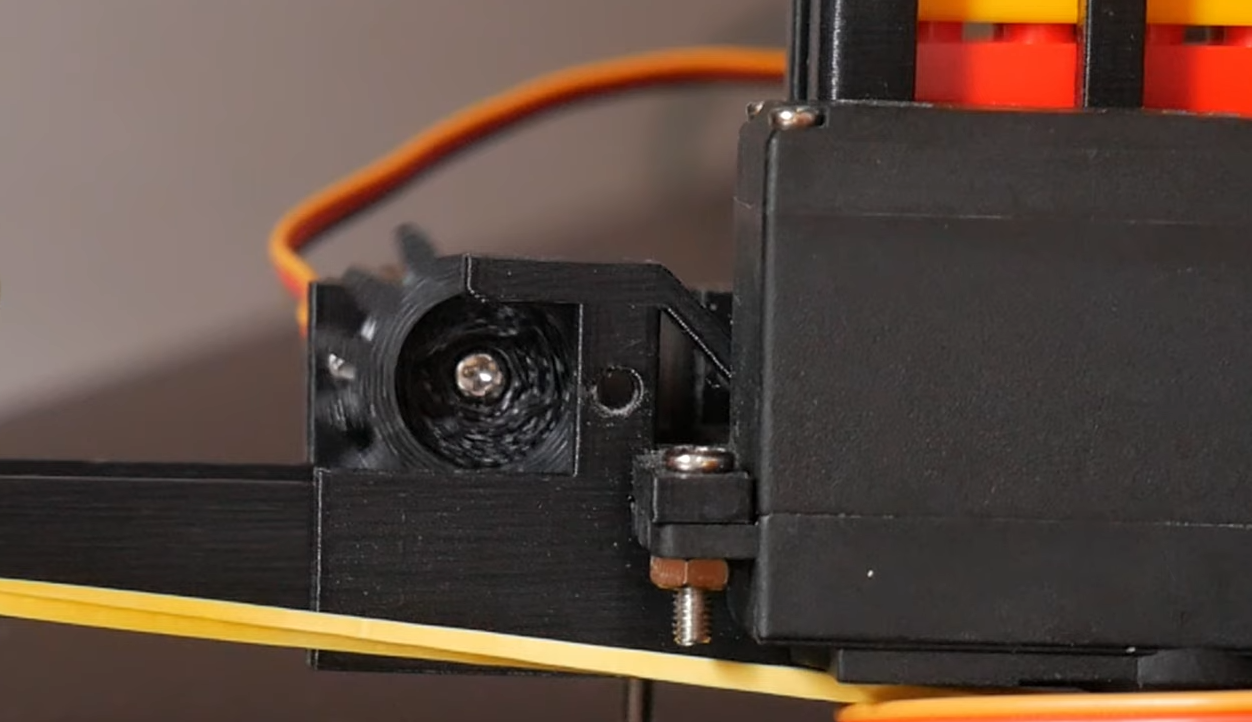
So from the photo above you can see three servos (black), the body (grey) and a rack gear (beige). The larger servo is for aiming the robot, which turns around the robot's stand, fixed to the ground.
The two smaller servos were for drawing back the rack gear by turning a spur gear (not shown above). The groove in the back of the spur shown is for a rubber band, which is pulling the spur so it can fire back in to shoot out a lego piece. It's released when a section of the spur gear is reached where there's no teeth.
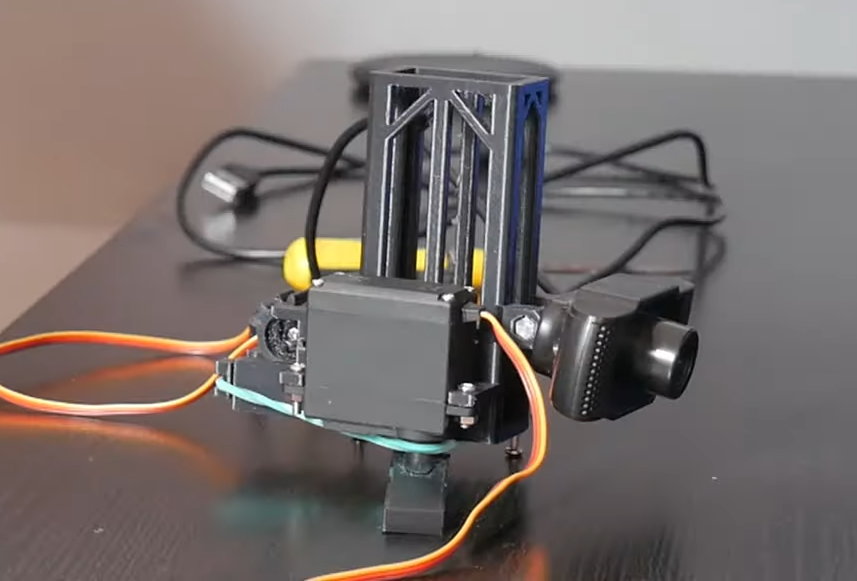
The lego pieces are stored in a 'magazine' (the tall part of the body), and fall into the chamber. The fully assembled robot can be seen below, as well as the spur gear as it pulls back the rack.
Technical Deep-Dive
- Computer Vision Pipeline (OpenCV & Python):
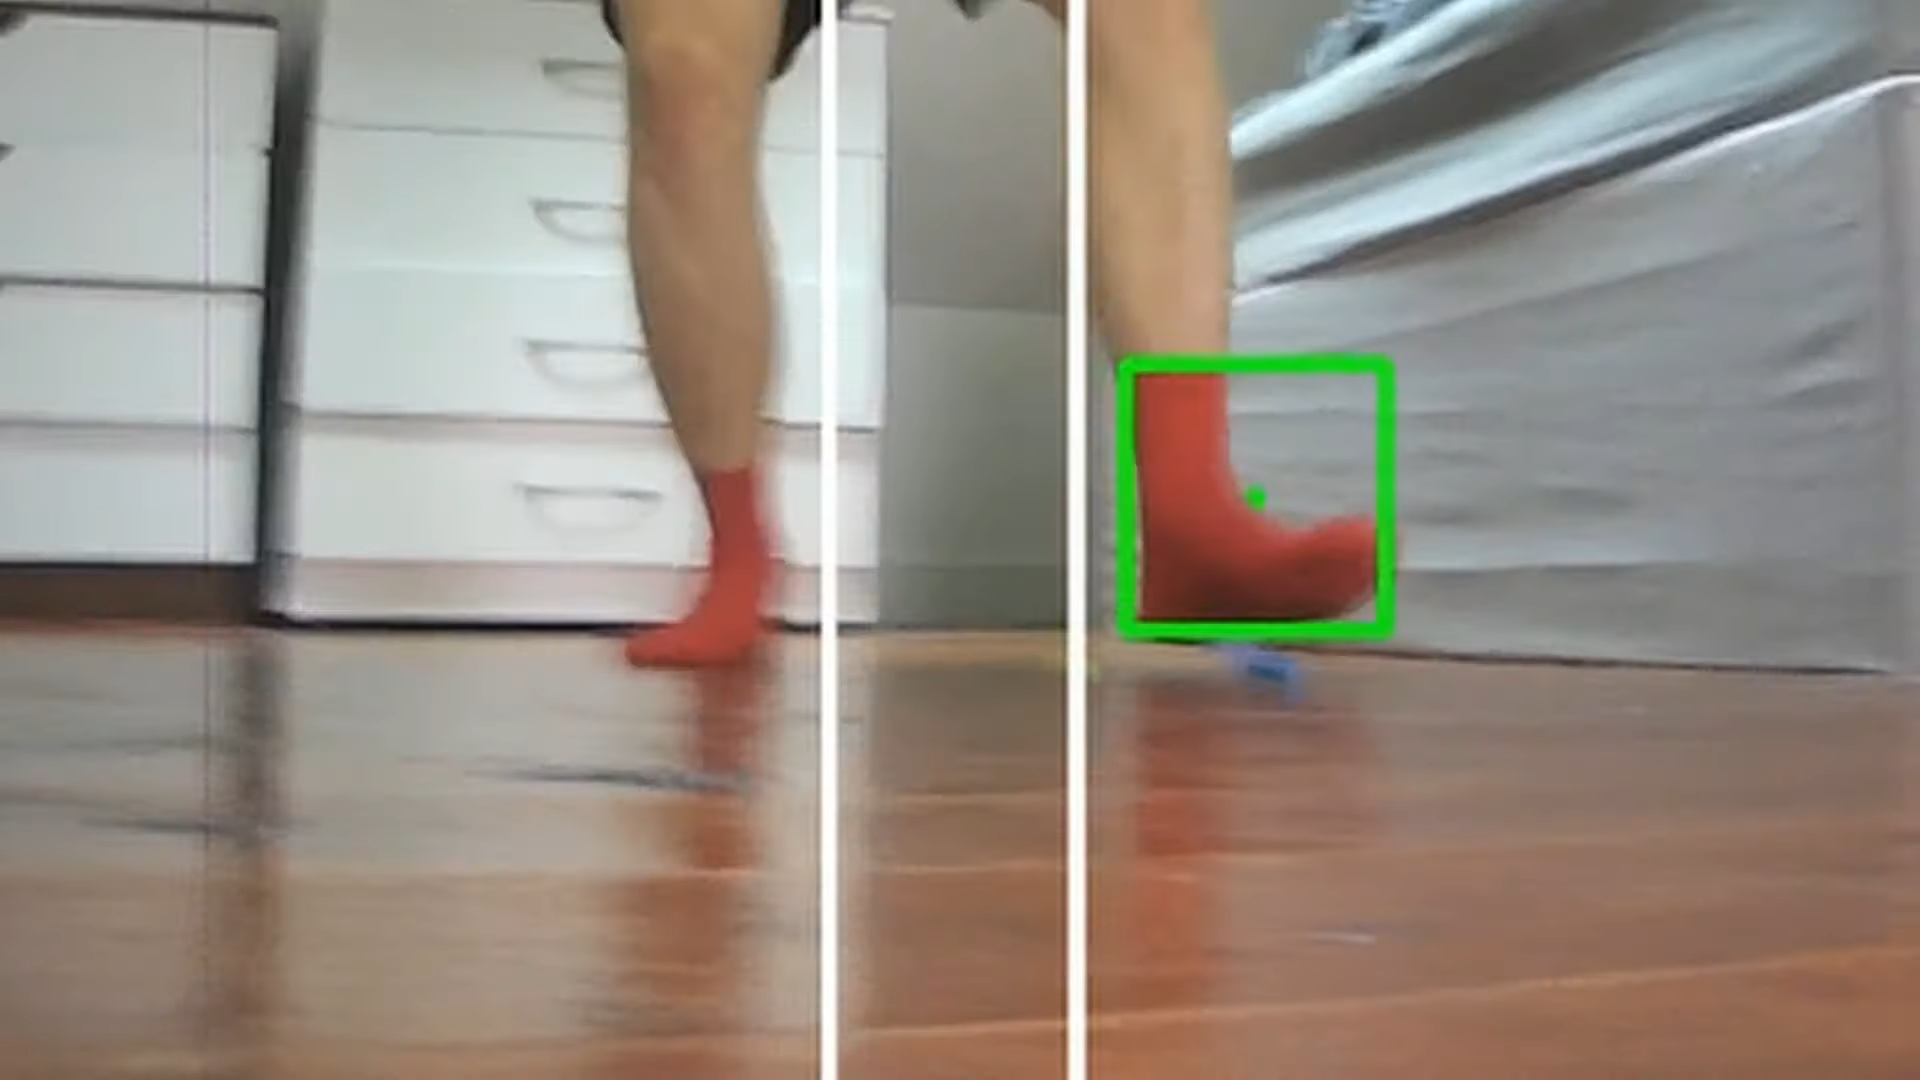
- The Tracking Challenge: Having assembled the hardware, I had to work out how to make it track my feet. I've already made a face tracking nerf gun (that shot me in the face). However surprisingly, using haarcascades, which I used for the face tracking, it was far harder to track feet. For one I was only able to find a leg tracking haarcascade, which was far more temperamental, I suppose because legs have fewer distinct features. In the end I ended up wearing red socks and using colour detection in OpenCV to track them (I know it's kind of cheating, but at least I didn't have to show my bare feet on the internet).
- Color Masking: By defining a range of HUE, SATURATION, and VALUE for a specific color (e.g., red socks), the Python script generates a binary mask. It then performs Contour Analysis to find the largest "blob" and calculates its Centroid (X, Y coordinates).
- Error Calculation: The script compares the centroid coordinate to the image center. If the foot is to the left of the center, a serial command is sent to the Arduino to rotate the turret counter-clockwise.
- Turret Kinematics & Firing Logic:
- The MG996R Pan Base: Due to the weight of the Lego magazine and firing assembly, a high-torque MG996R metal-gear servo was used for the horizontal (Pan) axis to ensure smooth, non-jittery movement.
- Intermittent Firing Mechanism: This is a brilliant mechanical "One-Shot" design. A continuous-rotation logic uses a Spur Gear with a missing tooth segment. As the gear turns, it pulls back a Rack Gear (tensioned by a rubber band). When the missing tooth section is reached, the rack is instantly released, slamming forward to propel the bottom Lego brick out of the chamber.
- Serial Communication Protocol:
- The Python script acts as the "Controller," sending a formatted string (e.g.,
X120Y45F1\n) over the USB serial port. - The Arduino UNO parses this string, mapping the X-axis coordinate to a 500-2500 microsecond PWM pulse width for the servos, and checking the "Fire" (F) flag to initiate a rotation of the firing gear.
- The Python script acts as the "Controller," sending a formatted string (e.g.,
Engineering & Prototyping
- CAD Modeling (SolidWorks): The entire assembly was designed in SolidWorks to ensure precise tolerances for the rack-and-pinion firing system. 3D printing allowed for rapid iteration when the initial fit between the SG90 servos and the grey chassis was slightly off.
- Safety & Feedback Loops: The software includes a "center-locking" algorithm. The turret only fires when the tracked foot centroid is within a specific "Dead-Zone" (represented by white bands in the CV view), preventing wasted ammunition when the target is moving too fast for the pan motor to keep up.
- Physical Architecture: The "magazine" utilizes gravity feeding. Bricks are stacked vertically and drop into the "barrel" once the rack has fired and returned to its neutral position, allowing for rapid-fire deployment.
Either way you can see below the foot tracking in action. The arduino code was quite simple after that, I was sending it the coordinates of the centre of the feet (the green square) from the python script, and then the servo move so that the centre was within the centre of the image (the white bands). When it was within them it would then fire.
So it works. Very badly. But I think maybe it's not the best idea to spend my time trying to improve such a a stupid robot like this.
Thanks for reading! Again check out the full video if you want to see me stand on many many lego bricks, and go support the channel!
https://www.youtube.com/watch?v=I6gpKFjL6_8&t=4s&ab_channel=AdamBeedle