This project is born when we decided to build a small robotic arm using an Arduino Uno controlled by a button (to control the servo which drops the steel ball) and a joystick (there are two potentiometers in it, each of them "drives" a servo). We watched on the web and decided to make an "unusual" kind of robotic arm: the SCARA.
Project Overview
"SCARA-Link" is a high-utility exploration into Planar Robotic Kinematics and Velocity-Based Control. The SCARA (Selective Compliance Assembly Robot Arm) architecture is an industry standard for pick-and-place tasks due to its high vertical rigidity and rapid horizontal acceleration. This project implements a modular SCARA system that leverages high-torque DS3218MG servos to achieve precise angular displacement, controlled via an analog joystick with incremental interpolation forensics.
Technical Deep-Dive
- SCARA Kinematics & Linkage Forensics:
- The 2-DOF Planar Model: The robot consists of two primary revolving joints (Base and Elbow) that operate in a shared horizontal plane. This architecture minimizes gravitational load on the servos, allowing for higher speeds and payload capacity compared to 6-axis vertical arms.
- Selective Compliance Integrity: The design emphasizes high axial stiffness. By utilizing steel-ball bearings and heat-set inserts in the 3D-printed chassis, the system achieves the mechanical stability required for repeatable dispenser tasks (e.g., dropping steel balls into designated slots).
- Joystick-to-Incremental Velocity Mapping:
- The Delta-Step Algorithm: Instead of direct angular mapping (which can cause jerky movement), SCARA-Link treats the joystick as a velocity input. When the potentiometers reach their polar thresholds (extremes), the firmware increments the target servo angle in 5° intervals using a non-blocking
millis()timer. This provides the operator with "Smooth Pursuit" control over the end-effector.
- The Delta-Step Algorithm: Instead of direct angular mapping (which can cause jerky movement), SCARA-Link treats the joystick as a velocity input. When the potentiometers reach their polar thresholds (extremes), the firmware increments the target servo angle in 5° intervals using a non-blocking
- High-Torque Actuation Diagnostics:
- DS3218MG Current Forensics: The base joint experiences significant rotational inertia. The system utilizes high-torque servos (20kg/cm) to maintain positional accuracy under dynamic loads. Power management is critical; the dual DS3218MG array requires an isolated high-current rail to prevent logic brownouts in the Arduino Uno.
Assembling of the Parts
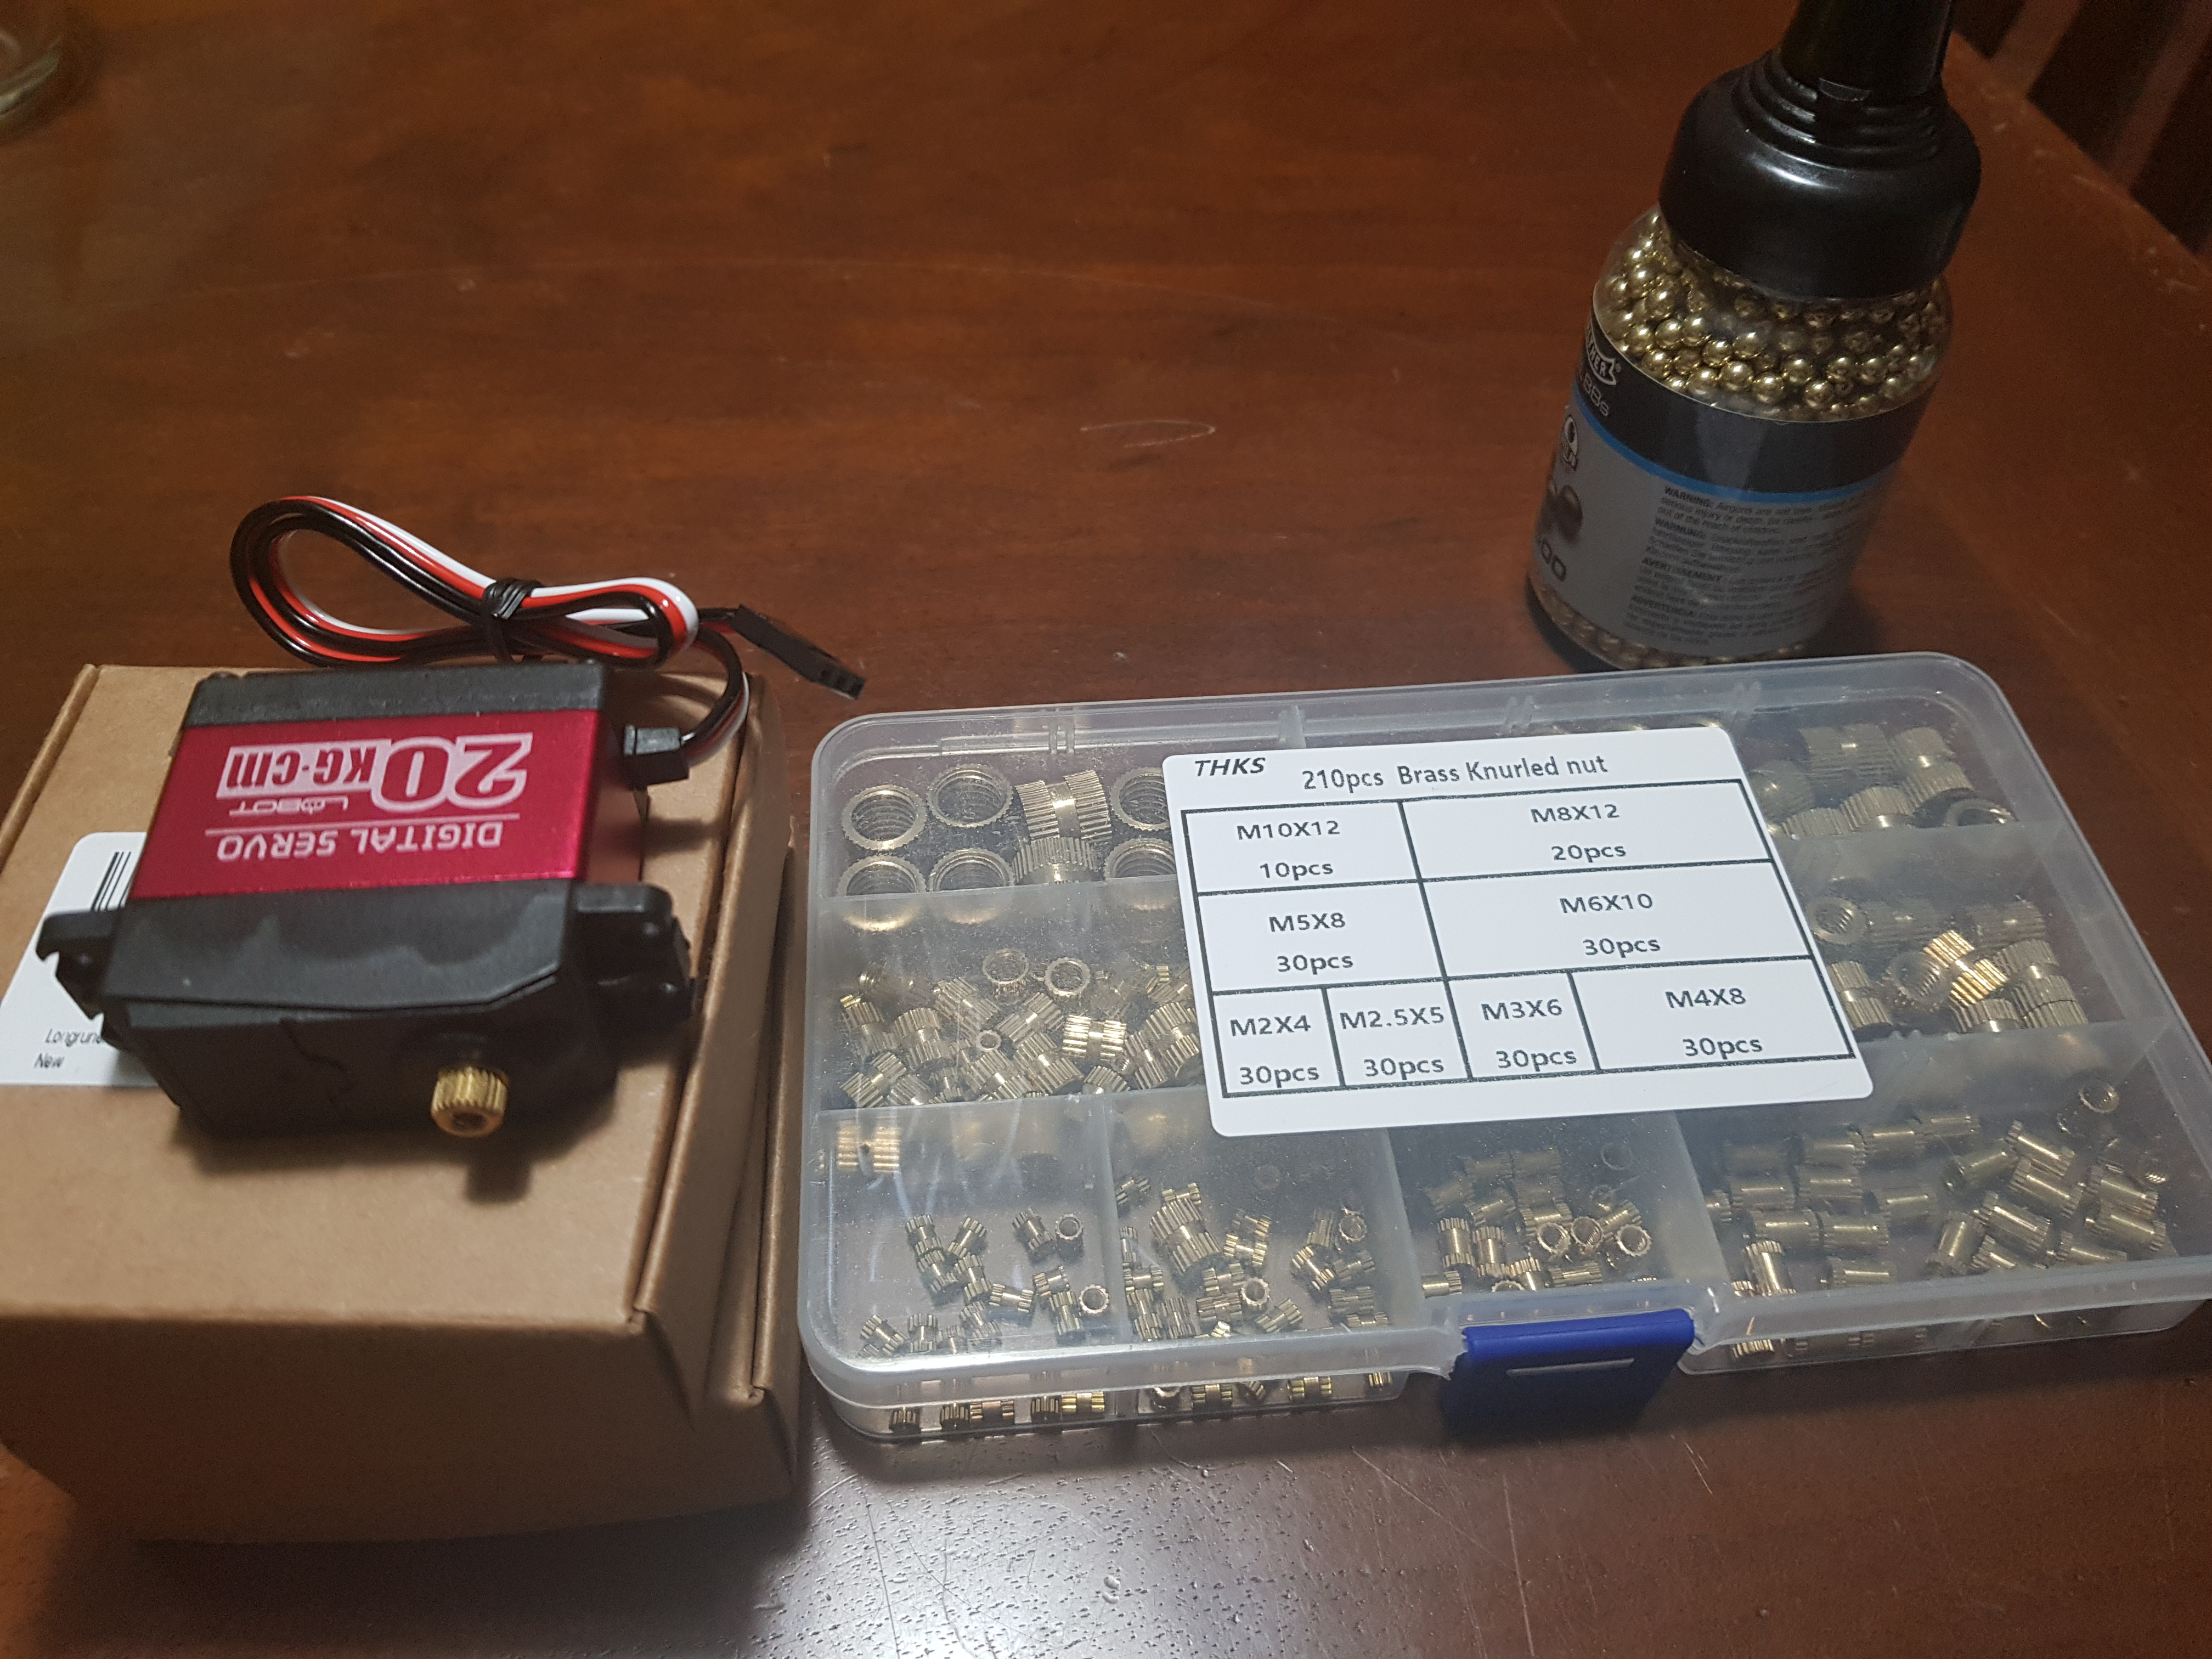
Assembling Hacks Probably the holes in the 3D printed parts will be too small for the heat inserts (it depends on their outer diameter, so it’s suggested to get inserts with a diameter of 3, 5mm), so you’ll have to drill the printed parts to let the holes reach the depth and the diameter of your inserts. In our case, flange’s holes were too small too so we had to drill with a 3mm drill bit.
It’s not hard to assembly all the parts of this Scara robot. These are the main steps:
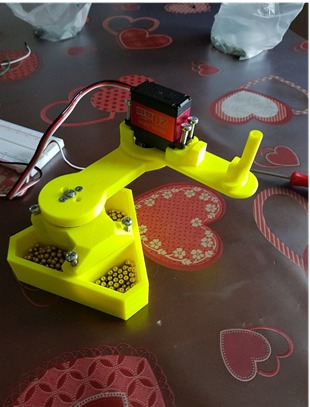
- 3D print the plastic components of the Scara ( we used a cartesian 3d printer) ;
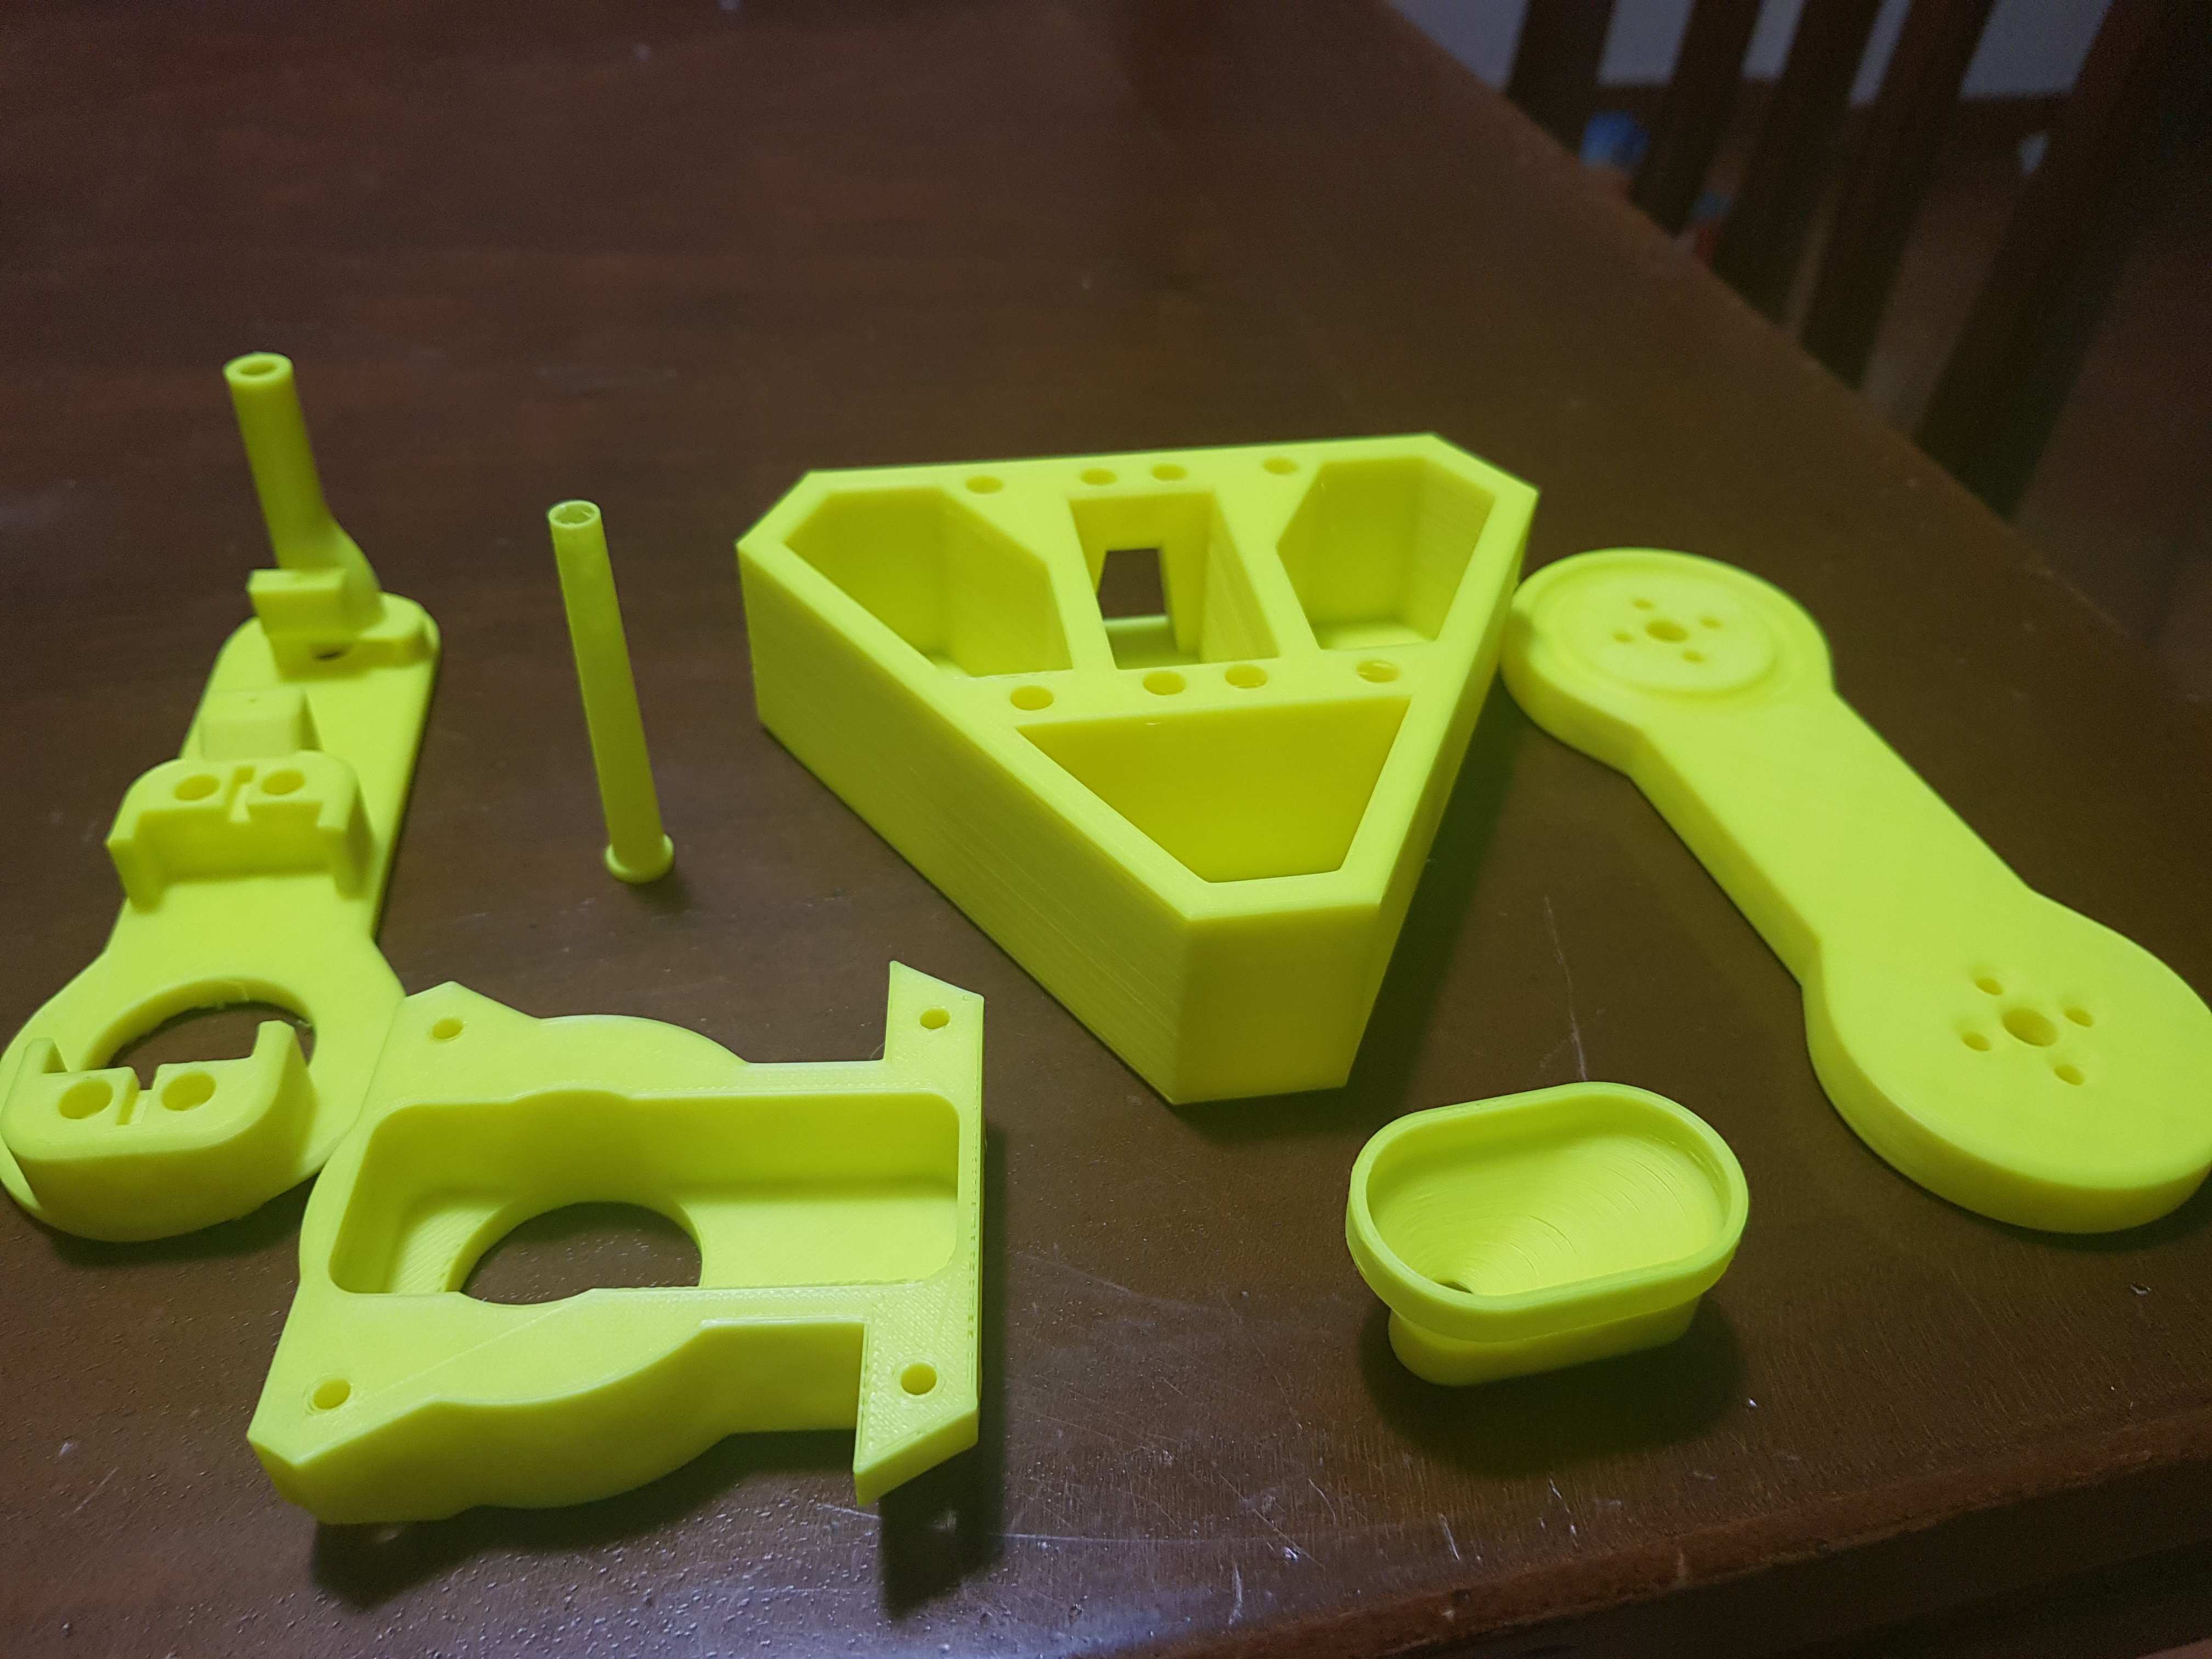
- Install the inserts (the easiest way is by heating them with a soldering iron);
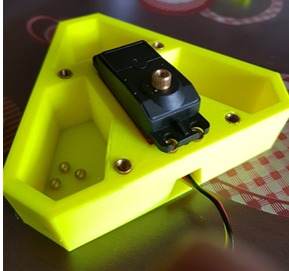
- Put the first DS3218MG Servo in the “Base” and put the “Top” part on it, then block these parts with M4x10 screws (for the servo) and with M4x20 screws (for the “Top”);
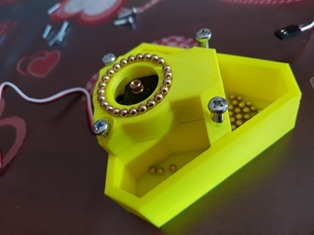
- Block the flange on the lower side of the “Arm” with four M3x15 screws and nuts (the nuts will stay between the servo and the flange). Then put a washer and a M3x15 screw in the hole in the middle;
- Put the steel balls in their seat and then place the “Arm” on it (repeat this two steps (4-5) for the “Dispenser” part);
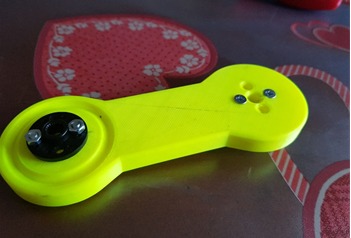

- Block the other DS3218MG Servo on the “Dispenser” with four M4 screws;
- Put the SG90 (upside down) on the supports of the dispenser, block it with hot glue;
Engineering & Implementation
- Mechatronic Assembly Logistics:
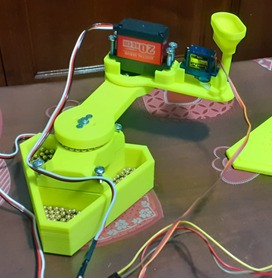
- Step 1: Structural Integrity. 3D-printed parts are reinforced with M3/M4 heat-set inserts to ensure durable joint-linkage connections.
- Step 2: Joint Zeroing. Each joint is calibrated to a known "Home" position ($0^{\circ}$) during initialization to ensure accurate kinematic transformations.
- Step 3: End-Effector Payload. The SG90 micro-servo is mounted in an inverted orientation to actuate the dispensing mechanism, triggered by an independent tactile switch.
- Bluetooth Telemetry Bridge:
- The HC-05 module transmits real-time joint coordinates $(\theta_1, \theta_2)$ to a remote terminal. This data stream allows for "Black-Box" recording of the robot's movements, providing a foundation for automated path replay in future iterations.
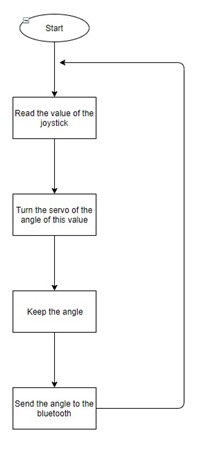
Operating Principle
This Scara’s operating process is quite easy. In the joystick there are two potentiometers (there is a button too, but we decided to use a separate one in this project) and in the entire mechanism of the robot there are three servos (two “big” and powerful ones and a smaller one), so we decided to drive each DS3218MG with a potentiometer and the other servo with the button: more specifically, every time a potentiometer reaches one of its ends, the servo will turn 5° right or left (depending on the side reached by the potentiometer) and every time the botton will be pushed, the smaller servo will drop a steel ball.
Conclusion
SCARA-Link demonstrates the power of Industrial Robotic Abstraction. By mastering Incremental Joint Interpolation and Selective Compliance Forensics, developers can build sophisticated automation platforms capable of handling complex planar tasks with speed and precision.
Planar Precision: Mastering SCARA kinematics through joystick forensics.