Project Description
In this article, you will learn how to build an interactive scary pumpkin right in time for Halloween. The only things you need are an UNO R4 WiFi, a small breadboard, a mini MP3 player, and a speaker. With these components and some code we provide later on, you will be able to control the pumpkin remotely, change the color of the eyes, and trigger an evil laughter.
This project uses Arduino Cloud and if you are completely new to it, we recommend you read Getting Started with Arduino Cloud .
Spooky Animatronics: The Scary Jack-O-Lantern
The standard candle inside a pumpkin is outdated. The Scary Halloween Pumpkin project elevates holiday decorations into theme-park-level animatronics. It sits completely dormant, looking like cheap plastic, until an unsuspecting trick-or-treater crosses its invisible tripwire!
The Ultrasonic Activation Trap
The element of surprise is entirely handled by an HC-SR04 Sonar Sensor, sneakily embedded into the pumpkin's eyes or nose.
- The
loop()continuously fires silent ultrasonic pings into the dark yard. - The baseline distance of the sidewalk might be 200cm.
- The State Change: A person walks up to the door.
if (distance < 50cm) { WakeUpTheDead(); } - The Arduino instantly snaps out of its idle state and executes a terrifying cascade of sensory outputs.
Fusing Light, Sound, and Motion
To make an effective scare, you must overwhelm the senses simultaneously.
- The Light: Inside the pumpkin, two WS2812B NeoPixel Jewels (7-led clusters) act as the eyes. Using the FastLED
Fire2012mathematical algorithm, the eyes begin to violently flicker deep blood-red! - The Sound: A DFPlayer Mini MP3 Player receives a serial command:
myDFPlayer.play(3);. It instantly blasts a digitized zombie scream through a hidden 3-Watt speaker. - The Motion: A heavy-duty MG996R Metal Gear Servo attached to a plastic linkage violently smashes the lid of the pumpkin up and down 10 times in one second!
- After 5 seconds, the entire system resets: the lights die, the lid drops shut, the sound stops, and it waits for the next victim.
Creepy Components
- Arduino Nano (Small enough to fit inside a hollowed-out gourd).
- HC-SR04 Ultrasonic Distance Sensor.
- DFPlayer Mini + 8-Ohm Mini Speaker.
- WS2812B NeoPixel LEDs for programmable fire simulation.
- MG996R Heavy Servo Motor.
- An actual pumpkin (real or plastic) heavily modified with a Dremel tool.
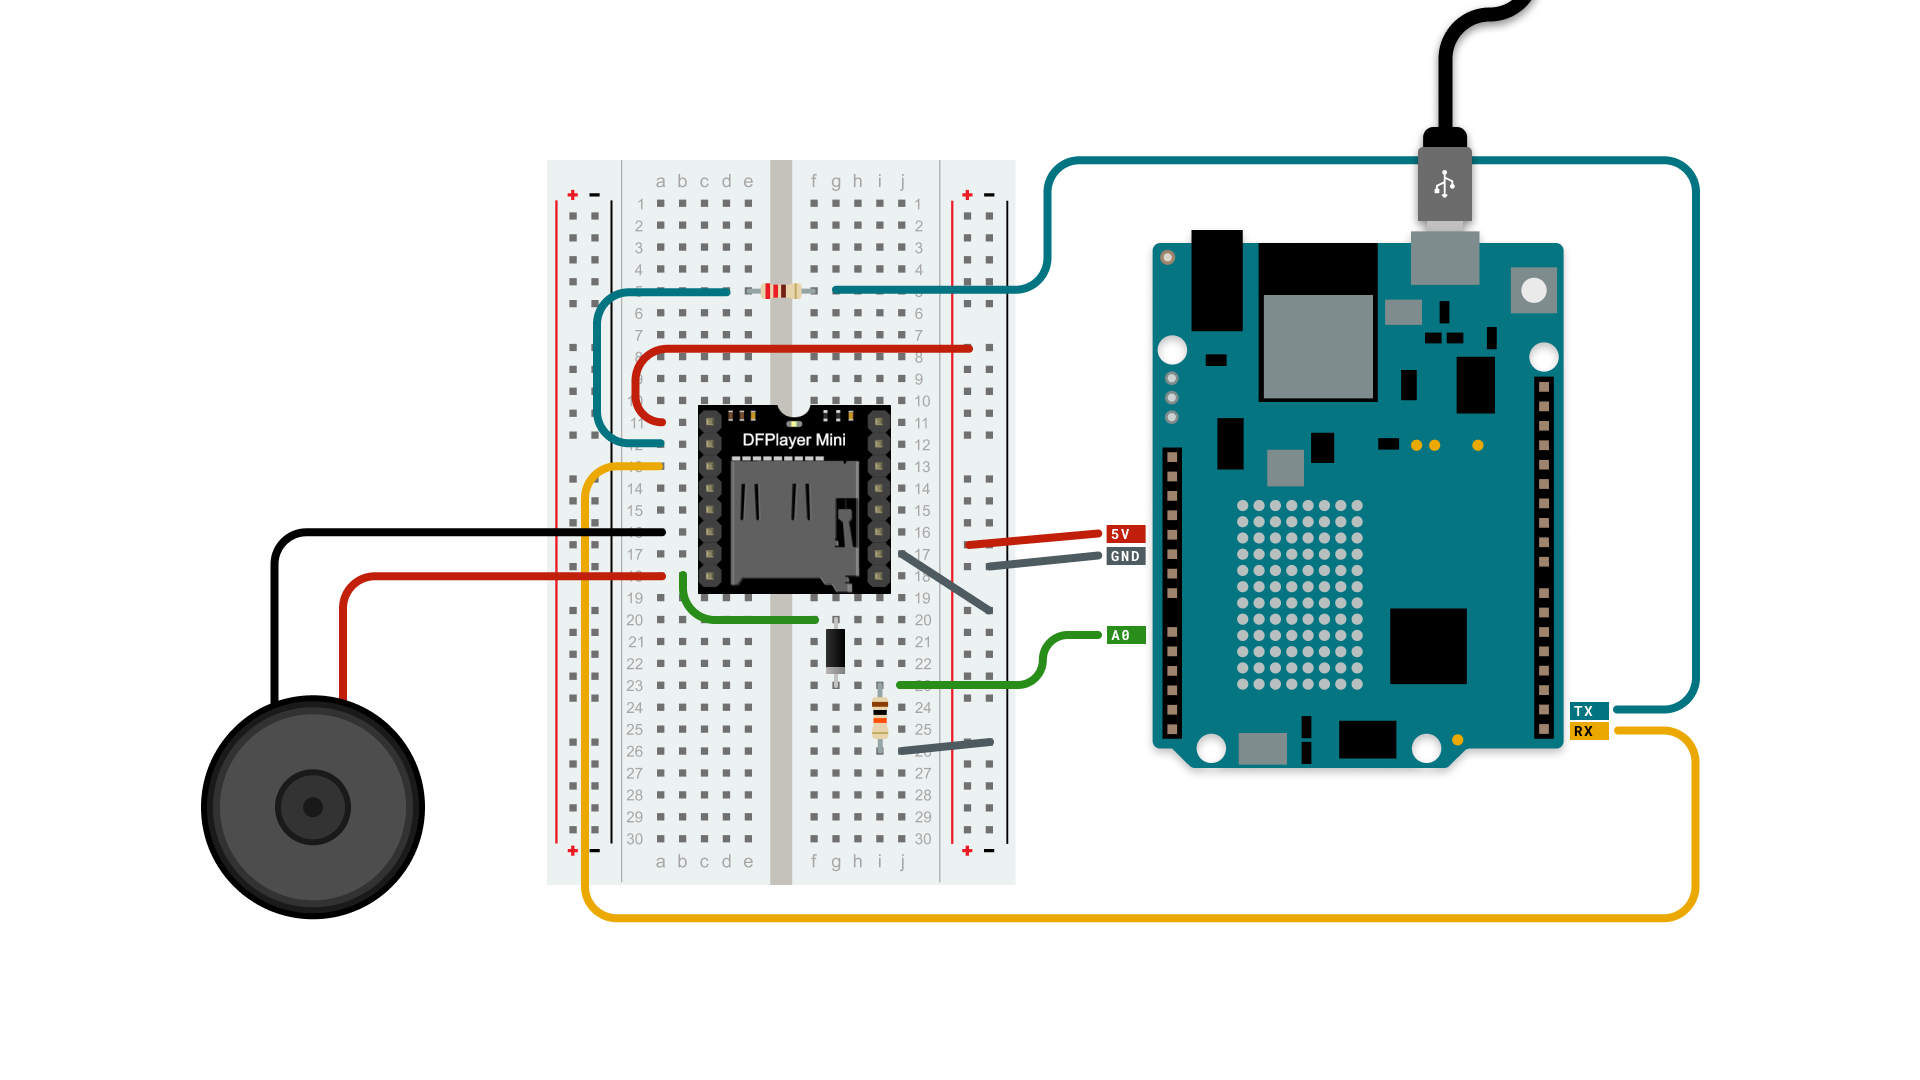
Circuit
Connect the components according to the circuits below:
- 220 Ohm resistor for TX line.
- 10K Ohm resistor for A0 line.
- Connect the Diode with the silver strip towards the resistor.
Code Template
This project uses Arduino Cloud to activate the pumpkin remotely, change the laughter and keep track of how many people you have scared. To make it as easy as possible you can import a template we created for this project here. The template will automatically upload the code and create a dashboard.
Upload Sound
For the project to work correctly you need to download the mp3 files attached for this project and place them on the SD card. The files are already in the correct folder structure so you won't need to change anything. If you want to add more sounds or creaste your own it's import to name the folders 01, 02, 03, 04 and the files must be named (0001mp3, 0002.mp3, ...). That's it!


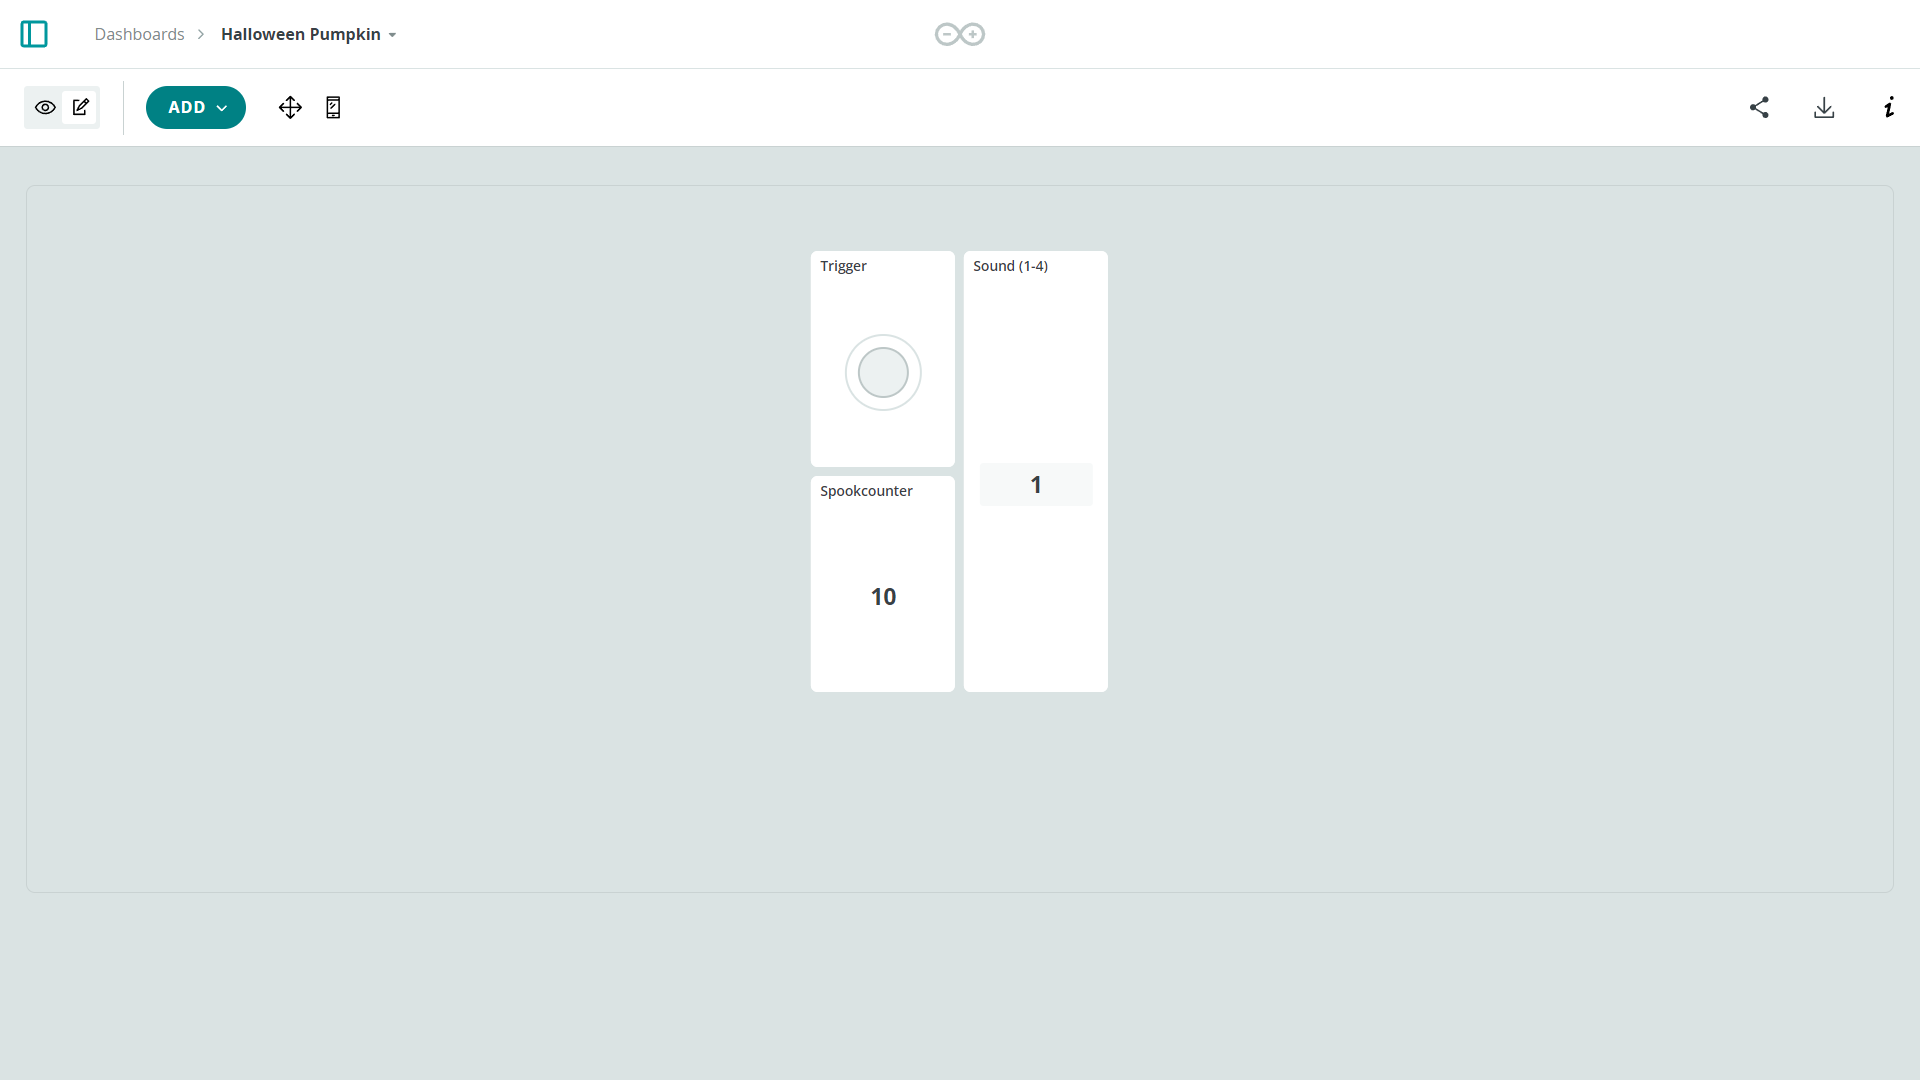
Dashboard
Once you have placed the mp3 files in the correct folder structure and uploaded the template you should see the following dashboard. If you want to change the sounds name or add more to them click the pen (edit) icon in the top left corner and change the number of each field to correspond with the number of your mp3 file.
References
DFRobot. (n.d.). DFPlayer Mini SKU DFR0299. DFRobot. Retrieved October 11, 2024, from https://wiki.dfrobot.com/DFPlayer_Mini_SKU_DFR0299