About
Hello everyone! In this tutorial I will show you how to use and code joystick module with an Arduino Uno Rev3 (board) and PictoBlox (software).
Understanding the game
The goal of this game is to shoot with an aim as much as possible monsters. You move your aim with joystick module.
Things needed
For this project, you will need:
1x Arduino Uno
1x Joystick module
1x Breadboard
A few wires (generic)
Connections
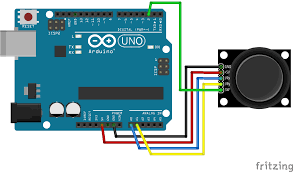
Now lets connect joystick to Arduino.
(Component - Arduino)
Joystick
+5V - Pin 5V
GND - Pin GND
VRx - Analog pin A0
VRy - Analog pin A1
SW - Digital pin 3
Circuit
Here's a circuit for connections:
Sprites and backdrop
Now, after connecting all things, let's pick sprites and backdrops. You don't need to pick same things as me if you don't want it. So, I will pick these sprites:
1x Monster
1x Aim
And the backdrop "Space".
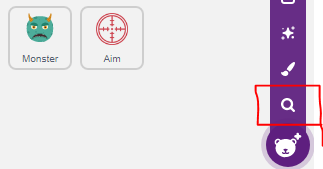
This image is showing you how to pick a new sprite.
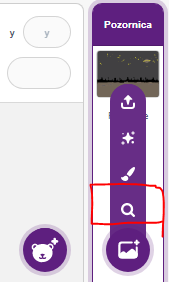
And this image is showing you how to pick a new backdrop.
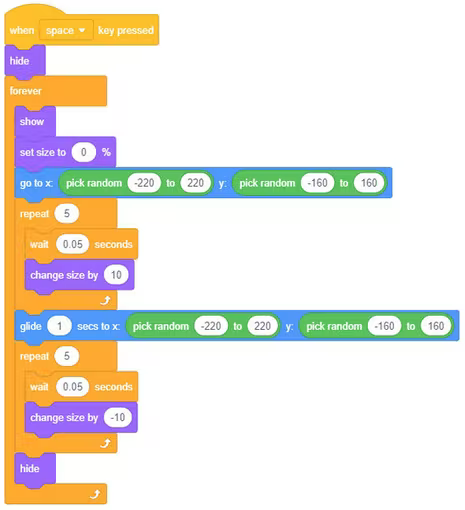
Coding the monster
I'm picked a Monster sprite, and now I will show you how to code it:
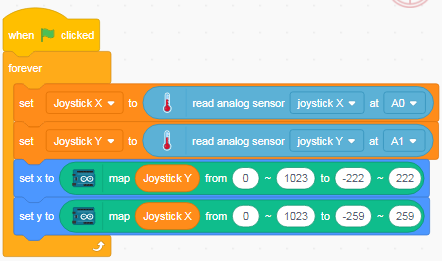
Programming joystick and Aim sprite
Now it's time to program Aim sprite.
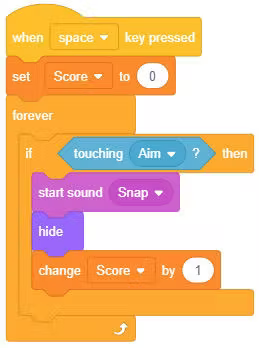
Script for score
The logic is simple: As soon as the aim sprite touches the monster, the score will increase by one.
Write the following code:
Uploading the code
Now we need to upload this code to Arduino:
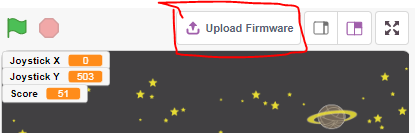
Click the button "Upload Firmware".
__________________________________________
And now that's it! Now test the game. You also can change sprites and backdrops.
EXPANDED TECHNICAL DETAILS
Interactive Visual Programming
This project merges physical game controllers with a digital playground, teaching users the fundamentals of human-machine interaction.
- Dual-Axis Joystick Integration: The Arduino reads analog voltages from a thumb joystick (X and Y axes). The firmware cleans this signal using a "Dead-Zone" algorithm to prevent jitter and sends the coordinates to PictoBlox via high-speed serial.
- Event-Driven Gameplay: PictoBlox (block-based Scratch clone) handles the sprite animation. When the joystick "Select" button is pressed, a "Shoot" command is triggered, and a Piezo buzzer on the Arduino plays a "Zap" sound effect.
Educational Logic
- Variable Scaling: Demonstrates how to map the 0-1023 analog range to the -240 to 240 pixel range of the PictoBlox stage for precise character movement.