Intro:
This project was created using the Lilypad USB Protosnap Plus as an introductory exploration into wearables and the capacities of the Lilypad board. I wanted to create something simple, but that could still have a beneficial function for a user. Because of trying to maintain simplicity, all of the parts used in this device are included in the original board, with no need to purchase other outside components.
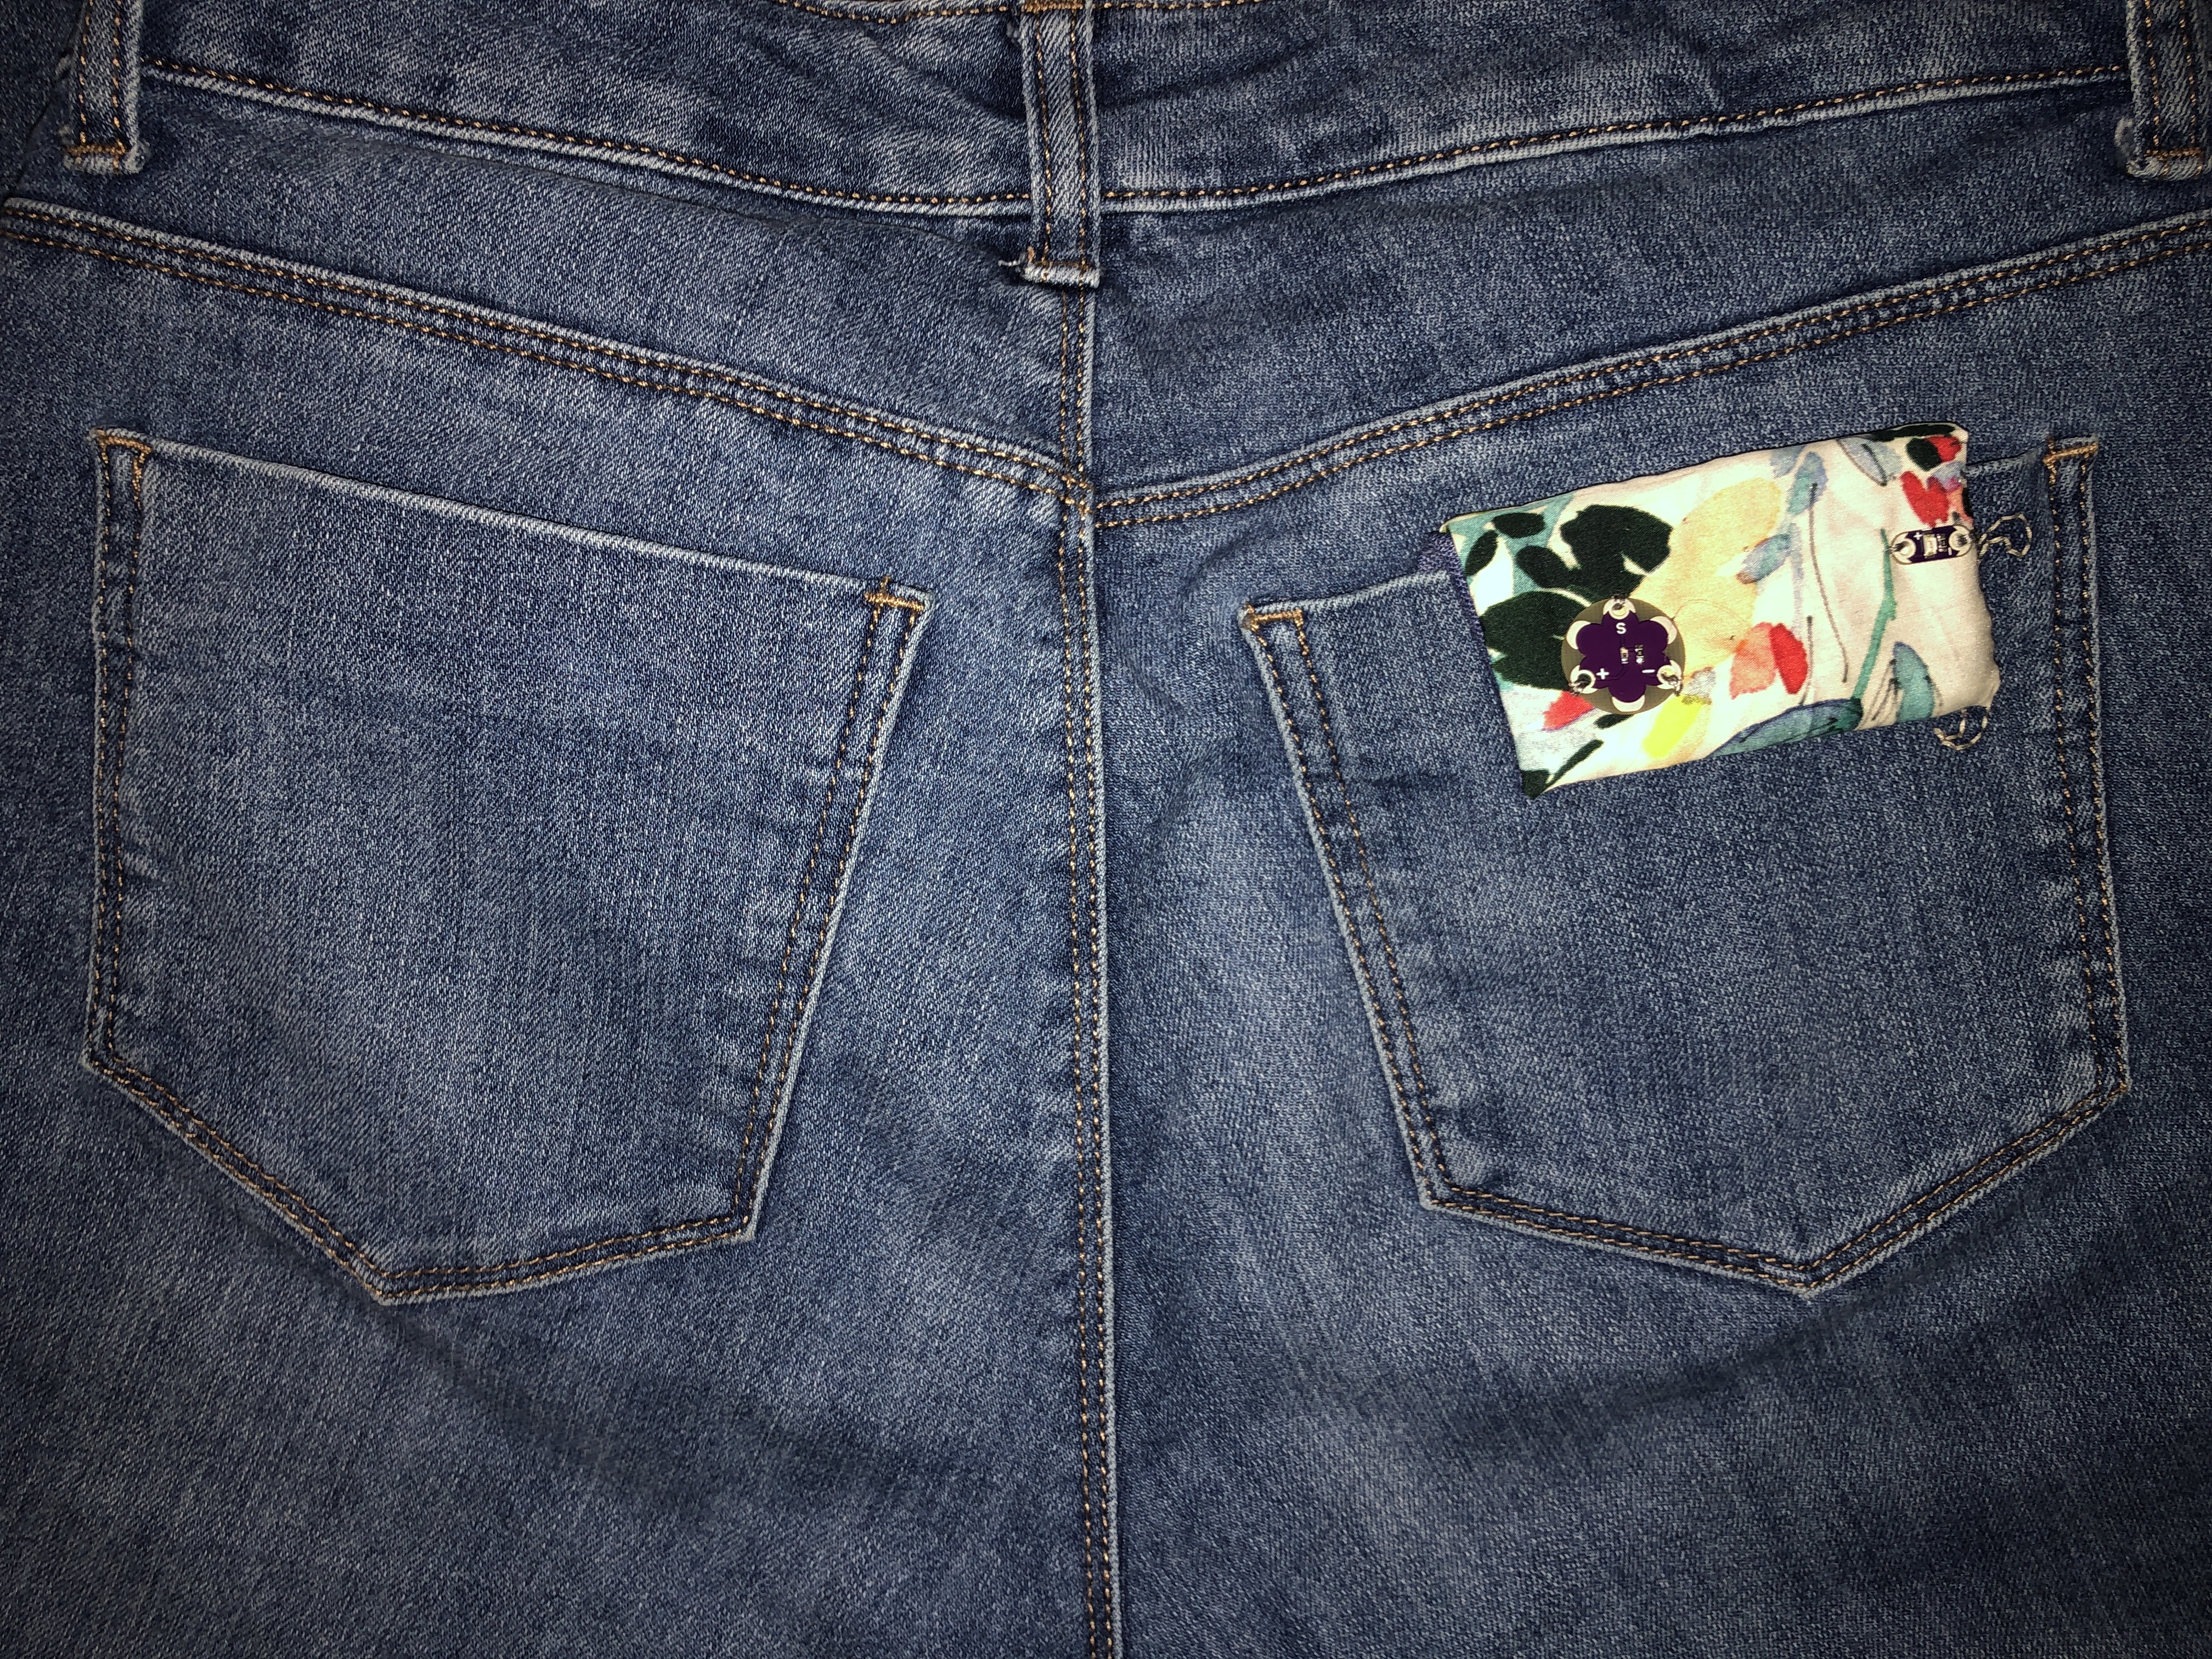
The device is pocket worn, so the main board component goes inside the pocket, while the light sensor and LED(optional) sit on a flap on the outside of the pocket. When a user sits down, the light sensor is covered and will alert the user if they have not moved in a given period of time. The current code is set to 10 seconds, but this is just for testing purposes as it can easily be adjusted to 10-15 minutes or however long is desired. The benefits of a pocket worn device rather than incorporating the tech into one specific pocket is the versatility it allows and the fact that it can be worn on any pair of pants that has back pockets.
Project Perspective
Sitting Sensor is an intuitive and simple wearable sensor layout for anyone to understand about basic physical and digital interaction. By utilizing a light sensor and a buzzer for feedback, you'll learn about basic e-textiles and health monitoring.
Technical Implementation: Fabric and Circuits
The project replaces traditional copper wires with soft, flexible materials:
- Conductive layer: Conductive Thread acts as the wiring, allowing electricity to flow between the LilyPad and the sensor/buzzer directly on the fabric.
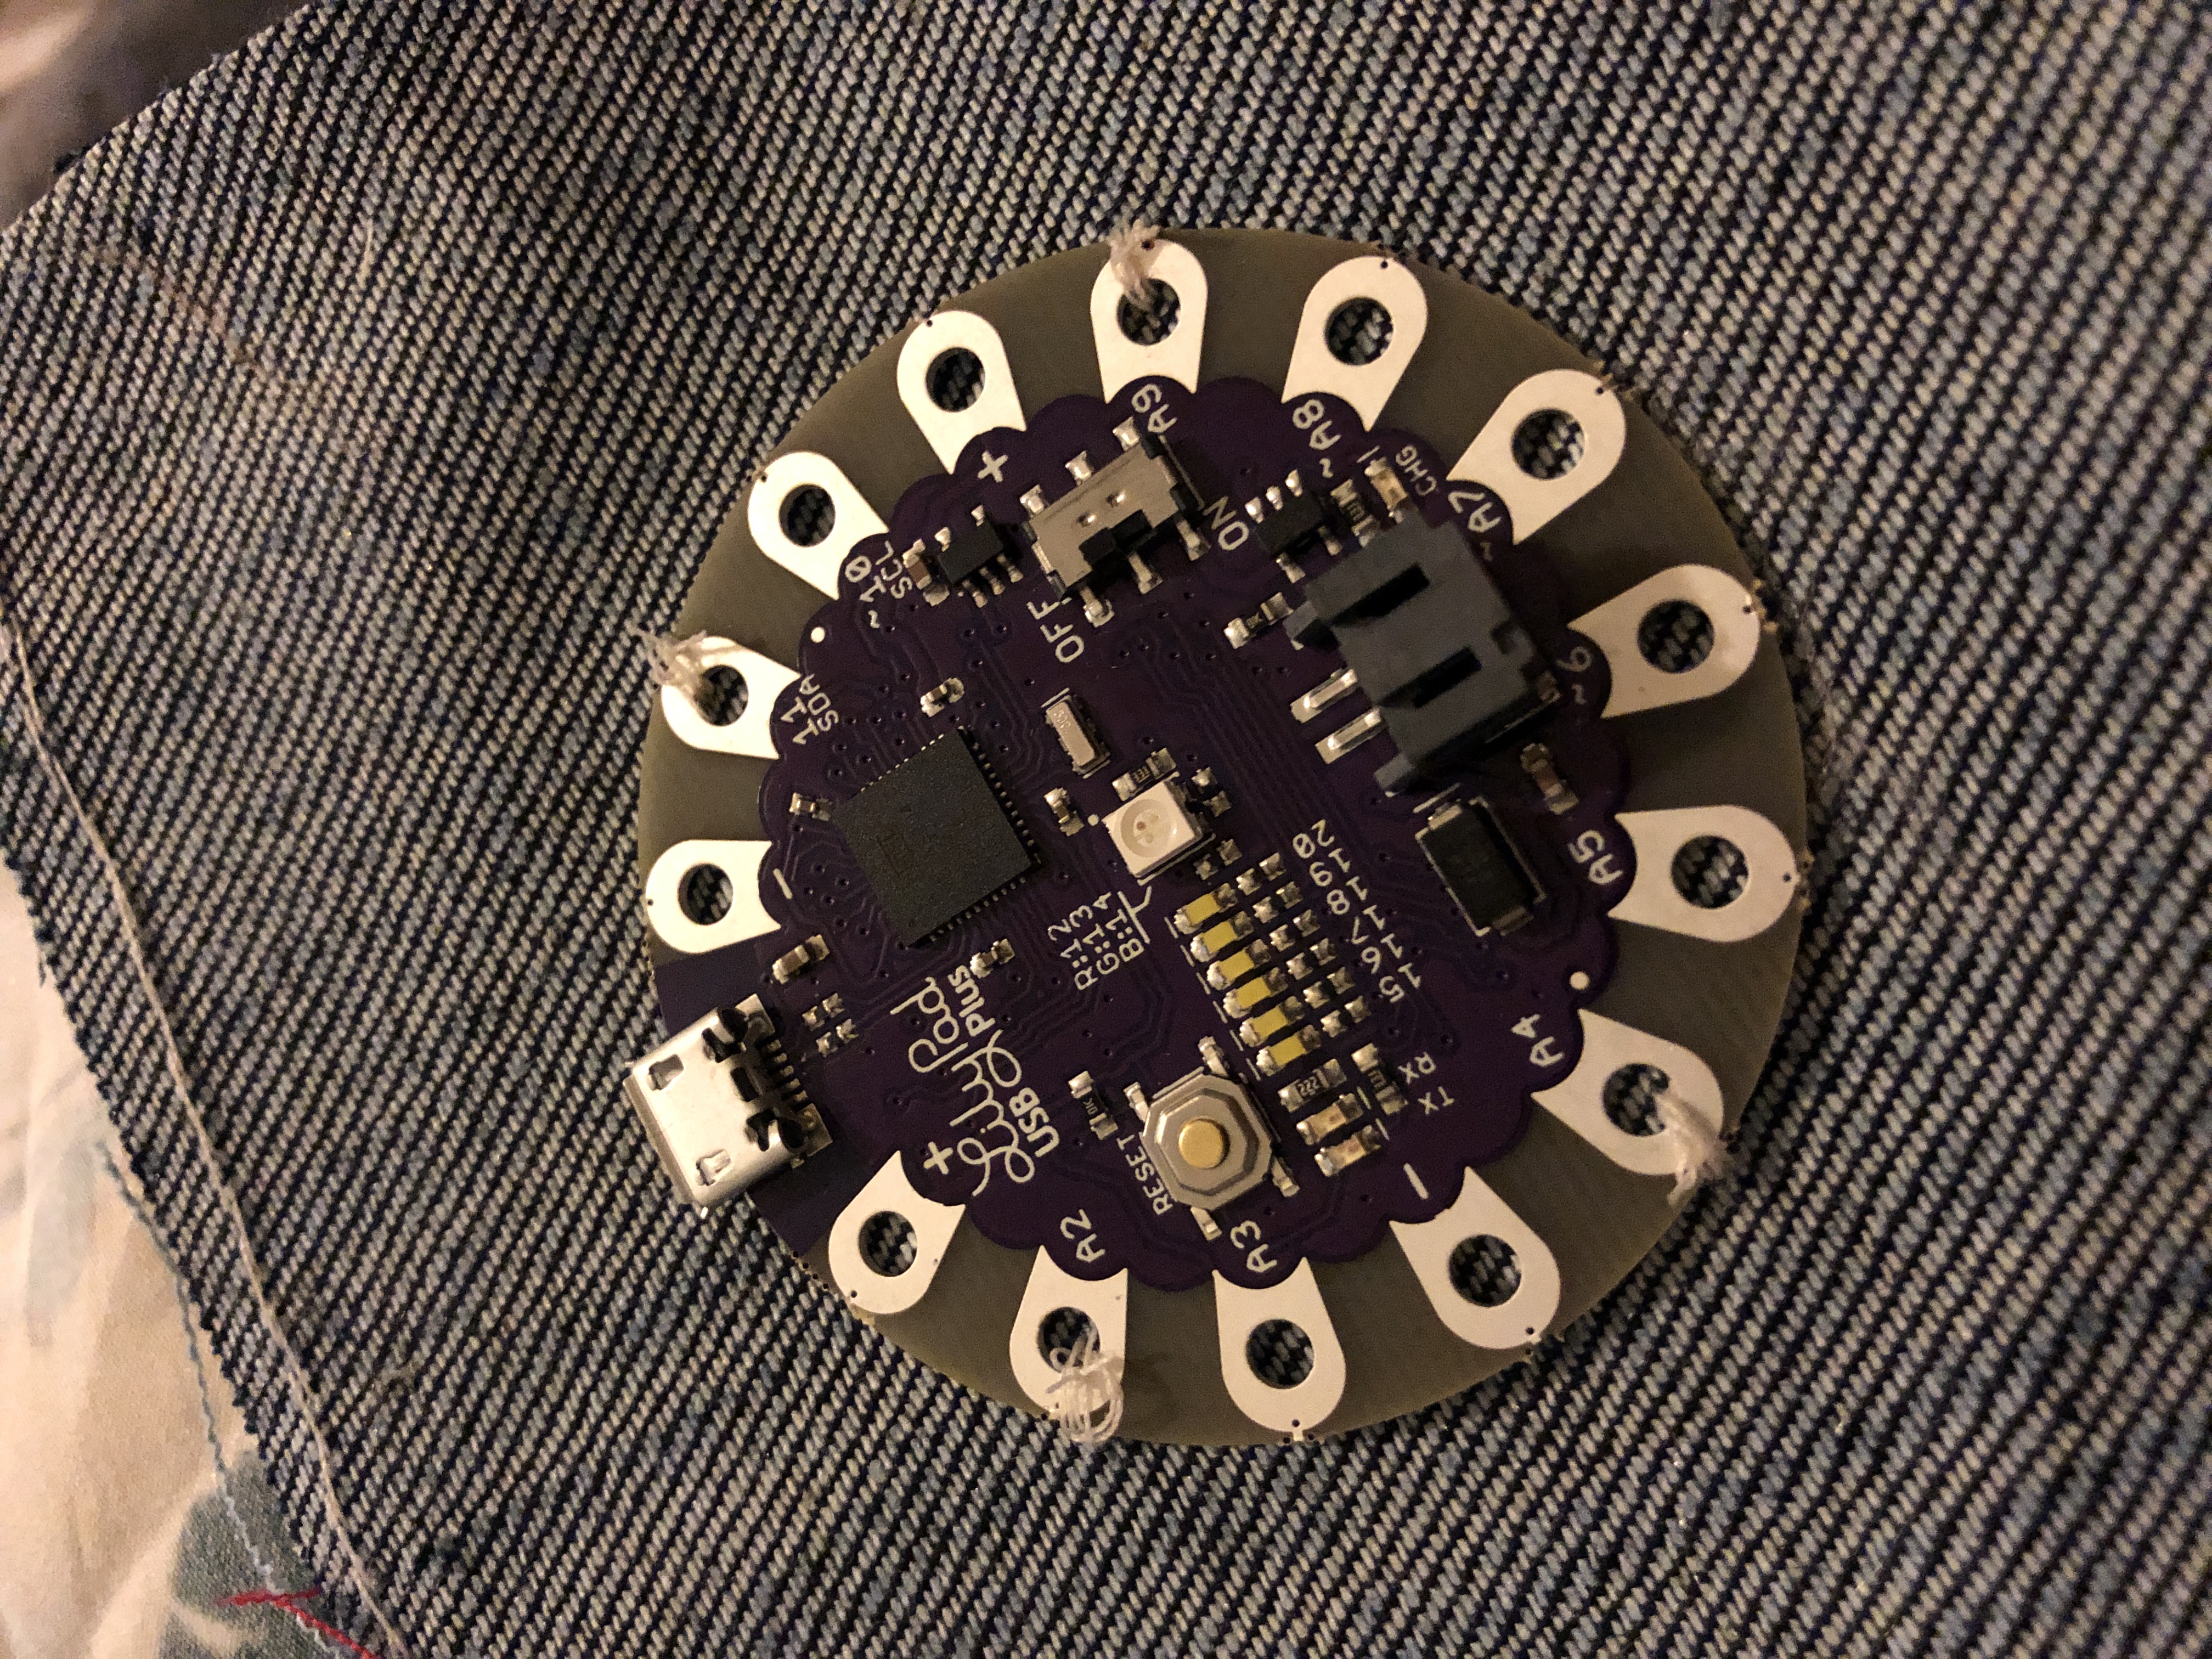
- Micro-controller layer: The Arduino LilyPad USB is a specialized board designed to be sewn into clothing, featuring large holes (pads) that are easy to stitch to and an integrated USB port for easy programming.
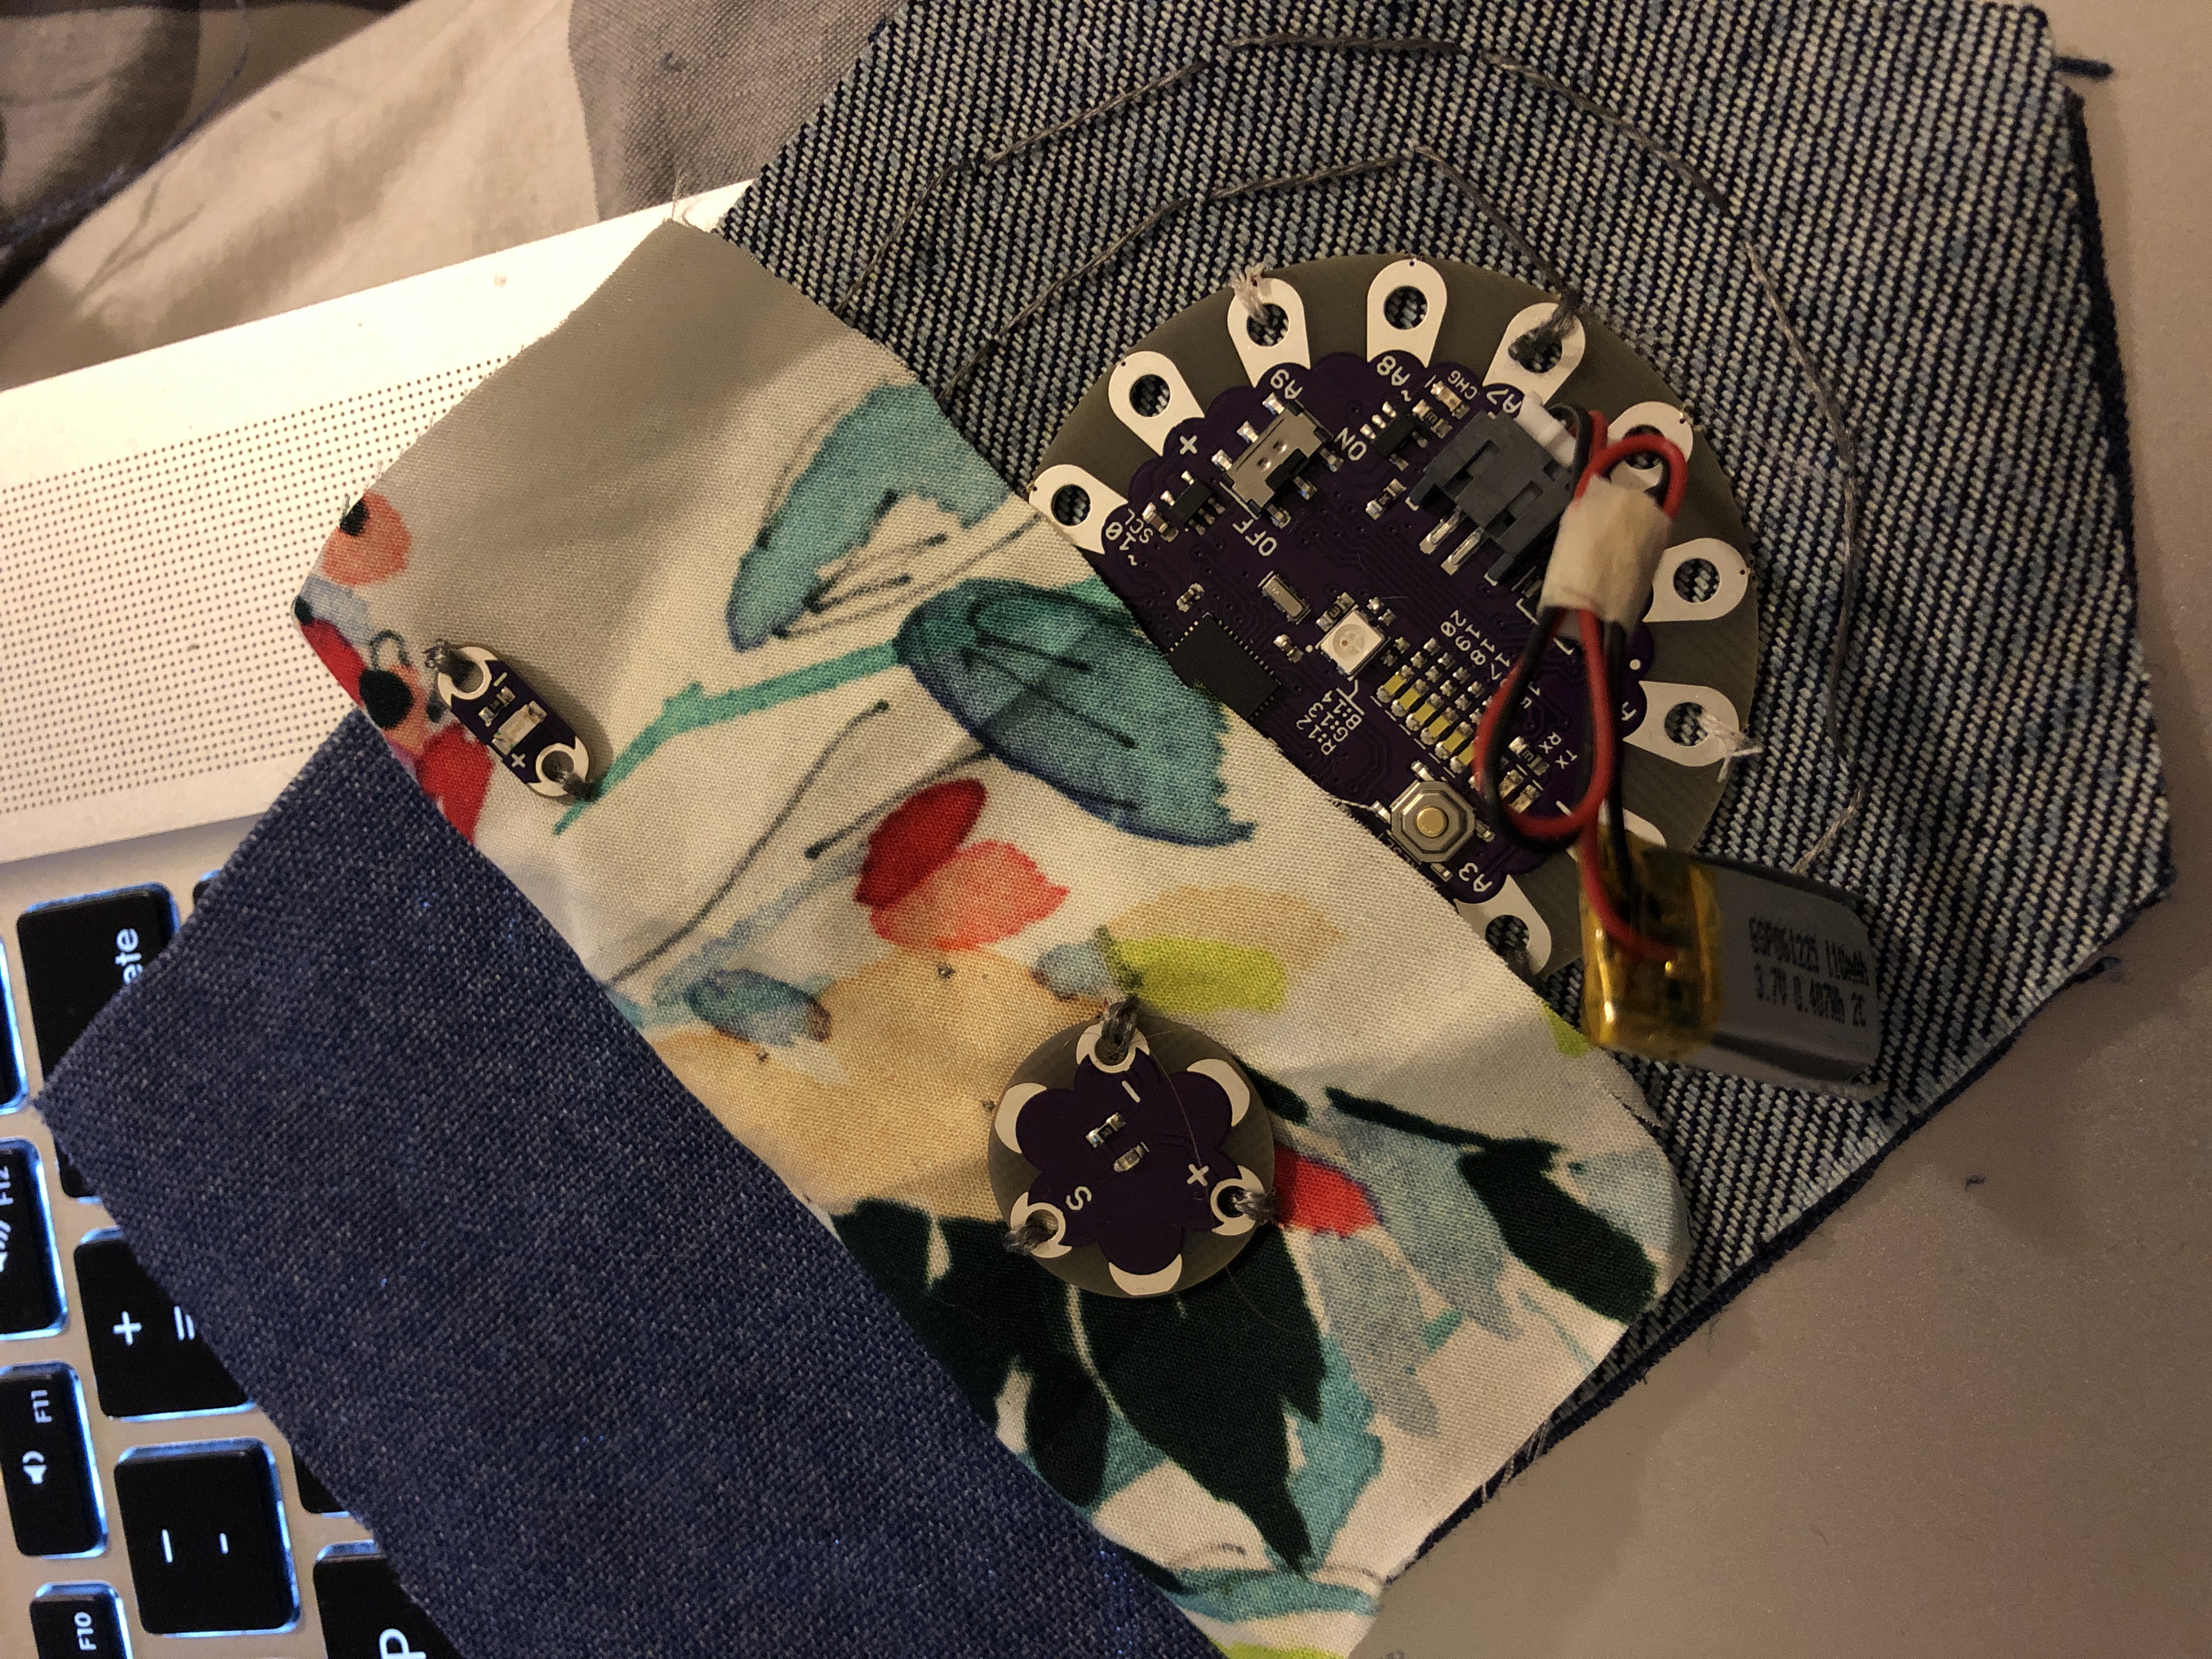
- Sensing layer: A LilyPad Light Sensor is used to detect when a user sits down (by covering the sensor in a pocket), triggering the timing logic.
Hardware Infrastructure
- Arduino LilyPad USB: The "brain" of the sensor, managing the timing and coordinating buzzer alerts.
- LilyPad Light Sensor: Providing digital/analog input based on the light level to detect sitting.
- LilyPad Buzzer: Provides a clear audio alert when the user has been sitting for too long.
- Li-ion Battery: Provides a compact and lightweight power source for the entire wearable.
- Micro-USB Cable: Used to program the LilyPad directly from your computer.
How To:
- Coding the board.
- Constructing the wearable.
Coding the Board
The first step is properly coding the board before splitting it apart to make the wearable. The LED used in the code is mostly for testing purposes and gives you pretty clear feedback that the device is working properly, though it would work just fine if the lines regarding the LED are taken out or changed to a different LED.
Software Logic & Timing
The Arduino code is programmed to be energy-efficient and user-friendly:
- Initialize: Setup the LilyPad pins for the light sensor (input) and buzzer (output).
- Polling: The LilyPad constantly polls the light sensor to detect the start of a "sitting" event (light level < threshold).
- Timing: Use the `millis()` function to accurately track the duration of the sitting event without blocking the program.
- Feedback: When the sitting duration exceeds a pre-set limit (e.g., 15 minutes), the buzzer sounds an alert pattern to remind the user to move.
Important Notes: The code uses a time based check point (`millis()`) so that the Lilypad board can multitask, rather than just relying on the `delay()` function. To learn more about `millis()` check out the Arduino reference page.
Code Overview: The code itself starts by defining all of the integers. A few of the integers used can be changed for preference, including: the tone of the alarm note, the LED used, and the length of the sitPeriod time.
After noting the inputs and outputs in the `setup()` the first chunk of code is meant to set up the Serial Monitor to read both the light sensor value and the currentTime, this helps with troubleshooting later in the process.
In order for the code to work and recognize when to start counting time, a `boolean` was created to register if the user was sitting down. When the light sensor is reading a value of less than 80, the board understands the user to be sitting down and will appropriately change the boolean. To ensure that the sensor is working, when the light sensor value is greater than 80 the LED will be dimly lit giving clear feedback that the board is working.
When the light sensor registers a value below 80, not only is the boolean `sittingDown` changed to true, but the current time is remembered as the `SitPeriodStart` to reference later in the code to know how long a user has been sitting. When a user has been sitting for longer than the assigned sit period designated in the beginning, an `alarm()` will sound (shown as the last function in the code). This alarm could be altered to any song or alert noise that can be created by the Lilypad buzzer.
The if loops allow for the board to continually check if the user is sitting or not and maintain a track of how long they have been sitting for. This accounts for if a user stands up before the given sit period has gone by.
Below is an example of the board working:
Constructing the Wearable
After the board has been properly coded, it's time to integrate it into a wearable. The example shown was just created with scrap fabric I had; I used denim for the pocket insert because it was stiff and sturdy providing a good base for the Lilypad board.
The first step was to attach the main hub to the fabric using non-conductive thread. I used four small tacks to ensure it was secure on the fabric.
After the hub was attached, I went through using conductive thread and sewed the LED, light sensor, and buzzer to the fabric connecting them to the appropriate ports and following the circuit schematics. It’s important to make sure none of the threads cross each other, otherwise the device will short circuit, make sure to plan out where each part will sit so there are no intersecting paths.
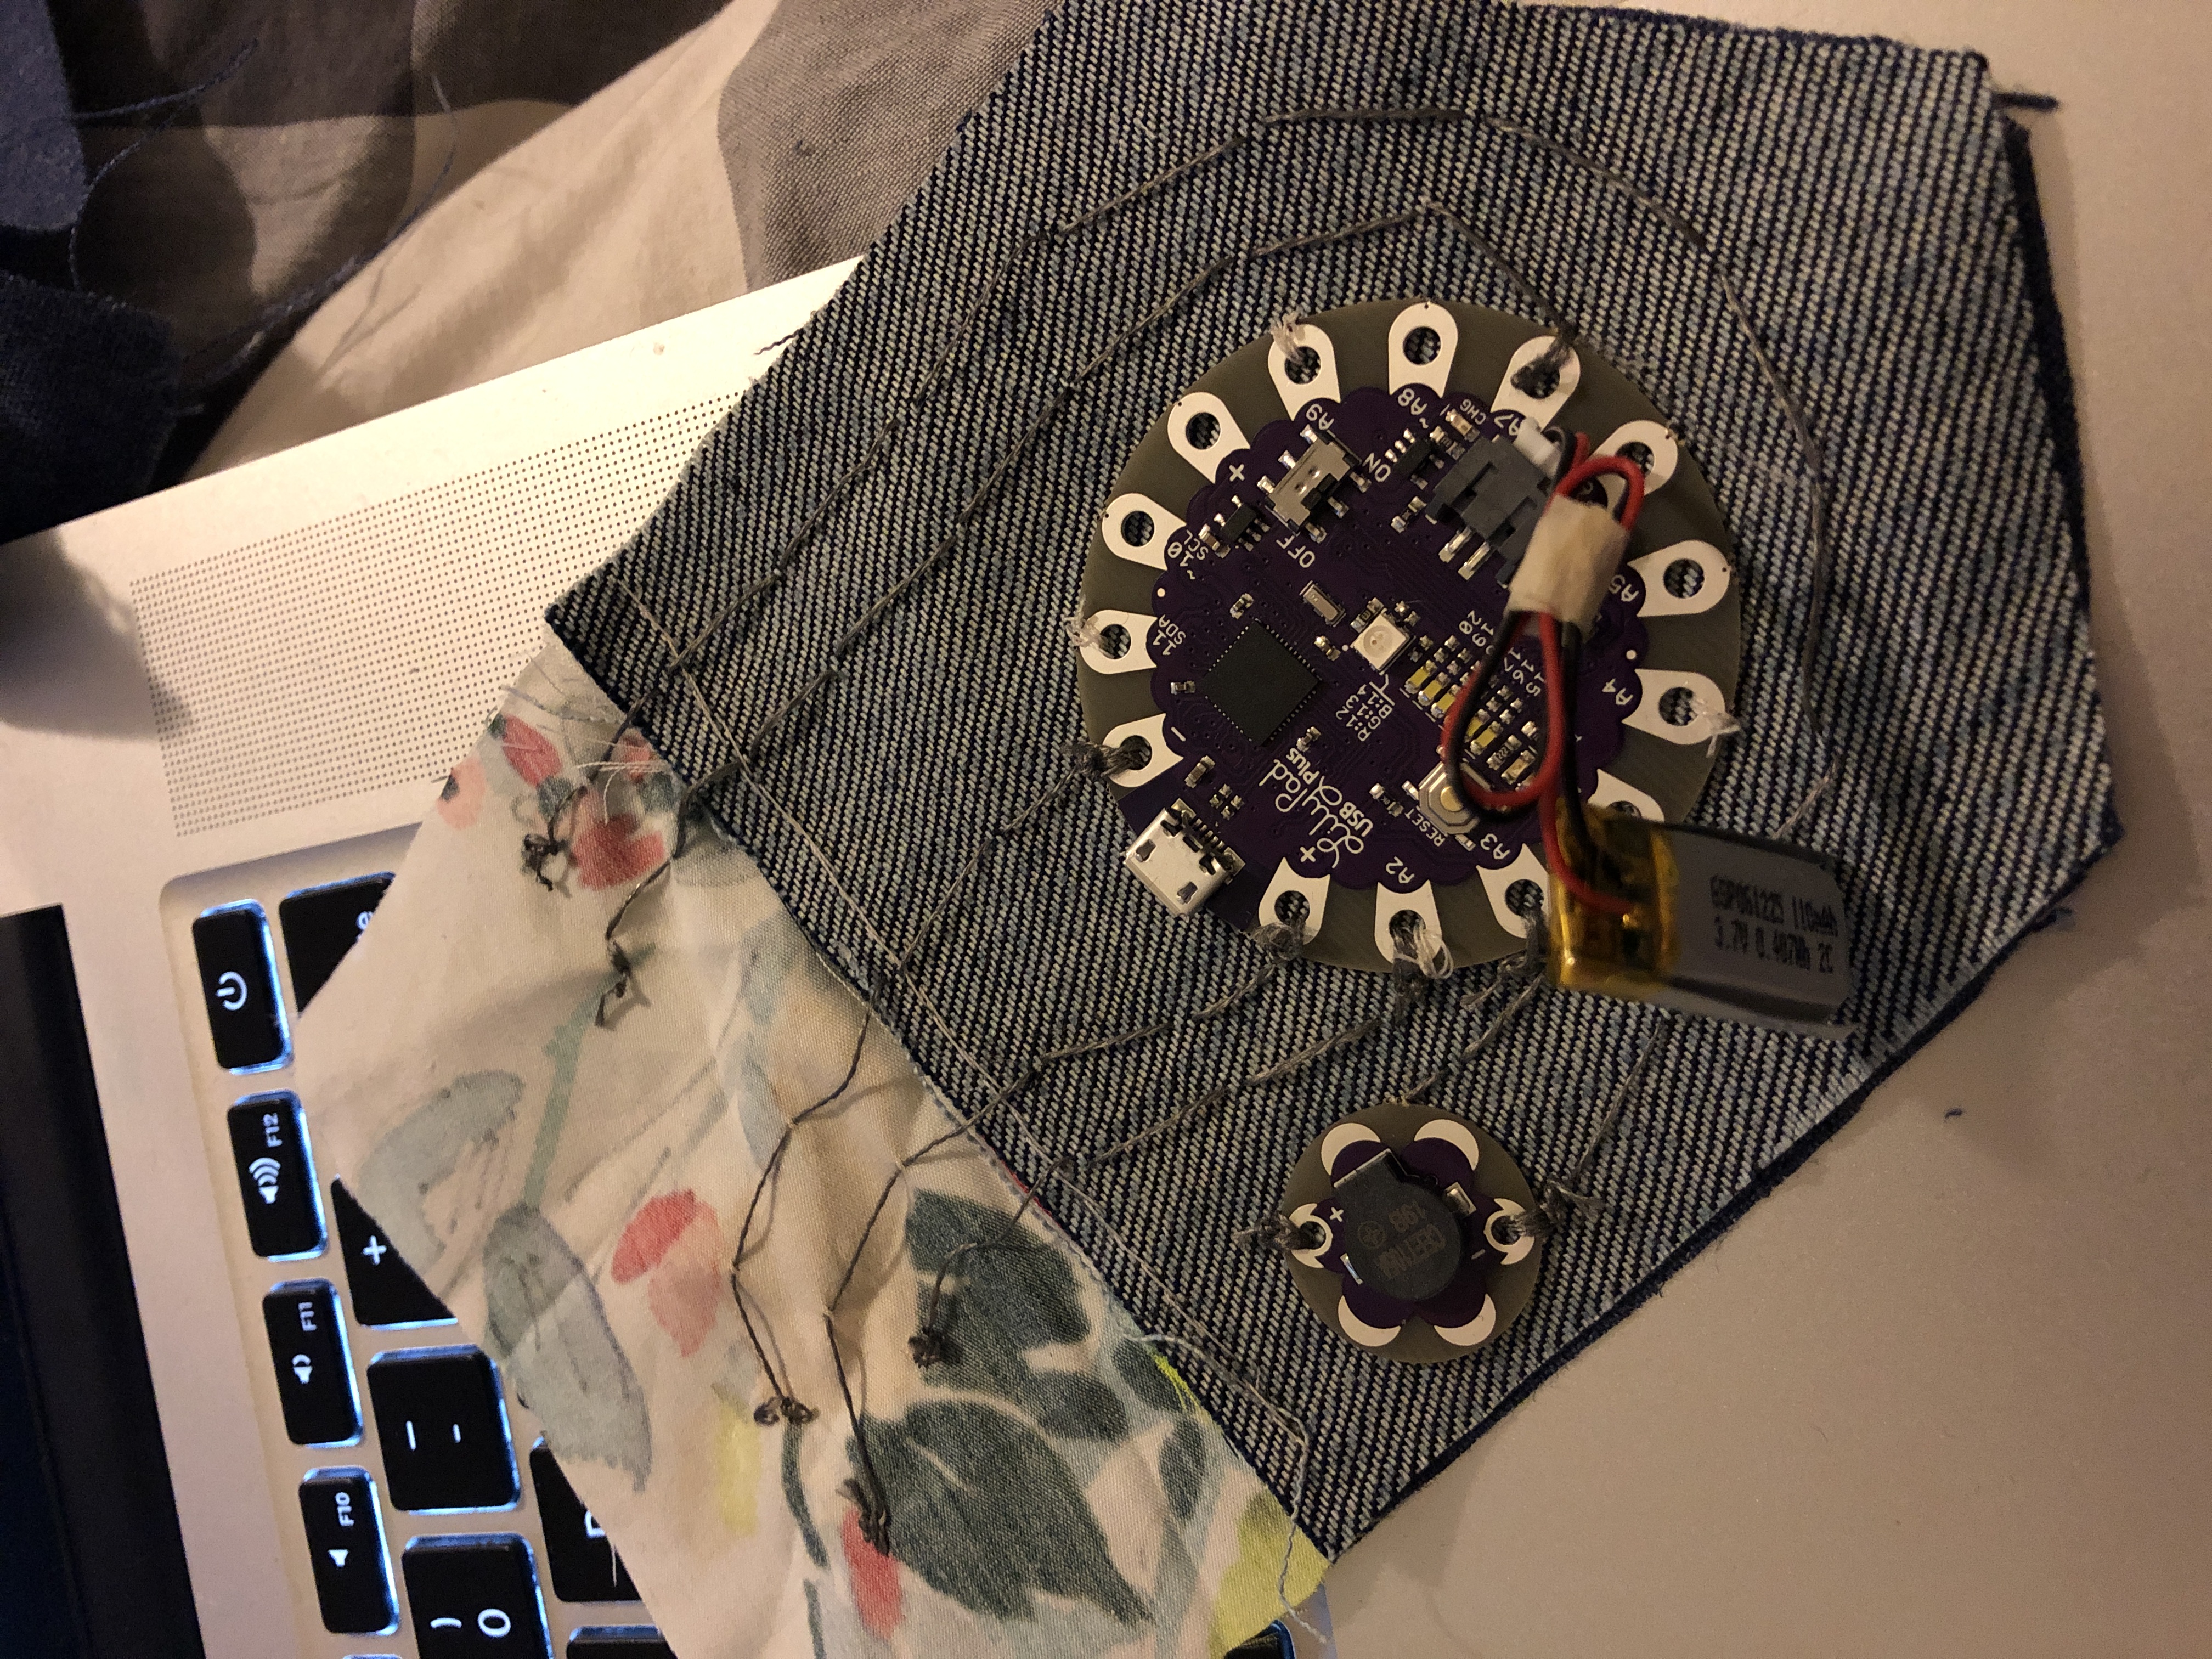
Before closing the wearable, the battery was inserted to check if it was working and charged.
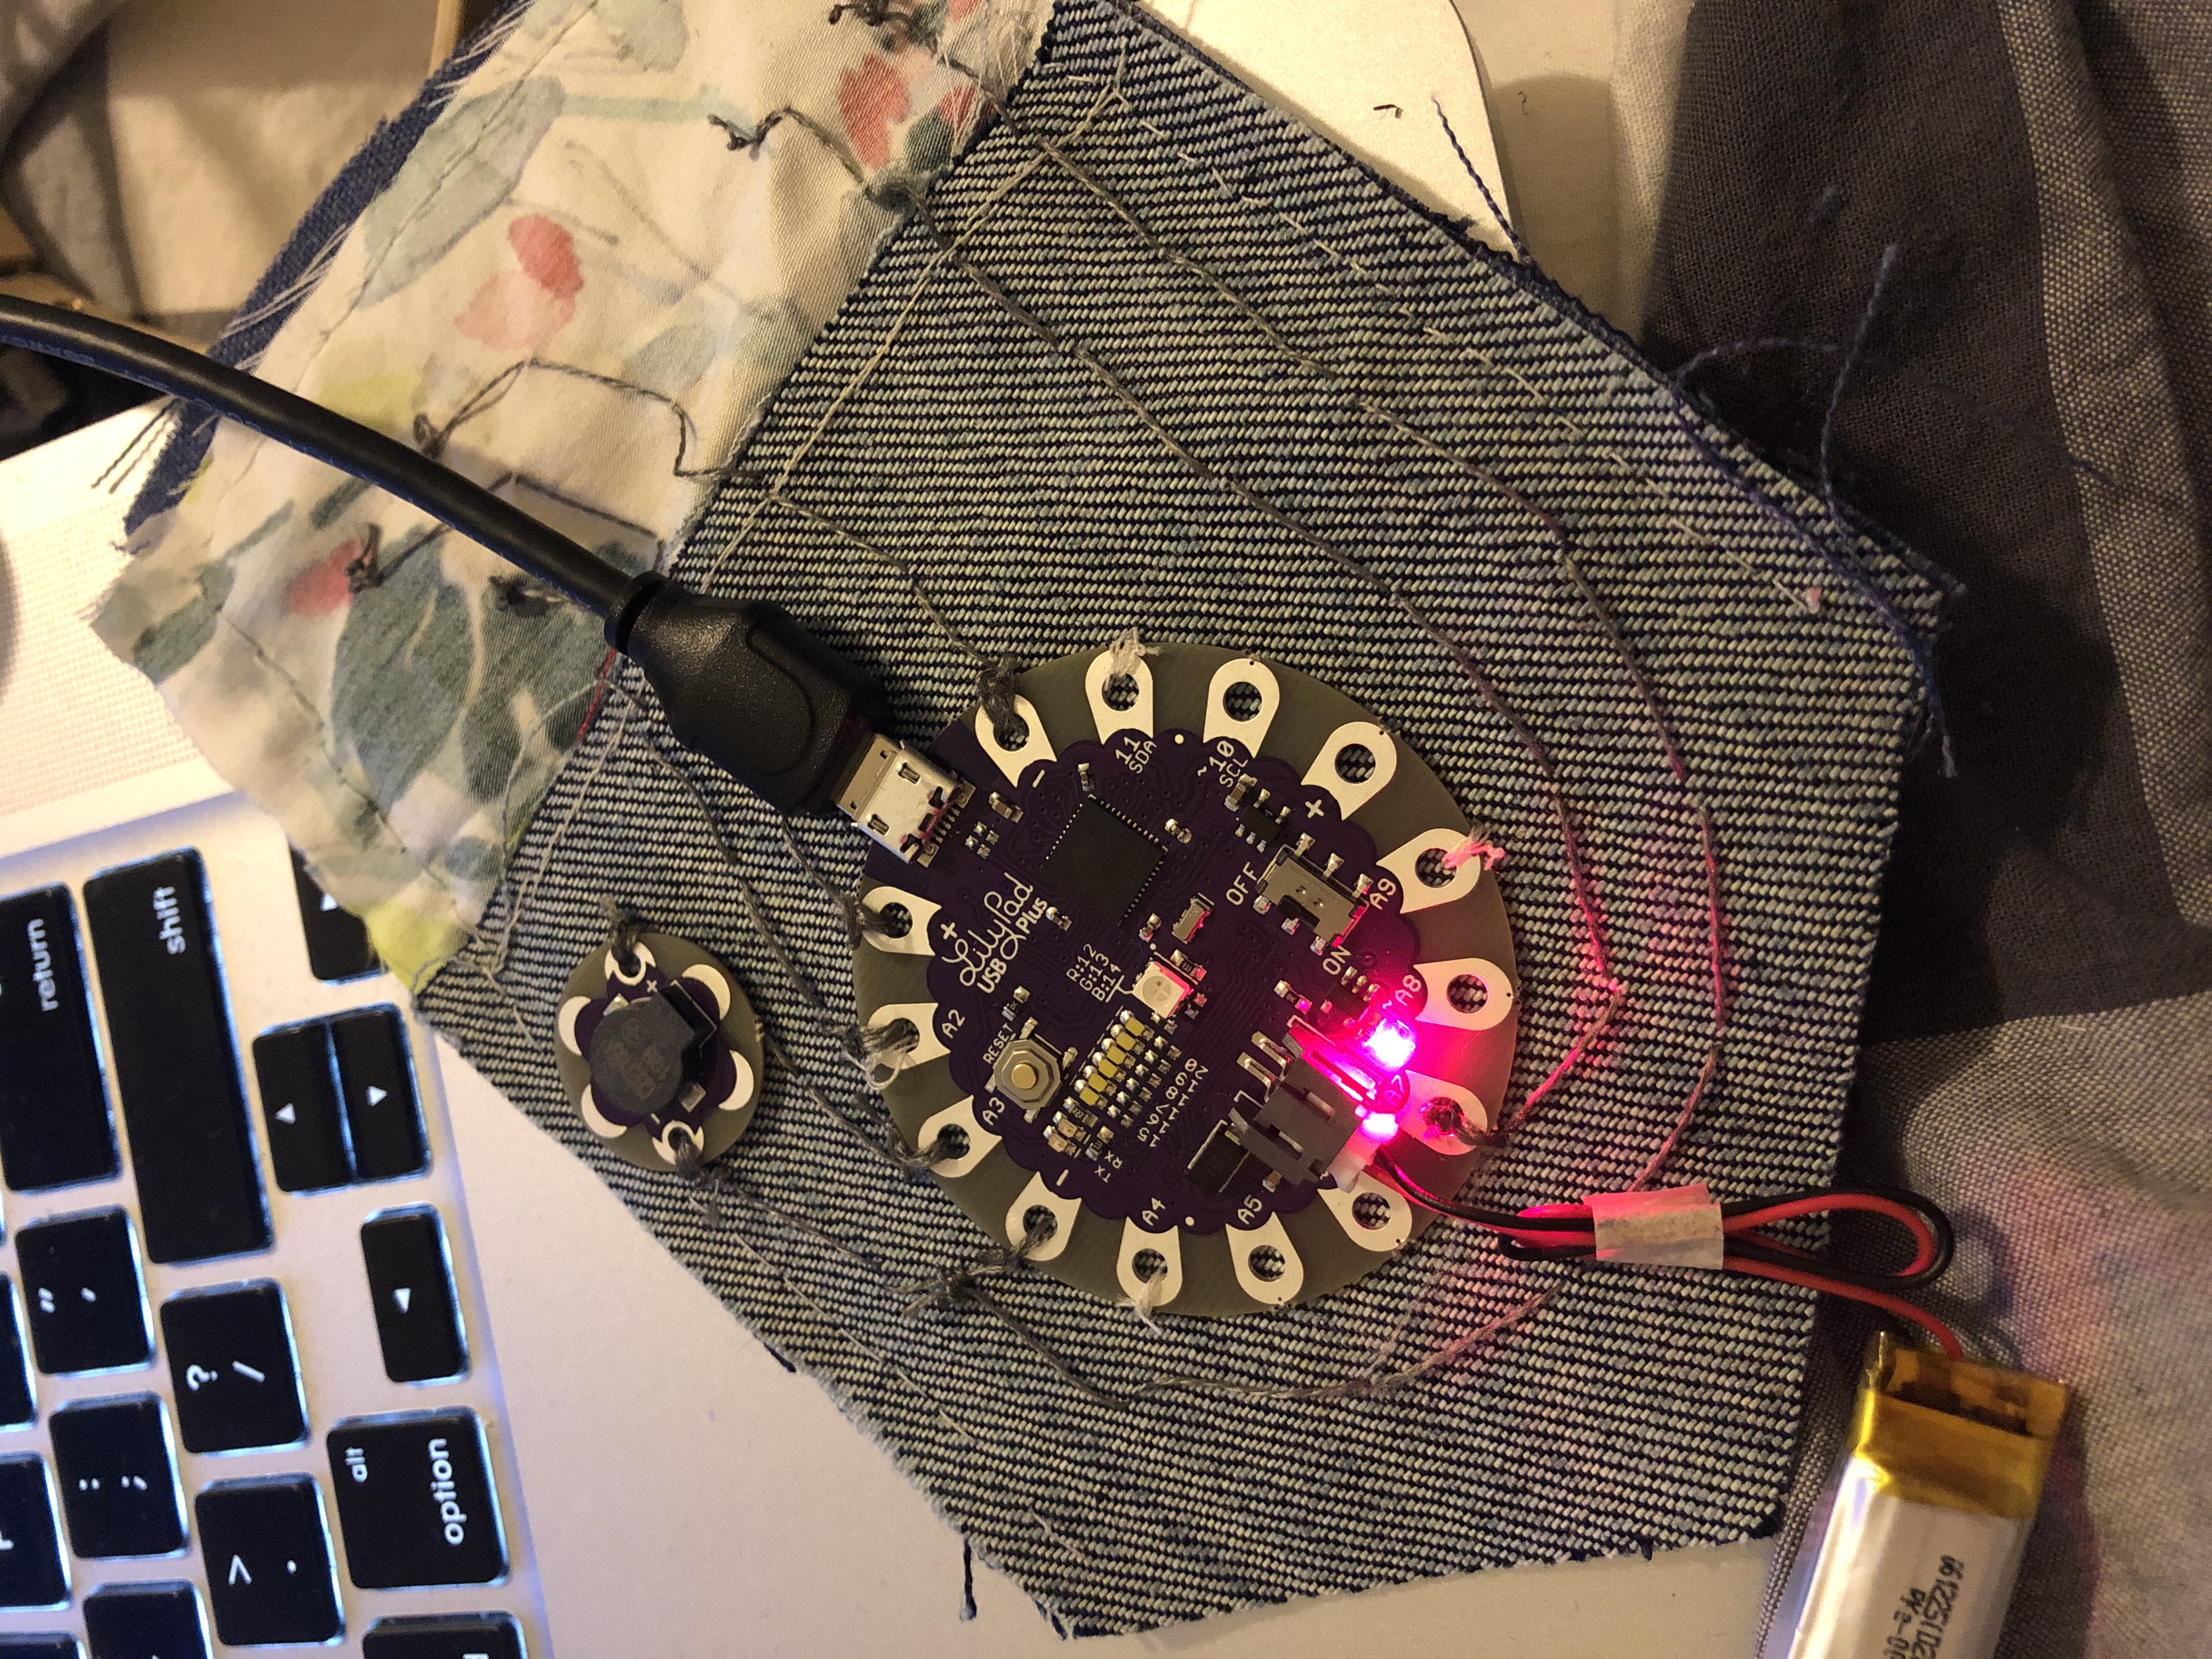
This step is optional, but once everything was sewn, I added a back panel to enclose all of the tech and ensure the wires would not intersect each other when the device was bent over the pocket.
Here you can see the LED turning on and off as the light sensor is covered as well as how the alarm goes off when it has been covered a given period of time.
The device can pretty simply be worn over the pocket as shown in the final image, so when choosing fabric, be sure to take into account which fabric will be visible outside of the pocket.
Future Expansion
- Vibration Alert Integration: Add a small LilyPad Vibration Motor for discrete silent alerts rather than an audible buzzer.
- Bluetooth Health Sync: Add a small BLE module to sync your sitting data with a health app on your smartphone.
- Multi-Sensor Integration: Use multiple light sensors or accelerometers to improve sitting detection accuracy.
- Custom Fabric Buttons: Sew buttons or sliders using conductive fabric to customize the alert duration or turn the sensor on/off.
Sitting Sensor is a perfect project for any electronics enthusiast looking for a more interactive and engaging health tool!