This is a basic project for the starters who are stepping into the Arduino world.
Why this?
The aim of this project is to blink the LED in a more smarter way using Arduino. The blinking simply means the ON and OFF of the LED, it's more simple as that of switching the power supply ON and OFF. Then why can't we make it much easier again? What about assigning somebody to do the ON and OFF procedure of LED? Here we go with Arduino, who is going to control the blinking of LED in much smarter way than we do. The whole blinking setup is completely depended on delays provided by the programmer.
How this?
Now we'll discuss about how we are going to make this happen.
First and foremost step is to grab the components. The components needed are: LED(1), Arduino UNO(1), Resistor 221 0hm(1) [you can use your choice], Jumper wires(1), Bread board(1). We aren't mentioning about any required power supply here. Because, 5 V power supply can be get through USB connected to your computer, for the purpose of dumping the code to micro controller. It is also possible to use a battery to provide the power instead of depending on USB.
Once collected the components, do the connection as shown in the schematic below.
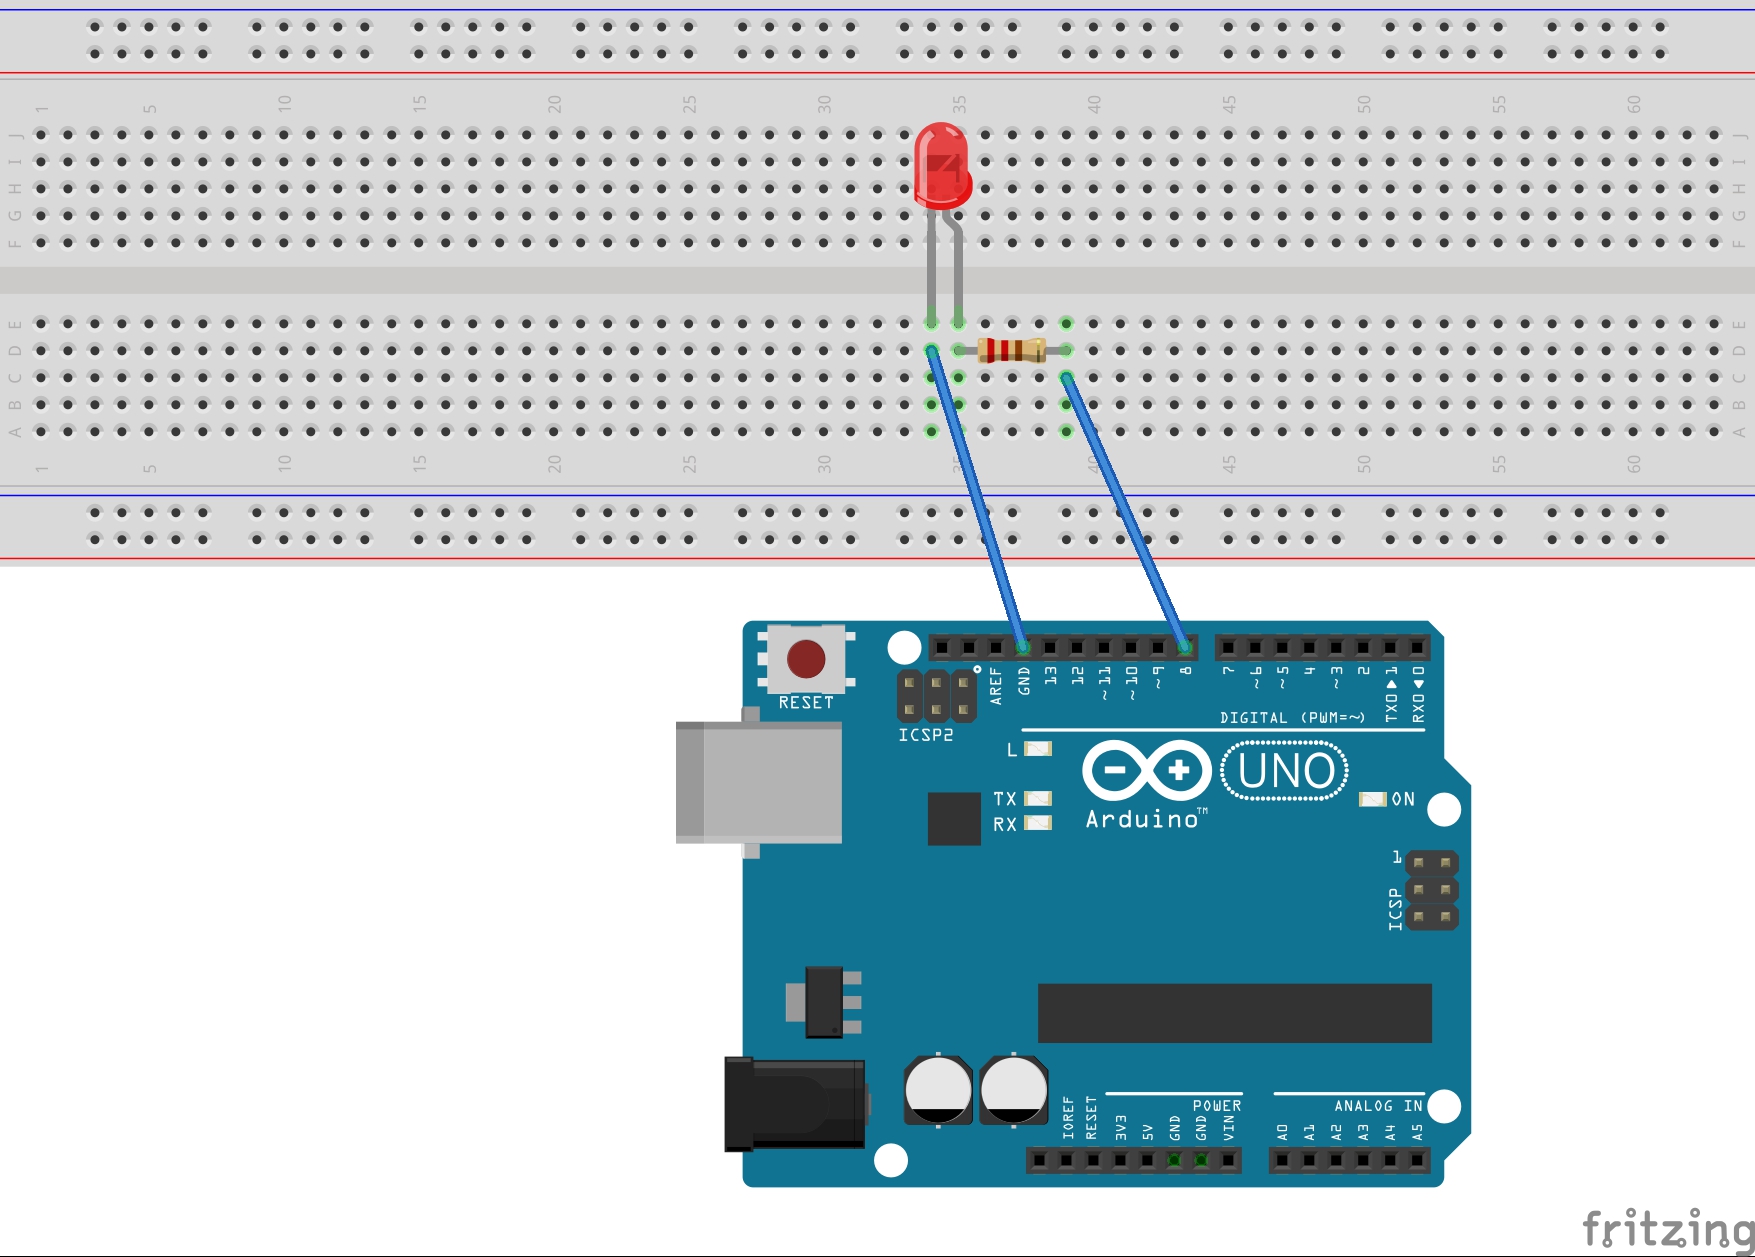
Plug the short leg of LED into the GND (ground) header. Also connect the positive leg to digital pin '8' as per the code we use now. You can use any of the other digital pins, and change the '8' in your code to match. Don't forget to add a resistor in between positive leg of LED and digital output pin of Arduino, to prevent the burning of LED due to high voltage. Remember, a resistor can connect in either way around. Use a bread board and a pair of jumper wires to make all the above mentioned connection.
Or you can consider of blinking an in-built LED in the Arduino board itself and thus avoid the whole external circuit procedure discussed above. You have to change pin number to '13' or 'BUILT_IN', in the code using (the BUILT_IN led and pin 13 connected internally).
Next step is to program the micro controller chip inside the Arduino. Download the tool from: https://www.arduino.cc/en/Main/Software
You can get the code for blinking an LED as follows:
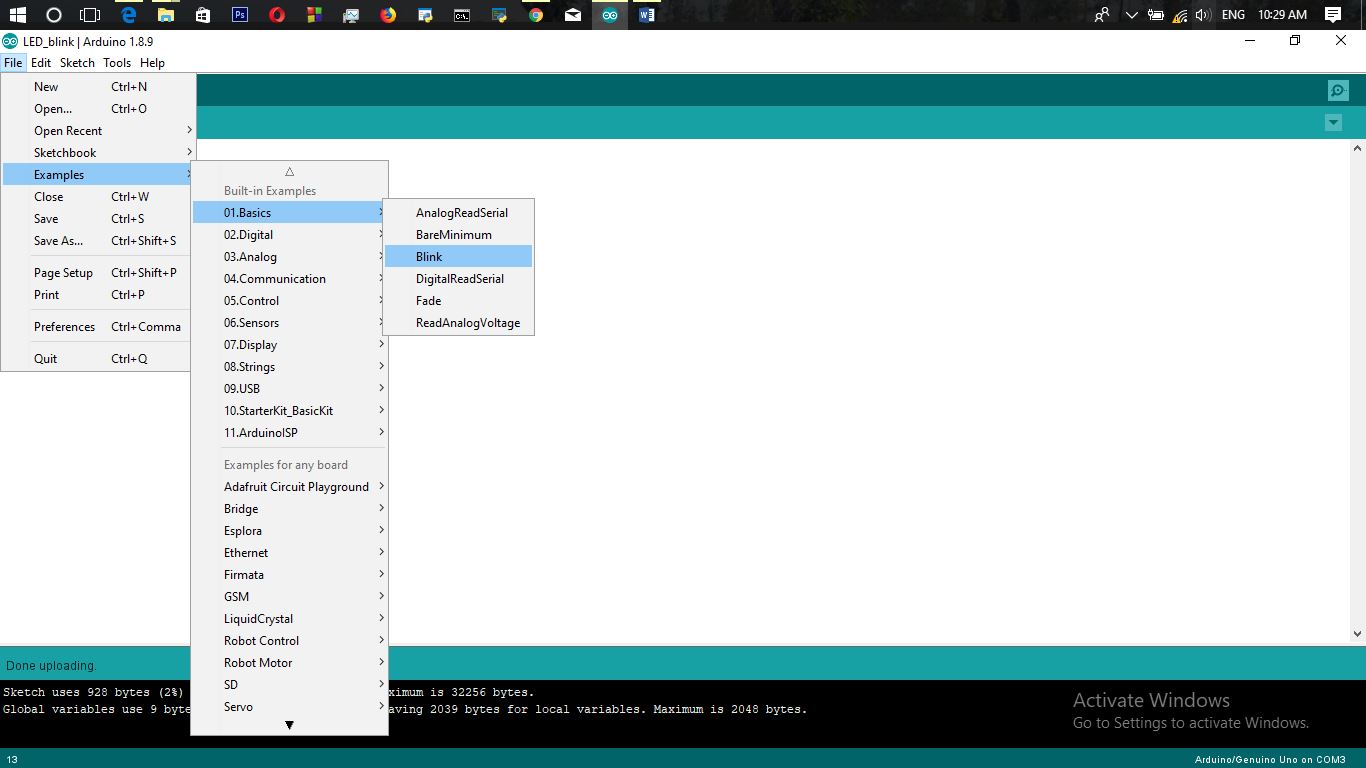
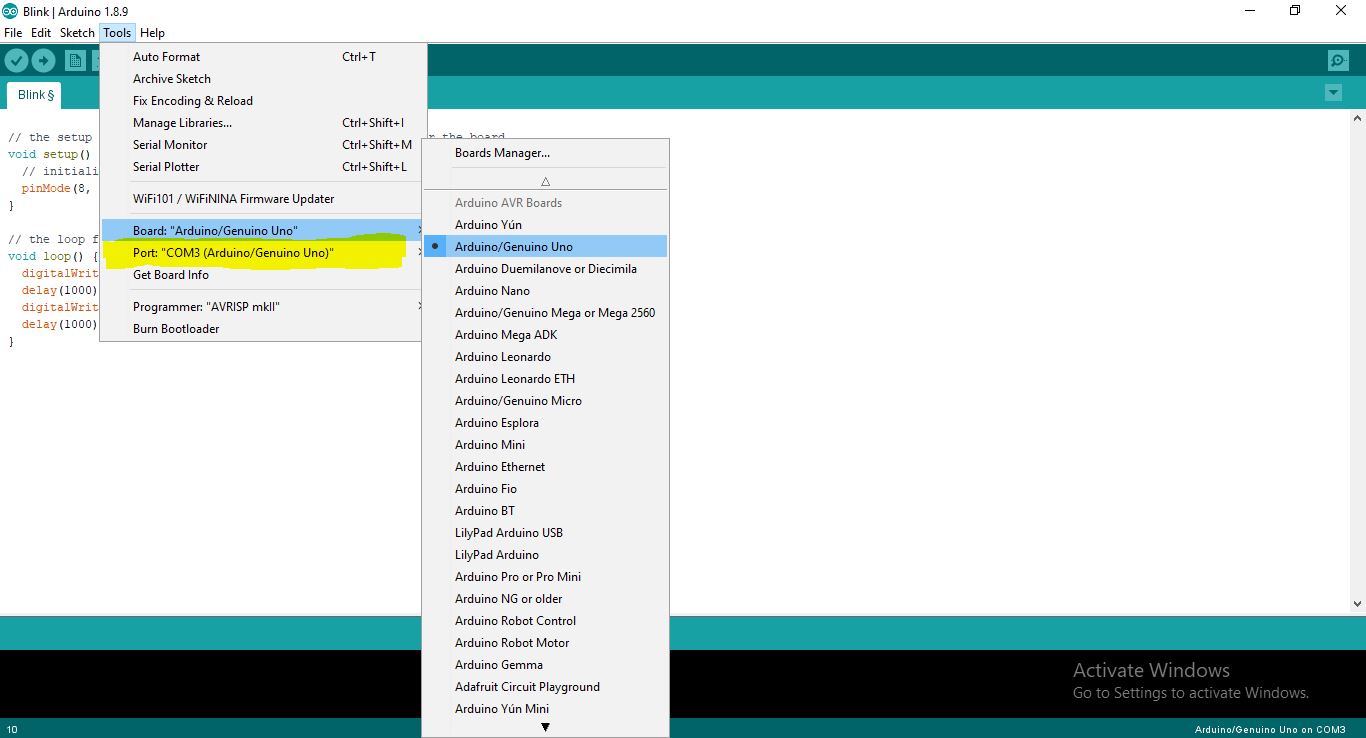
Get the code, then connect the Arduino to the computer through USB port. Choose the board type and COM port number in the software. Then first verify and next go for upload. Then observe the magic happens on your LED.
Expanded Technical Details
Beyond a basic "Blink," this project explores the technical principles of PWM (Pulse-Width Modulation) and digital timing transitions.
Logic-Gated Visual Signal Foundations
- Temporal Duration Scripting: The Arduino manages the state of a digital pin (like Pin 13). The standard
delay()function is a simple way to control timing, but it blocks all other code execution. For more advanced applications, you can move tomillis()-based non-blocking code. This allows the LED to blink on a precise schedule while the Arduino simultaneously performs other tasks, such as reading sensors or responding to button presses. - PWM Intensity Fading Matrix: To create effects like a smooth "Breathing" LED, you can use the
analogWrite()function on pins marked with a PWM (~) symbol. This function uses Pulse-Width Modulation, rapidly switching the pin on and off at a high frequency (490Hz on most Arduino boards). By varying the ratio of on-time to off-time (the duty cycle), you can effectively mimic an analog voltage change, controlling the LED's brightness to the human eye.
Prototyping
- Verified with Arduino IDE: This project is optimized for 100% stability using the official Arduino IDE, providing a clear and reliable first-step for any student entering the world of embedded systems.
Done!!!