Intro
Hello, greetings from Indonesia.
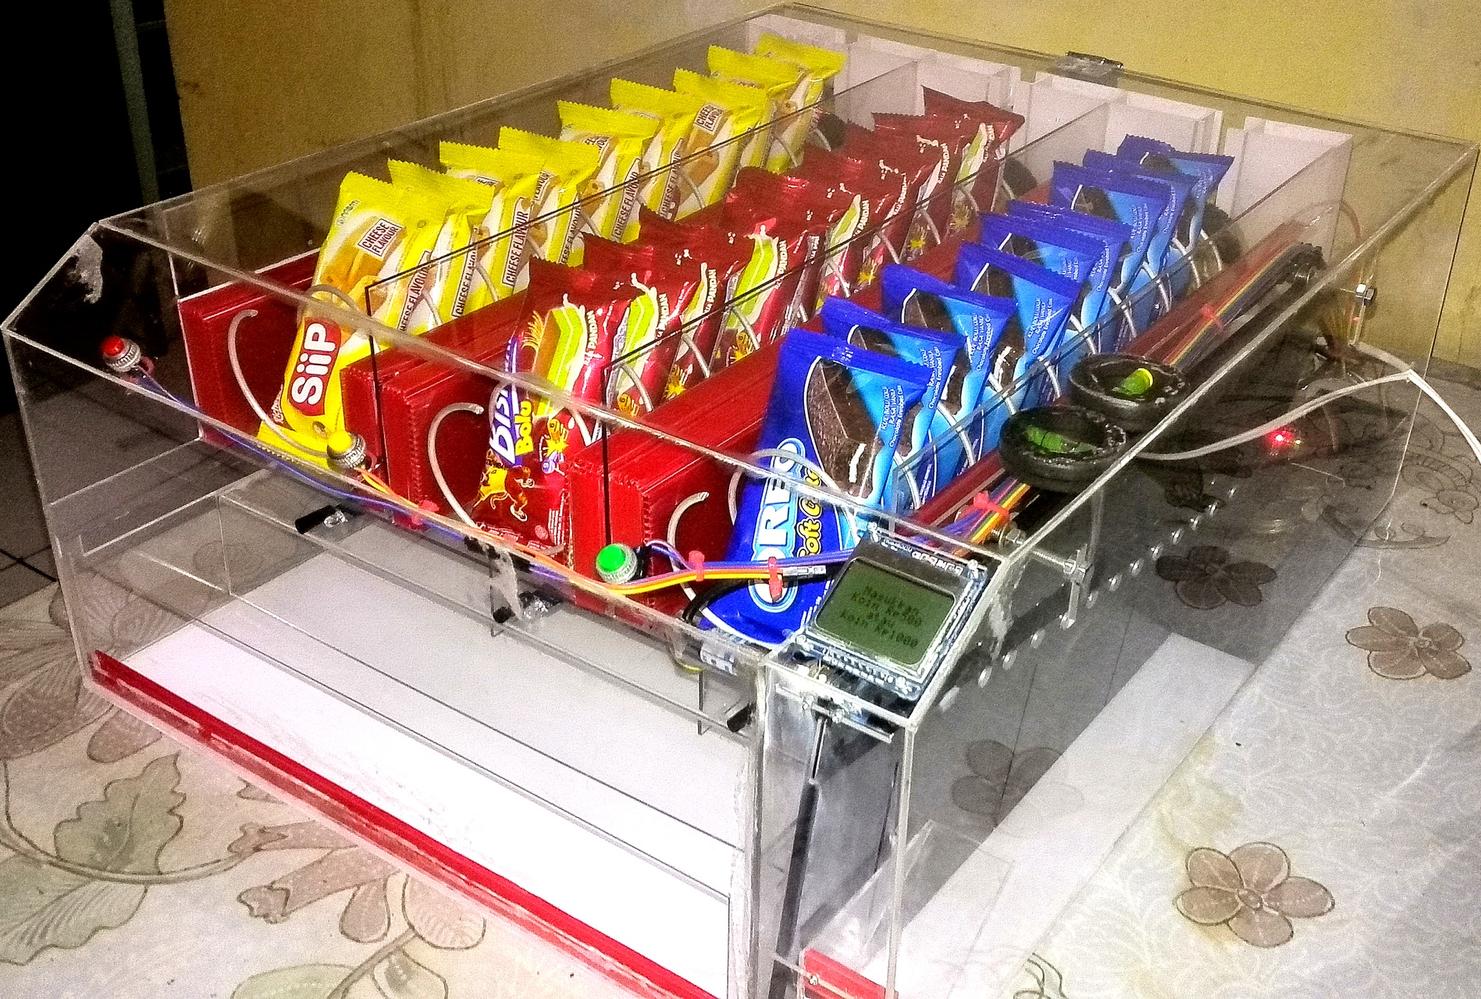
This snack vending machine is my final project. This project was actually finished in end of 2015.
The aim of this project is to create a vending machine, powered by arduino microcontroller, using "any cheap and easy to get" components available in local store.
Goals: The vending machine has to accept certain amount of money (in coin), before let customer choosing their product, and of course delivering product.
This video below is Snack Vending Machine final test video, from payment/coin test, product selection, and product delivery.
So, this is what i did to achieve that goals:
Step 1: Sketch the concept
First think first, the concept.
This sketch is my very first idea of what i might build. Its gonna be a snack vending machine, accepting coin as a payment, and using Acrylic case.
Pick and mature your concept, try to think about anything, any scenario, any condition.
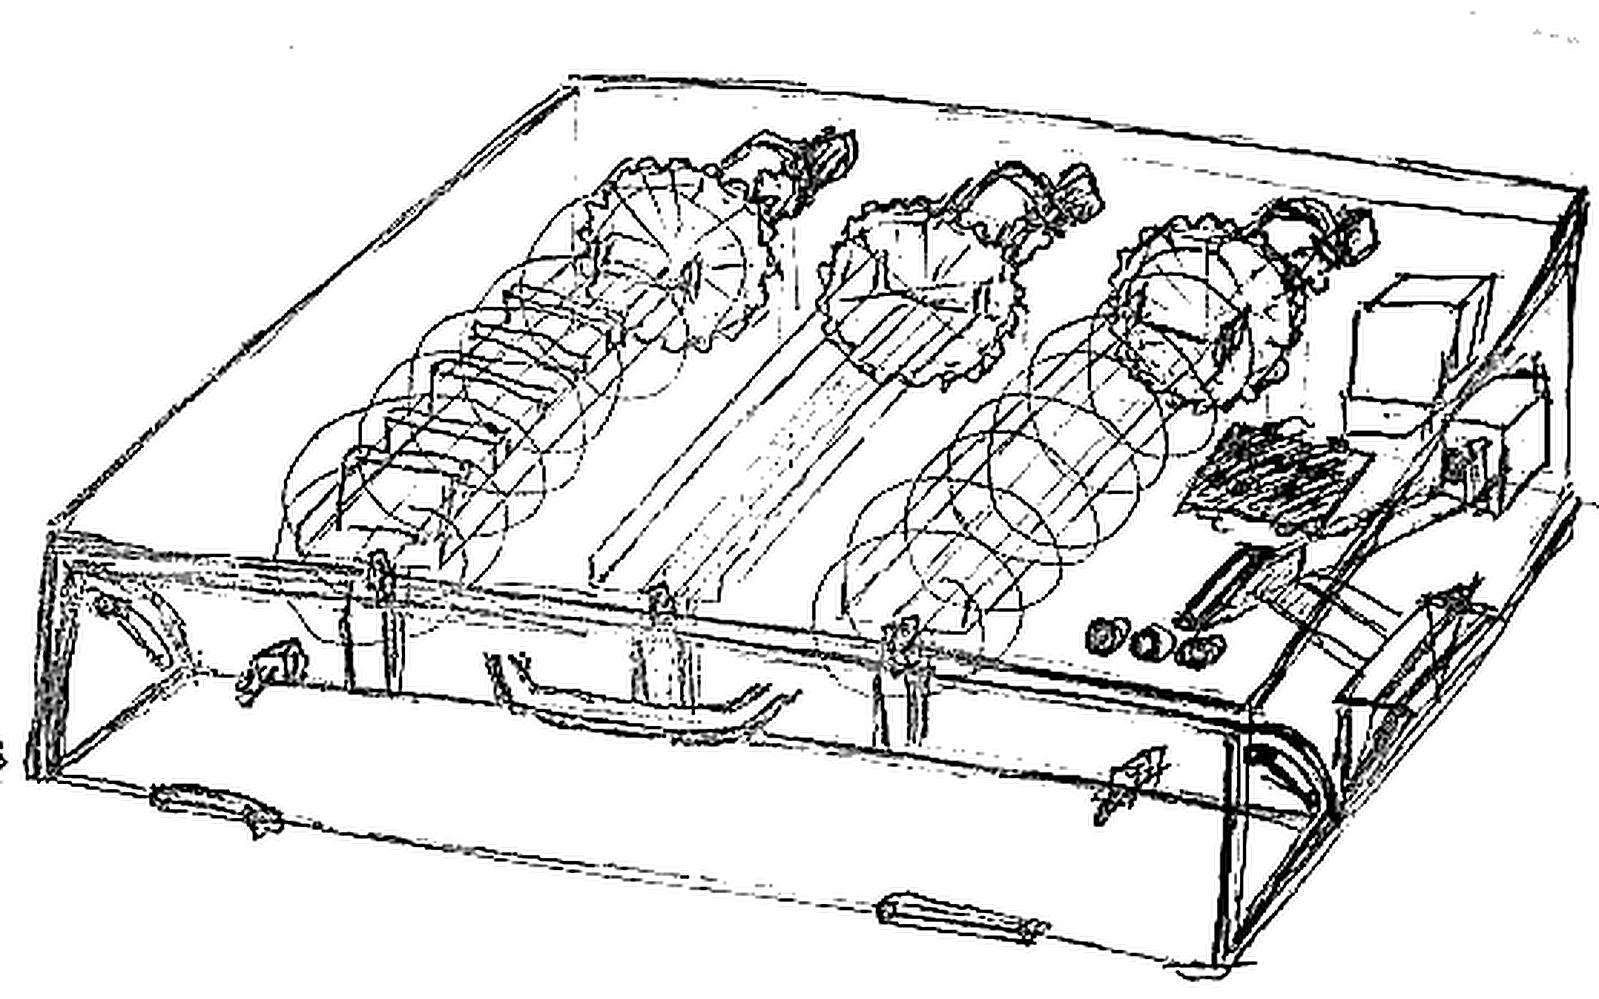
Try to sketch everything, dont worry if your drawing is ugly, seriously look at my drawing. :D
The right time to think about the un-thinkable is before the project even started.
Step 2: Create 3D Model
Maybe this step is not necessary for every people, but for me, and for this project, its crucial.
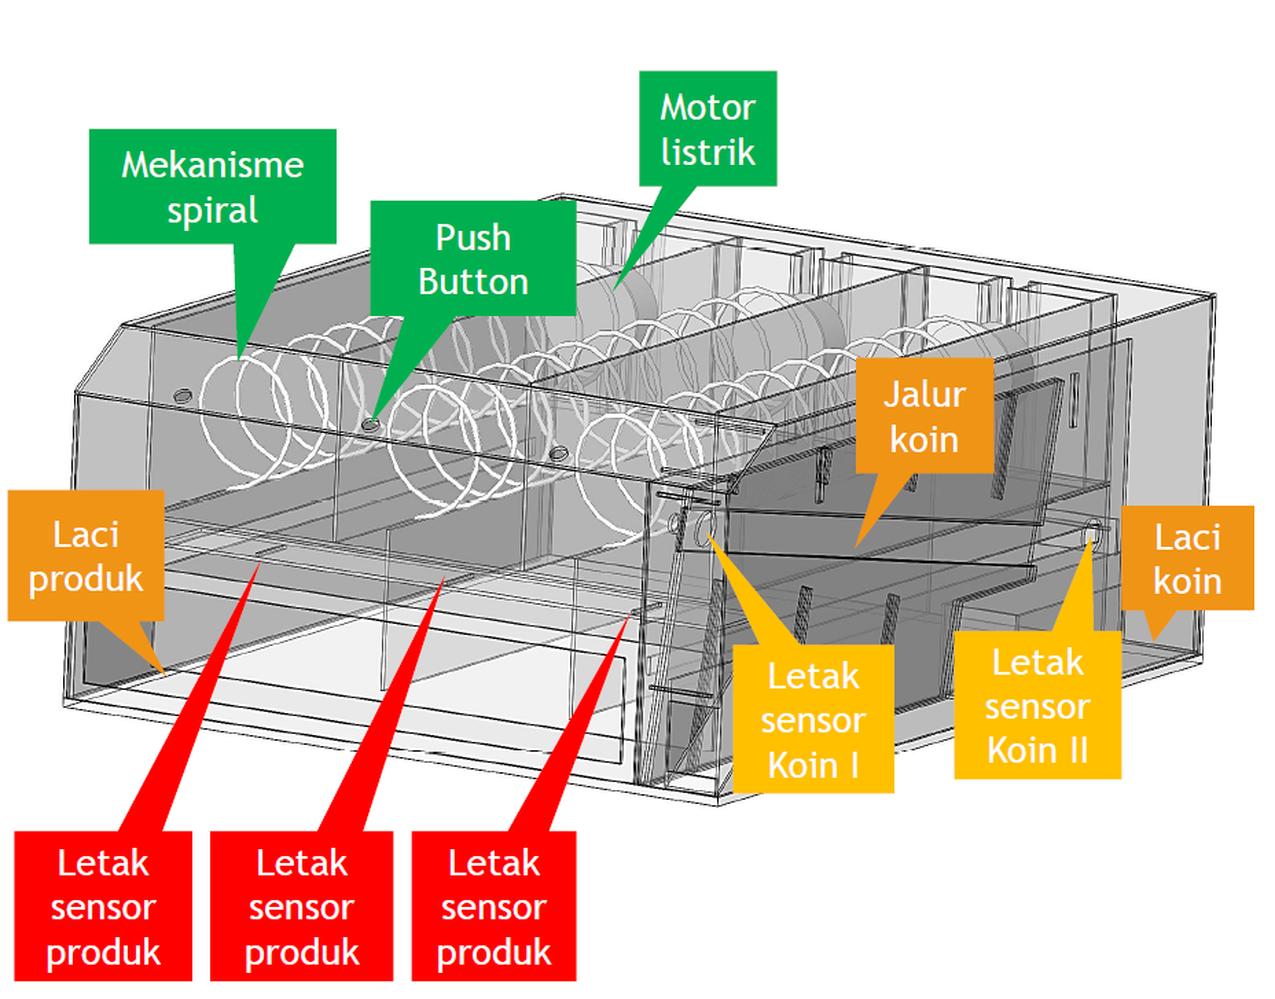
I create solidworks model. And i mean really fully completed model. I need to determine the dimensions of the product, in this case, a snack packages. The size of accepted coins, the size of rejected coins, size of coin slot, size of coin ramp, size of push button, sizes of almost everything. This step include compare, pick, and measure the size of Arduino Microcontroller used. What sensor used, or will possibly use in the future, where to placed, whats the dimension and sizes, where accepted coins goes to, I also think about where I should put a monochrome LCD (its not necessary but I insist).
And finally, still in solidworks model creation, dont forget to create holes for screw, for every parts.
The case are made from Acrylic material, and cut using laser cutting method. That's why I create model as detailed and accurate as I can, because the more accurate my model, more precision case I will get.
Step 3: Design a Coin Slot
To filtering coins, first I am using coin dimension. By designing slot coin, I can determine what coins size are allowed to enter the machine.
Then second filter, I determine what coin size are allowed to accepted and rolling down to the coin holder.
Because by using gravity force, if coin sizes (diameter) are smaller than the length of coin ramp/track, then it will falling down and rejected.
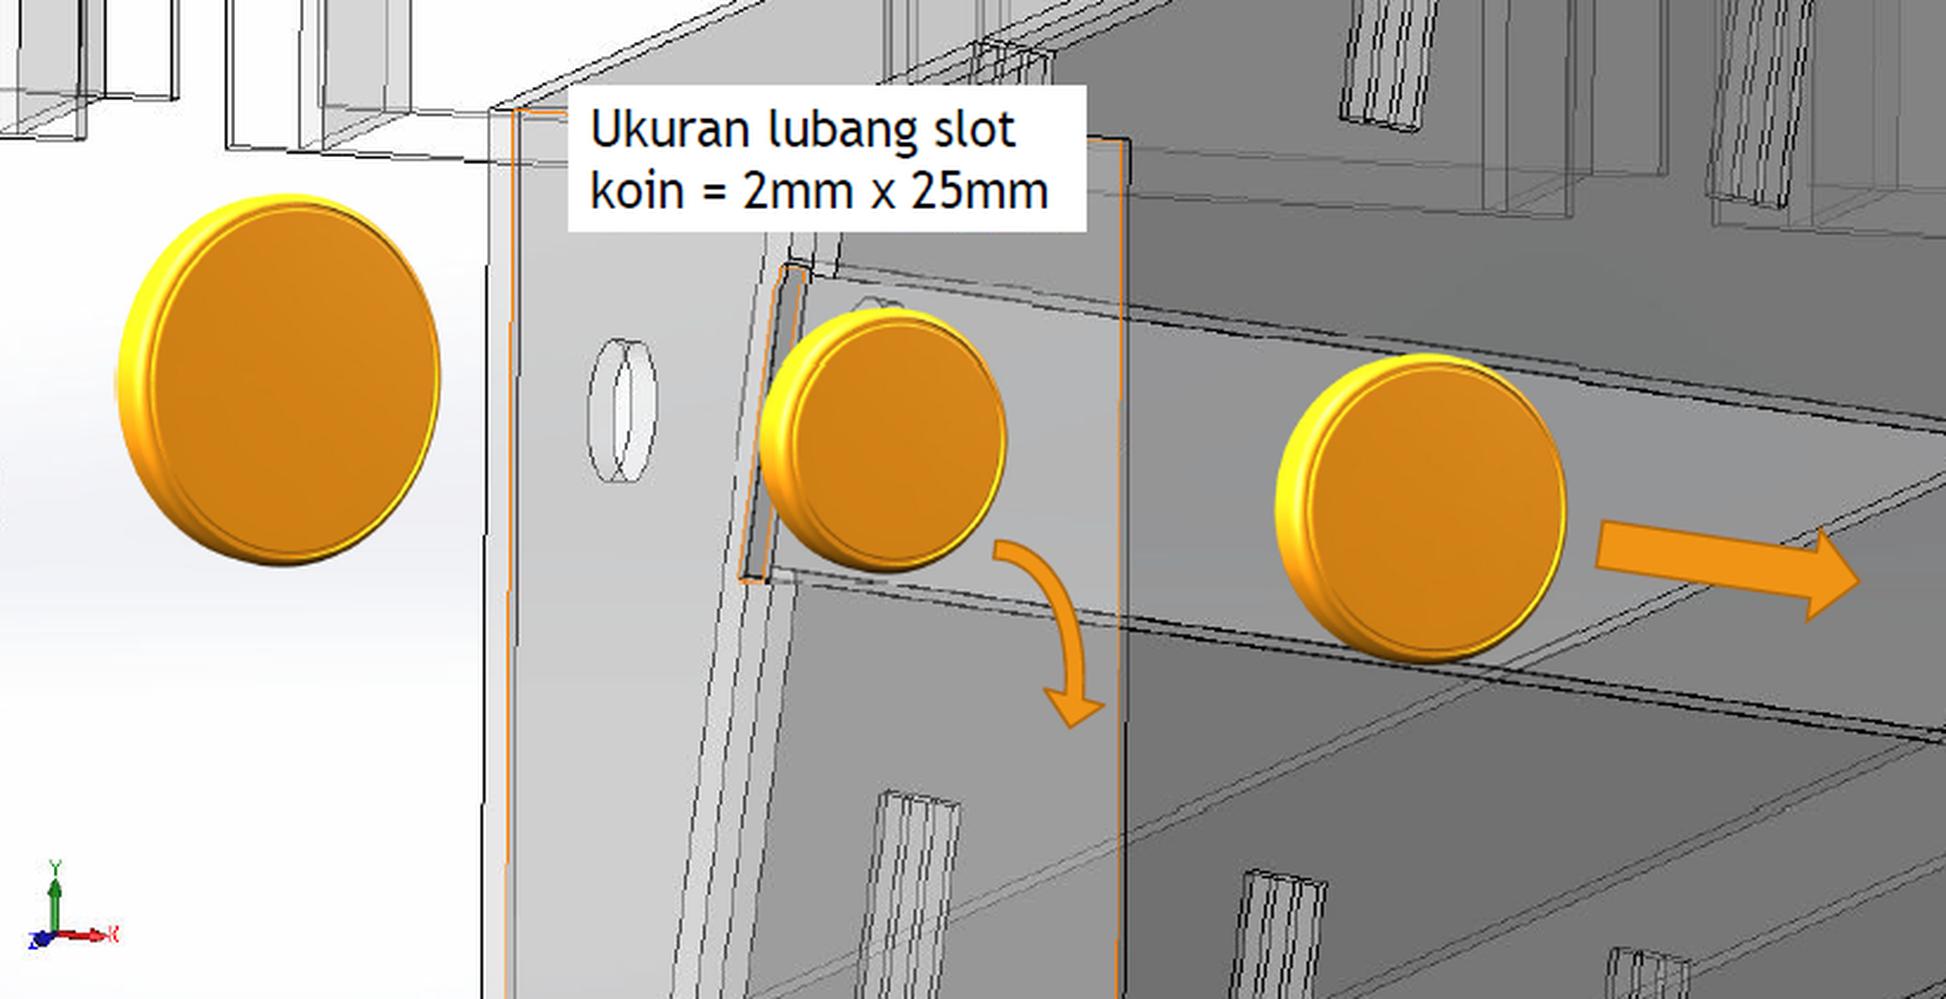
- On the pic above, coin on the left wont enter slot coin.
- Coin on the middle will fall and rejected.
- Coin on the right is accepted coin, goes down to coin holder.
This is video when i am doing some coin testing, it will show you how this method working.
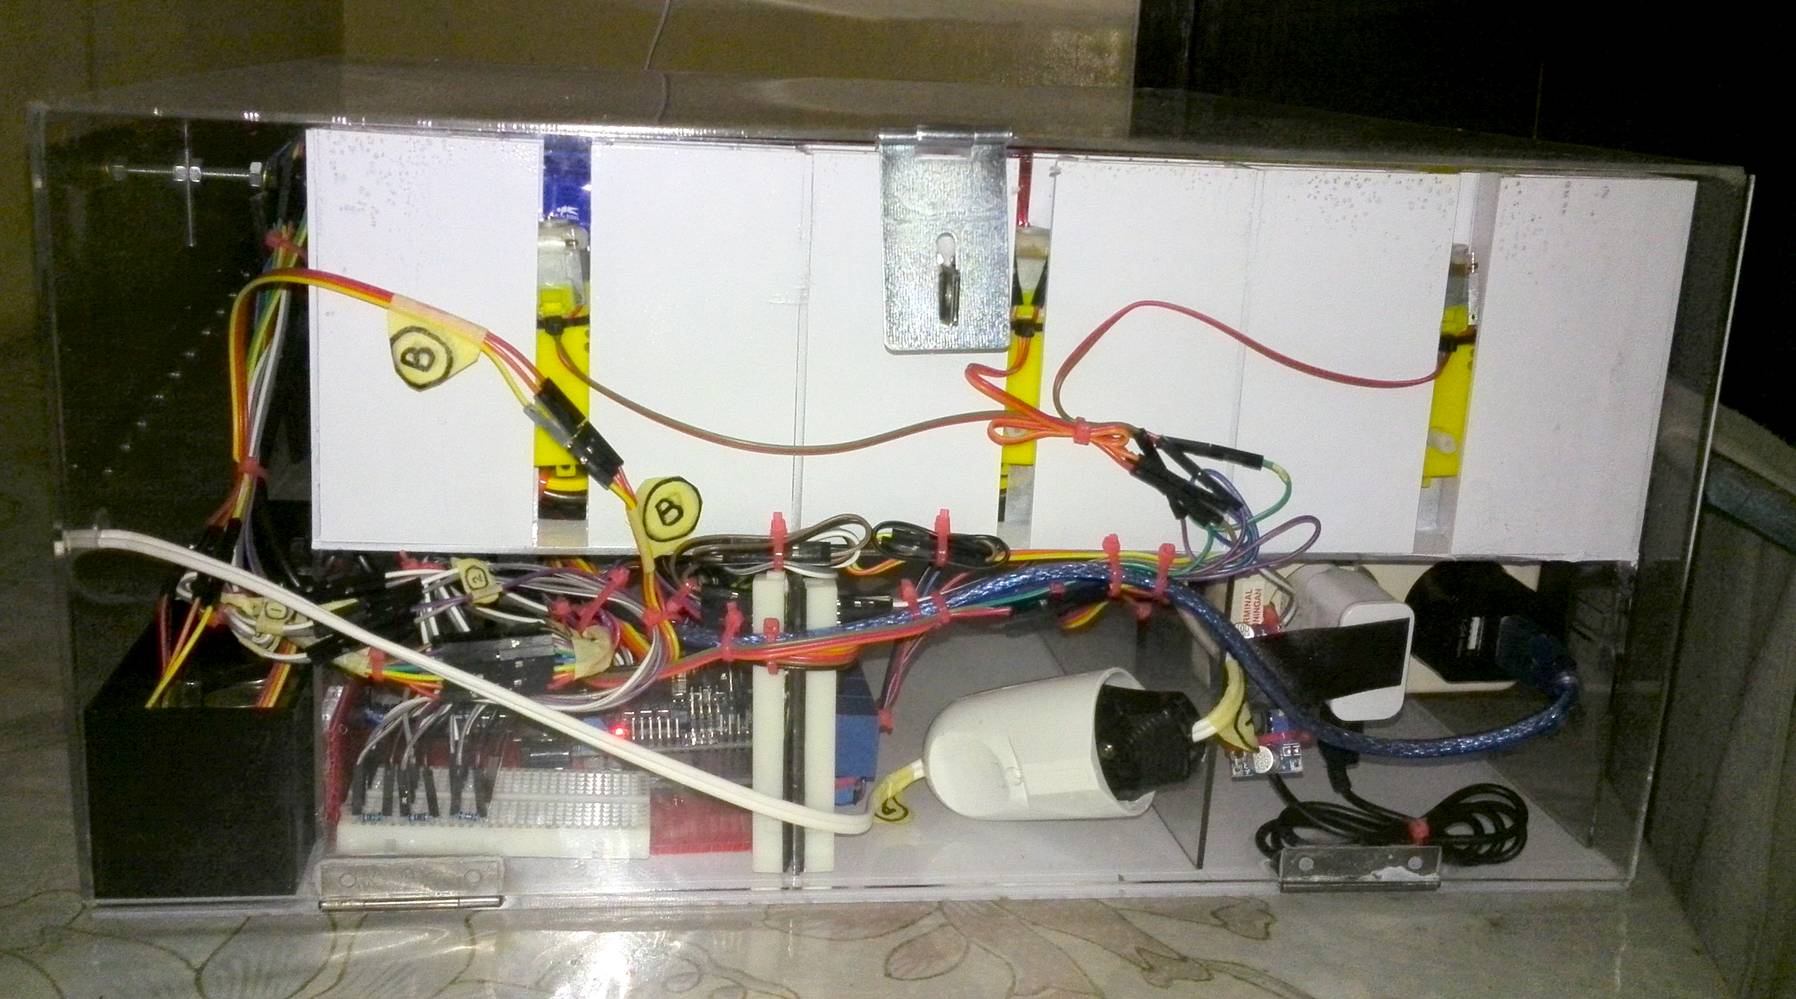
Step 4: Prepare and test every component
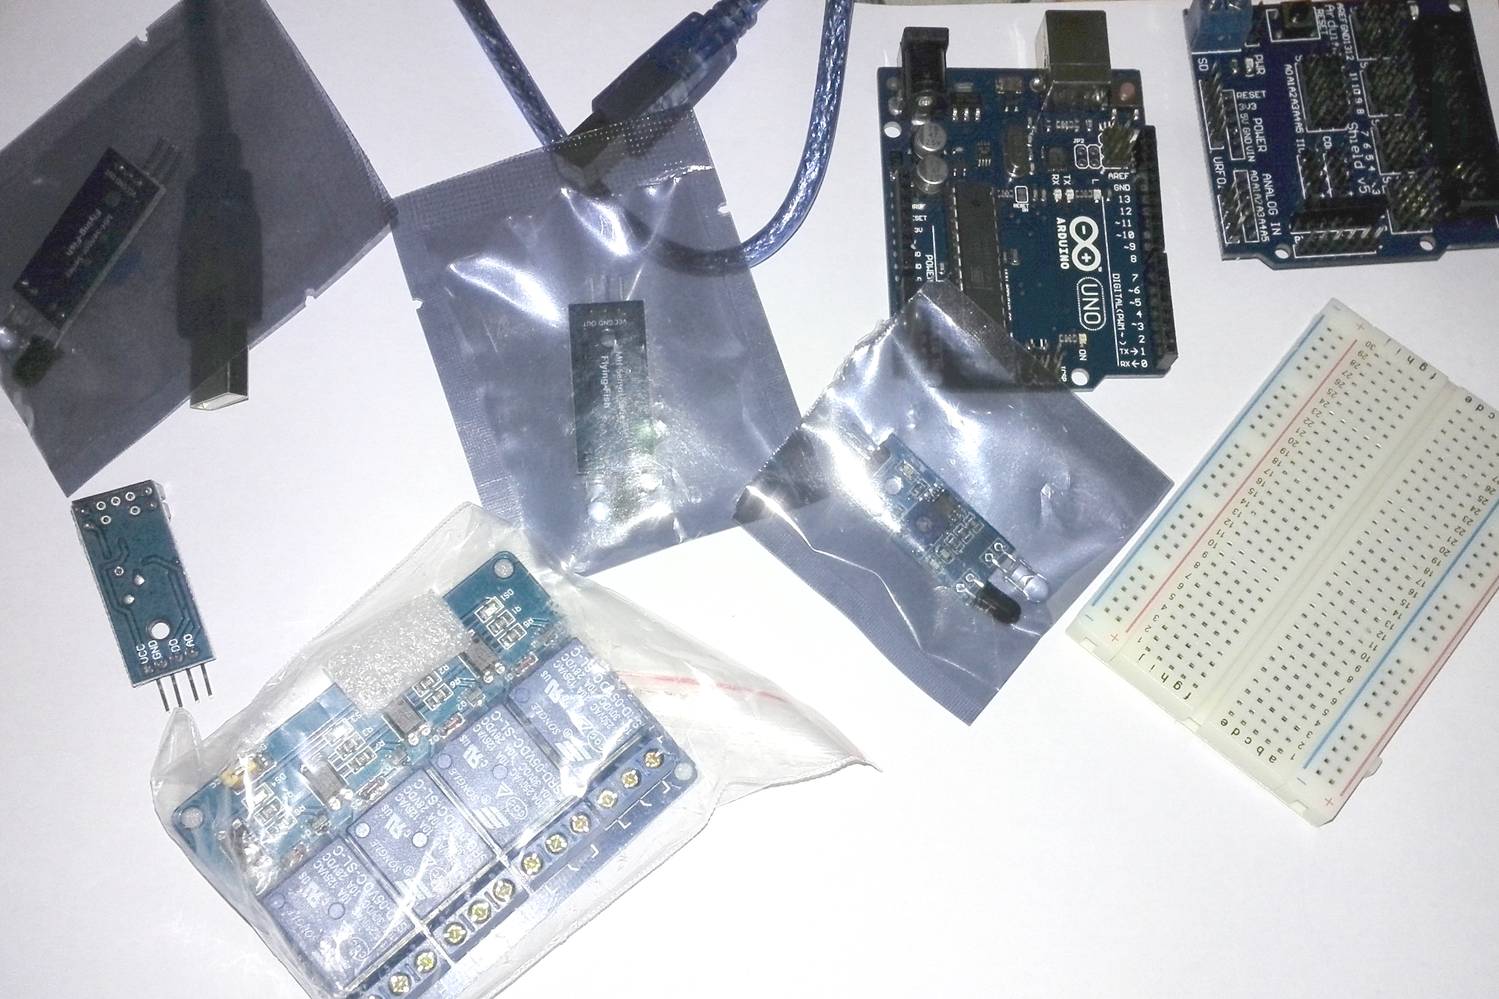
Get your arduino ready, prepare every things needed.
Test every component, LCD push button, relay, LED, just try to combine everything and learn different logic and coding. Make sure you know about what you do. Try to test to the limit, find the limit, but don't break it.
Why use resistor, what happen when this, or that, why sensor reading are not stable, what value actually read by sensor, etc. I did the test and found that proximity sensor reading are "not clean", need to add a resistor to calm it down.
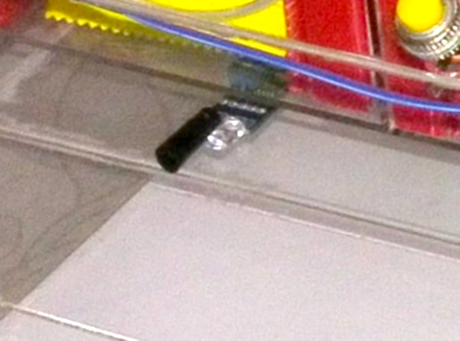
Infrared sensor perform very bad and not normal under direct sun (I know about this before, but never actually feel the impact, until now). The solution is using some duct-tape to isolate around the receiver part of infrared sensor, as shown in the image above.
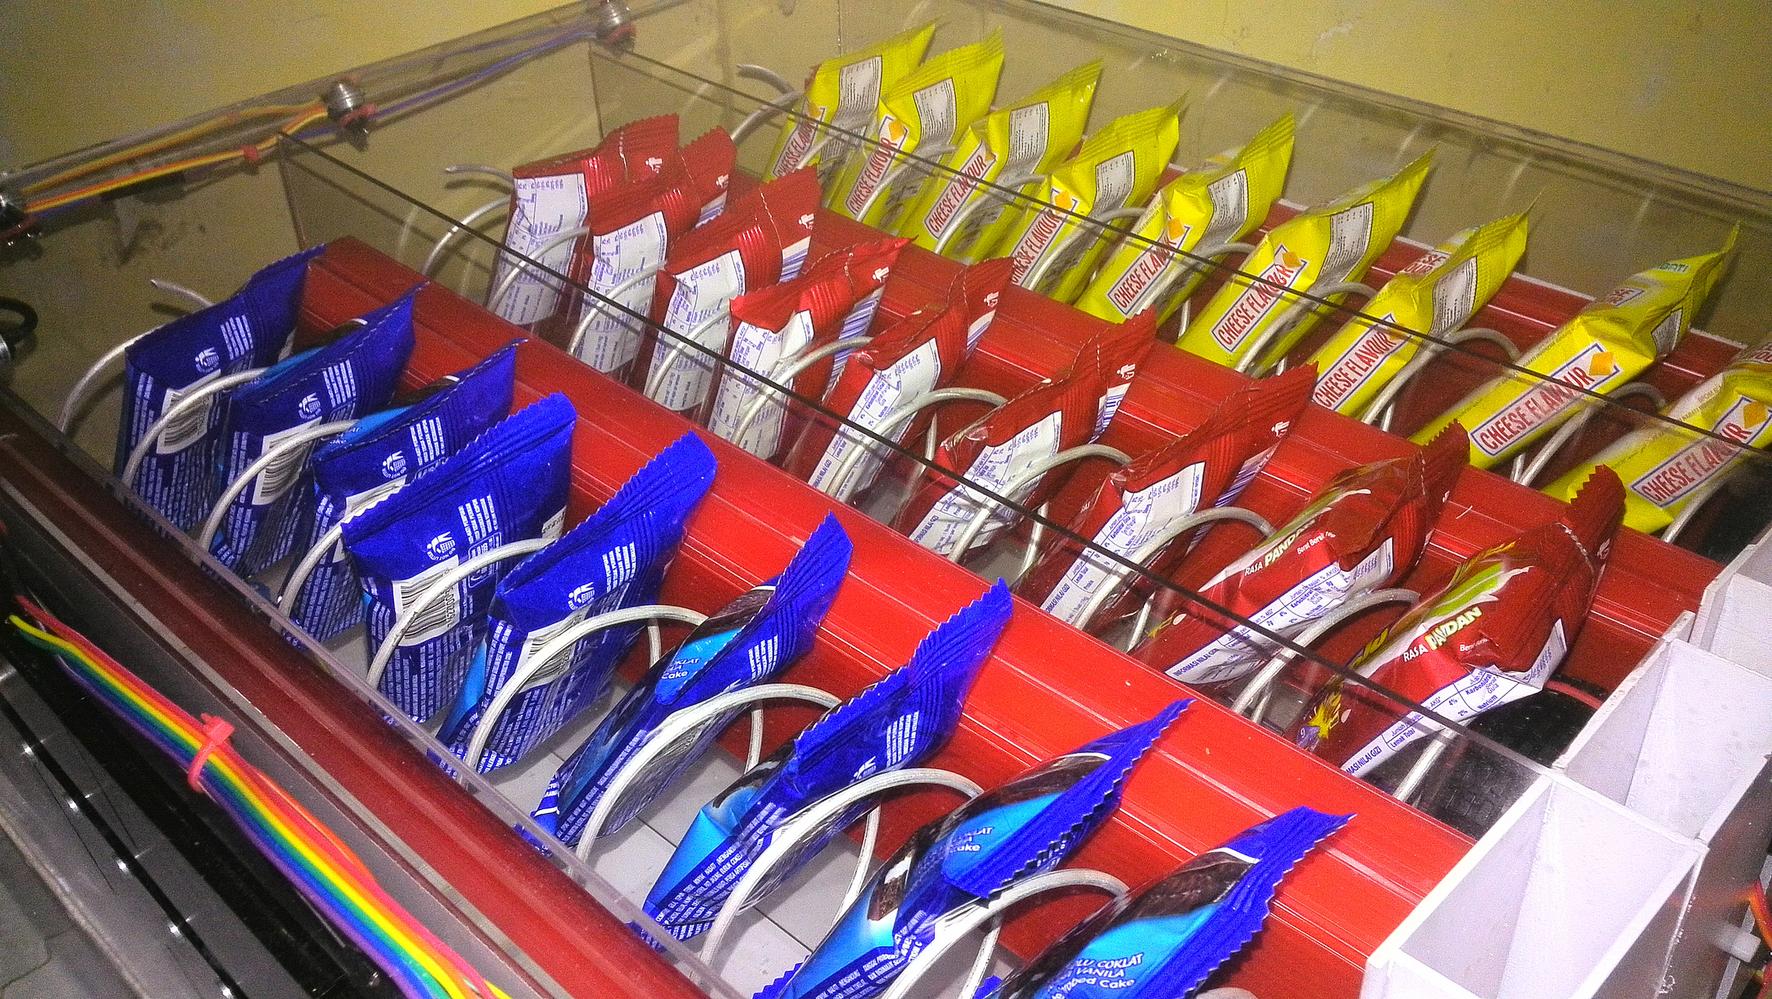
Step 5: Build a Spiral mechanism
This is one of the most important part on vending machine, delivering mechanism.
I am using spiral mechanism, with aluminium wire (2mm wire diameter), manually shaped into spiral with the help of 9cm diameter PVC Pipe.
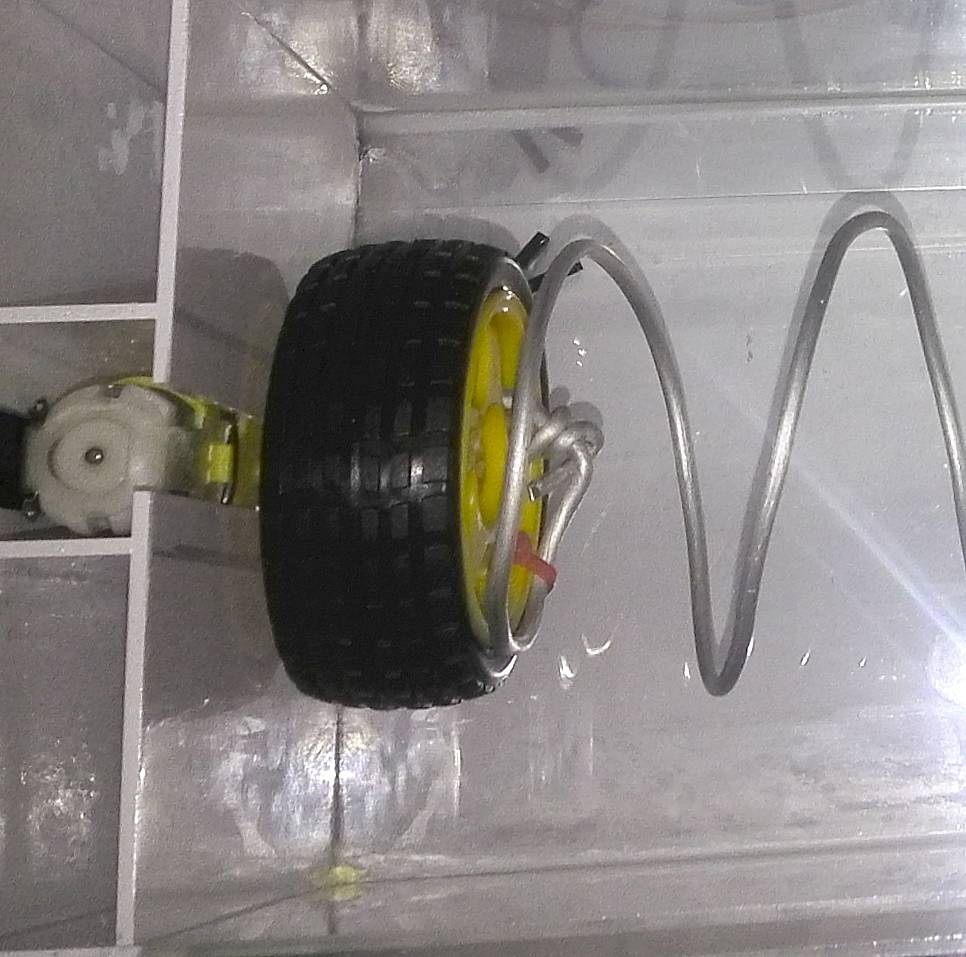
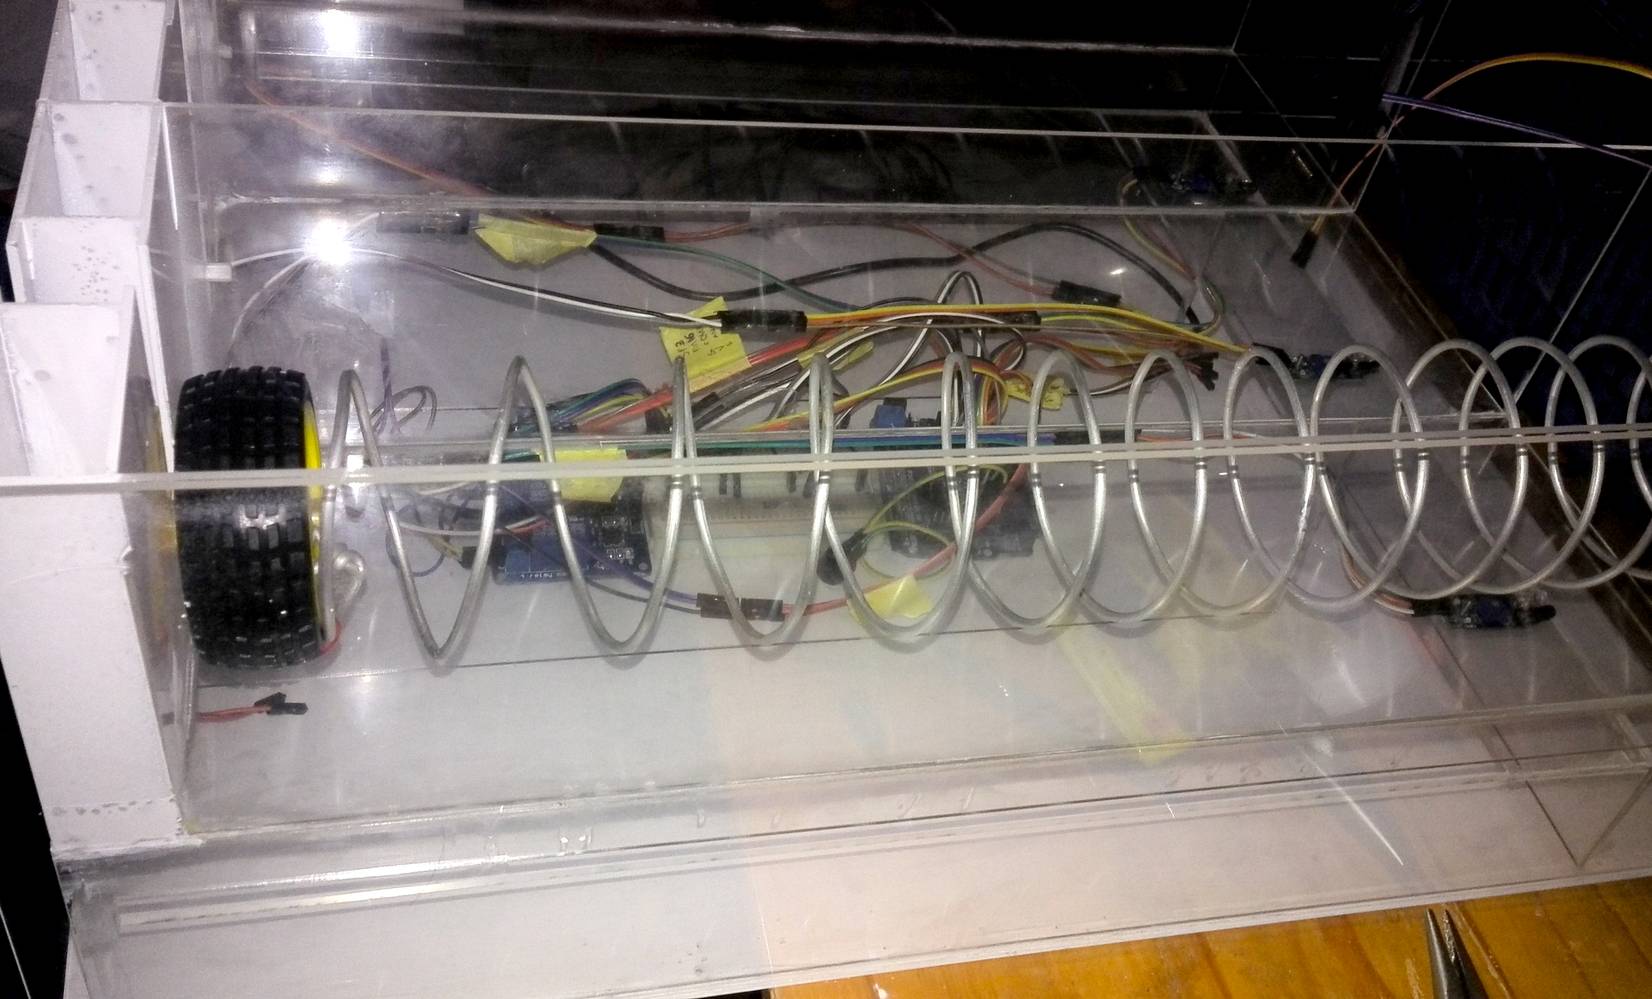
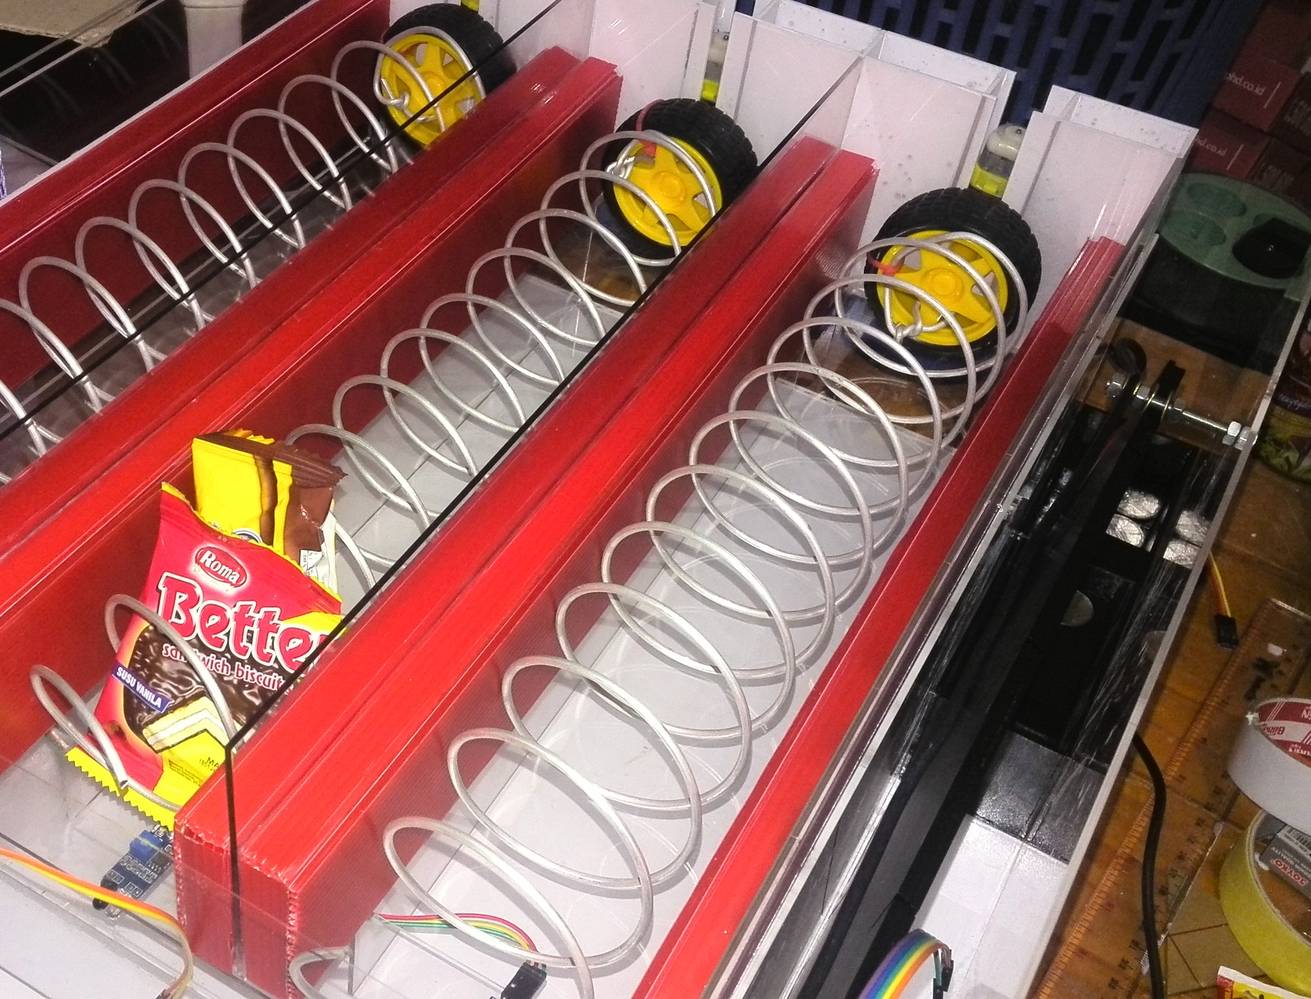
Spiral wire are tied to a wheel using cable ties. When DC motor ON, wheel rotating, and spiral wire will rotate.
Rotating spiral are actually converting rotational into linear movement of product.
EXPANDED TECHNICAL DETAILS: The Kinematics of the Spiral (FS90R Servos)
A generic 180-degree servo cannot push a candy bar out. This project utilizes a similar principle with DC motors. In a more advanced setup, you could use FS90R or MG996R Continuous Rotation Servos. A heavy 3D-printed or thick-wire spiral (The "Auger") is attached to the servo horn. The dispensing protocol in code would trigger the specific servo. For a continuous rotation servo, `servo.write(180);` means "Spin Forward at Maximum Speed", not "Go to 180 degrees". After a `delay(1500);` for the spiral to make a full rotation, `servo.write(90);` is the mathematical "STOP" command.
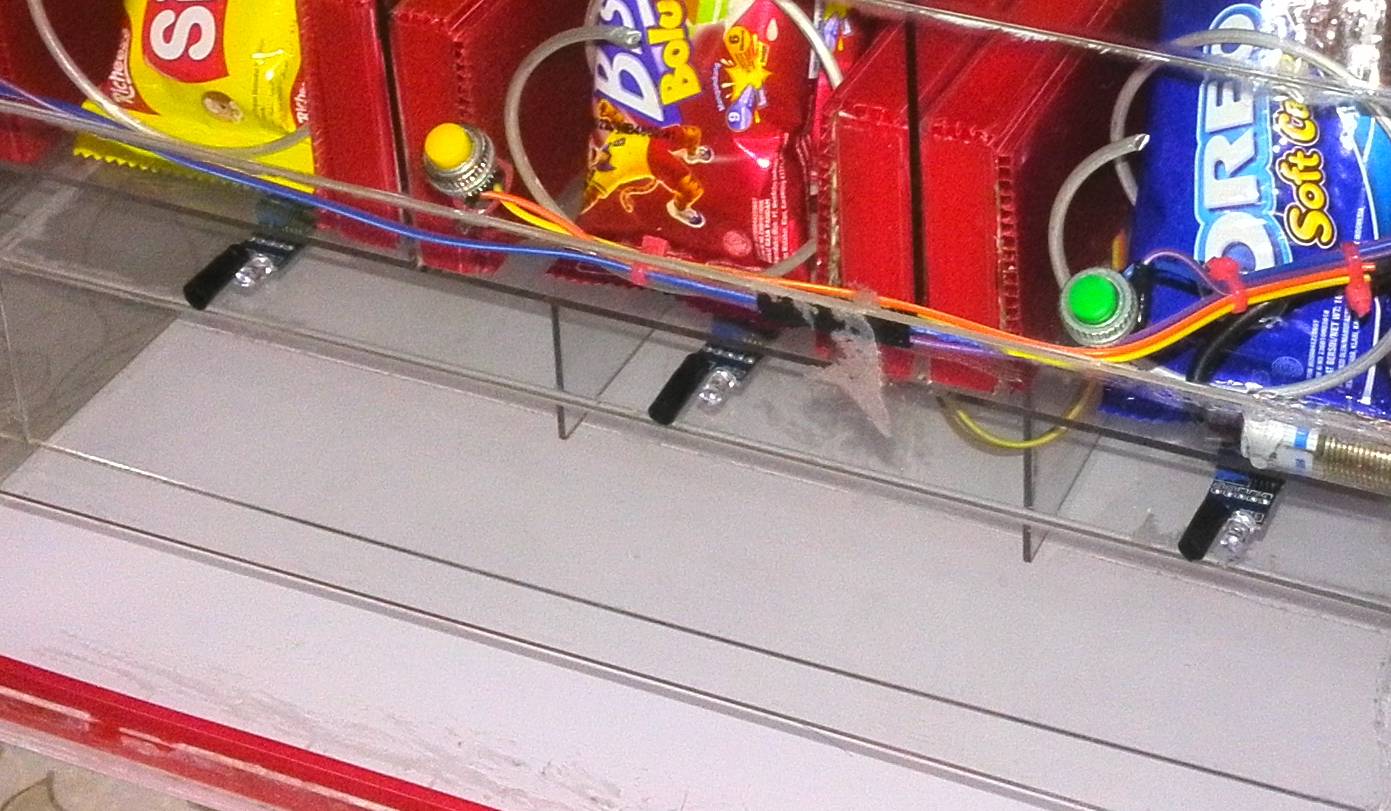
Step 6: Build a coin identifying mechanism
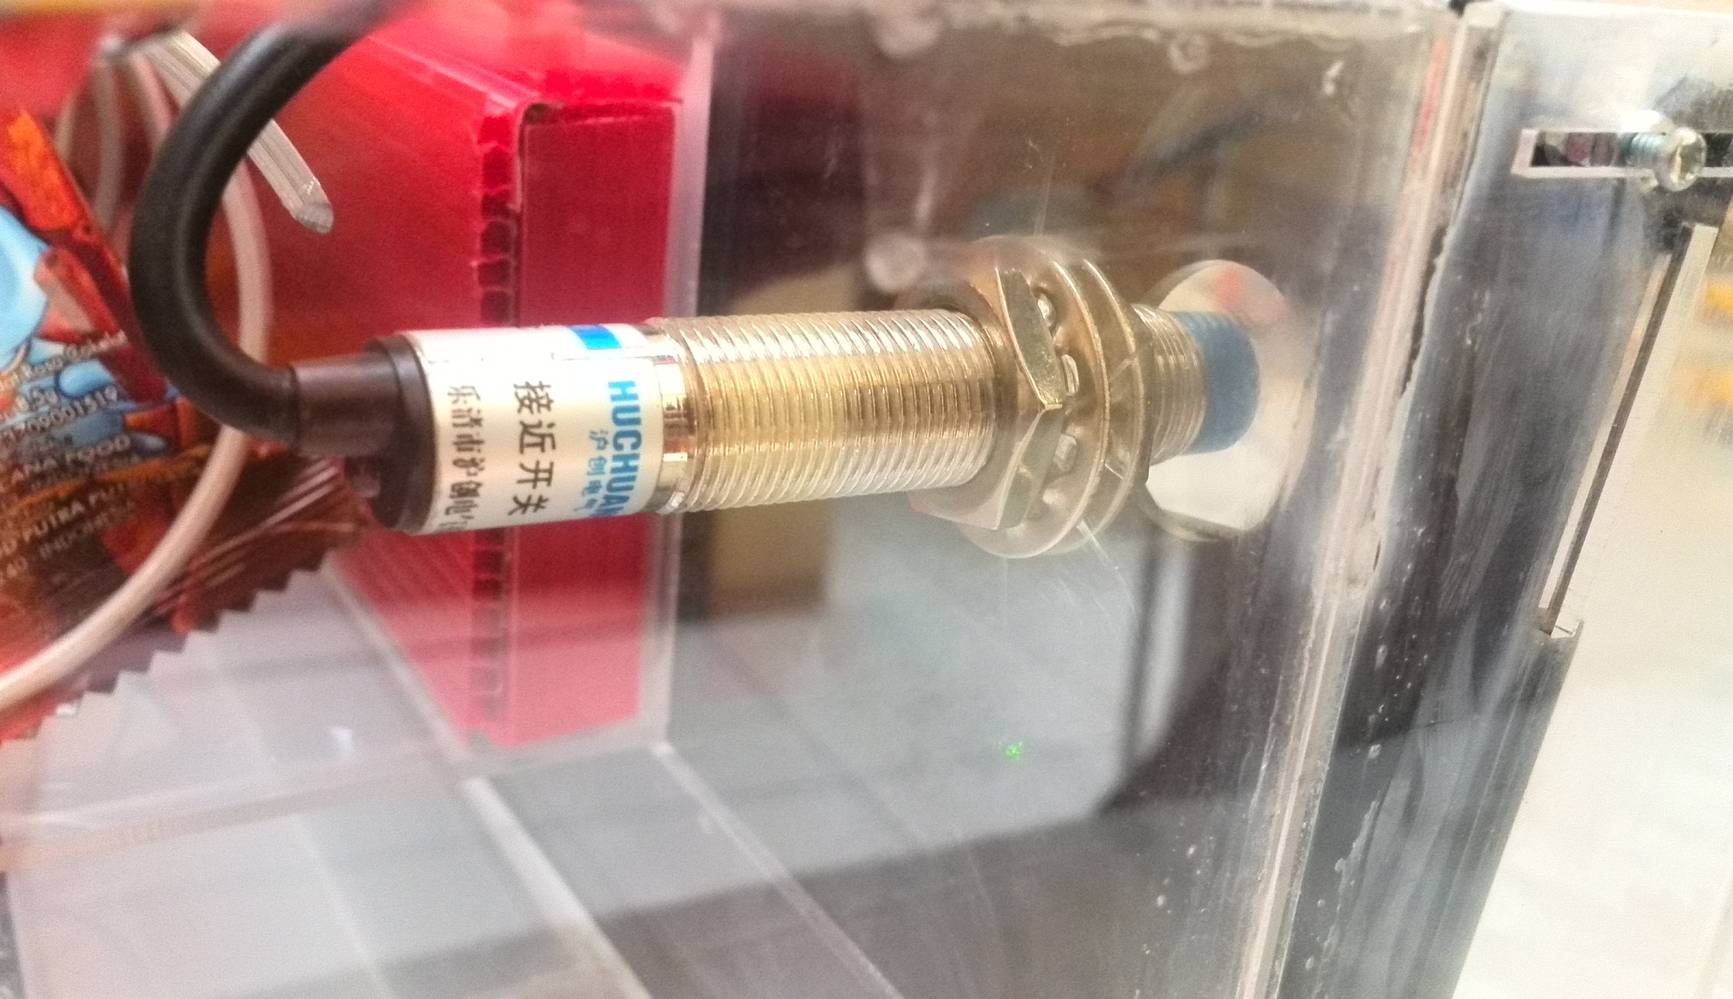
First pic is coin sensor number 1, it using proximity sensor, or induction electromagnet sensor.When accepted coin pass this sensor, it will trigger arduino to start counting time (in millisecond).
if sensor1 triggered then start counting time in millisecond
And when accepted coin pass coin sensor number 2, a distance interupter sensor, arduino will stop counting time, and get the time required for that particular coin, to travel from sensor number 1 to sensor number 2.
if sensor2 triggered then stop counting time in millisecond. "travel times" is xxx millisecond
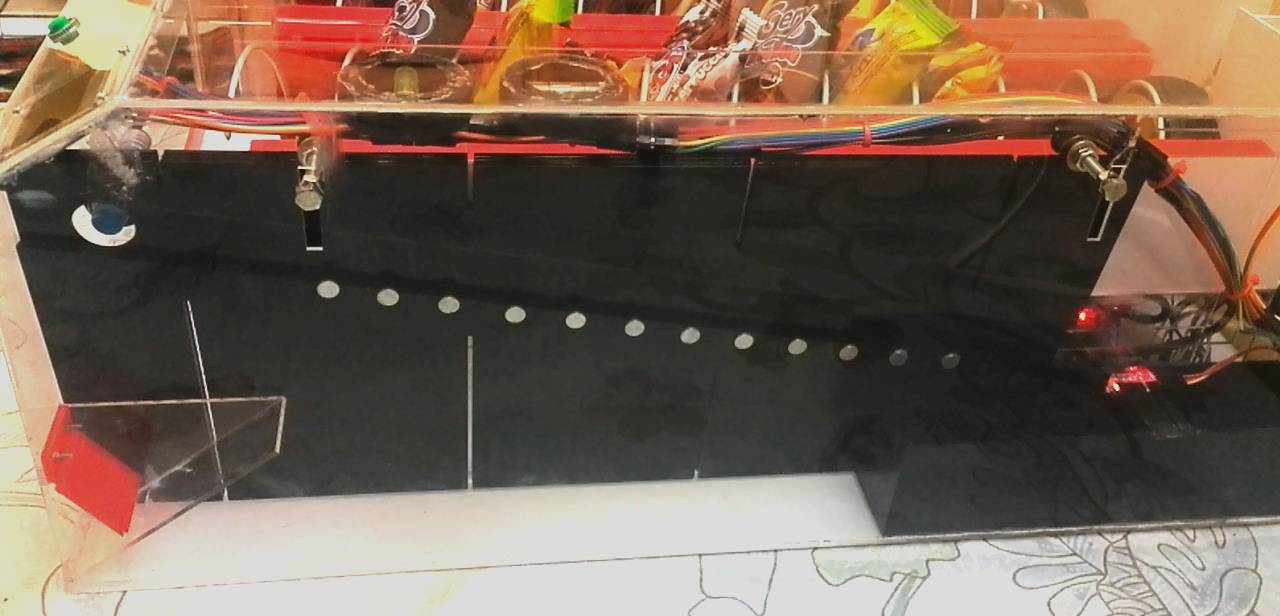
Using magnets, attached alongside coin ramp, i can identifying between coin that did not affected from magnetic field, and coin that being affected from magnetic field. Coins that affected by magnetic field will rolling down slower (just about 300 to 500 millisecond slower), but then again it depend on how many magnets attached along side coin ramp.
Dont use too many magnet as it will jam and make coin stop in the middle of coin ramp. We dont want that to happen, because we need to counting time for every coin, to get "travel times" between sensor number 1 and number 2. This "travel times" (in millisecond), are used for arduino to determine the value of accepted coin.
if "travel times" more than or equal to "yyy" millisecond, then its "aaa" coin, else it is "bbb"
EXPANDED TECHNICAL DETAILS: Industrial Coin Selection (The Comparator)
This project uses a clever mechanical and timing method. A more industrial approach uses an Electronic Coin Acceptor Module (like the CH-926). This module evaluates a coin's exact physical diameter, thickness, and metallic alloy composition at high speed. If a valid coin is dropped, the Acceptor sends a precise number of fast 5V pulses down its signal wire (e.g., one pulse for a $1 coin, five rapid pulses for a quarter). The Arduino must utilize `attachInterrupt(..., FALLING)` to catch these pulses, adding the correct amount to an internal `creditBalance` variable.
This is a video when I testing this method, identifying coins using magnet.
Step 7: Build a product detection mechanism
I am using 3 infared sensor for product detection when its fall from being pushed/moved by spiral mechanism.
When product fall, it will trigger infrared sensor, sending OFF signal to DC Motor (via relay).
So basically all we want is, when product falls, spiral mechanism simply stop rotating.
This video show how product detection working in this vending machine.
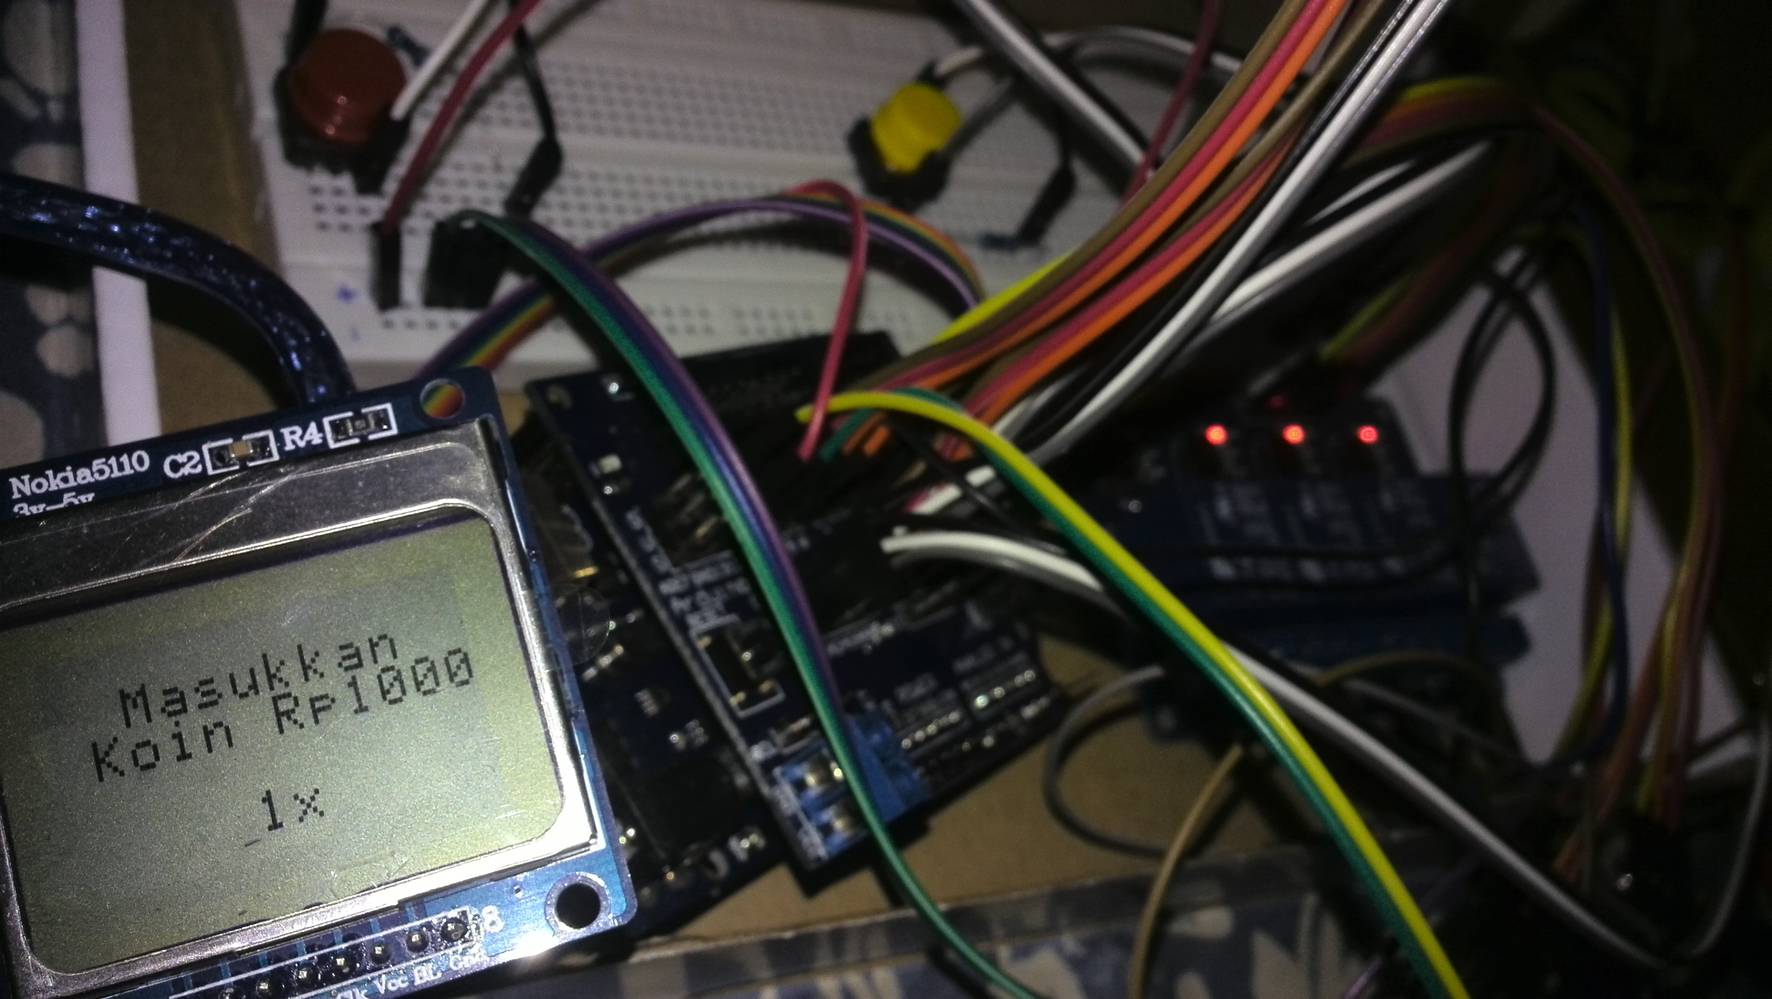
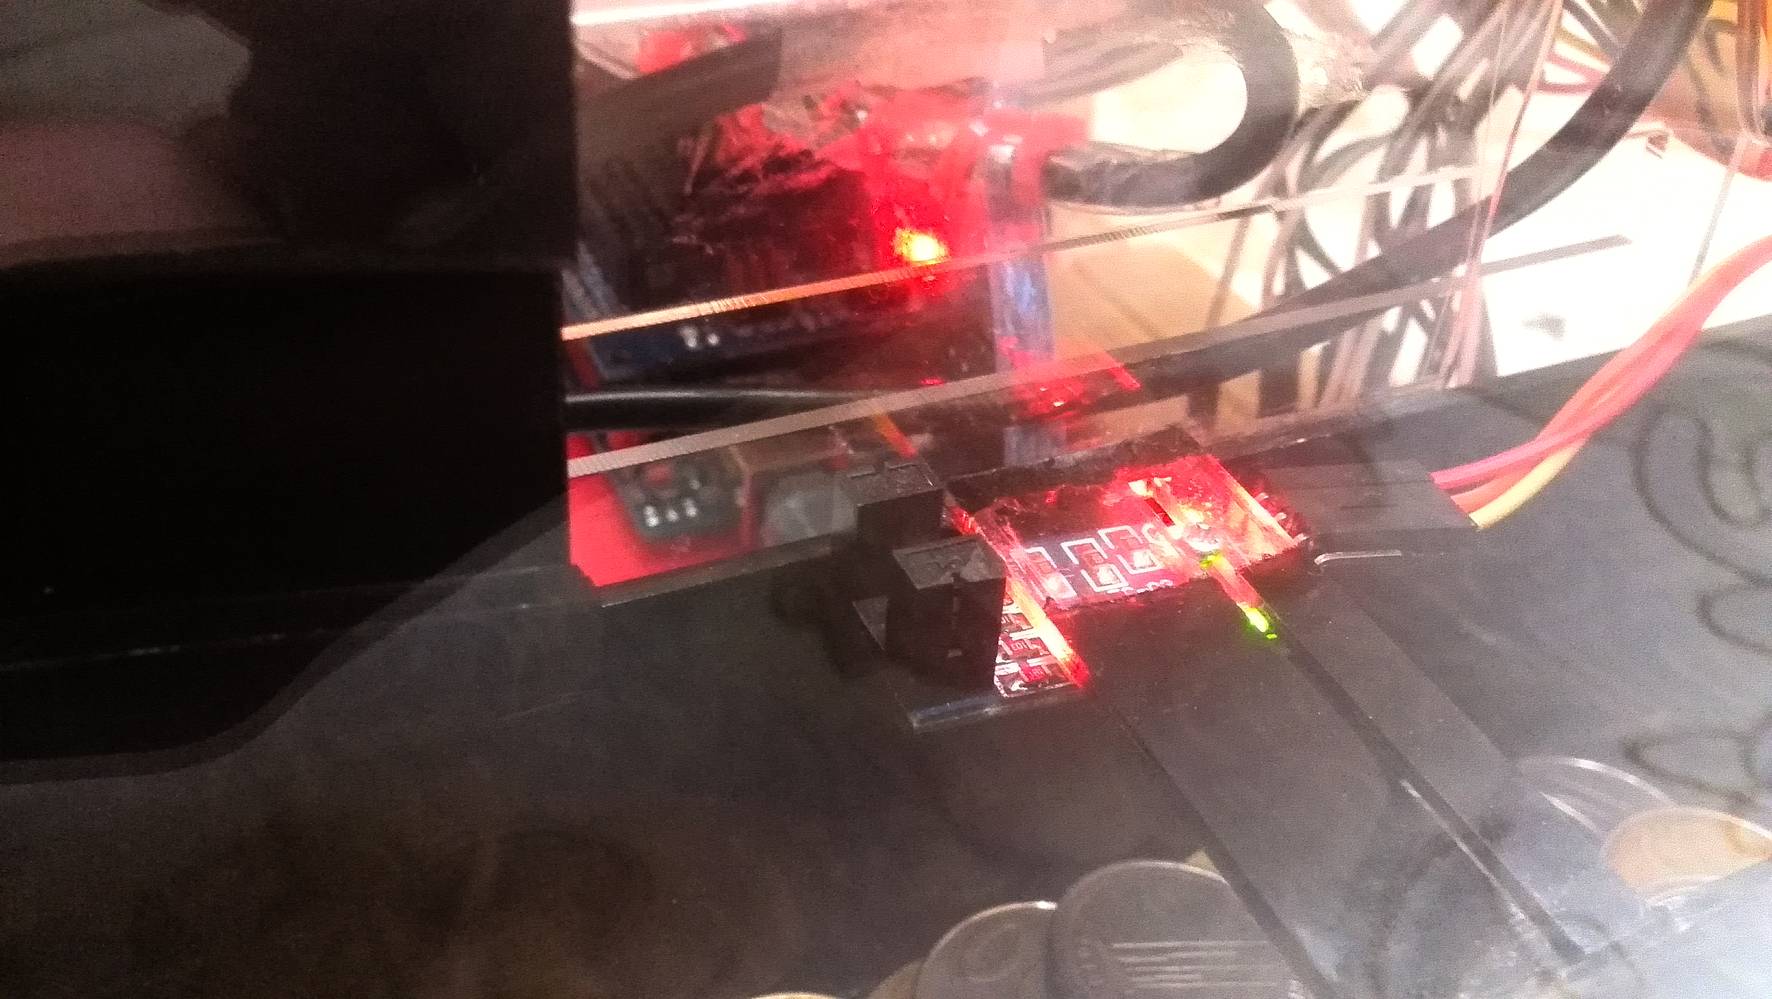
Step 8: Using LCD for information
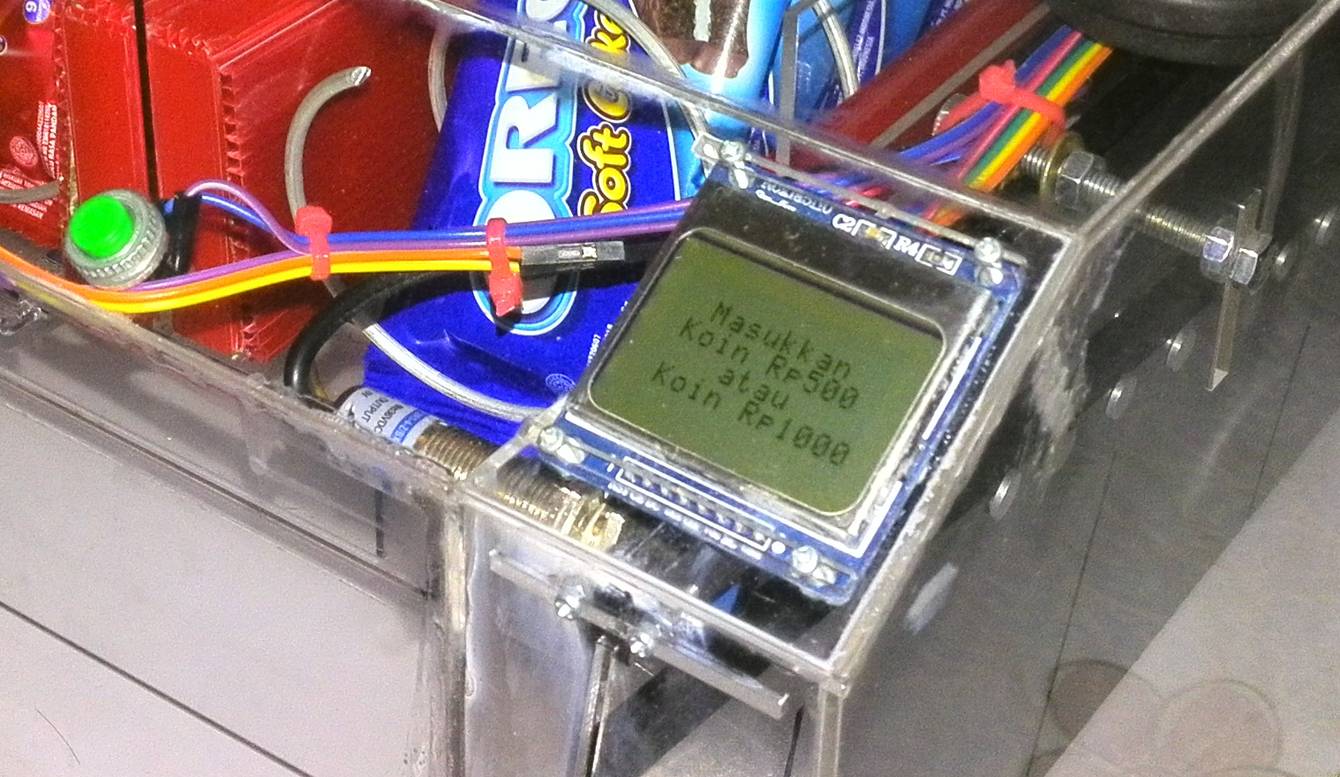
In this project, i make the LCD showing information (in Indonesian currency) about accepted coin value, everytime customer enter a coin. It also will show how much total balance from accepted coin, and other general instruction about step by step to operate this machine.
When machine turned ON
- MAIN display = "Please enter coin".
- IF coin entered = "Display coin value, and total balance".
- IF coin did not entered = keep MAIN display.
After coin successfully identified
- IF total balance more or equal than product's price = "Please select product".
- IF total balace less than product's price = "Please enter more coin".
After spiral mechanism turn ON (delivery occur)
- IF Product detection mechanism triggered = "Thank you", Transaction done.
- Delay, and back to MAIN display.
Step 9: Finishing and testing
Finally, finished Snack Vending Machine. ;)
After 3 months, or so, i am ready to do some final test to this machine, from payment/coin test, product selection, and product delivery.
This is Snack Vending Machine final test video:
ข้อมูล Frontmatter ดั้งเดิม
apps:
  - "1x Arduino IDE"
  - "1x Solidworks"
author: "Sevenmojoe"
category: "Home & Automation"
components:
  - "3x DC Motor 6V include Wheel"
  - "1x Relay (generic)"
  - "3x Push Button"
  - "1x Arduino UNO"
  - "1x Sensor Shield"
  - "2x LED (generic)"
  - "1x Power Supply 6V for DC motor"
  - "1x Distance interupter (infrared/optocoupler) sensor, used for coin sensor number 2"
  - "3x Infrared (reflective) or line follower sensor, used for product detection"
  - "1x Proximity (electromagnetic) sensor, used for coin sensor number 1"
  - "1x LCD (Nokia 5110 LCD)"
description: "Mechatronic retail! Master the complexities of high-torque continuous rotation servos, spiral wire dispensing mechanics, and coin-acceptor hardware to construct an entirely functional junk-food robot."
difficulty: "Intermediate"
documentationLinks: []
downloadableFiles: []
encryptedPayload: "U2FsdGVkX193rF+r0lR+TxlPLRs0QJAcEsX7QDw/qLhdsBWnClGyy/vA1AdbxZL7/W8V3WcRJmcJ2DIM3k15KOS8vRMztf0q/NeHJsp1qP3xZb5GZSpbMsIGqy9ICDBN"
heroImage: "https://cdn.jsdelivr.net/gh/bigboxthailand/arduino-assets@main/images/projects/snacks-vending-machine-powered-by-arduino-46554c_cover.jpg"
lang: "en"
likes: 69
passwordHash: "4fa10f0dab47a3b3f1acf3d88af399099d0e03b24b70d5eaf92574d8245a0230"
price: 699
seoDescription: "Build a DIY Snacks Vending Machine using Arduino and affordable local components. Easy-to-follow guide for makers and students."
tags:
  - "vending"
  - "vending machine"
title: "Snacks Vending Machine Powered By Arduino"
tools: []
videoLinks:
  - "https://www.youtube.com/embed/6qPCrWp8L4s"
  - "https://www.youtube.com/embed/yDRFBDbLNp0"
  - "https://www.youtube.com/embed/7RXVzYR_HE0"
  - "https://www.youtube.com/embed/VHj58T4UYEo"
  - "https://www.youtube.com/embed/6qPCrWp8L4s"
views: 59202