Purpose
We have a lot of squirrels in our garden and installed a feeding station. In order to know, when the station is running out of nuts, I decided to get an information how often these nice little animals approaching our food station and especially when they are hungry.
I did this access control for squirrels, but you can use it for almost every access for whatever purpose.
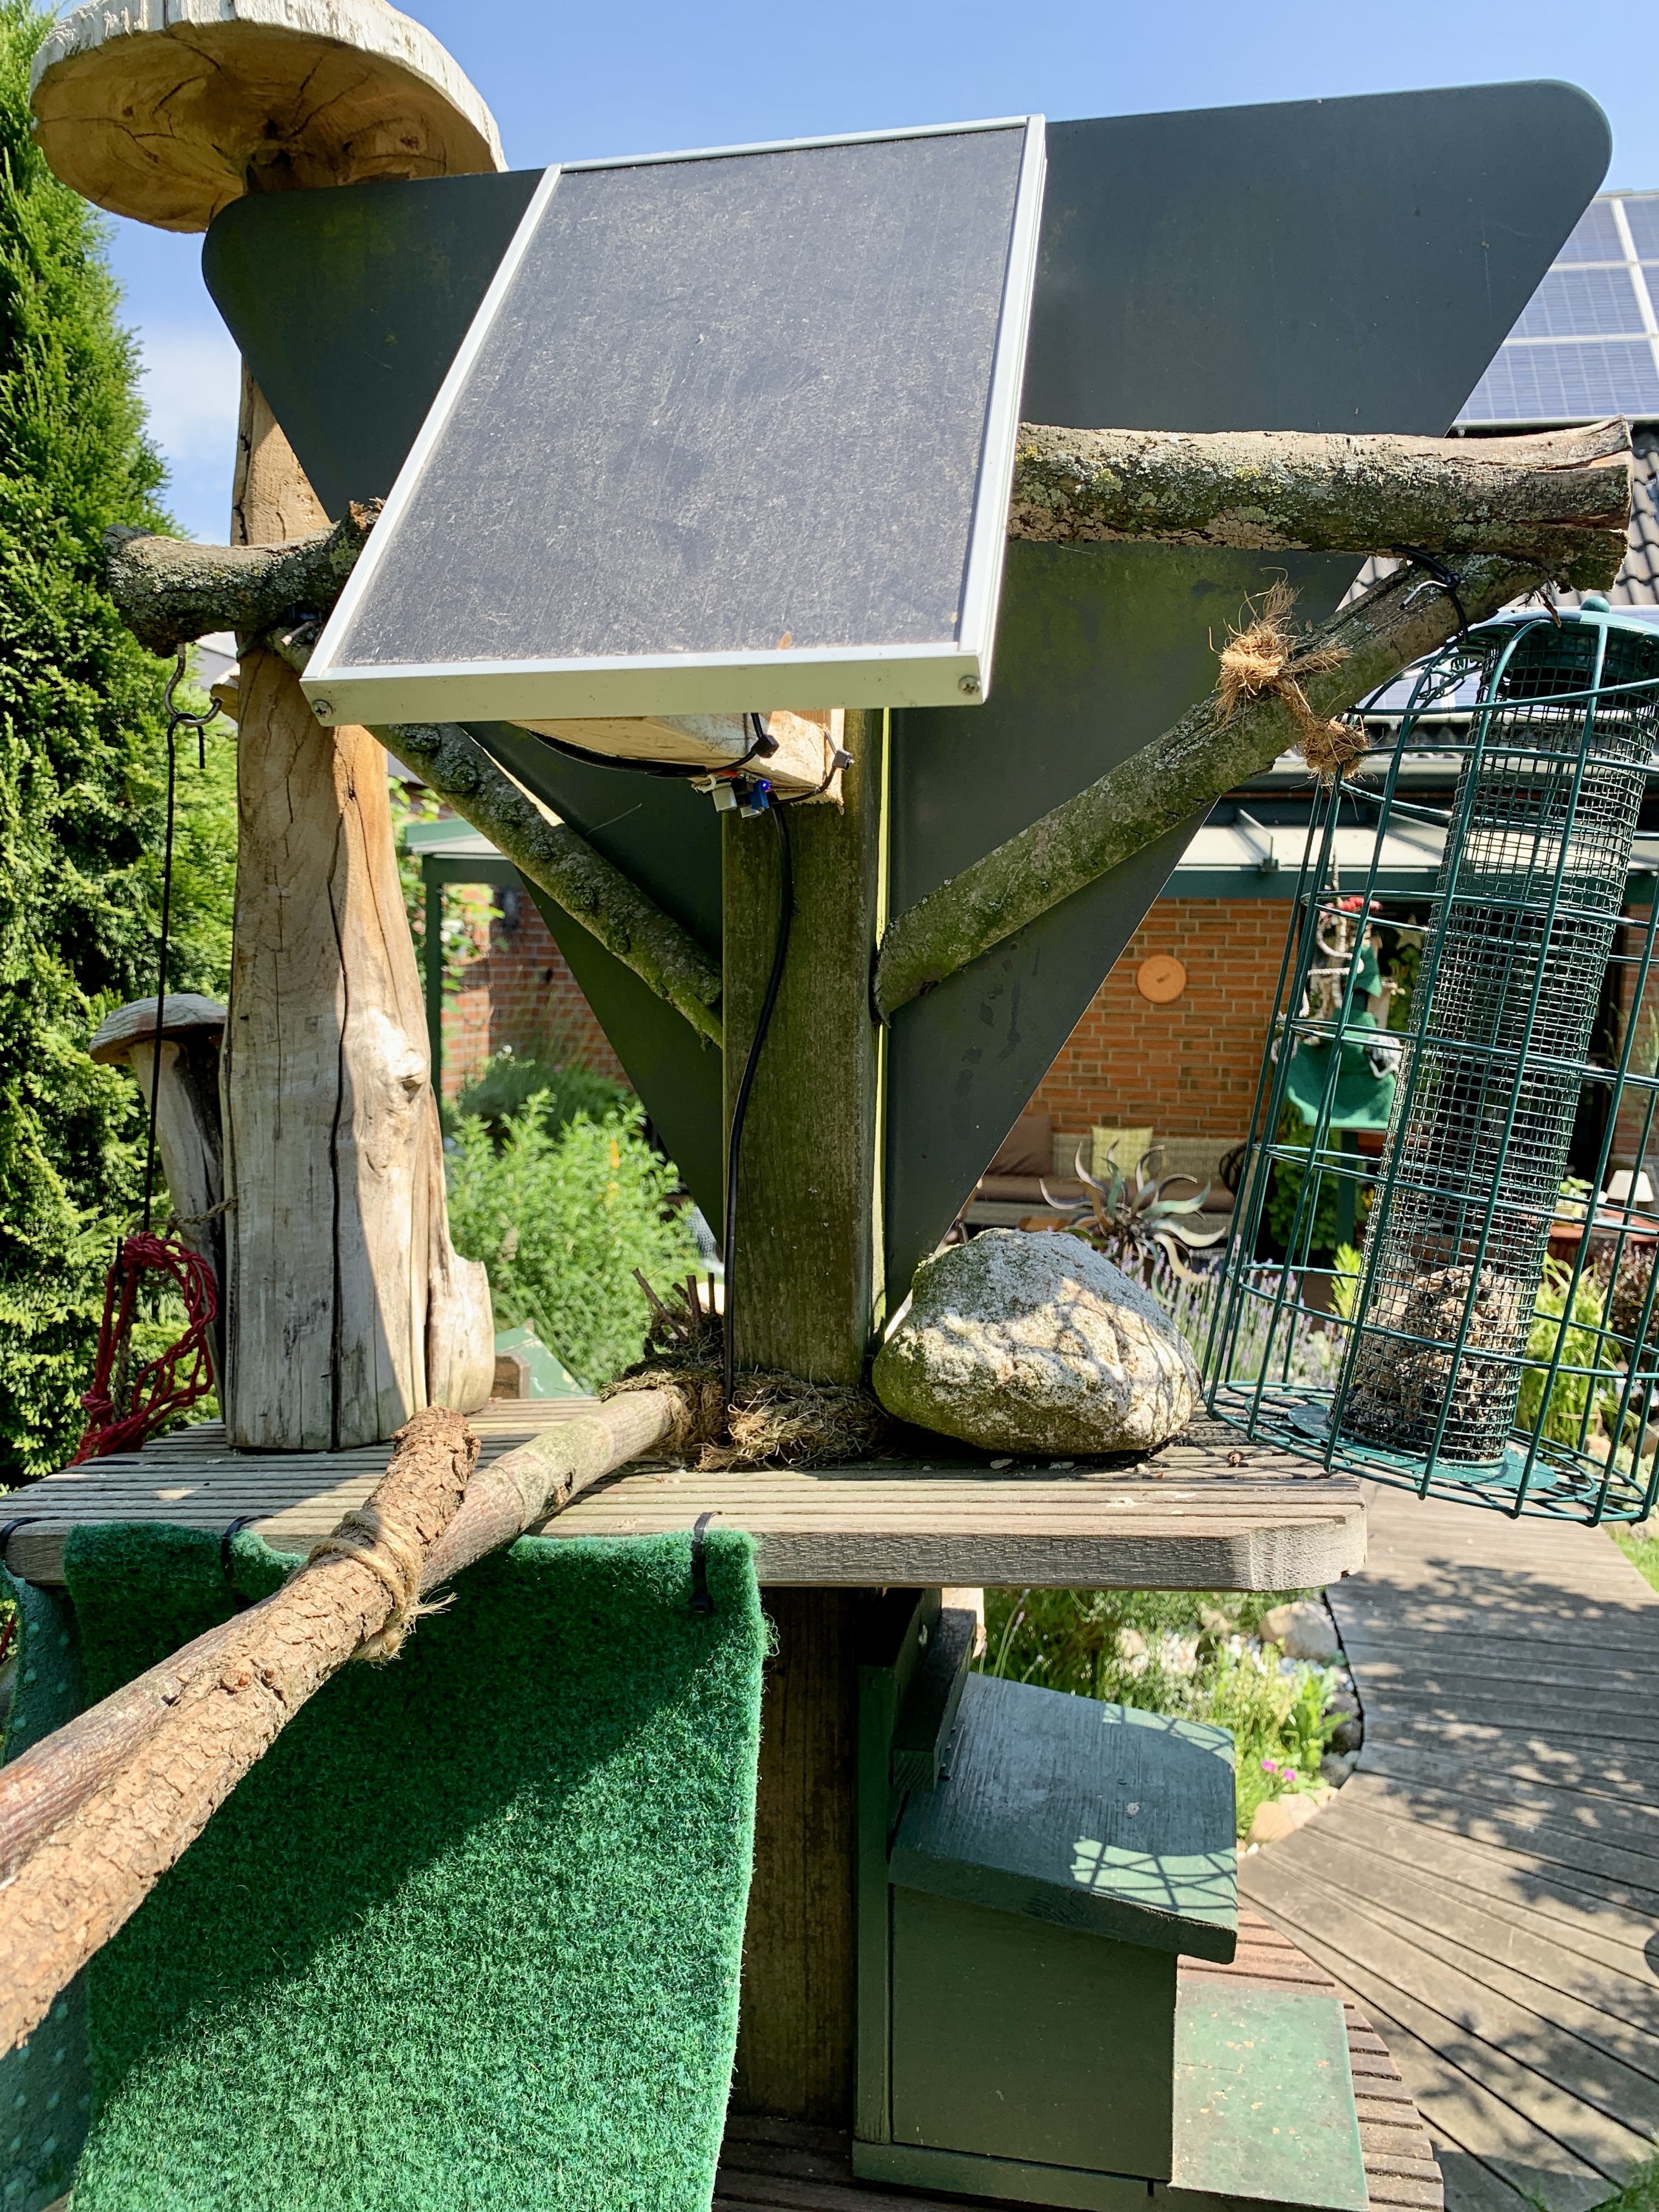
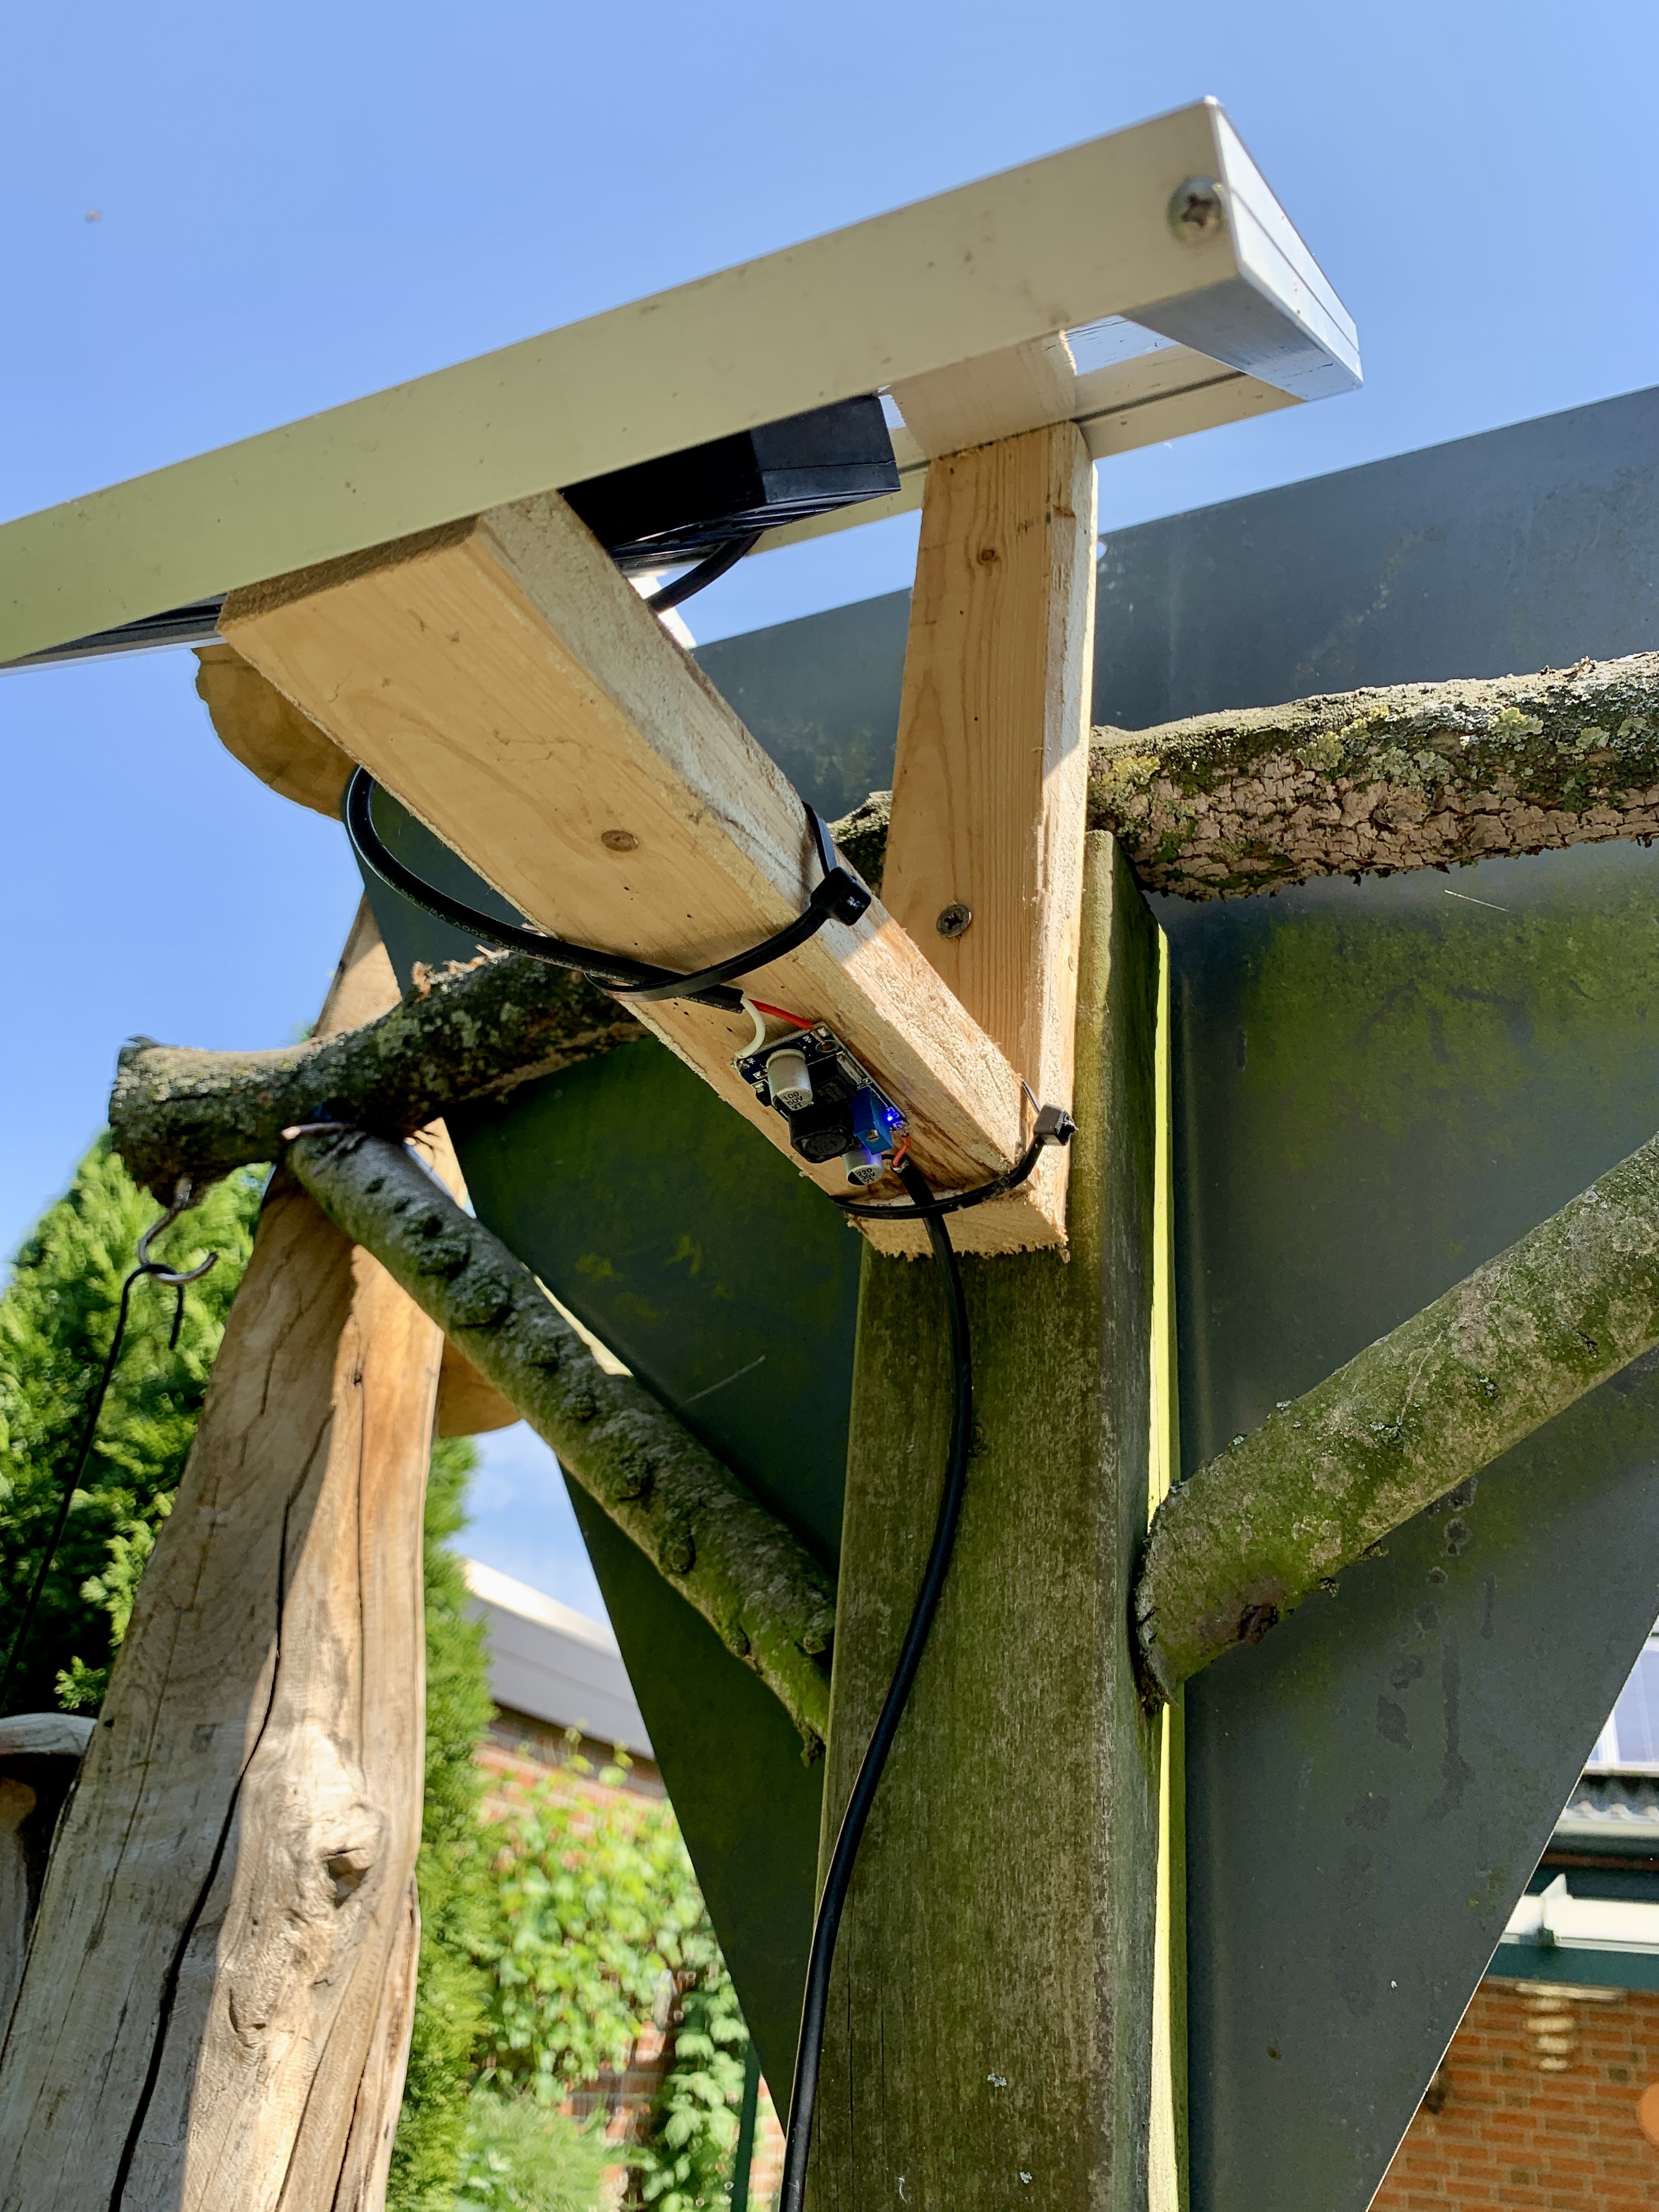
In our case, the station was within our WiFi distance from our house and I choose the MKR 1010 device for connection. Furthermore, I have no power in the garden and decided to have a solar powered source.
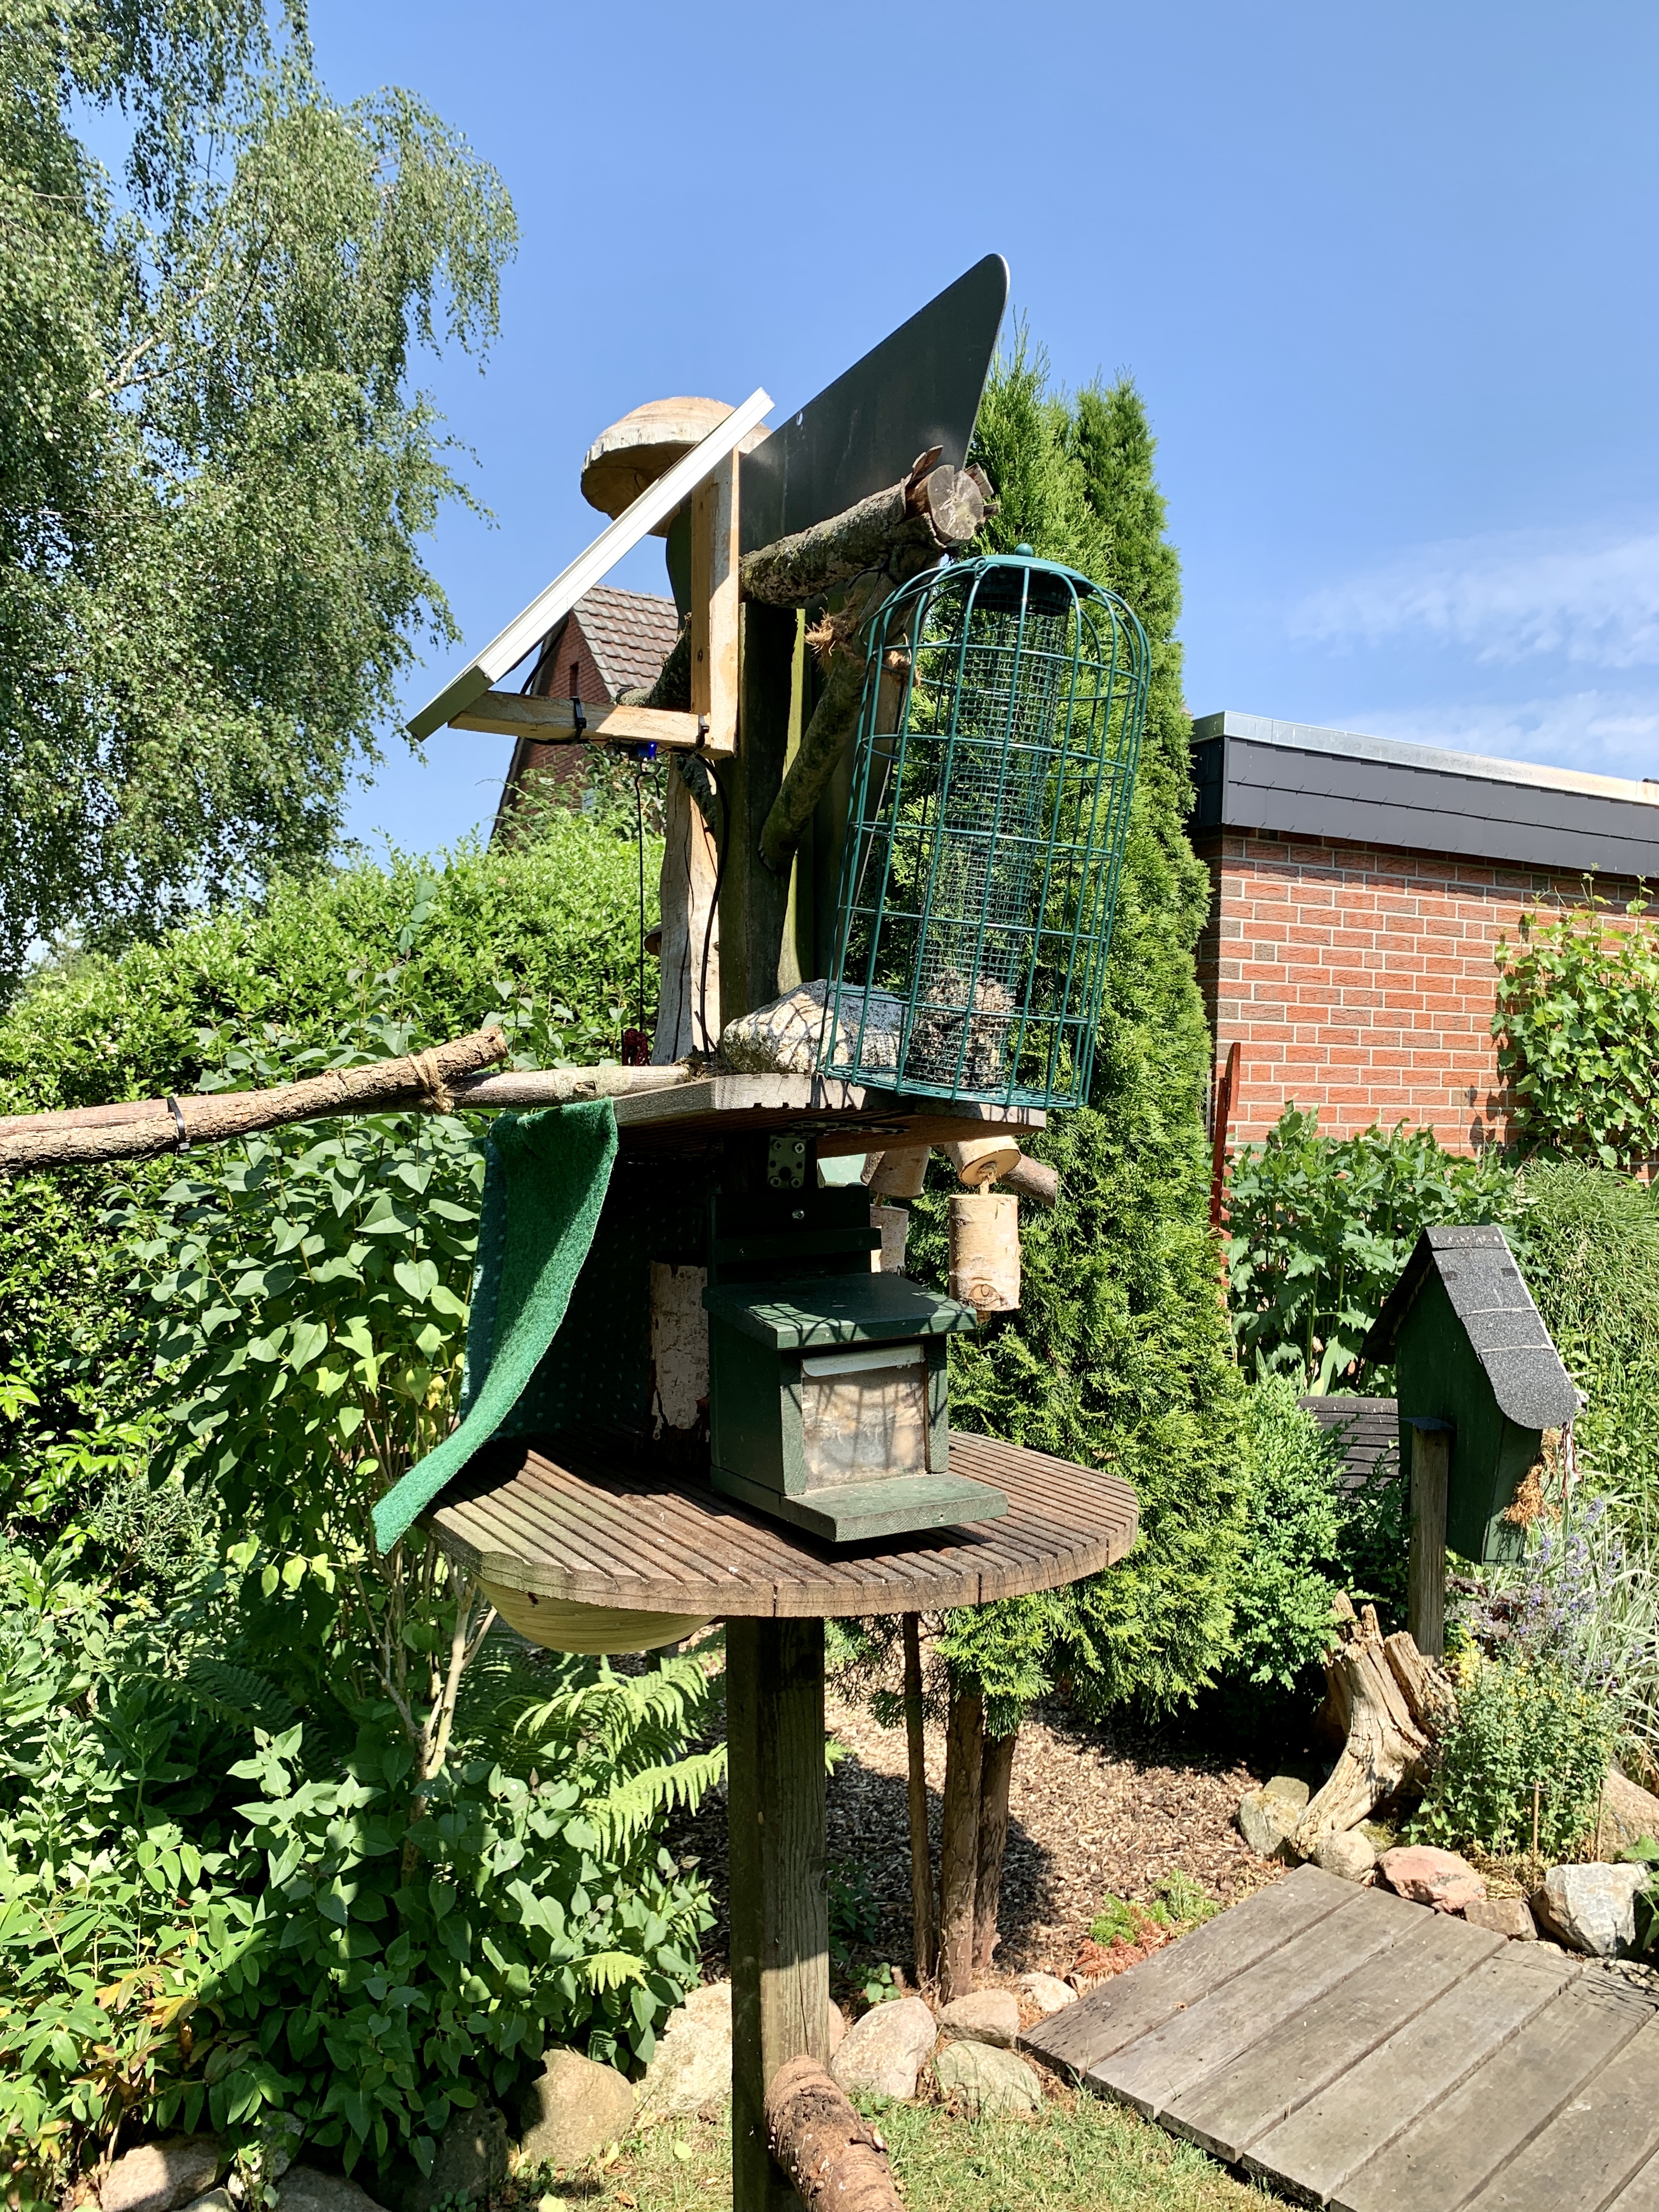
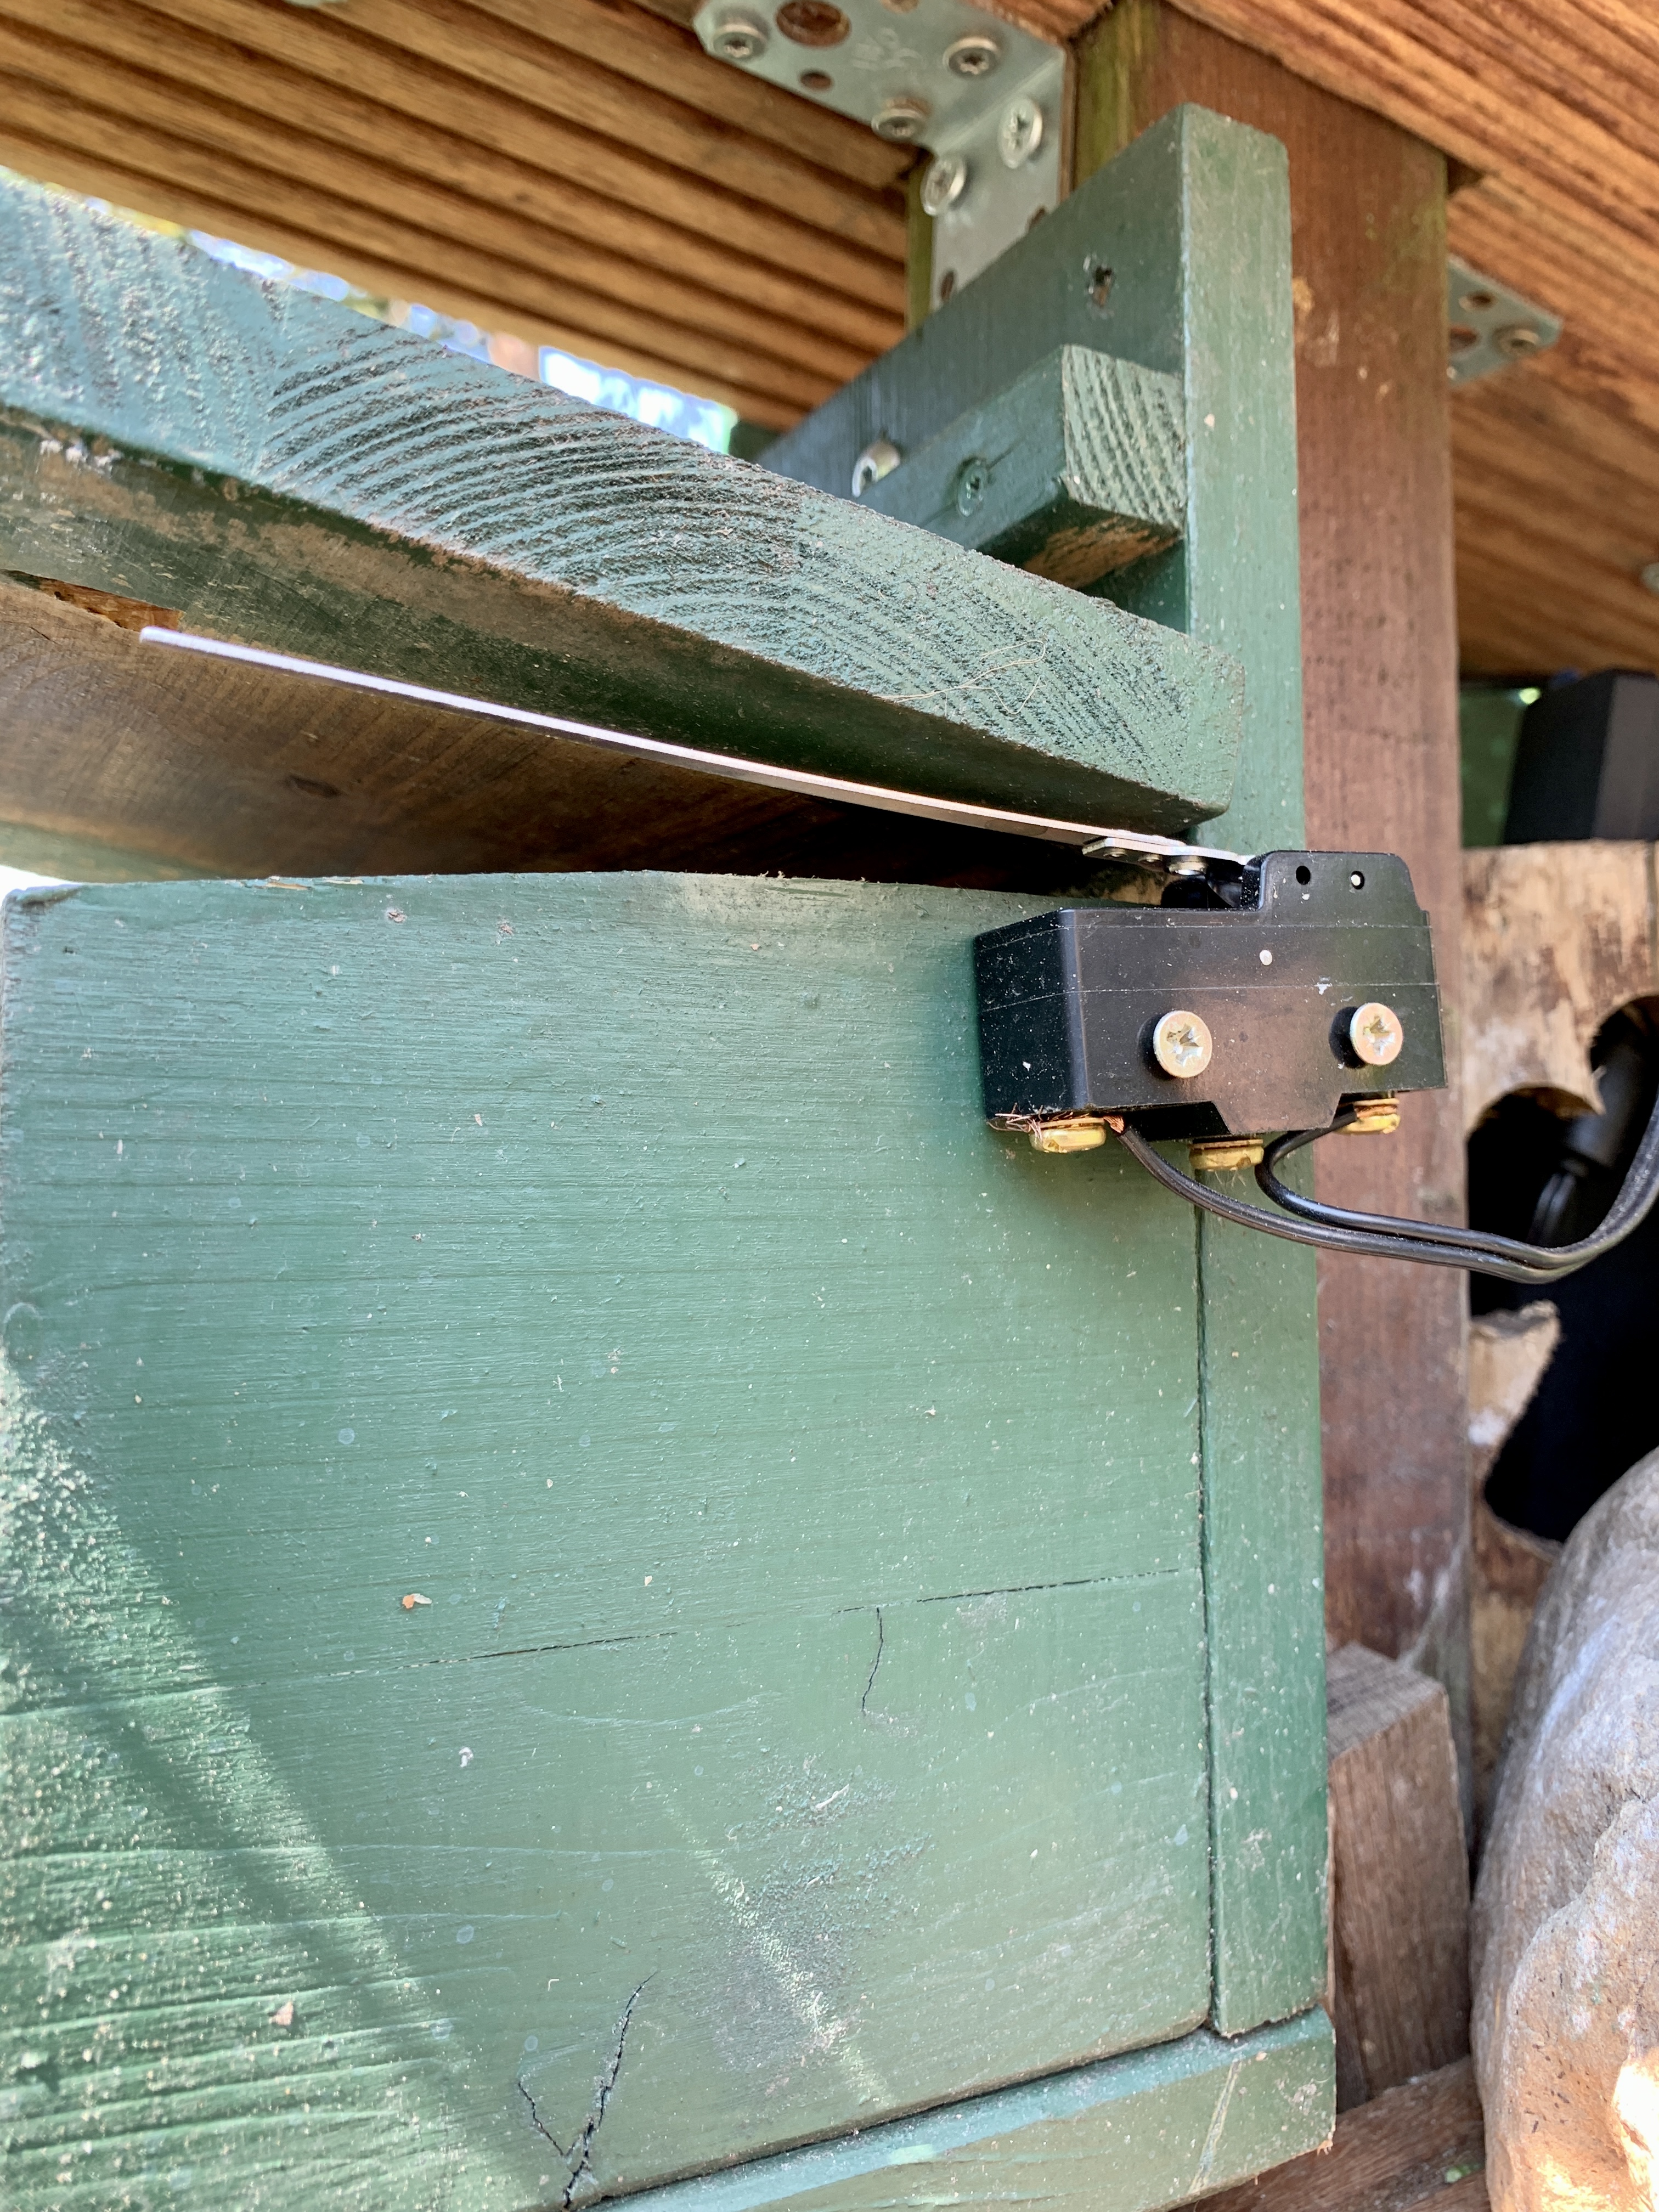
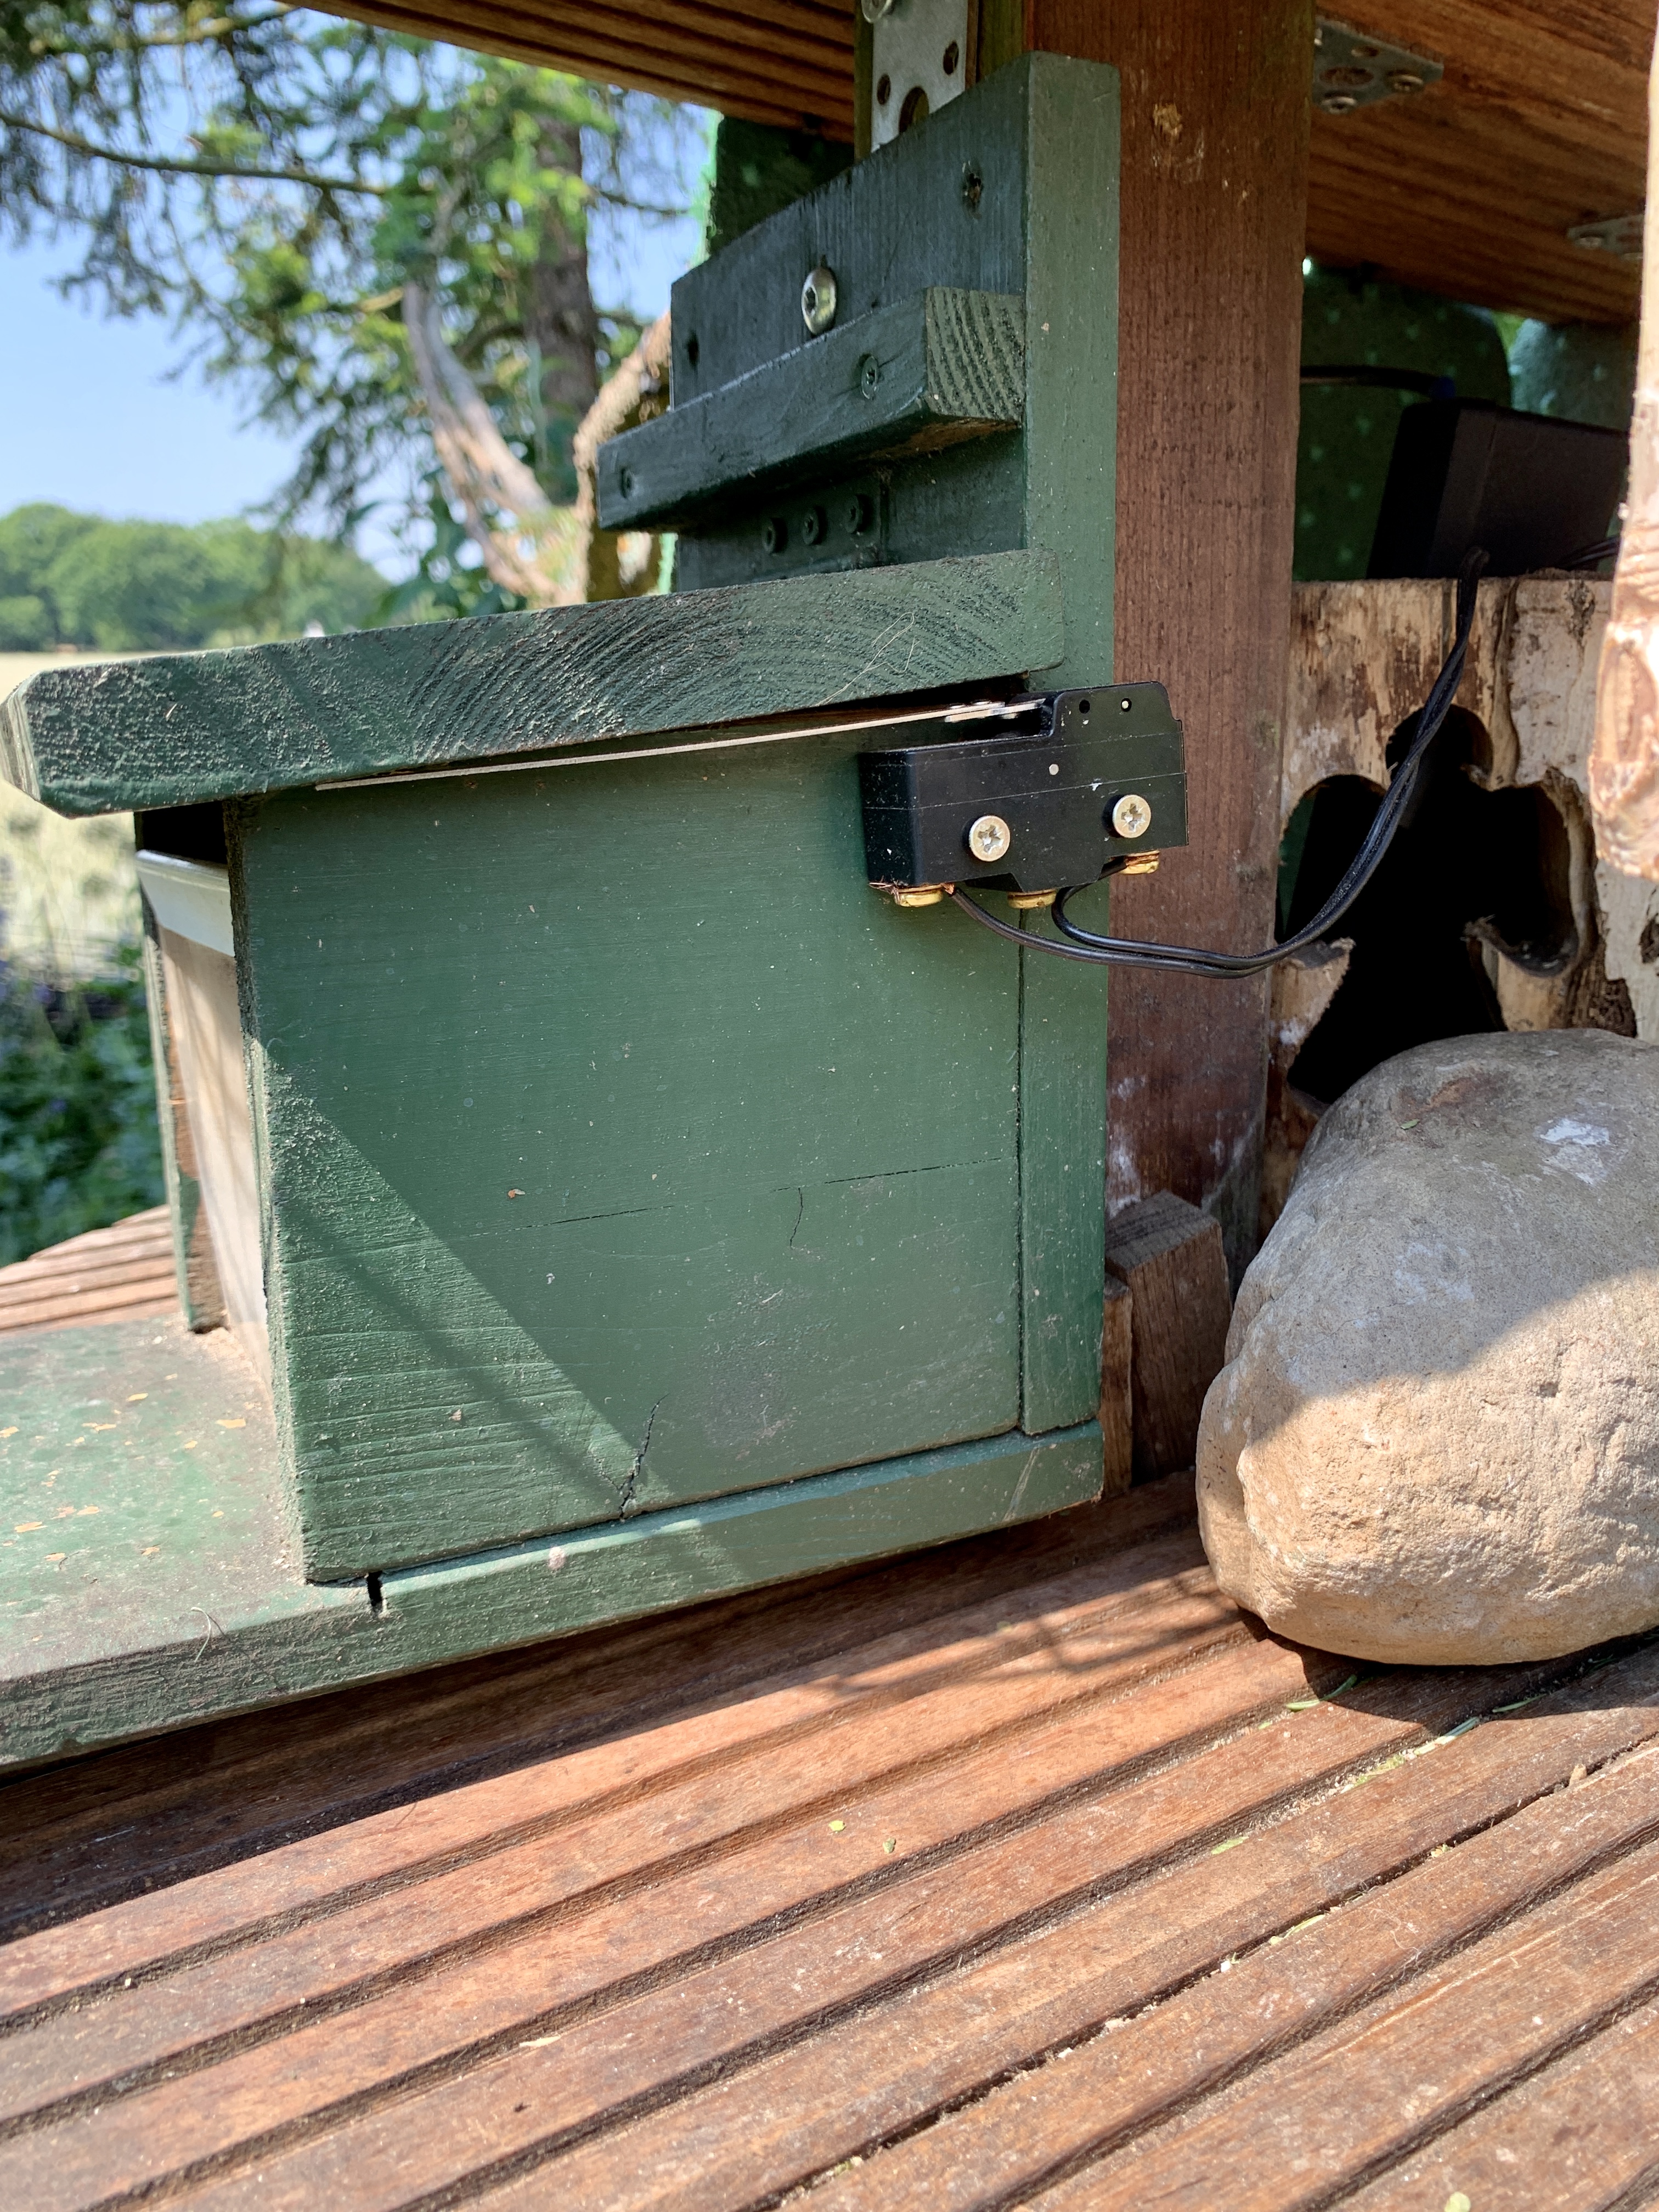
Here are some pictures of the Squirrel Food Station:
Functional Description
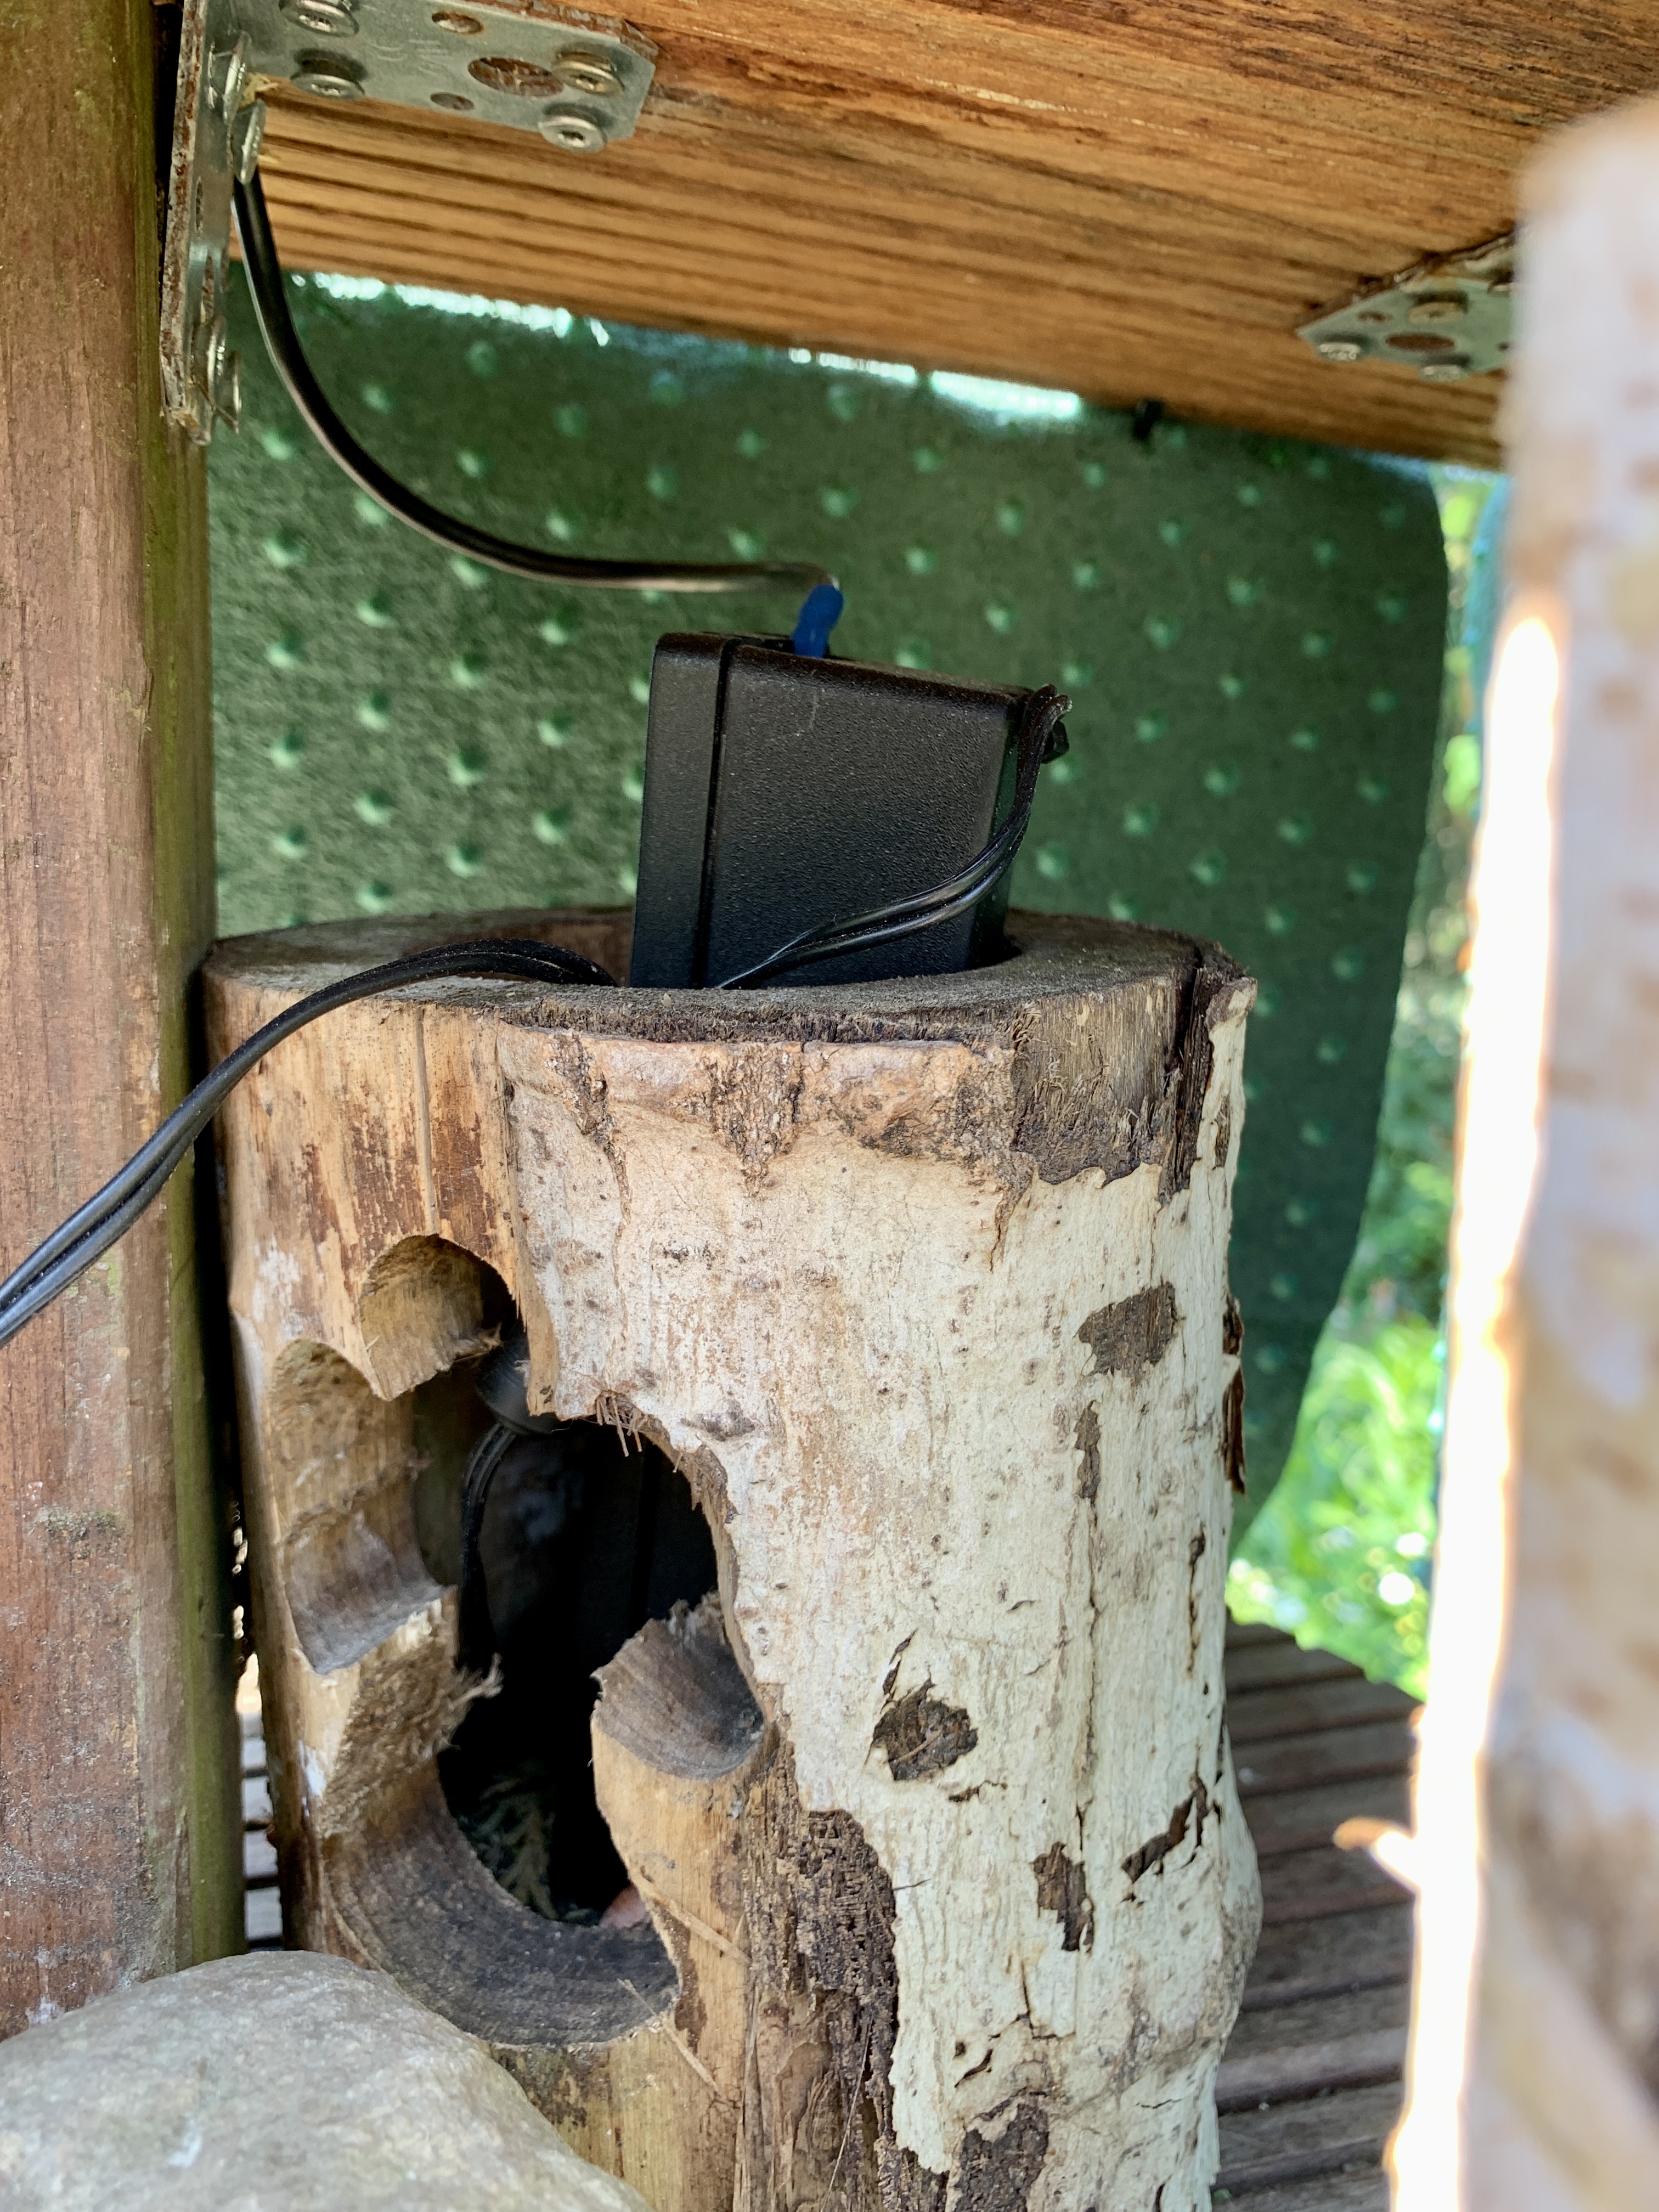
Once, a squirrel approaches the station and lifts the roof, a small switch wakes up the Arduino for 10 minutes (I choose 10 minutes, because some squirrels will just grab a nut and runs away). So, the system is running for 10 minutes (thanks to the onboard RTC of the MKR 1010) and goes into deep sleep mode afterwards. As the station is solar powered, it is important, that I do not draw too much energy from the battery (thanks to the onboard battery charger).
The switch next to the station works as an interrupt, pulling down the internal Arduino input pull-up resistor down to LOW, once the roof was lifted. You need a switch with 2 possible switch states. In this application it must open a contact, once the switch is pushed.
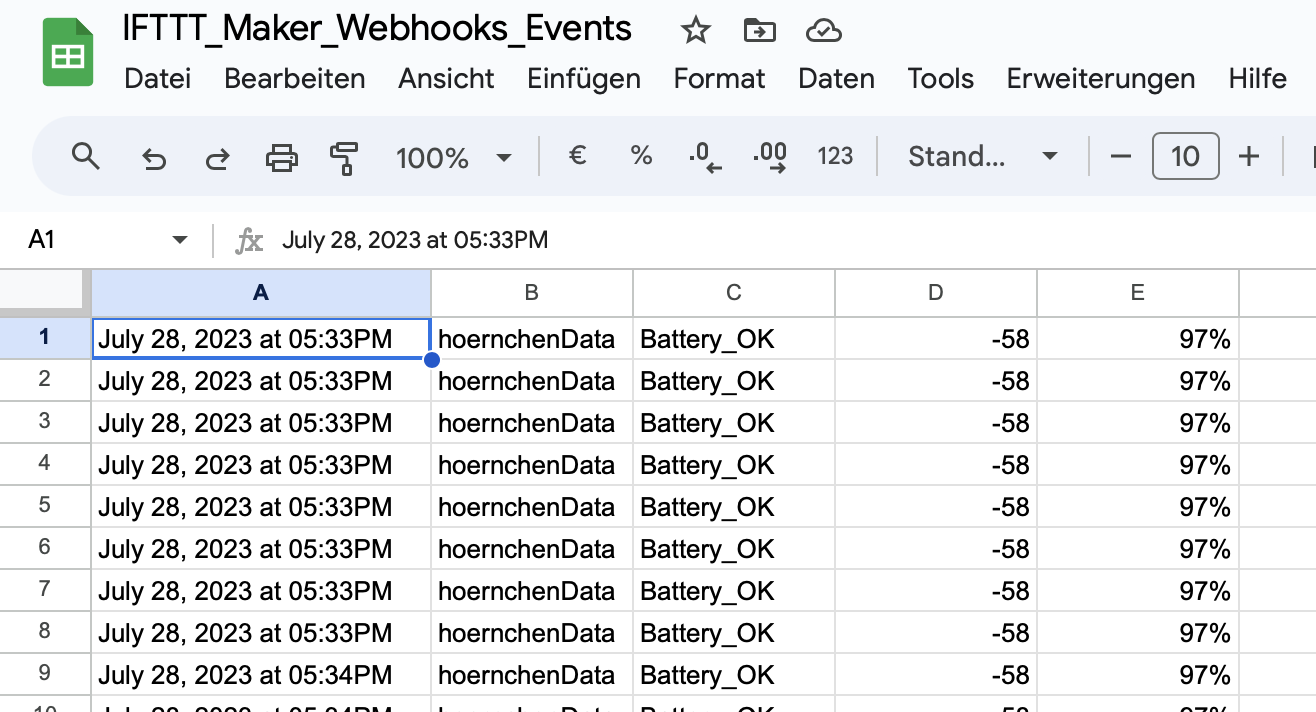
Everytime, the roof was lifted, I transfer general battery status (Battery low, Battery ok), Battery Power level (0-100%) and the WiFi signal strength to Google Sheets for monitoring the access in Google Sheets on my smartphone or computer. Google Sheets adds a time stamp automatically. If you are familiar with script programming for Google Sheets, you can write a script and send an eMail for every access :-)
How to do it
First of all, you need to setup a web hook to be able to transfer data to Google Sheets. I used IFTTT as a web hook. How to setup that one is very good describe here . It works perfectly fine and I do not need to repeat it here again. You can send 3 parameters for free. If you want to send more, you need to decide for a plan or, as a workaround (and your are familiar with Google Sheets script programming), you could use one of the 3 parameters as a flag. If the flag is a 1, than the script transfers the values behind the row before and a second call of IFTTT can take place :-)
Here is a picture of how it looks like:
Wiring Diagram
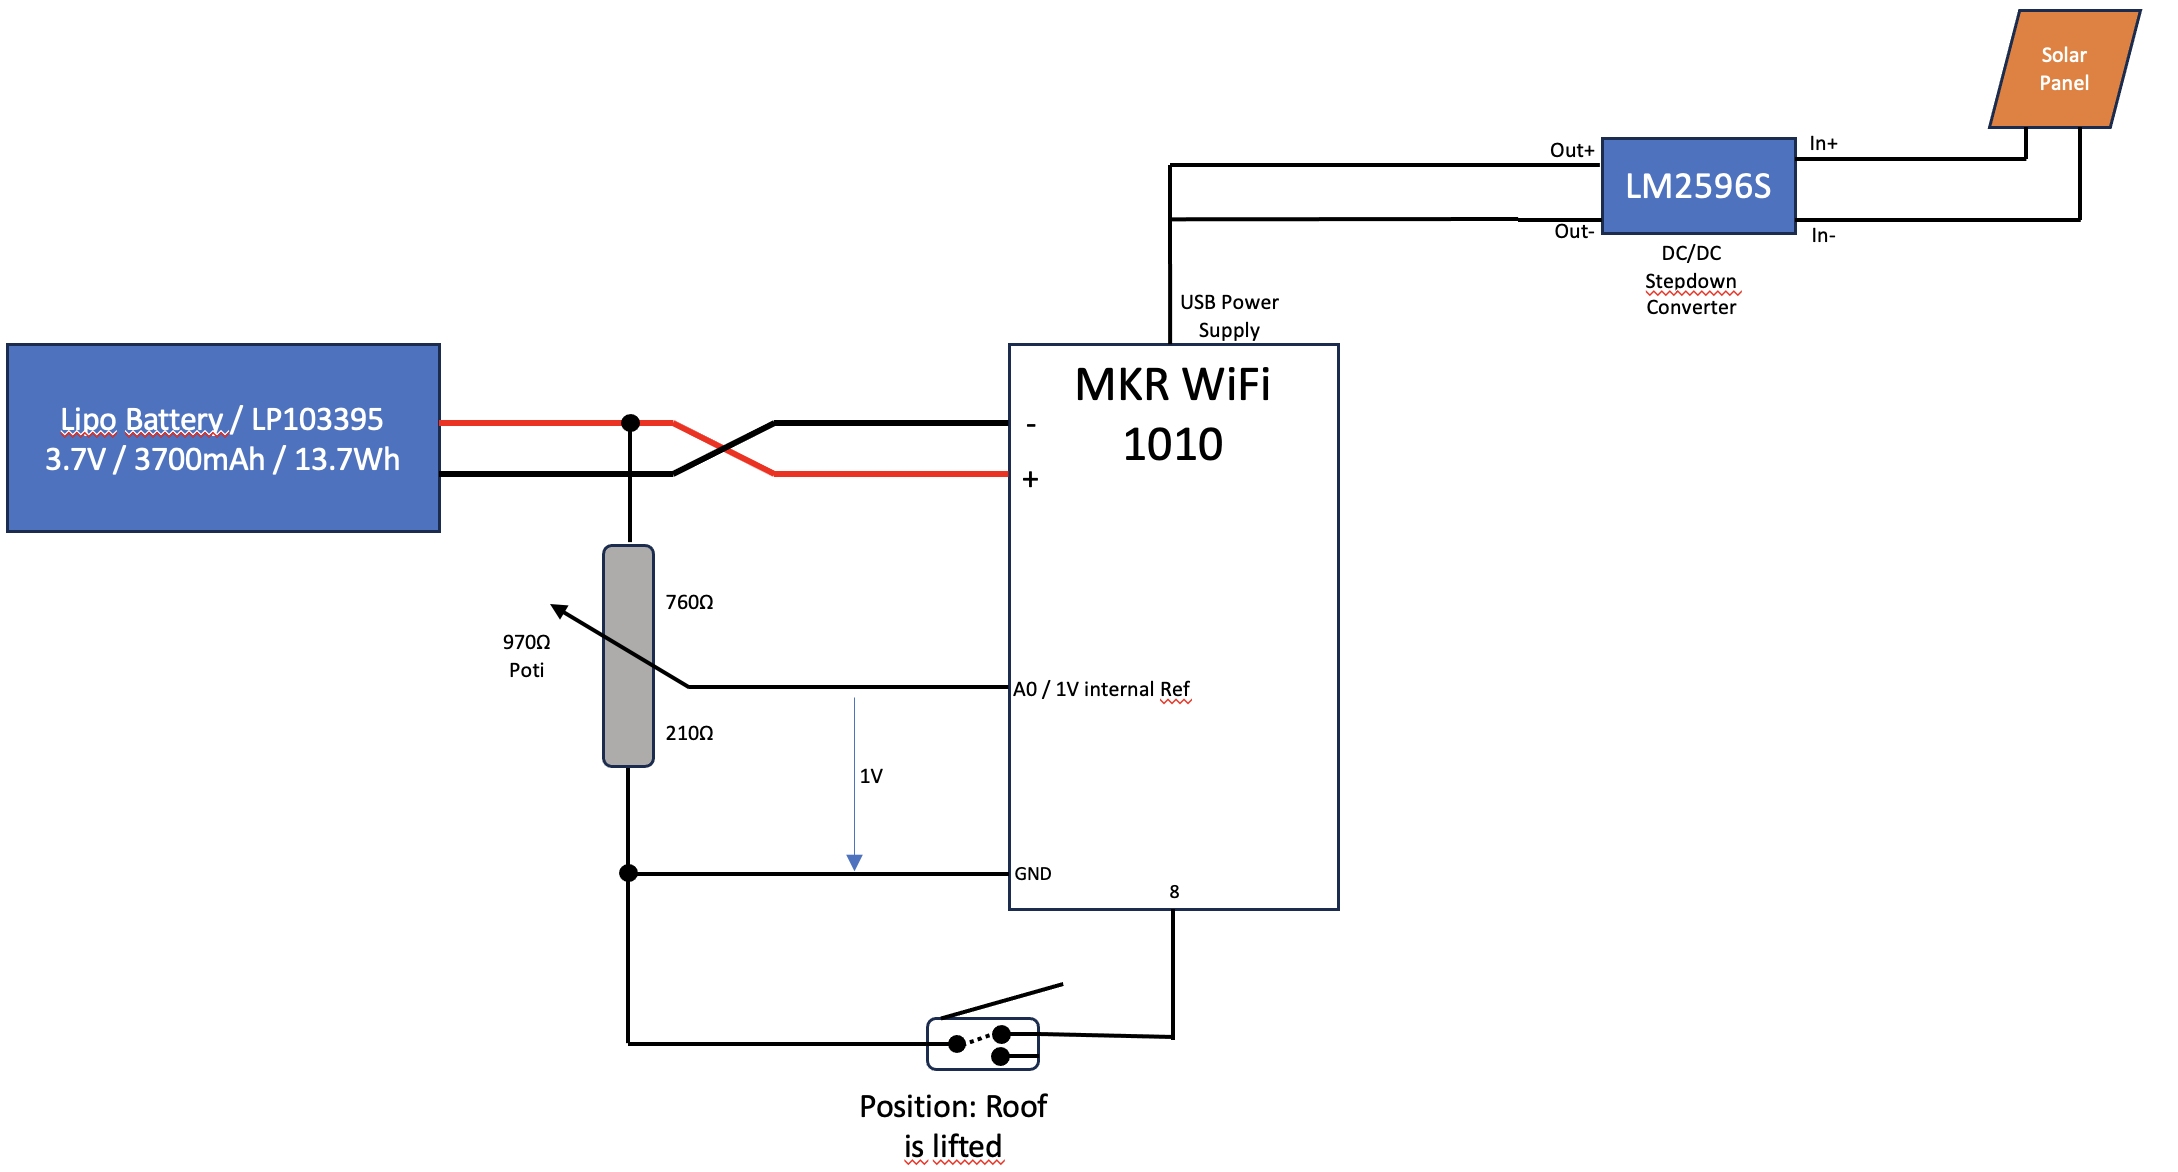
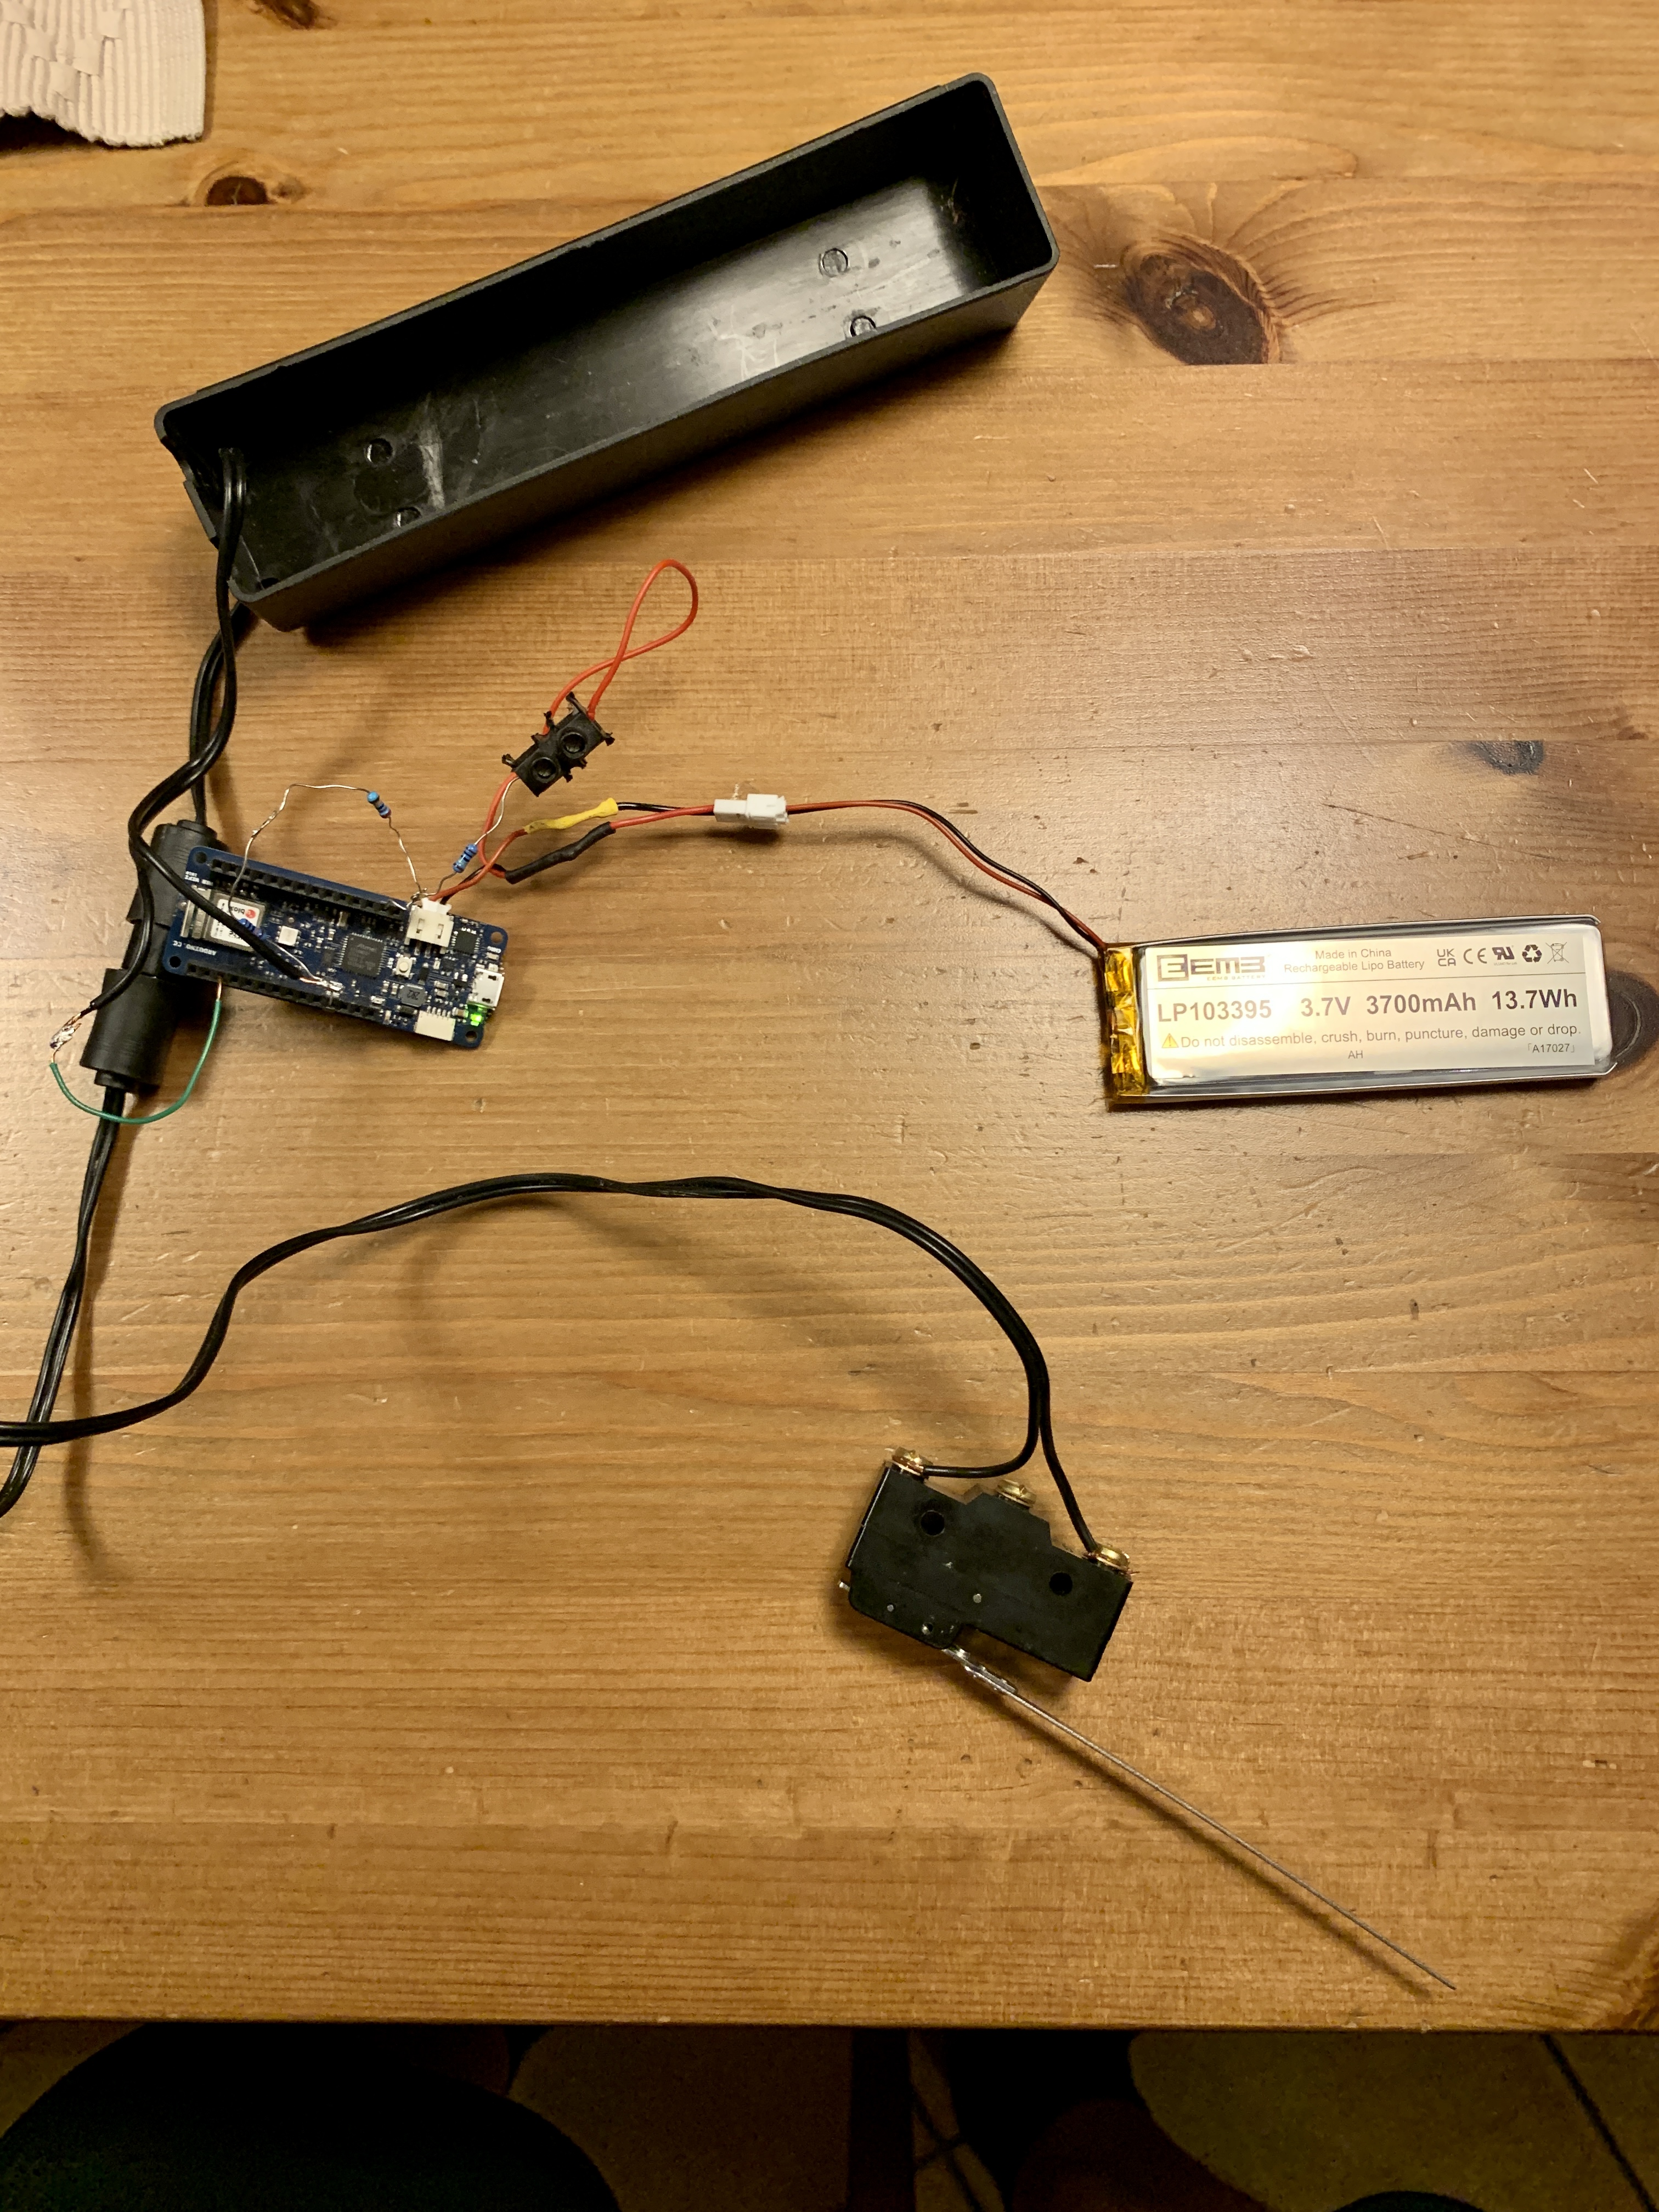
Battery voltage is divided by 4 with resistors in order to meet the internal 1V reference voltage.
Please watch out for the right battery connection. Arduino boards may have a switched polarity against the Lipo batteries. You may need to make an adapter to change wires.
Solar Power
To provide the Arduino with power, I use a Solar Panel. Use any Solar Panel (min. 5W) , which provides a voltage up to 35V (depending on possible input voltage range of the Stepdown controller). A DC/DC Stepdown controller converts the voltage provided by the Solal Panel into a stable 5V for the Arduino. First, you need to adjust the output voltage with the a screw and the adjustable resistor on the converter to 5V, before you connect it to the Arduino! That's it.
EXPANDED TECHNICAL DETAILS
Autonomous Outdoor Wildlife IoT
This rugged, solar-powered station monitors wildlife activity in real-time, logging data directly to the cloud for statistical study.
- Off-Grid Power Management: Powered by a 6V solar panel charging a 18650 Li-ion battery. The Arduino (using ESP8266) spends most of its time in "Deep Sleep" mode, only waking up when a PIR or weight sensor is triggered.
- Google Sheets Integration: Uses the IFTTT (If This Then That) Webhooks service. When a squirrel is detected, the Arduino sends a packet to the webhook, which appends the time, date, and "Feeding Duration" to a public spreadsheet.
Durability
- Weatherproof Telemetry: Features an integrated DHT22 sensor to log the ambient temperature alongside the feeding data, providing insights into how weather affects squirrel behavior.