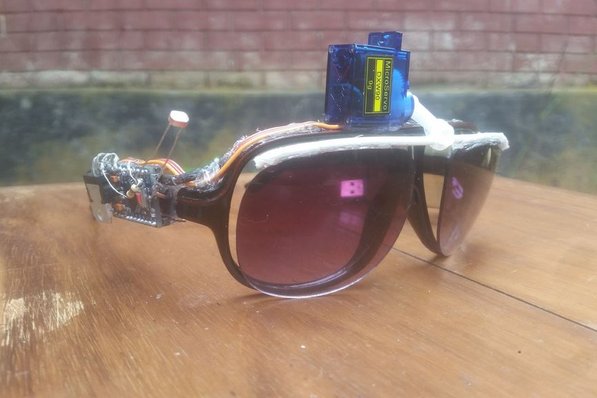
A pair of sunglasses that automatically detects light intensity and closes or opens its black shade.
So from now on, you don't need to worry about eyes. Instead, this pair of glasses is here to automatically protect your eyes and also open the shades for ease of viewing at low light.
This robot is made using Arduino and some basic parts. Sounds cool, isn't it?
Update: This robot has been Featured as TOP PROJECT on HAckSpace Magazine https://hackspace.raspberrypi.org/issues/9
Project Overview
The "Lumina-Shield SunGlass-BOT" is a pioneer in Reactive Wearable Robotics. Featured in HackSpace Magazine, this project transforms a static pair of sunglasses into an autonomous protective system. Utilizing an Arduino Pro Mini for its ultra-small footprint, the robot monitors ambient lux levels and mechanically deploys secondary darkened shades when thresholds are reached. It is a study in miniaturized mechatronics, analog photometry, and Human-Centric Design (HCD).
Step 1: Parts
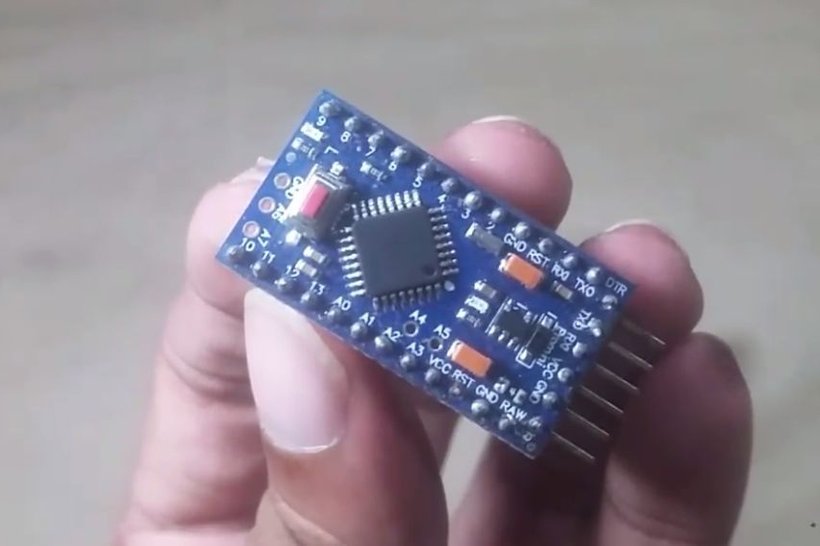
- 1x Arduino Pro Mini (5v 16 MHz)
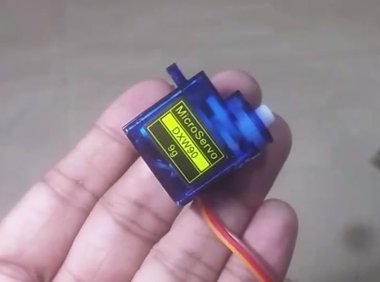
- 1x micro servo motor (any model is good but it needs to be small)
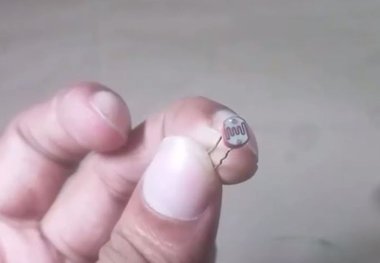
- 1x LDR (light dependent resistor)
- 1x 10k ohm resistor
- a pair of sunglasses
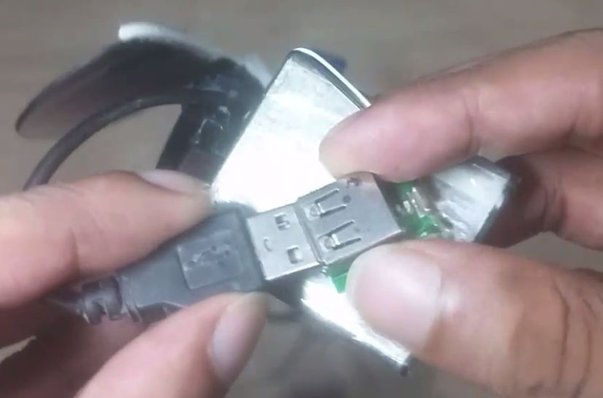
For programming, you'll need a USB to TTl converter or Arduino Uno. I'll upload code using an Uno.
Step 2: Principle & Technical Deep-Dive
We'll make a voltage divider circuit and connect it with Arduino. Now we know that LDR is a variable resistor and its resistance value changes according to light intensity. Since our resistor is 10k, our value will be in between 0 to 1023. If there is bright or a medium sun light, the value will be less than 100. In room light, the value will be something around 500 to 600. If too dark, the amount will be 1023. You got it, right? Let's proceed!
- Photometric Triggering (LDR Physics):
- The Voltage Divider String: An LDR is paired with a 10k resistor in a voltage divider configuration. The resistance of the LDR drops significantly in bright light (e.g., from 1M-ohm to <100-ohm), shifting the voltage at analog pin A0.
- Lux-to-Angular Mapping: The firmware implements a simple yet effective threshold logic. When the ADC reading drops below a calibrated "Sunlight Threshold" (approx. 100), the Arduino sends a specific PWM width to the servo to rotate the shades down.
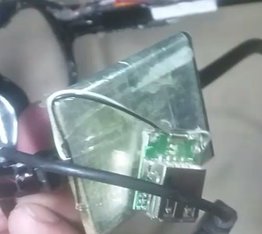
Step 3: The Circuit
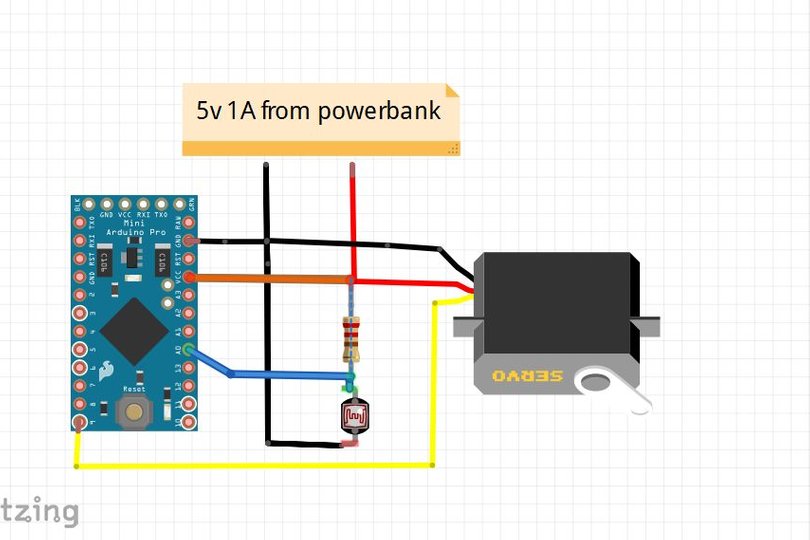
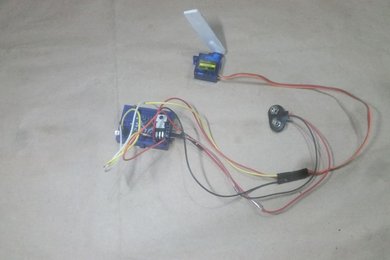
The circuit is simple enough to build. I've tested it on breadboard, and then soldered it onto an Arduino Pro Mini. Make room for the LDR as it will have to detect the light.
Step 4: Programming the Arduino Pro Mini
As you can see, we don't have a USB programming option on the Pro Mini. Use a USB to TTL converter or use an Arduino Uno. After all, we all have an Uno, right? So why waste money?
- The Pro Mini Architecture:
- Miniaturization Logic: The Arduino Pro Mini is chosen specifically to minimize weight on the user's face. By removing the bulky USB-to-Serial hardware found on Uno boards, the Pro Mini maintains a minimal 18x33mm profile, allowing it to be mounted directly onto the glasses' temple (arm).
- Prototyping via Uno: Since the Pro Mini lacks on-board USB, the project demonstrates a professional workaround: using a "Headerless" Arduino Uno as a USB-to-TTL Bridge (Serial Passthrough) to flash the firmware.
Just remove the ATmega328P IC from the Arduino Uno using a screwdriver to lift it up. Then connect the pin as follows:
- UNO -------- Pro mini
- 5v---------------vcc
- Gnd------------Gnd
- tx----------------tx
- rx----------------rx
- reset----------- rst
You may watch the video to do so (language different):
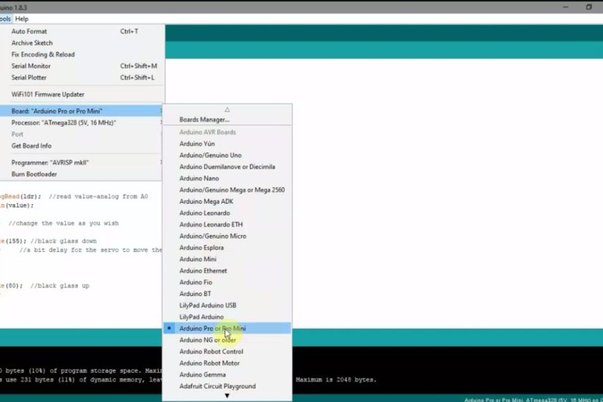
That's it! Then connect Arduino Uno USB cable and connect to your PC or Android to upload the code. Before uploading go to tools>board type> select Arduino Pro Mini (also select the right processor 5V 16 MHz in our case). See the picture.
Then upload the code.
Code link: https://github.com/ashraf-minhaj/SunGlass-Bot-Auto...
//*SunGlass-Bot an automatic sunglass by ashraf minhaj.
//full tutorial on youtube: www.youtube.com/c/fusebatti
//Contact if necessary ashraf_minhaj@yahoo.com
#include<Servo.h>
Servo sglass; //servo name
int ldr= 0;   //connect LDR to A0
int value= 0; //define value 0
void setup()
{
 Serial.begin(9600); //this is not necessary-but to show value to pc
 sglass.attach(9);   //declare in which pin the servo you attach
}
void loop()
{
 value = analogRead(ldr);  //read value-analog from A0
 Serial.println(value);
 delay(100);
 if(value<100)  //change the value as you wish
 {
   sglass.write(155); //black glass down
   delay(100);     //a bit delay for the servo to move there
 }
 else
 {
   sglass.write(80);  //black glass up
   delay(100);
 }
}
Upload it and see how it works!
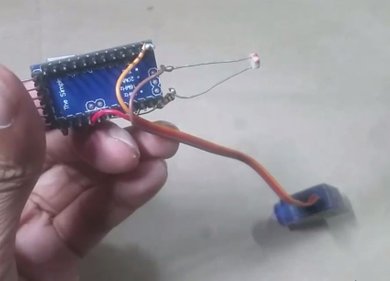
Step 5: Prepare the Sunglasses & Engineering Implementation
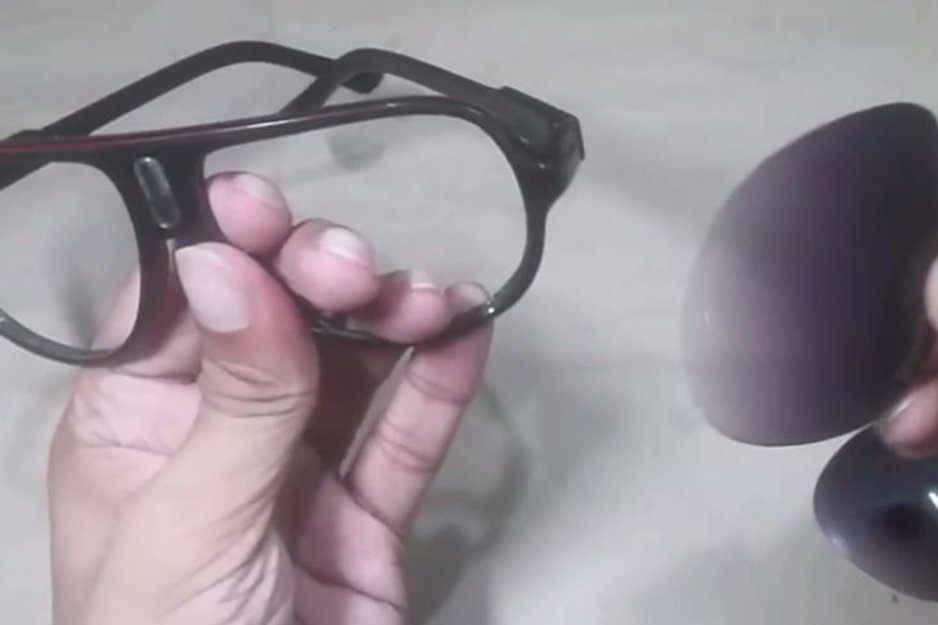
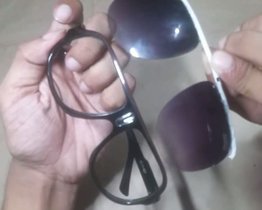
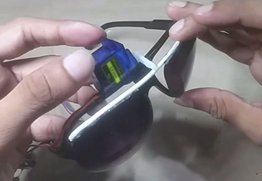
Push hard to remove the black glasses and glue them on a hard wire just like this. Then mount the servo and add a servo arm to glue it with the extra glass frame we made.
- Mechanical Actuation:
- The Secondary Frame Linkage: The project involves "gutting" the black shades from a standard pair of glasses and mounting them on a custom wire pivot. A Micro-Servo (SG90) provides the rotational torque necessary to flip the shades.
- Angular Limits: The servo is programmed to move between 80° (Stowed) and 155° (Deployed), ensuring the shades stay flush with the face without colliding with the user's eyebrows or the primary clear lenses.
- Fabrication Techniques:
- Custom wire-forming is used to create the shade hinges. The use of hot glue provides a shock-absorbent mounting for the servo, protecting the delicate internal gears from the vibrations of daily movement.
- Wearable Power Delivery:
- Current Spikes: A micro servo can draw up to 500mA during rapid movement. To prevent CPU resets, the system is powered by a 5V 2A Power Bank, ensuring the Pro Mini’s logic rail remains stable even during mechanical deployment.
- Ergonomics & Weight Distribution:
- The placement of the servo and battery lead is critical for comfort. The build documentation emphasizes balancing the weight of the Pro Mini on one temple with the servo on the other, creating a stable, wearable experience.
- Hysteresis & Debouncing:
- Stability Logic: To prevent the shades from "jittering" when the user walks through flickering shadows (e.g., under a row of trees), the code can be improved by adding Software Hysteresis—setting different activation and deactivation thresholds.
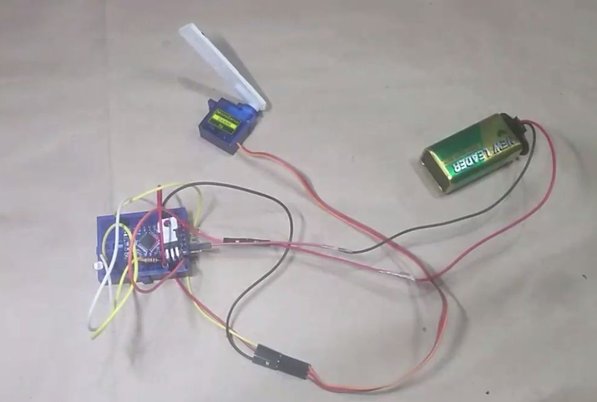
You may power it up using any 5V 1A power source. I'll be using a homemade power bank.
Step 6: Done!
Power up the circuit and you should see the Arduino light up. Now go out and have fun with this weird-looking yet amazing sunglass robot!
Conclusion
As a recognized "Top Project" in the maker community, the SunGlass-BOT demonstrates that high-performance wearable automation can be achieved with entry-level hardware and creative mechanical engineering.