The story behind this project started when I needed to figure out a way to stop my water pipes from freezing at my cottage in the autumn months prior to winterizing.
I found a 12 volts pipe heating cable, but needed a way to control it. After doing a little bit of research a came across this online course on how to build a fully automatic and adjustable thermostatic relay, so I gave it a try.
The course was quite simple to follow, as they supply all the code and made it easy to follow step-by-step instructions. The unit can also display a warning message which will scroll on your LED display when a certain predefined condition occurs.
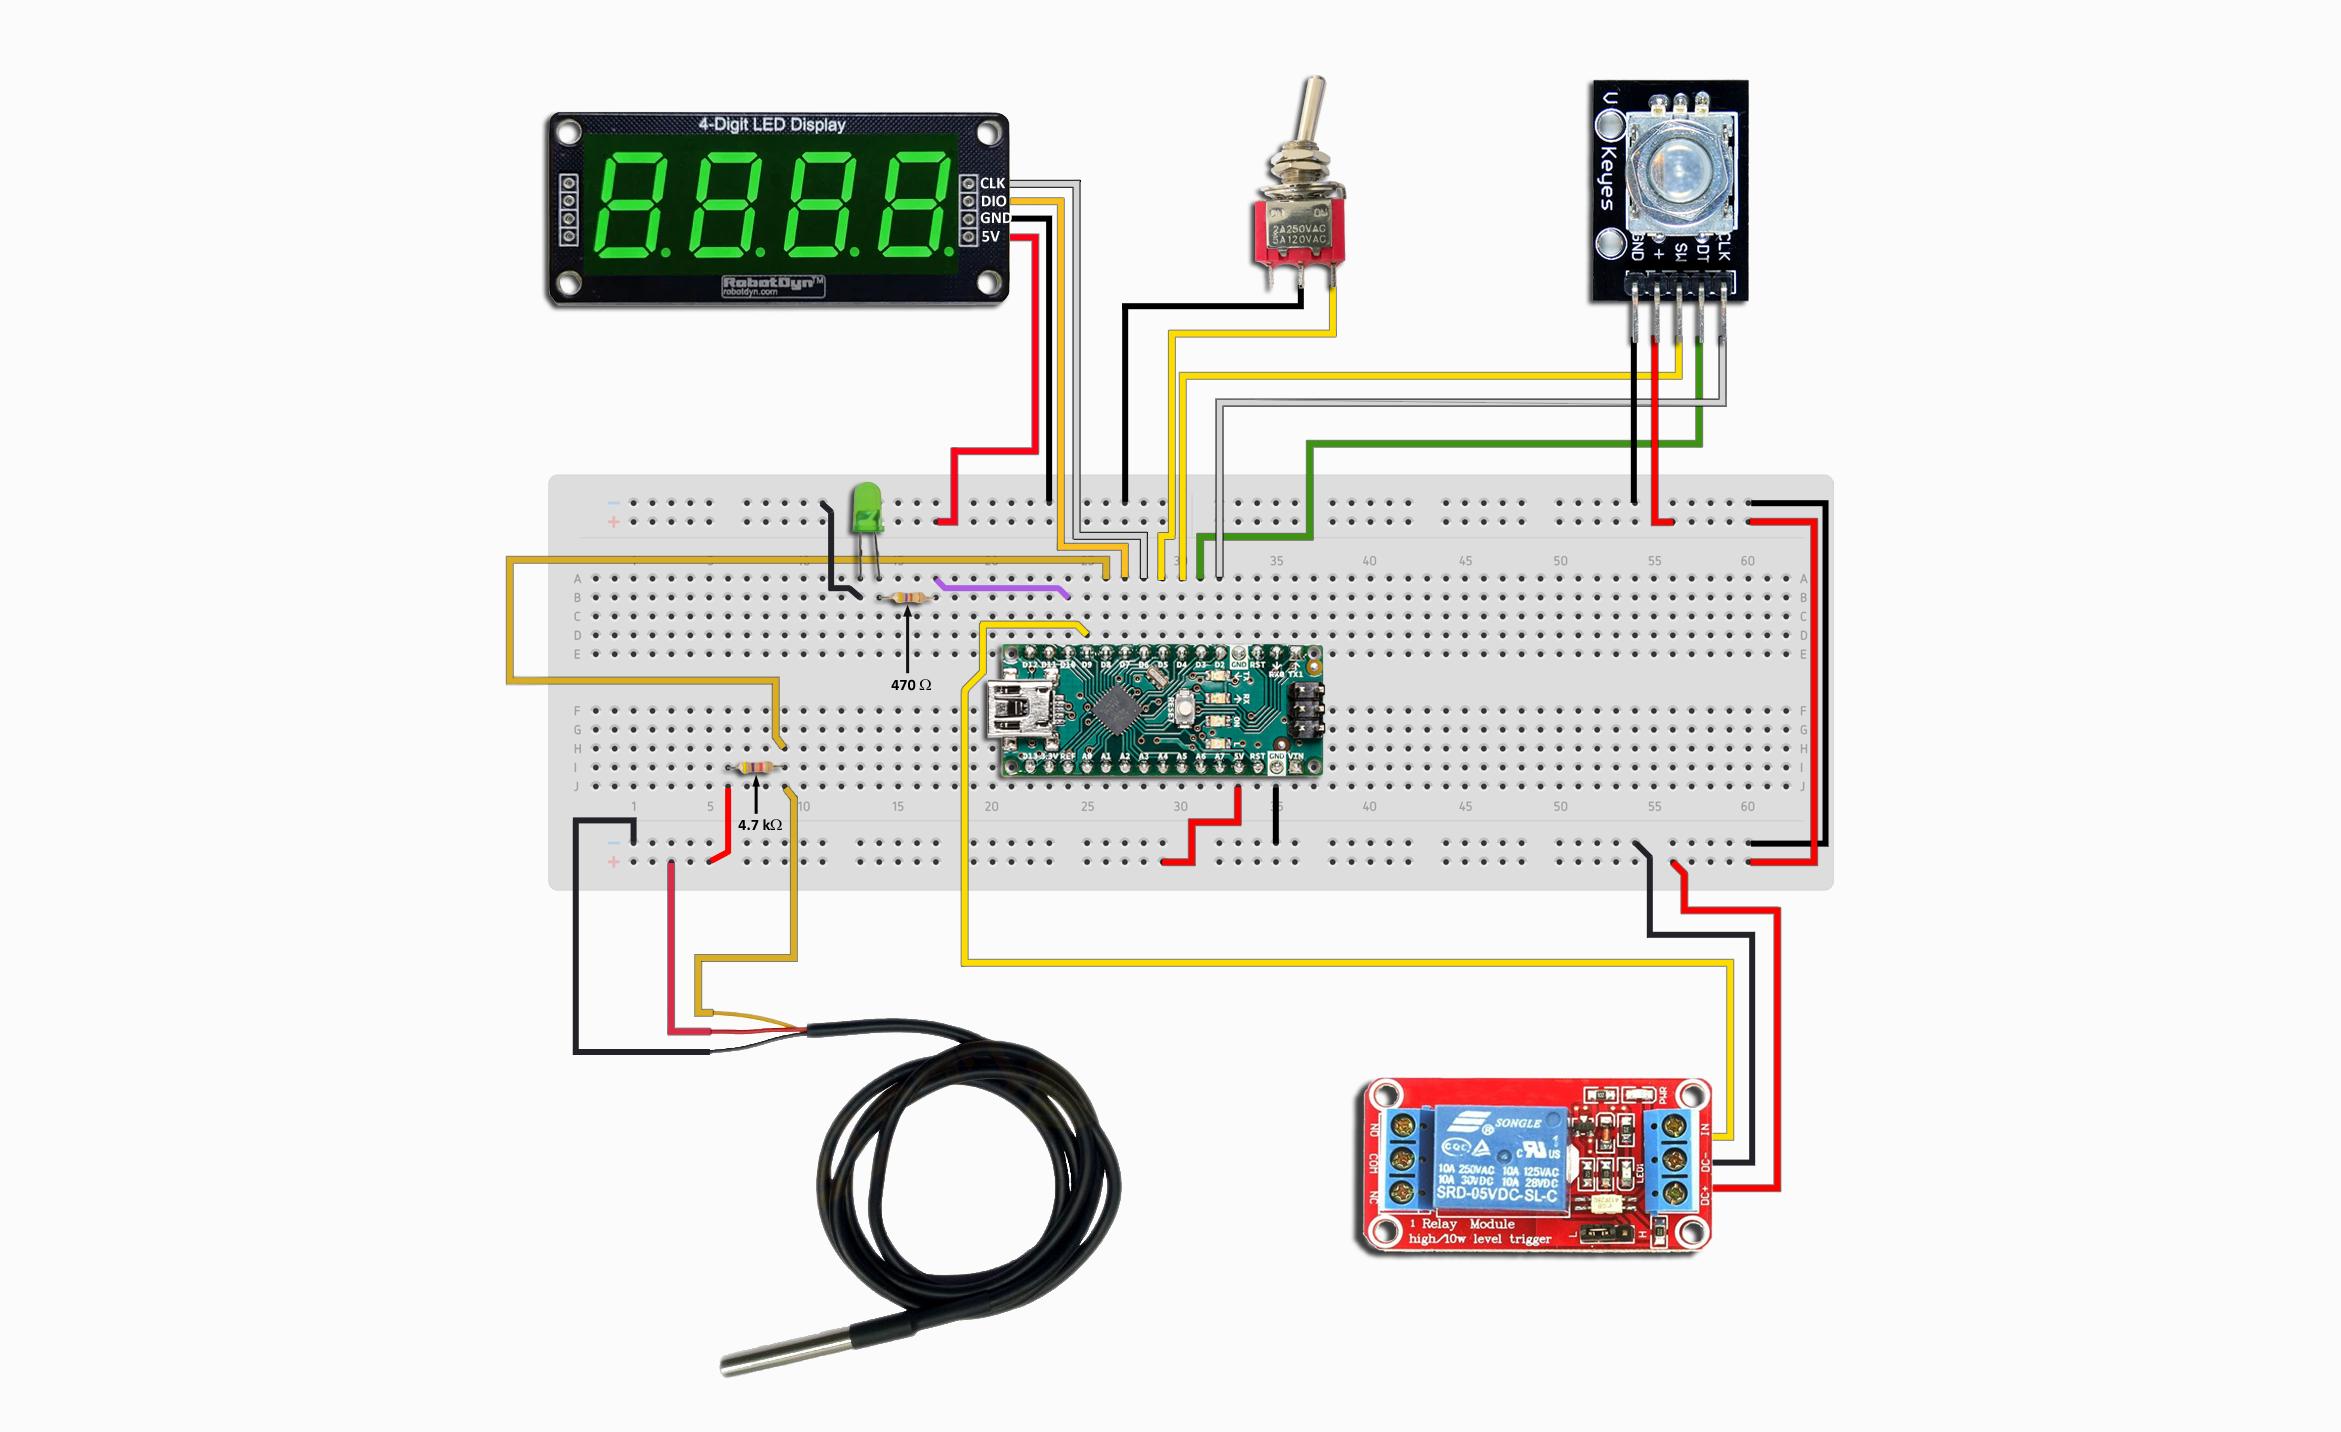
Here is a diagram of the completed and functional project on the breadboard prior to assembling the portable version:
Precision HVAC Control: Programmable Thermostatic Relay
Cheaper commercial space heaters use analog bimetallic strips that bend under heat to click off, resulting in wildly erratic temperature swings spanning up to 5°C! The Ajustable Thermostatic Relay project fundamentally re-engineers thermal containment by utilizing true digital sensing. The Arduino Nano constantly interrogates a high-precision digital environmental sensor and runs custom Hysteresis mathematics to command a physical electromagnetic Contact Relay, maintaining the exact atmospheric target degree with surgical stability!
Implementing The Critical "Hysteresis" Envelope!
If you write simple code like if (temp < 25) { Relay_ON(); } else { Relay_OFF(); } you will violently execute your Relay!
- The temperature will waver at
24.99and25.01rapidly, causing the heavy 240V Relay to click ON and OFF 10 times a second (Short Cycling). This immediately melts the relay contacts and destroys the connected Heating Compressor! - Hysteresis enforces a mandatory massive "Dead Zone" gap!
float currentTemp = dht.readTemperature();

// The heater turns ON only when it drops far below 23°C
if (currentTemp <= 23.0) {
  digitalWrite(RELAY_PIN, HIGH); // 240V HEATER ENGAGED!
  heaterState = true;
}

// But it refuses to turn OFF until the room reaches all the way up to 26°C!
if (currentTemp >= 26.0) {
  digitalWrite(RELAY_PIN, LOW); // HEATER DISENGAGED!
  heaterState = false;
}
// Between 23 and 26, the Arduino executes NO commands! The state is locked!
The High-Voltage AC Relay Interface
The Arduino operates entirely inside a tiny 5V logic bubble.
- To violently control a massive 1500-Watt Space Heater, you must explicitly use an Opto-Isolated 5V Relay Board.
- The Arduino sends 5V into an LED inside the Relay Board (Optocoupler), which shines light onto a phototransistor to active the magnetic coil.
- This physical light-gap completely isolates the fragile Arduino silicon from the terrifying 240-Volt grid power!
Climatic Hardware Infrastructure
- Arduino Nano (Its tiny form factor is incredibly optimal for housing inside small 3D-printed thermostat boxes on the wall).
- DHT11 / DHT22 or DS18B20 Sensor Matrix (DHT22 is vastly superior for absolute decimal precision over the DHT11!).
- 16x2 I2C LCD Screen (Absolutely critical to visually verify the target Setpoint against current Ambient parameters).
- Rotary Encoder or Potentiometer (To manually adjust the target threshold Setpoint Variable globally in real-time).
- Physical 10A / 250V AC Rated Relay Module (Always verify the amperage of the heater! A 1500W heater draws ~13 Amps at 110V; a standard 10A relay will catch fire! Ensure massive industrial load rating!).
Once I completed the portable version of the project, I tested it at my cottage and I've never had a problem since.
I’ve tried to include as much info on the project as I could without offending the authors of the course, but if anyone wants to take a deeper dive, I highly recommend going to the following link for more details on doing this project:
https://aiotconsulting.com/services/#iot
Here is a video from the project showing the finished portable version of the project with an external 5v power supply: