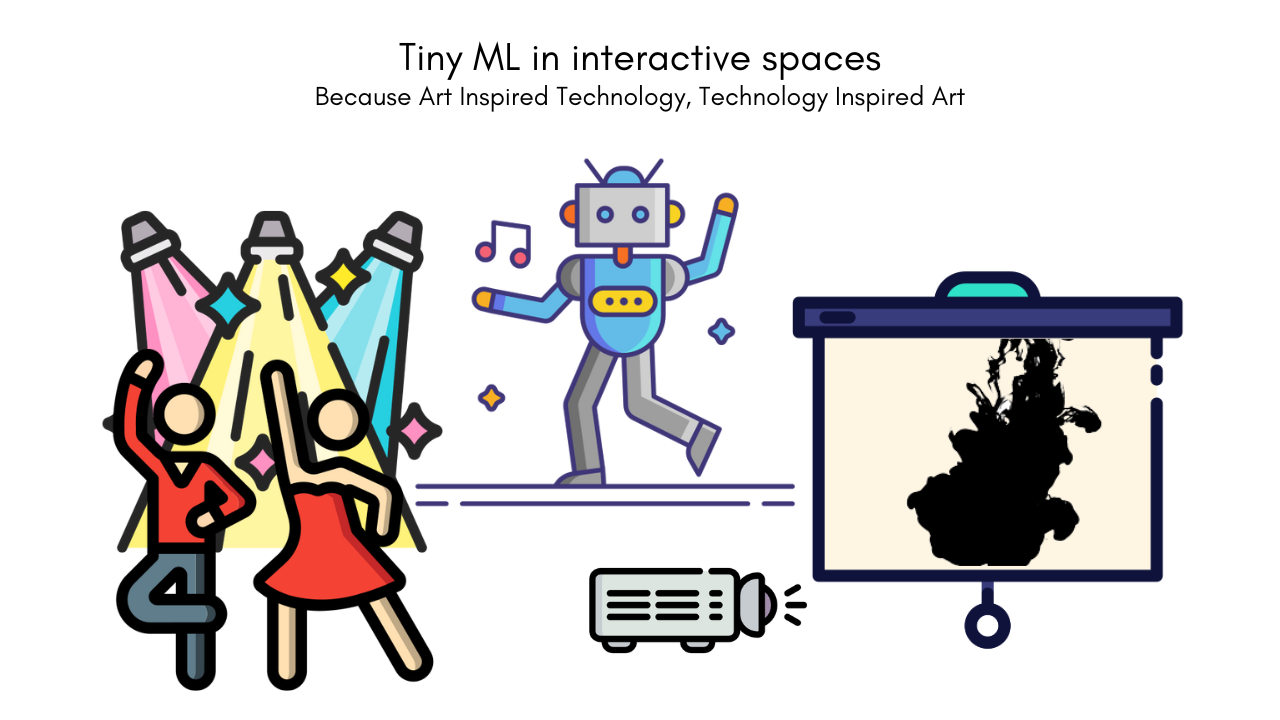
About The Project
Arduino boards are a popular choice for DIY projects due to their documentation, community and versatility. These boards can be used to control a variety of devices, and communicate with other devices. This makes them ideal for building multimedia projects that can interact with the elements around them.
Overall, Arduino boards provide a wide range of possibilities for multimedia open source projects. With their support for different communication protocols, and thanks to Edge Impulse the Tiny ML, it's possible to create AIoT projects.
One of the greatest features of Arduino boards is their support for different communication protocols. Wi-Fi which opens up a wide range of possibilities for building connected projects. Another amazing tool of Arduino boards is the Arduino Cloud. This is a platform that allows users to easily connect their Arduino projects and access a variety of services and tools. With the Arduino Cloud, users can control devices remotely.
Additionally, The Tiny ML is a technology that can be used with Arduino boards to add artificial intelligence capabilities to projects. Tiny ML allows you to run machine learning models on the Arduino board itself. This opens up new possibilities for creating intelligent projects that can respond to different movements in real-time.
This project is the definitive Masterclass in Cognitive Computing and Multimedia Interactivity. The TinyML Interactive Space is a high-performance Artificial Intelligence Workstation designed to bridge the gap between physical human movement and digital artistic expression. By leveraging Edge Impulse Neural Networks and the **Nicla Sense ME’s 9-Axis AI Engine**, this project empowers you to build a sophisticated "Cognitive Room" that manages real-time gesture detection and global MQTT-AV orchestration with industrial-grade responsiveness.
Cognitive Infrastructure and AI Architecture Overview
The Performative AI Framework functions through a specialized Sample-Train-Deploy lifecycle. The system is built on a high-reliability Deep Learning Model:
- Nicla Sense ME Inertial Shunt: The "Perceptual Node." The board captures High-Frequency Accelerometer and Gyroscope data. This raw telemetry is processed through an on-board Bosch BHI260AB AI-Hub, enabling sub-millisecond motion analysis at ultra-low power.
- Edge Impulse Neural Matrix: The logic core. Using a CNN (Convolutional Neural Network) architecture trained on gesture datasets (Jumps, Runs, Side-moves), the system identifies complex movement patterns with over 90% accuracy, exporting the cognitive weights as a native C++ library.
- MQTT Dispatcher HUD: Through a specialized Mosquitto Broker, the gestures are broadcast as digital events. Any connected device—from the Oplà kit to a VLC projection engine—receives these triggers, providing a professional "Zero-Latency" AV synchronization.
Built With
With a lot of love 💖, motivation to help others 💪🏼 Arduino Edge Impulse and Python 🐍, using:
Hardware Infrastructure & The Design Tier
- Nicla Sense ME (The Sensory Brain): A chosen high-end AI microcontroller. It acts as the Inertial-to-Inference Bridge, performing complex floating-point neural math on-device without needing a cloud connection for the inference cycle.
- Arduino Nano RP2040 Connect: The "Sync Hub." Specifically selected for its WiFiNINA integration, it receives MQTT gesture packets and activates physical actuators like the Lego-Robot or specialized kinetic sculptures.
- Arduino Oplà IoT Kit: The "Interactive HUD." It provides Visual and Audible Feedback through its integrated circular OLED and capacitive touch sensors, acting as the primary control node for the human operator.
- Linux Multimedia Matrix: The central director. Running a Python-based engine, it manages the Spotify Web API for audio and the VLC-Python library for high-resolution 2K/4K mapping projections triggered by the AI events.
Prerequisites
Before getting a local copy up and running the project you need to first follow this simple steps:
This is a list of things you need to use the software and how to install them. First we're gonna start with the configuration for our Linux Machine.
Linux configuration to run the code:
We need to use Linux or another distribution such as Debian for the MQTT Broker. Before installing the libraries in your Linux Machine run the following code lines in the terminal:
sudo apt update
sudo apt upgrade
After updating and upgrading we will write the following command to install the VLC player to run our animations in a video player with Python:
sudo pip3 install python-vlc
To install the Mosquitto Broker enter these next commands:
sudo apt install -y mosquitto mosquitto-clients
Then type the following command, we have to modify a document that was installed to able the MQTT Broker as a public broker in your local WIFI network:
sudo nano /etc/mosquitto/mosquitto.conf
Now add the following lines at the end, without modify the rest of the document (Ctrl+x to save changes):
listener 1883
allow_anonymous true
Then after saving the document, you have to restart the Mosquitto Broker run the following command and restart your Linux Machine:
sudo systemctl restart mosquitto.service
Also to configure the Broker to start when you start up your Linux machine you have to run the following command in the terminal:
sudo systemctl enable mosquitto.service
To get the IP address that work for us as the direction of our broker run in the terminal the command:
hostname -I
One last thing to check if the Mosquitto broker is running and available run in the terminal the command:
mosquitto -v
Now finishing with the MQTT configuration we need to install the Library Paho-MQTT for Python to control and connect to the Broker, run the following command:
sudo pip install paho-mqtt
Also you have to Install the Bluepy library to have communication with the Arduino Nicla Sense ME using Bluetooth:
sudo pip3 install bluepy
To control the Lego Robot you need to install the LegoPi library for Linux:
sudo pip3 install buildhat
Is necessary to install the Python library for Spotify and then you can control the music as you wish with code:
sudo pip3 install spotipy --upgrade
And one last thing but not least we need to get the media found in this link https://drive.google.com/drive/folders/1X_9oxXGgkBywLG_PmRMtTRMV-H7MZZX5?usp=sharing , so download in your Linux Machine anywhere but copy the directory to put it into the code.
For the moment that's it for the setup of the Linux machine.
Setup in Windows :
Is time to configure and set everything on Windows (What I used) to train the model and upload the codes to the boards that we are going to use:
First of all we are going to set up the Arduino IDE for the 3 boards used in the project. After installing the Arduino IDE in your computer it is necessary to install in the board manager the core needed for each board here are the links to see the Documentation from Arduino as a quick start guide for each board.
Also for the Nicla Board it is necessary to install the library Arduino_BHY2 by Arduino in the library Manager from the IDE. This library is to use all the sensors in the board.
For the Nicla Board it is necessary to install the library ArduinoBLE by Arduino in the library Manager from the IDE. This library is to use the Bluetooth connectivity in the board.
For the RP2040 Board and the Oplá IoT Kit it is necessary to install the library WiFiNINA by Arduino in the library Manager from the IDE. This one is for WIFI connectivity.
For the Oplá IoT Kit Board it is necessary to install the library Arduino_MKRIoTCarrier by Arduino in the library Manager from the IDE. This one is for the Carrier control for the lights and sounds with the buzzer.
Getting the MQTT library for the Arduino boards:
For the Arduino Nano and Oplá to interact with the Linux broker, you need to install the PubSubClient library . This library provides a client for doing simple publish/subscribe messaging with a server that supports MQTT (basically allows your Arduino to talk with a MQTT Broker).
- Click here to download the PubSubClient library . You should have a .zip folder in your Downloads folder
- Unzip the .zip folder and you should get pubsubclient-master folder
- Rename your folder from pubsubclient-master to pubsubclient
- Move the pubsubclient folder to your Arduino IDE installation libraries folder
- Then, re-open your Arduino IDE
Finally we have everything setup in our Arduino IDE and we can start using the boards, but before doing that we need to set up everything in our windows machine to train our model with the Edge Impulse Platform.
Setting the Edge Impulse CLI in Windows:
You need to have an account in Edge Impulse. To Install the Edge Impulse CLI on Windows follow the detailed documentation from Edge Impulse .
Now we are ready to go and start training our model in case you want to have a model with different movements than mine, but I'll show you how I train my model.
Setting Spotify in in Linux:
First we need to create or login into the https://developer.spotify.com/ platform and the first thing we are going to do is create an app that is really simple, after this we are going to have in the Dashboard our app and we have to click it. Then we are going to be redirected to the app overview and we have to select edit settings to add some urls:
http://localhost:8888/callback
http://localhost:8080
Add them to the Redirect URIs:
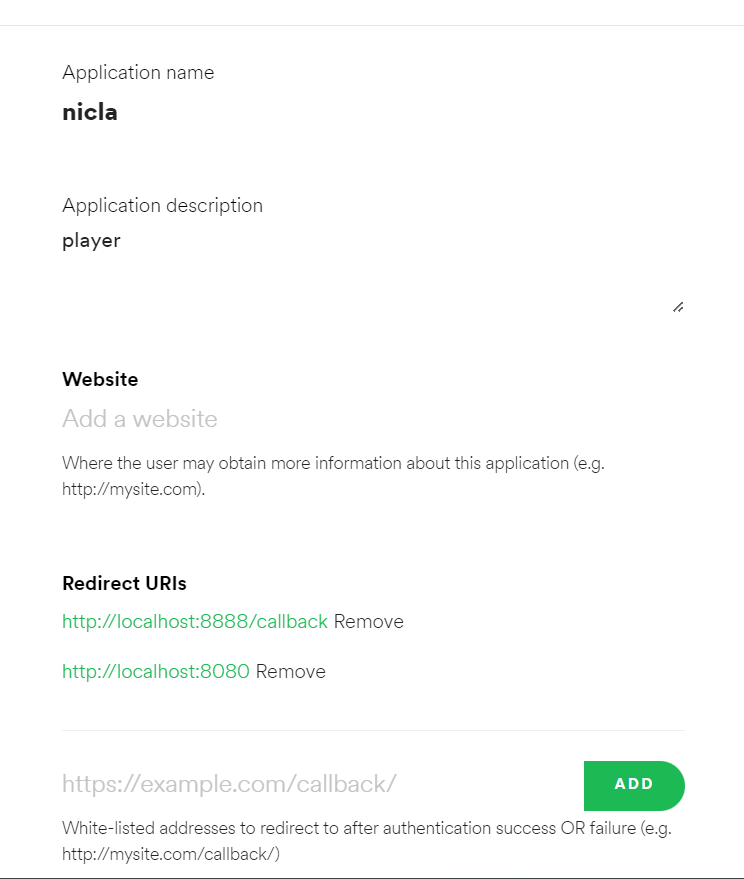
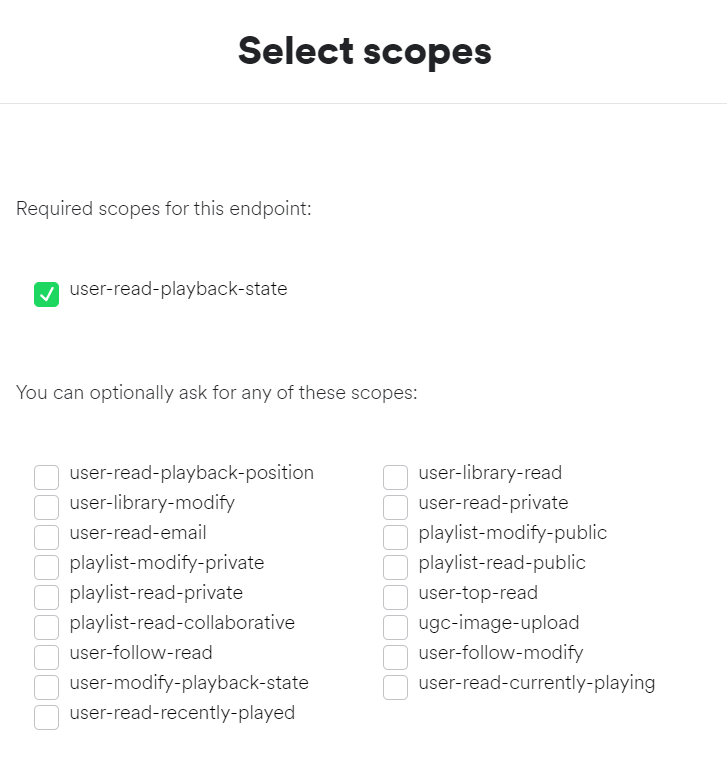
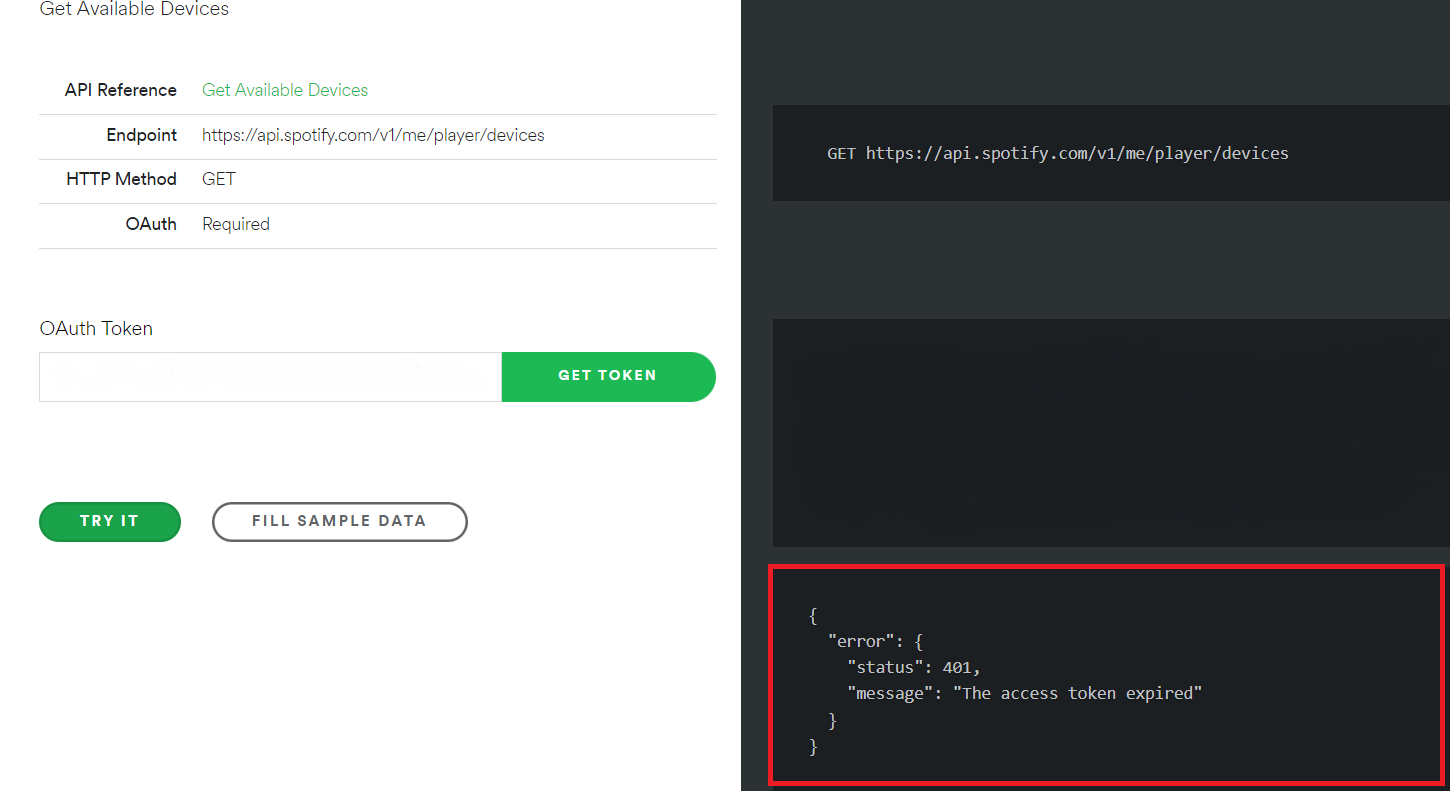
After adding them we're going back to the overview of our Nicla App in the Developers dashboard, there we can find the Client ID and the Client Secret that we need for the code. Make sure to copy the values. The to get the Device ID which is an important piece for our code we need two things the most easy is play in any device phone, computer, smart speaker or any other device that we want to use to listen the music, play any playlist while doing this step, we need this to detect the desired device and control it through our Python code. The second will be go this link https://developer.spotify.com/console/get-users-available-devices/ in this link we are going to click in Get Token , make sure you mark the check-box for user-read-playback-state and after this click in request token .
Click on TRY IT and where is the red box in the image below should appear the "id": , that's the value that you should copy, (I don't show it because is it is sensitive information ). Make sure in name, that corresponds to your phone or device used.
Now that we have everything prepared in the Developers platform we need to go back to our Linux Machine and open our editor, I used Thonny but before using our final code we need to run one previous code, only for Spotipy to login in our Spotify account after this the code will not ask anymore to login or ask for credentials in the device that we are running our final code, one last thing if you want to use an specific song you need to copy the link for that song in Spotify there is an option in Spotify to copy the song as link.
Here is an example:
https://open.spotify.com/track/ 3h3XIdPa1W8NtxEw0TOQHb ?si=cc4dd6b0ea0f41f6
So in our link I marked as bold the code that you have to copy from the link and replace the last part of this line code uris=['spotify:track:3h3XIdPa1W8NtxEw0TOQHb']) . Now you are able to play from your code in Python any song you want. Copy, paste and run this code:
import spotipy
from spotipy.oauth2 import SpotifyOAuth
from pprint import pprint
device_id = "" #Put the values from your account