Hello,
UIO is an acronimous for Ultrasonic Interactive Owl.
This name was deeply discussed with my 9 year old son.
This Project is (or try to be) an interactive, kind of emotional, funny and little useful robot I started to think about, to have fun with Arduino stuff. The text ahead will tell the creation process I think it was very interesting and thoughtful to encourage people that thinks this is too hard to do, and also experienced people who will find more ways to improve this Project.
I started to browse and think about other a project I could build with Ultrasonic Sensor(HC-SR04).
I also start to study RTC (Real Time Clock) module and Oled Display. This looks so simple... I mean...I am only a “Maker” witch want only to connect things and do simple code, with very little knowledge in eletronics and programming. I just read and gather blocks of code of those modules and sensors and try to adapt to my needs.
And for this I wil thank and thank again all of you People that shares your Works and explanations!!!
Here comes de idea: A little gadget that react to Ultrasonic readings and translate it to Oled display.
The funny “Eye Looking” of the Ultrasonic sensor is widely explored in Arduino projects and grabs immediate visual attention on little robots.
The Oled display is also an attention grabber. with many robots that use it as its “eyes”.
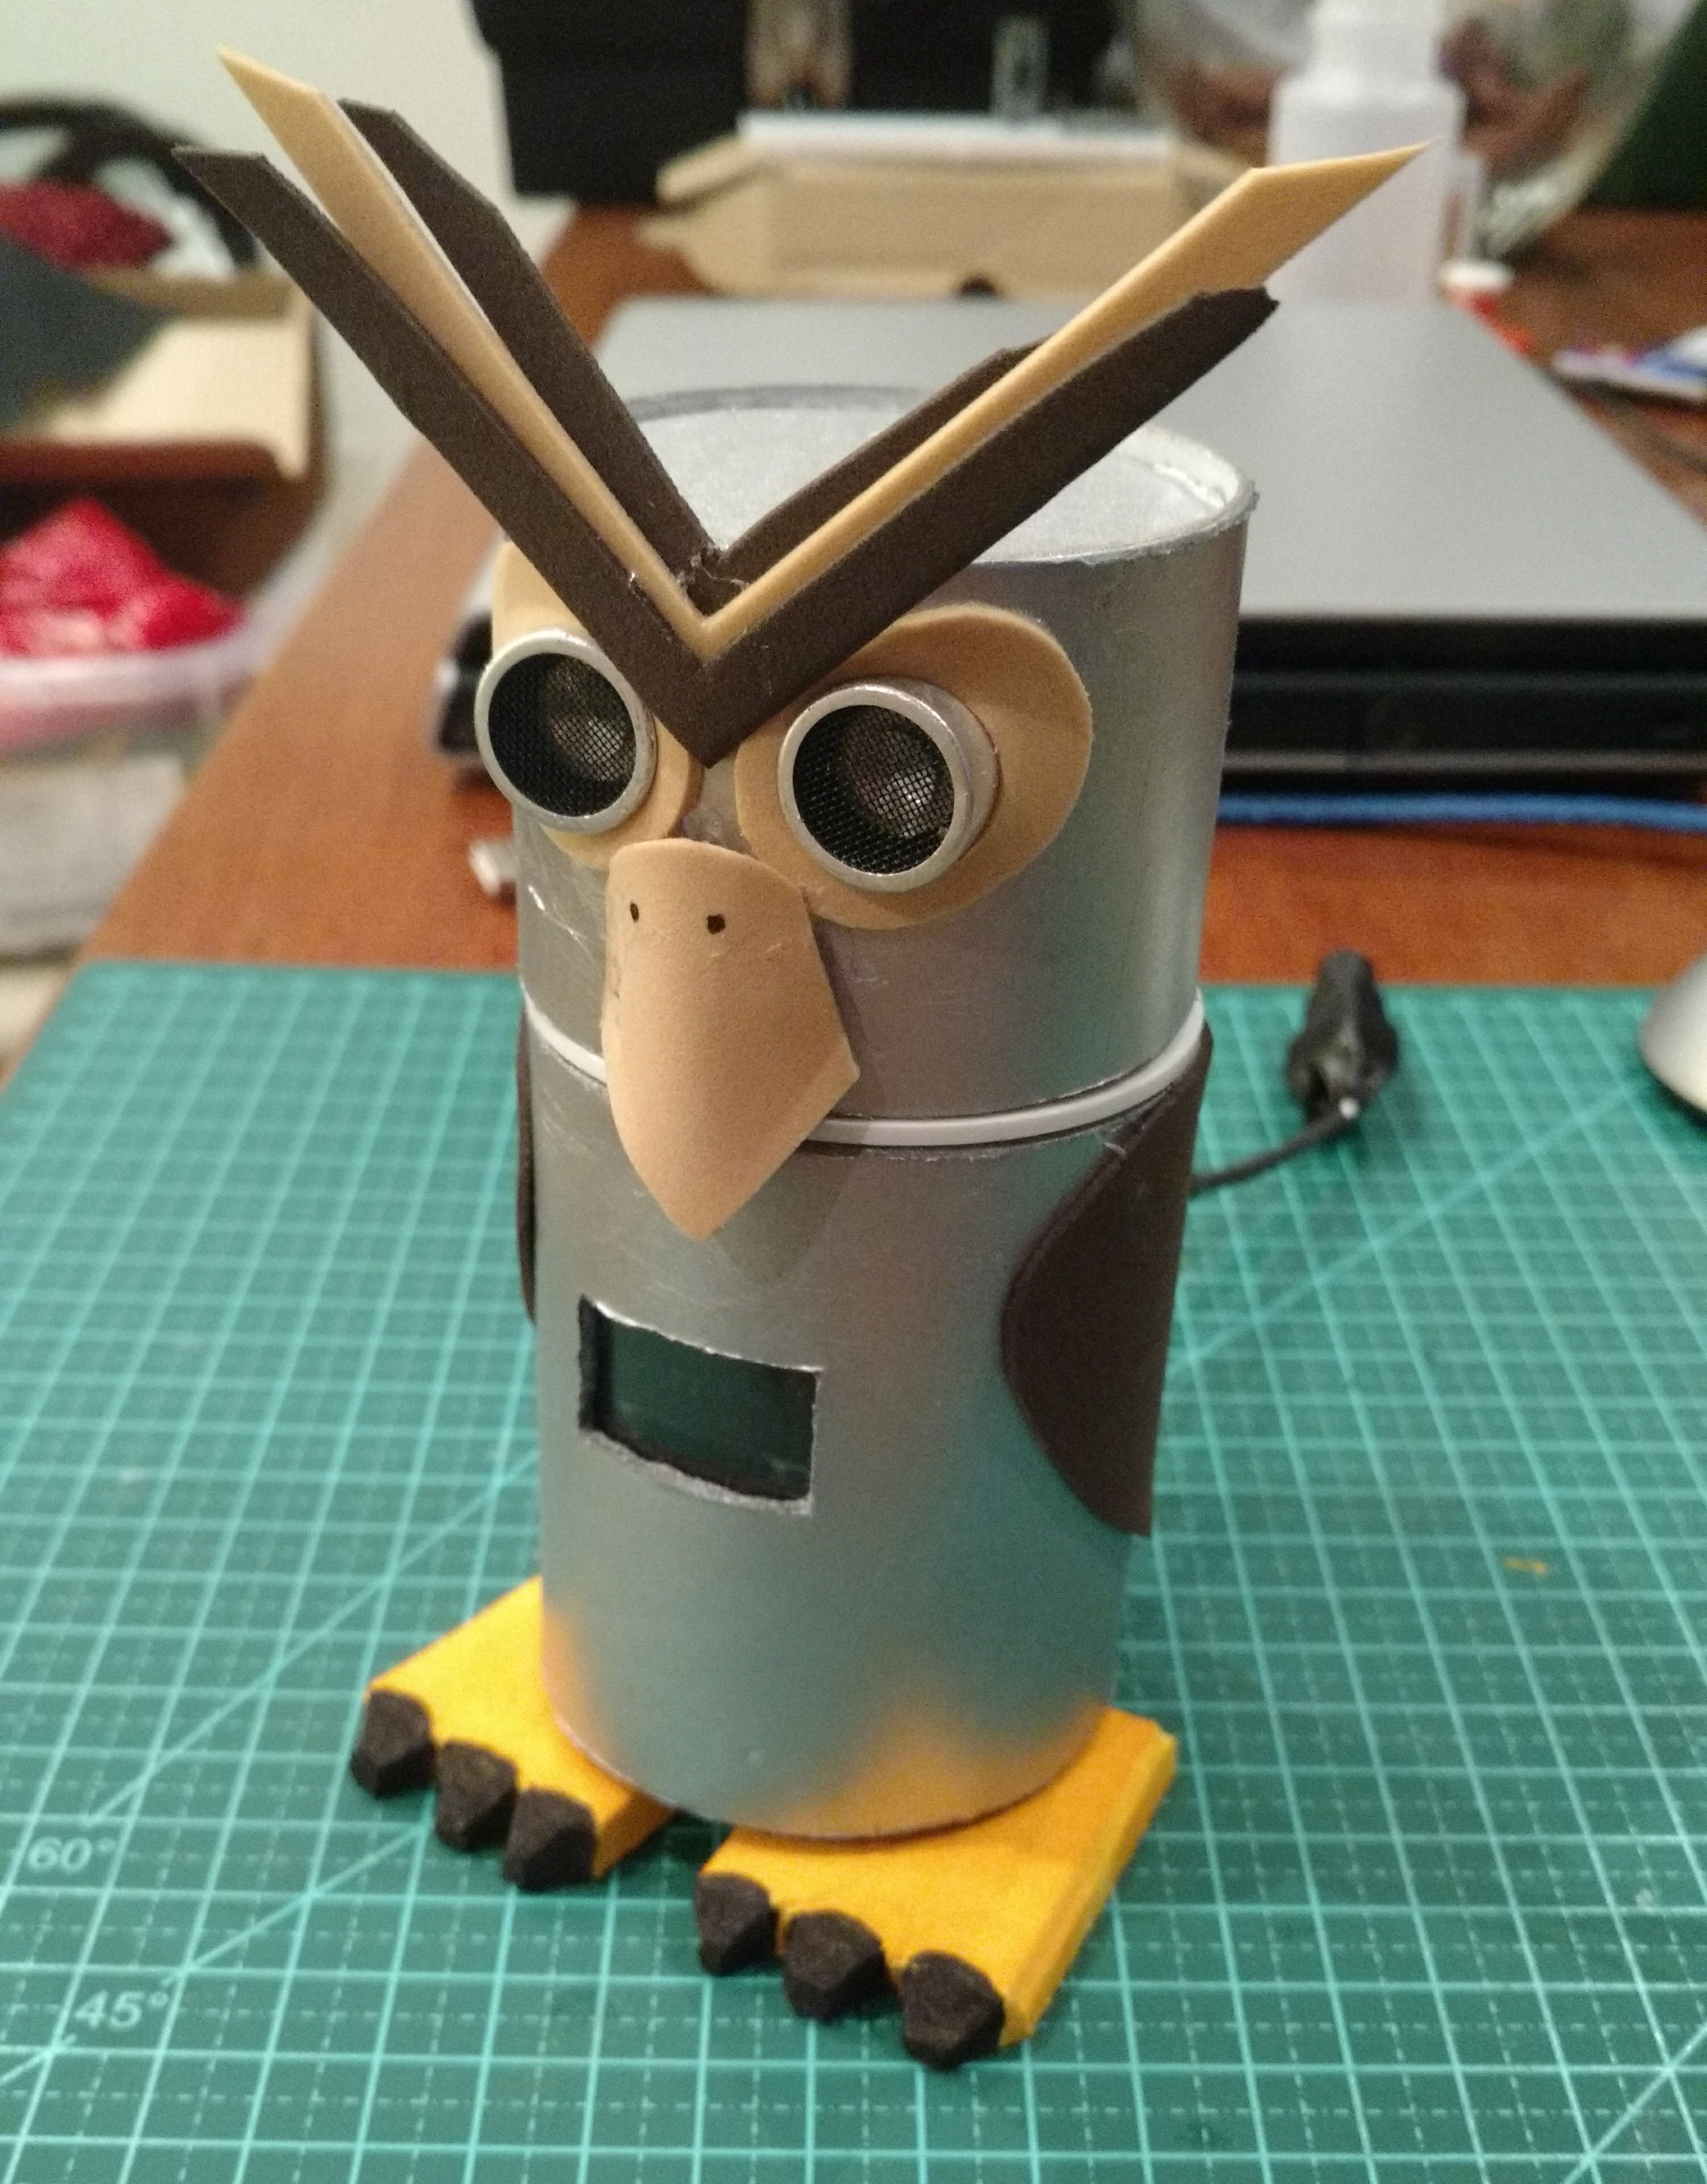
I decided to make a “Pirate Parrot” at first, but parrots have sided eyes. So...lets think about a “Pirate Owl” that has frontal eyes. The Oled display will be placed in front of its chest. The ultrasonic readings will be translated as heart beatings and (the useful part), date/time/temperature display.
Make it with cardboard pieces come to mind. As I keep thinking about the codding, I found a little cardboard coin bank that suits nicely.
It was a 60mm (2” 3/8 inches) in diameter, 15cm(6”) high, carboard tube with removable plastic closings, I could insert perfectly a 170 points breadboard with an Arduino Nano attached and make apropriate holes to attach the ultrasonic and the Oled display.
The first coding results was so incredible, easy and beautiful I started to think about improvements even without this Project lefts my hobbydesk table.
Now this Owl will have a Buzzer to make sounds disguised as the owl’s beak, a Servo motor to make it shakes, and another Servo to move the owl’s head.
I was wondering if this was too ambitious, if the Arduino Nano deal with all this things, the memory limits...the size of the code,etc. but the tests always drive me to keep going.

The Features:
1 – A 180 degree movable neck. (less than a real owl but it is ok). This movement is randomic in time and angle to simulate an owl looking around;
2 – A servo motor at the bottom to rotate and incline the body a little and return to normal upright position;
3 – At given distances, the owl will react with beeps, heartbeating, RTC displaying, body shake. (and all personalized behaviors left to your imagination!).
4 – The power system: A little cable conected to an external power supply (100/240V to 5V adapter) to feed servos and power the Arduino Nano. The sensors and modules will be powered by 5V Arduino port. As it does not walk, It can be placed on a cool local and be powered for long periods.

5 – No welding at all! Only plugged or screwed wirings. Of course a custom PCB and more secure connections are recomended. This is really cool to assemble.
6 – Double side 3M tape, eletrical tape and white glue for decorative parts.
Challenges:
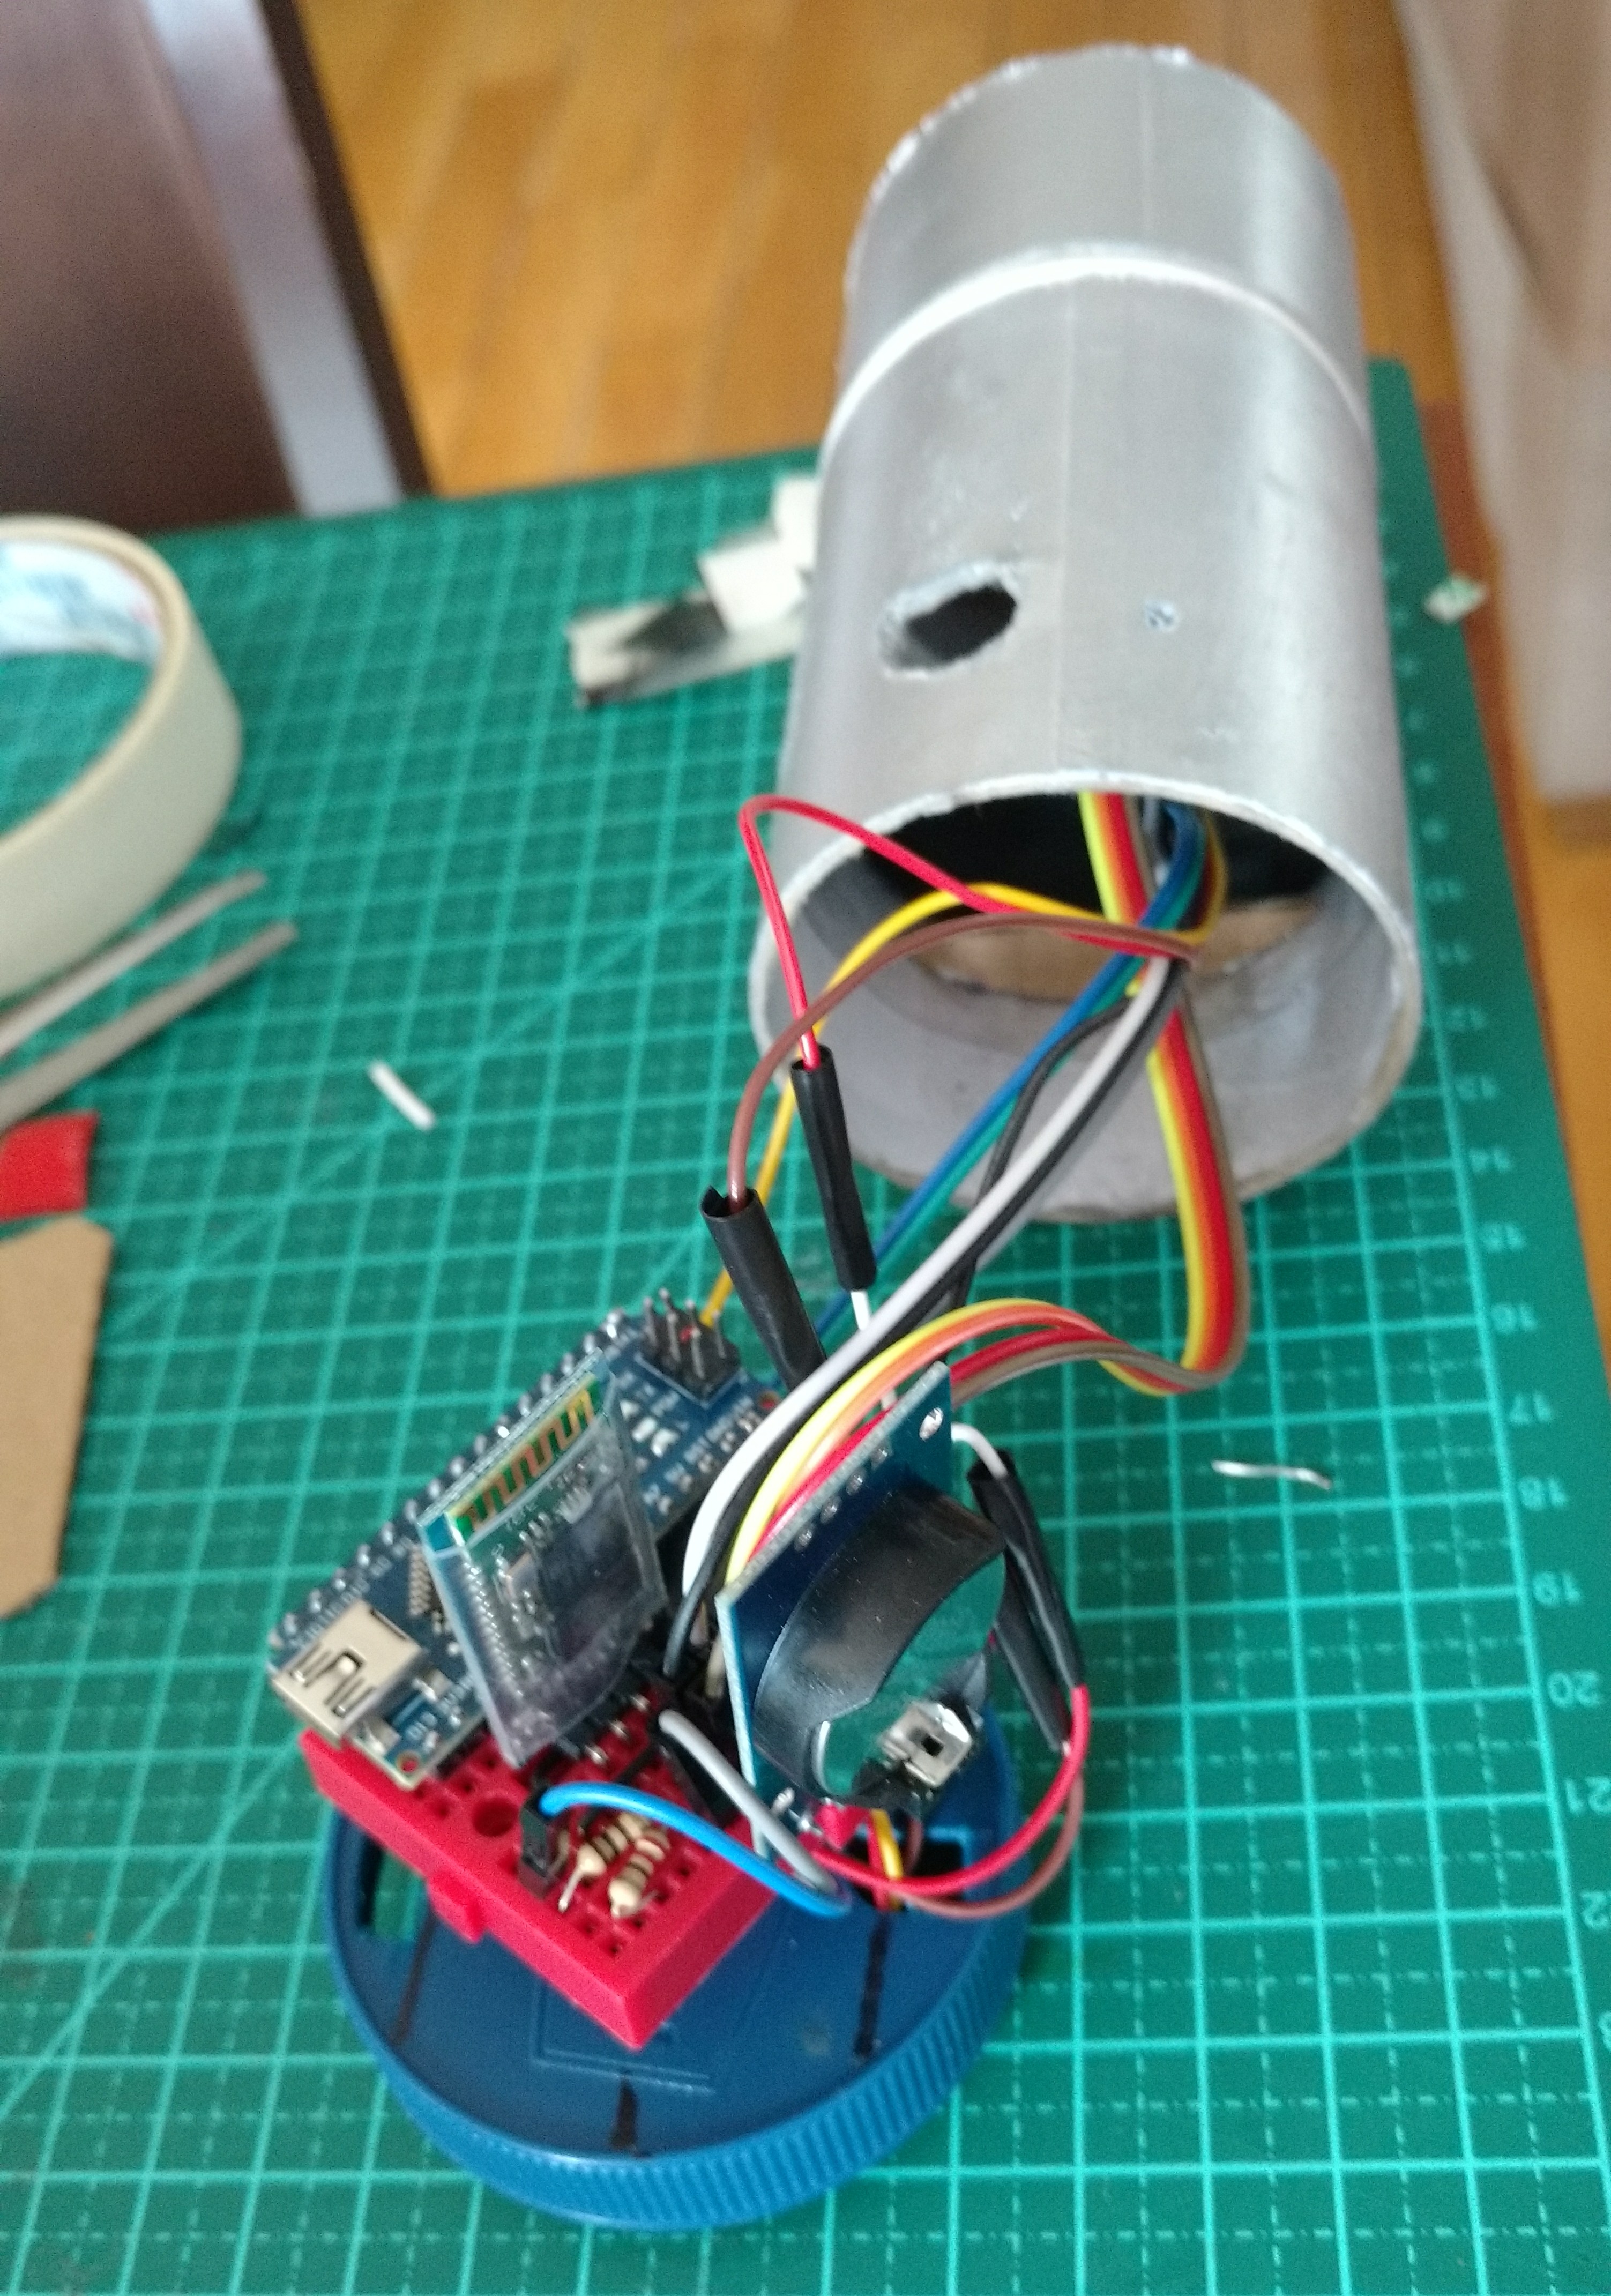
For a crisp eye, the picture above shows a bluetooth module attached.
I do not get it work and I do not know why...Conflict with many libraries? I am keep studying this because it will be very interesting to also have ways to test UIO's funcions and send new distance recognition parameters through bluetooth connection with an Android phone.
Coding:
As mentioned before, the first thing to do is get used with the modules and sensors, test and configure them in different sketches. As a "maker" who is not so much involded in how all this things work, I just read tutorial and test on trial and error basis till it works.
Next step was to think about code logics. I decided to write functions for each UIO's movements, sounds and screens. This funcions will then be placed into IF and ELSE IF statemens with configured distances I want UIO reacts.
To avoid it becomes annoying, I wrote some boolean variables to stop multiple readings in a short sequence, and obligue UIO to have another event to change state of that variables and allow it to repeat some ELSE IFs.
Other funny part was design the "Screens" that will be diplayed. Not so complicated. With MS Paintbrush I set an 128x64 image and start to draw.
After the image is ok, it will be imported to an HEX on-line converter to get it translated to arduino IDE.
Buzzer:
For the "suprise song" and other beeps UIO hoots, I did do a research on frequency charts to find and test sounds to compose. This is another cool part of process and have unlimited possibilities. A buzzer is unexpensive, but I am already thinking about upgrade to a mp3 sound module...
Delay x Millis
I found somewhere in internet this cool function that use millis() instead of delay(), to try to keep distance readings running with no halts. I will appreciate comments on that.
So, I hope you like it.
EXPANDED TECHNICAL DETAILS
Life-Like Robotic Interaction
UIO (Ultrasonic Interactive Owl) is an animatronic robot that responds to human presence with fluid, bird-like head movements.
- Presence-Triggered Animation: Uses an HC-SR04 ultrasonic sensor mounted in the owl's beak or chest. The Arduino tracks the visitor's distance; if someone enters the "Interaction Zone" (e.g., within 50cm), the owl "Wakes up" and initiates a series of movements.
- Multi-Servo Coordination: Manages two SG90 micro servos — one for horizontal rotation (pan) and one for vertical tilting (tilt). The firmware uses a "Smoothing" algorithm to prevent the robotic, jittery movement often seen in cheap servos.
Aesthetic Design
- Interactive Eyes: Features two high-brightness LEDs for the owl's eyes. The brightness is synced to the servo movement via PWM, creating a "Blink" or "Spark" when the owl looks directly at the visitor.