Introduction
In this tutorial, we are going to learn how to use the Arduino IDE to program a NodeMCU.
What is NodeMCU?
NodeMCU is an open source IoT platform. It includes firmware which runs on the ESP8266 Wi-Fi SoC from Espressif Systems, and hardware which is based on the ESP-12 module. The term "NodeMCU" by default refers to the firmware rather than the development kits. The firmware uses the Lua scripting language.Wikipedia
Developer: ESP8266 Opensource Community
Type: Single-board microcontroller
Operating system: XTOSYes. By default, NodeMCU uses Lua scripting language to program NodeMCU. Here, we are going to learn how to program NodeMCU using Arduino C++ language.
-- Pin definition local pin = 7            --  GPIO 13local status = gpio.LOWlocal duration = 1000    -- 1 second duration for timer
-- Initialising pingpio.mode(pin, gpio.OUTPUT)gpio.write(pin, status)
-- Create an intervaltmr.alarm(0, duration, 1, function ()    if status == gpio.LOW then        status = gpio.HIGH    else        status = gpio.LOW    end
   gpio.write(pin, status)end)
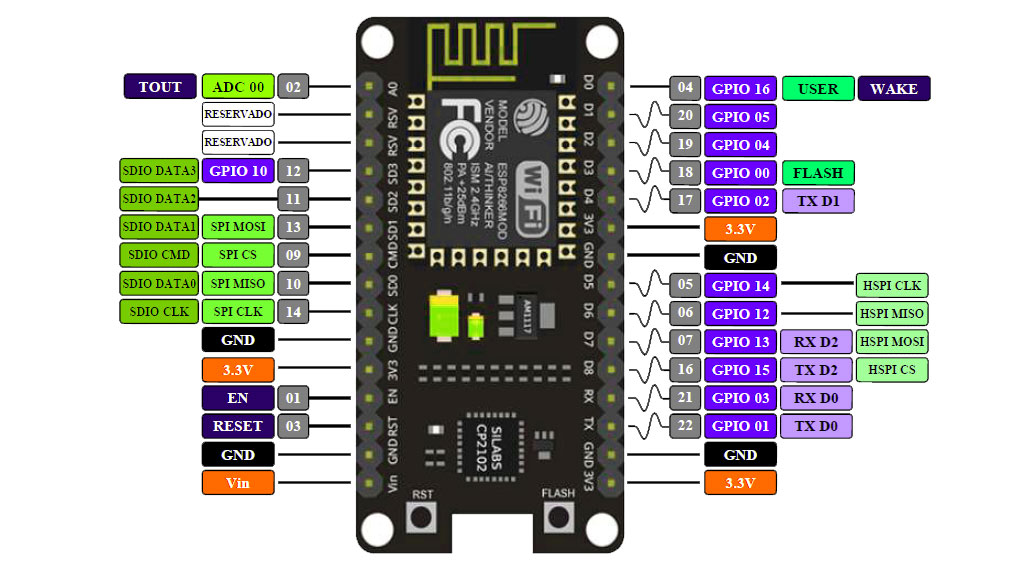
The above is a sample Lua script to blink an LED connected to the 7th pin ie GPIO 13 of NodeMCU.As you can see here the physical pin and the GPIO pin numbers are different in NodeMCU, below is a chart of the pin assignments,
Coding in Arduino IDE
Note: When you use the NodeMCU with the Arduino IDE, it will write directly to the firmware, of NodeMCU erasing the original firmware, So if you want back the Lua SDK, use the “flasher” to re-install the firmware. You can download the flasher from their Github page https://github.com/nodemcu/nodemcu-flasher.
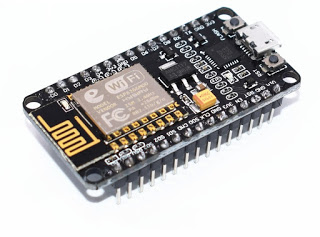
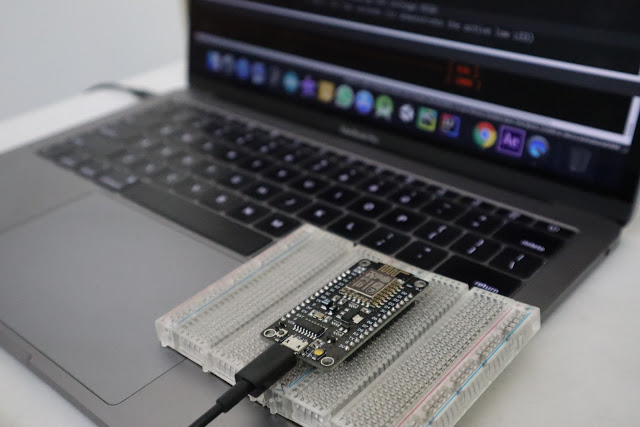
Step 1: Connect the NodeMCU with your PC or laptop with a micro USB cable.
Step 2: Download and install the drivers, You can download the driver for Mac, Linux or windows from this link https://github.com/nodemcu/nodemcu-devkit/tree/master/Drivers.
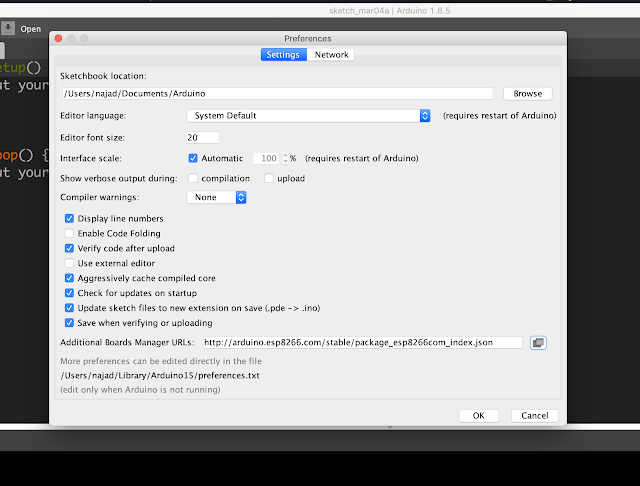
Step 3: Open Your Arduino IDE, then open preference from the file menu, then copy this link http://arduino.esp8266.com/stable/package_esp8266com_index.json to additional board manager URLs, as shown below in the screenshot, then click ok.
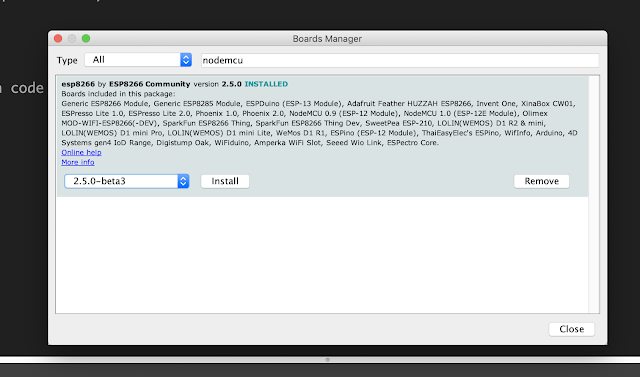
Step 4: Installing Board, Open board manager from tools -> board -> board manager.and search from "nodemcu"
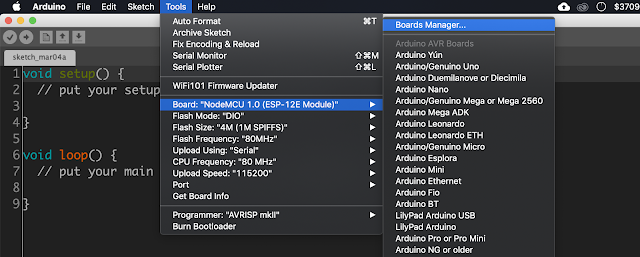
Then select the latest version from the dropdown menu and click install and restart the Arduino IDE.
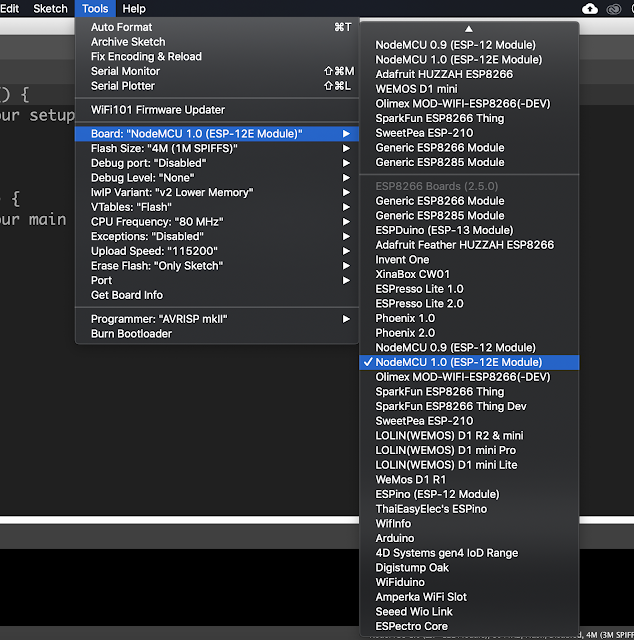
If everything is installed properly then you should be able to see the newly installed boards under tools -> board menu. As shown in the screenshot,
Testing
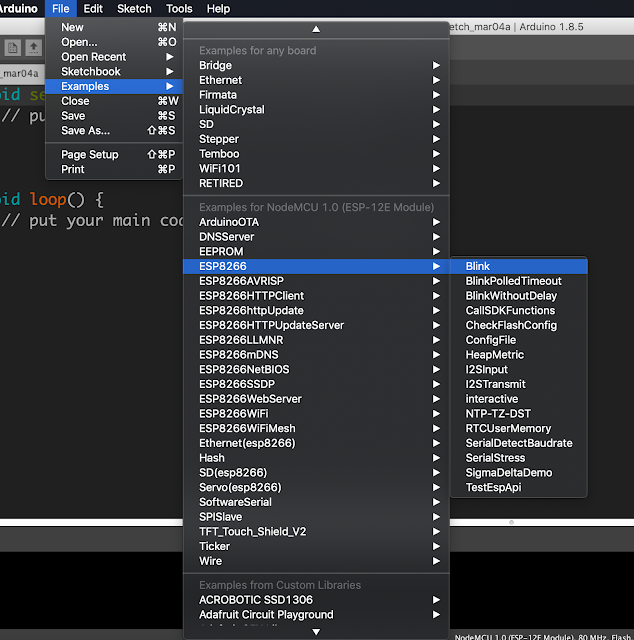
Now let's test our setup by running a blink sketch in our NodeMCU.Step 1: Open the example blink program from the "example for NodeMCU 1.0" section inside the example menu,
Step 2: Connect the NodeMCU with your computer using the micro USB cable.
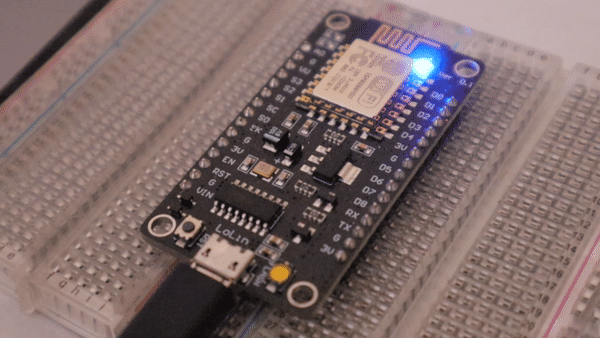
Step 3: Select and Board and Port and upload the program, that's it, now the builtin LED should start blinking.
First Wi-Fi Connection (Hello World of IoT)
You verify the setup by blinking the onboard LED, but the true test is running the `ESP8266WiFi` library. You write: `WiFi.begin("Your_Network_Name", "Your_Password");` When the IDE successfully compiles this, uploads it via USB, and the Serial Console prints `"Connected! IP Address: 192.168.1.15"`, you have successfully unlocked the entire world of Internet of Things engineering!
Hardware Constraints
ESP8266 NodeMCU Board: Includes a Micro-USB port for easy flashing.
3.3V Warning: Just like the Teensy, this board operates strictly at 3.3V. Sending 5V signals directly from sensors to its data pins can permanently fry the chip. Always use logic-level converters when interfacing with 5V modules!
Video Tutorial
Troubleshooting
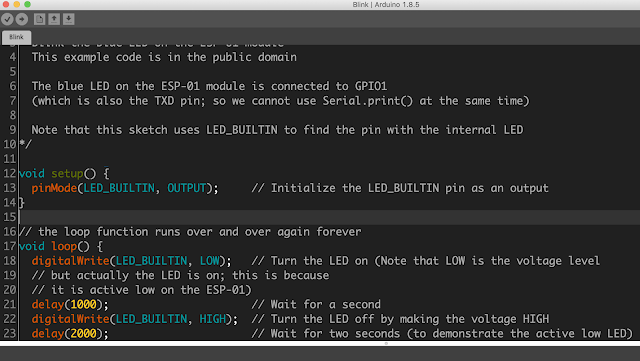
If your program uploaded properly and the LED is still not blinking then in the blinking sketch change "LED_BUILTIN" to "D4". like as shown below,
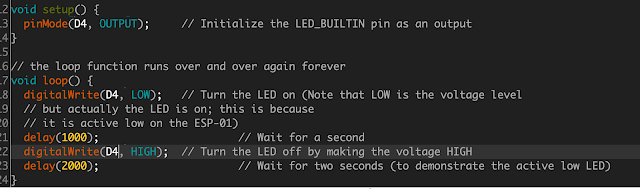
Image source: https://www.cnx-software.com,https://www.faranux.com