I have come to quite enjoy using LEDs and Arduino to make different projects. This is my Christmas 2017 project, an LED wooden Christmas tree.
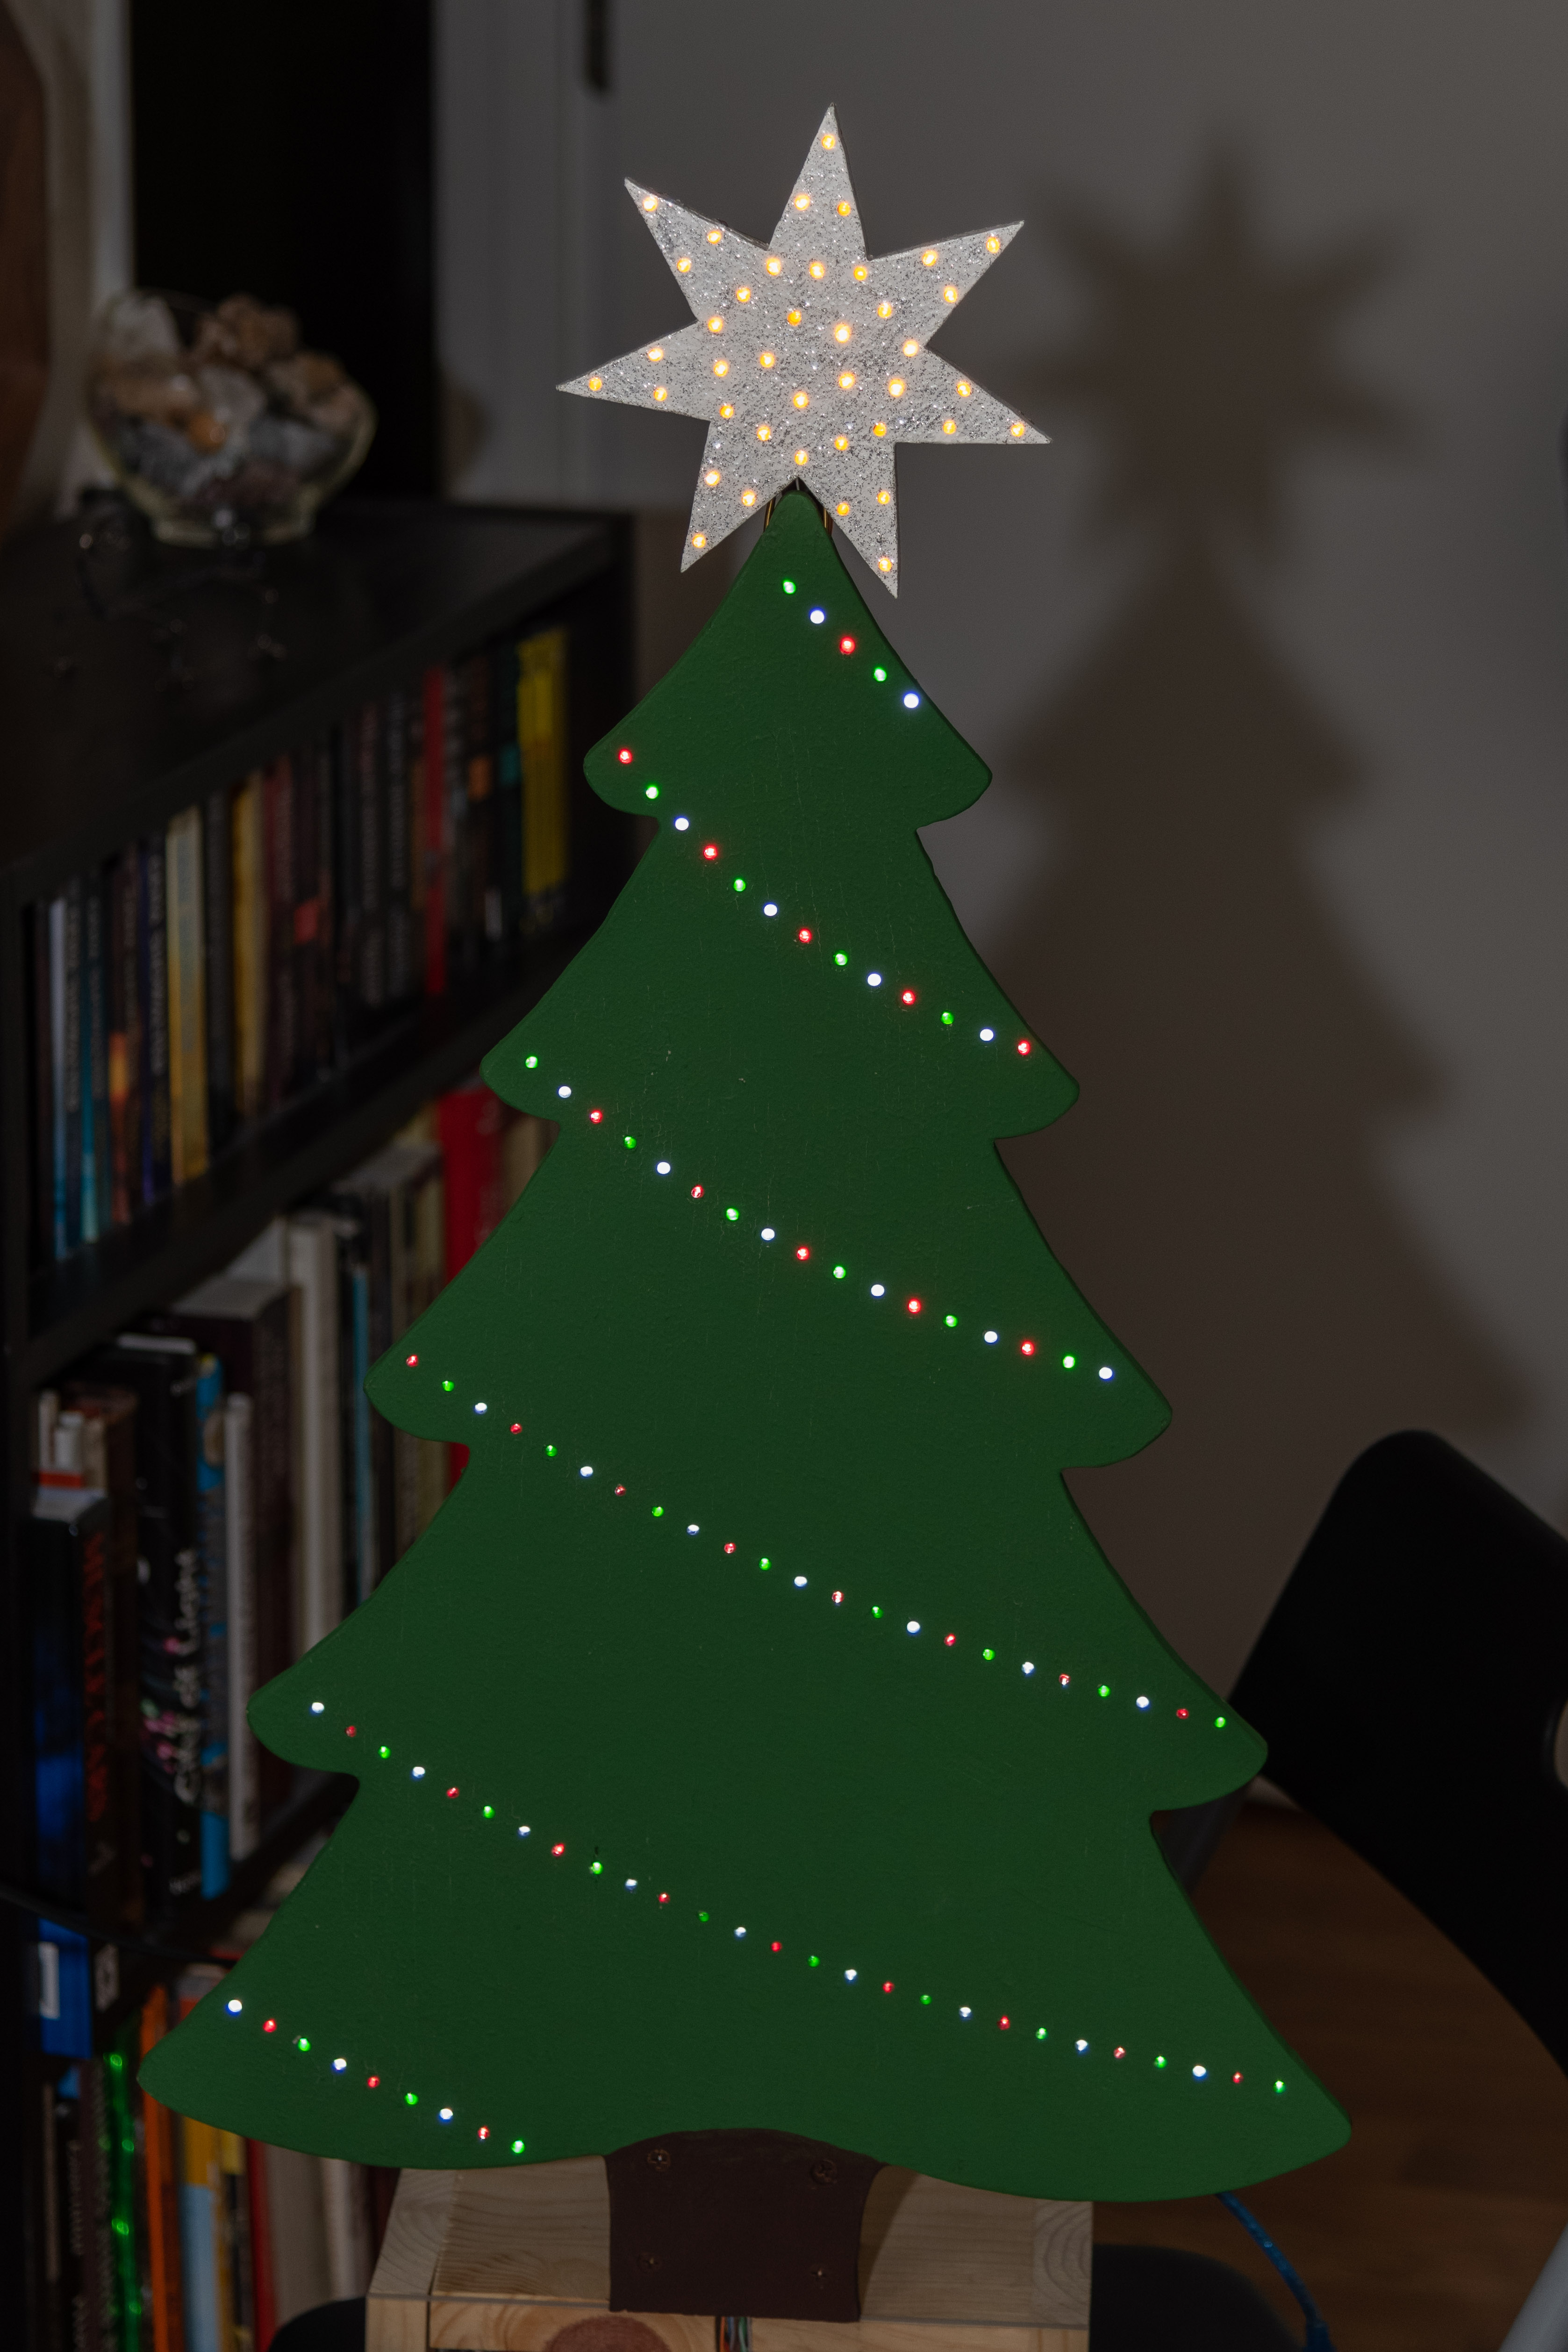
Here is the tree in action:
Though it's a fairly simple project in looks, it took me a while to make it; mostly the soldering. The tree consists of 6 rows of alternating red, green, and white LEDs creating garland around the tree. Each color in each row is a separate circuit, this way I have control of all colors and rows independently.
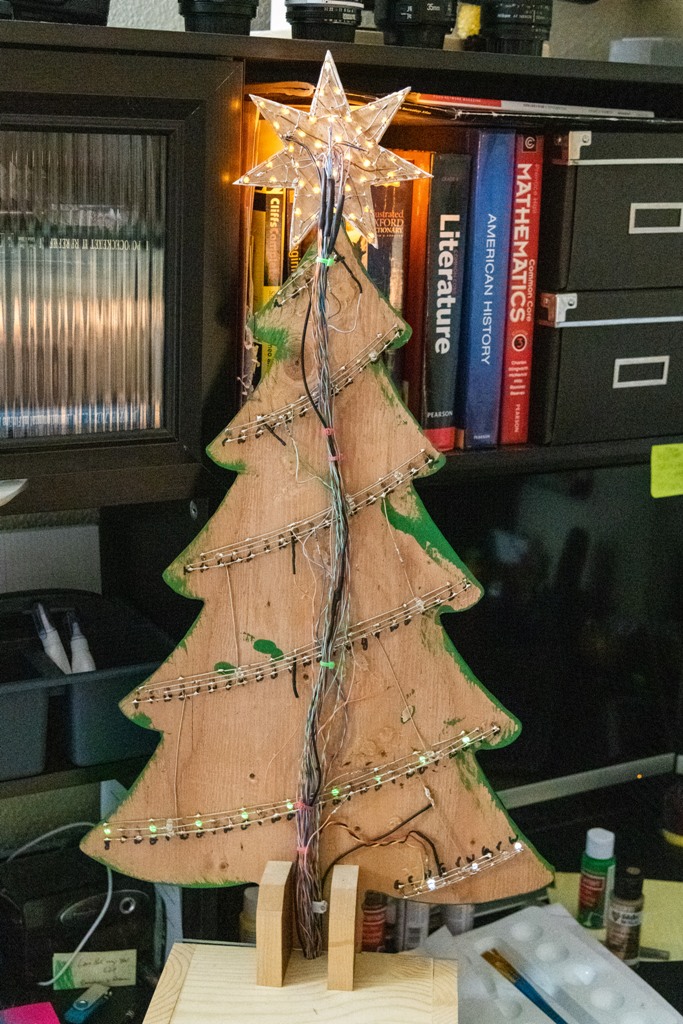
I found it easiest to use 20ga tinned wire for connecting all the LEDs, it made for a very clean back and was rigid enough to keep separate from the other circuits. Though I did put in blobs of hot glue as needed for insulators. Then from a resistor connected to each line of LEDs, a 24ga wire going to the base. All the grounds of the LEDs are connected together.
So the tree consists of 18 circuits, powered by a single Uno. The star is separate from the tree consisting of 20 circuits and powered by a Nano. That's all stuffed in the bottom:
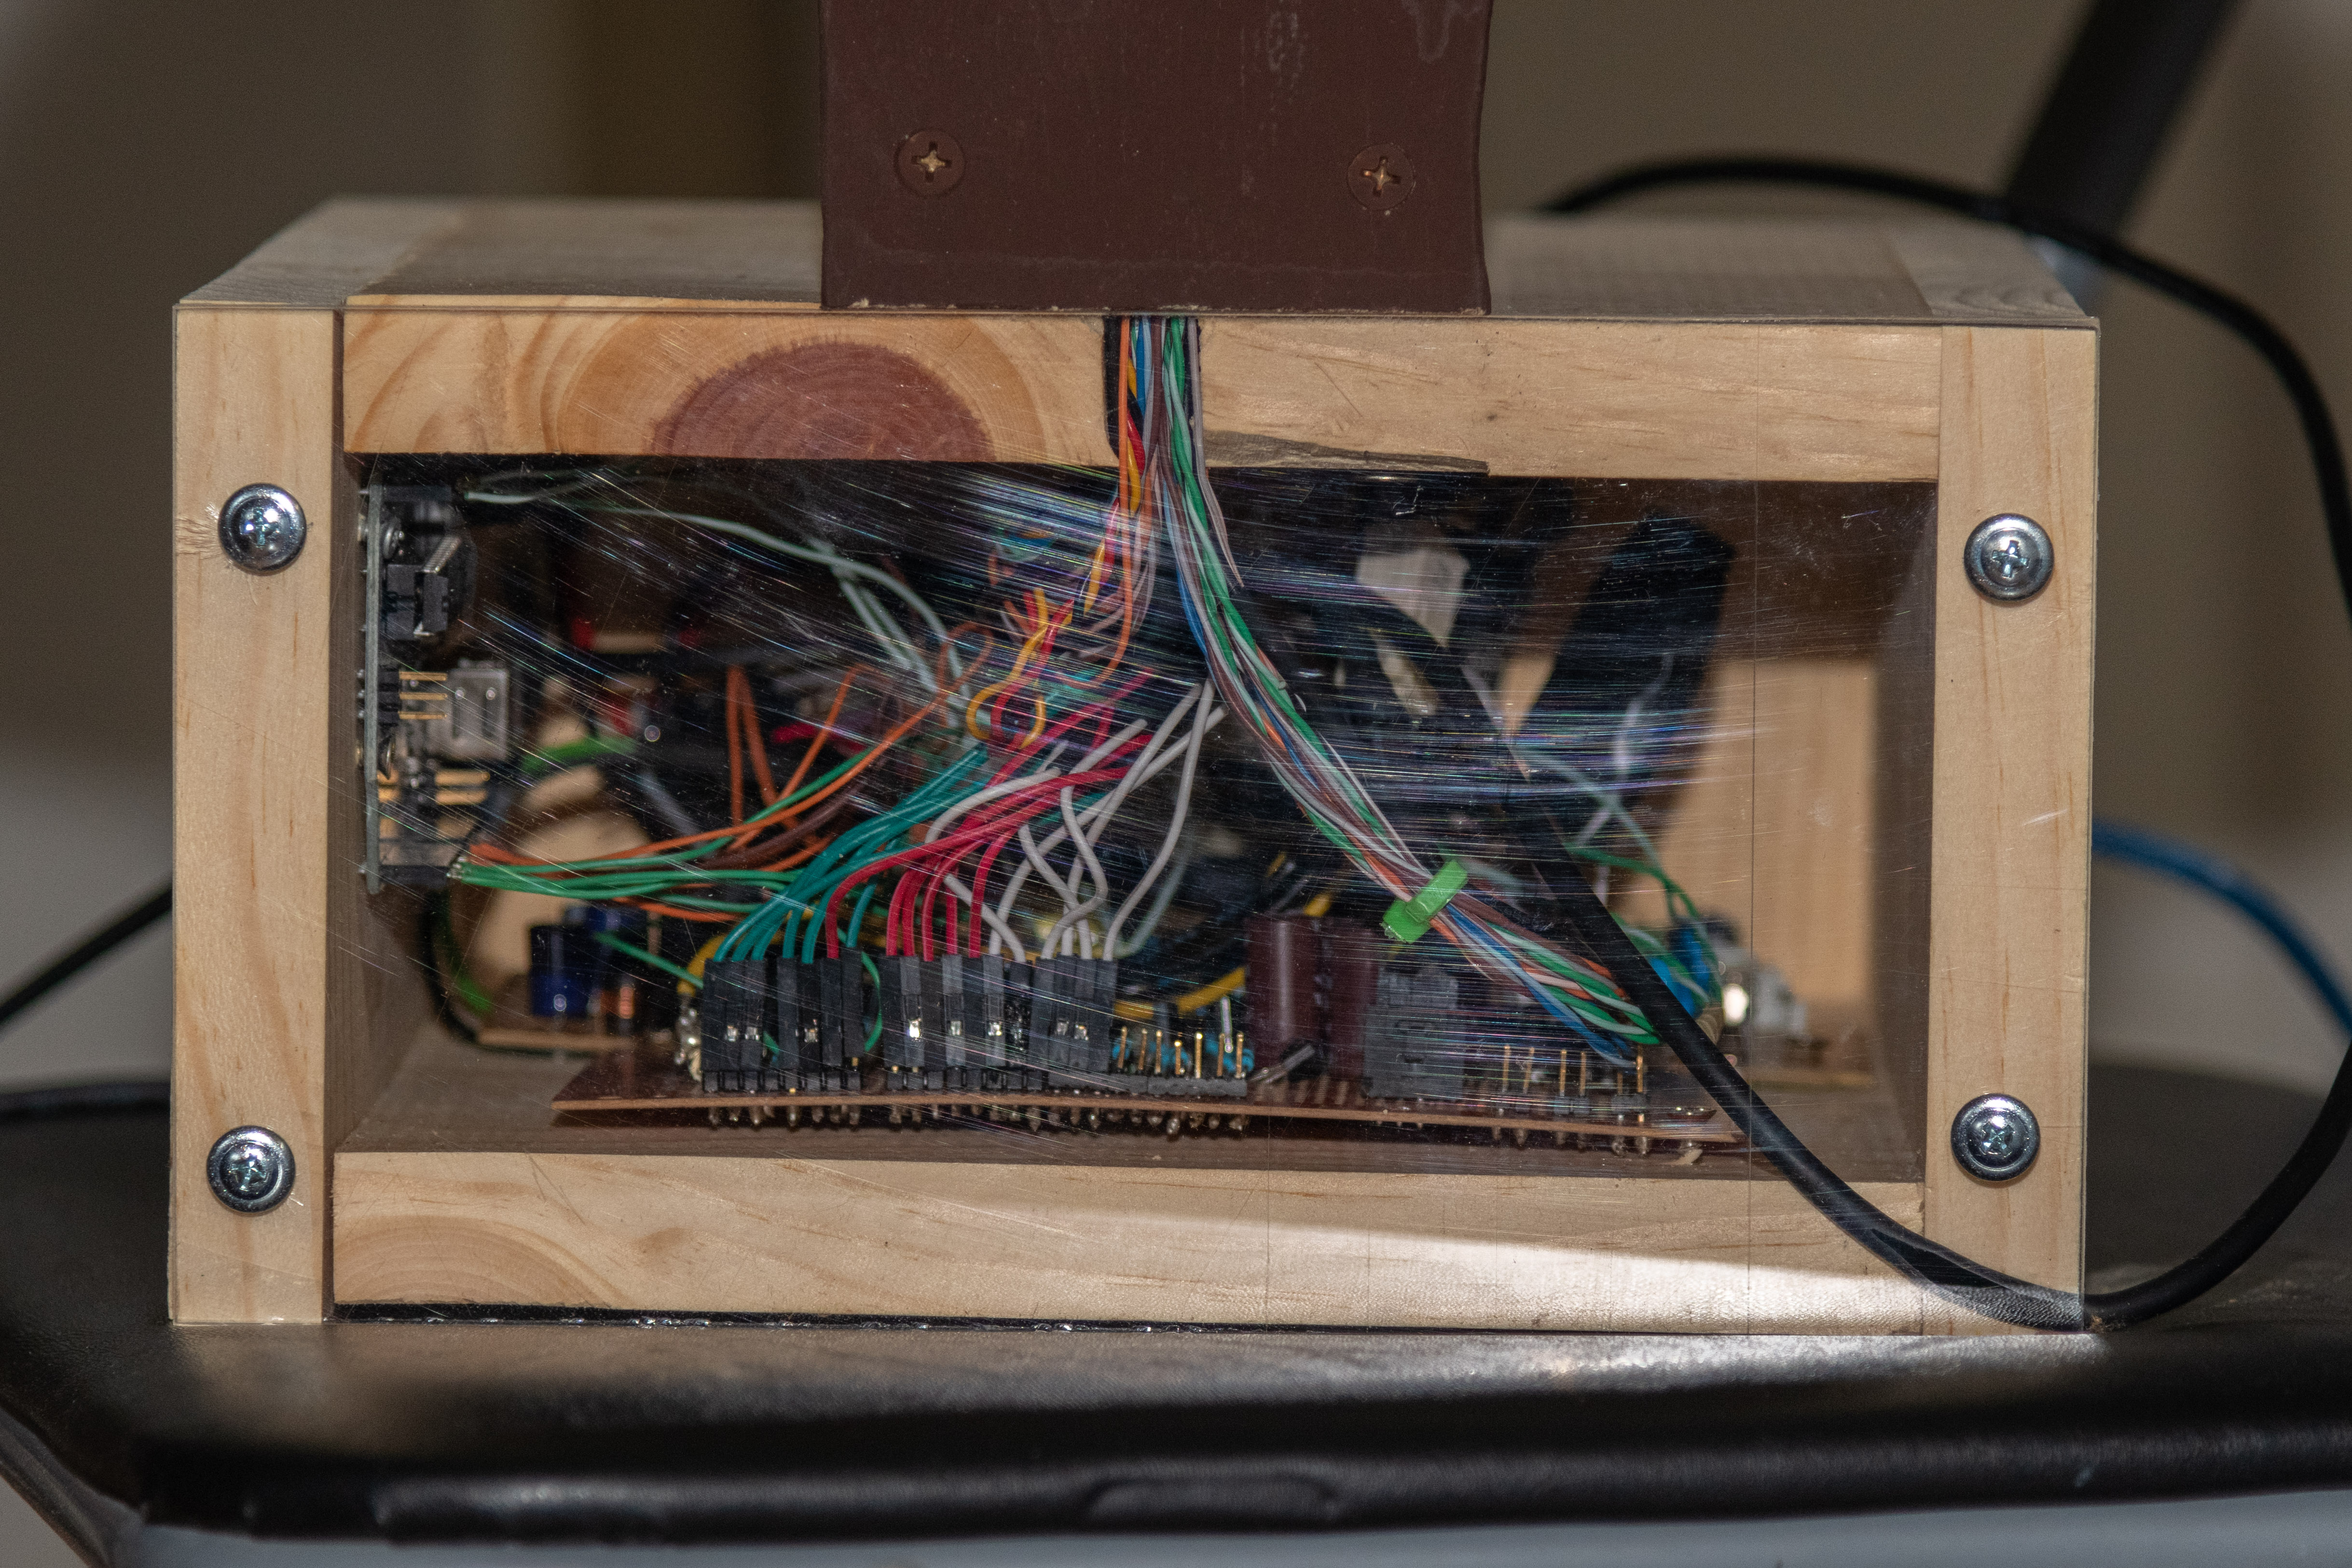
The inside isn't very pretty. I have plans to redo it, as I've produced my own switchboard PCB, which i'll explain next. But here are all the guts:

Technical Deep-Dive: Power & Control Architecture
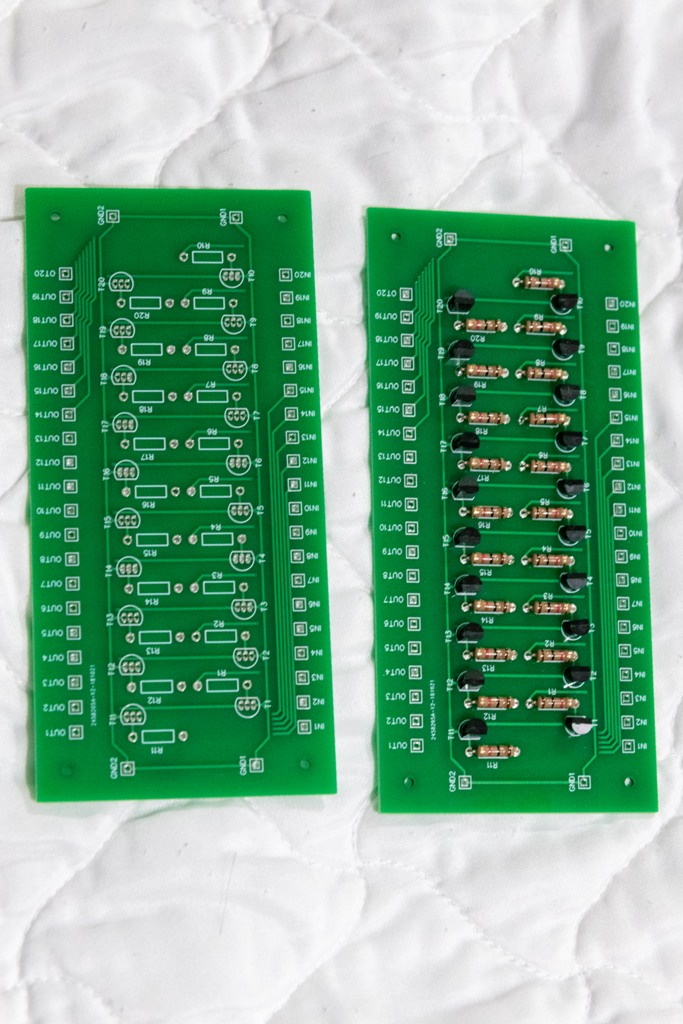
So while the star can be powered by a Nano, the tree has enough LEDs that it's just a little too much for the Uno to power. To overcome the current-sourcing limitations of the Arduino Uno's GPIO pins, I created a custom PNP Transistor Switchboard. This board gates high-current power from a secondary source using the Uno's logic signals.
- High-Current Photonic Switchboard: The system implements an 18-channel PNP transistor array. The Uno provides a 5V HIGH signal to the base of each transistor through a 1kΩ resistor, which switches on a separate 5V rail (sourced from a buck converter) to power the corresponding row of LEDs. This allows the Uno to control as many LEDs as needed without being overloaded.
- Power-Rail Stability: The tree's LED density requires a rigid power architecture. A buck converter steps down auxiliary DC voltage (sourced from a salvaged DVD player power supply) to a stable 5V rail. Careful attention to common-ground return paths ensures flicker-free illumination across all 18 independent circuits.
I have since also been in to creating circuit boards and getting them produced through JLCPCB, which I plan on using on this project to clean up the wiring. Here is my switchboard. It makes wiring very easy, with an IN side, which comes from the Arduino and an OUT side which goes to the LED.
Engineering & Implementation Details
- Structural Mechatronic Integration: The chassis is cut from 1/2-inch plywood. Conductive paths are established on the rear surface using 20ga tinned bare wire, acting as "bus-bars." 24ga color-coded insulated wires form the logic-to-load interconnects. Hot-glue encapsulation is used as a dielectric to prevent short circuits between channels.
- Star-Node Orchestration: The tree-top star is an independent photonic subsystem managed by an Arduino Nano. It runs a 20-channel sub-loop, where the Nano executes autonomous strobe-sequences asynchronously from the primary tree-logic hub, creating a multi-layered visual depth.
- Pattern-Logic & LED Balancing: By isolating color-groups into discrete circuits, the system allows for independent control. Current-limiting resistors (330Ω) ensure that Red, Green, and White LEDs emit balanced brightness, compensating for the varying forward-voltage drops of the different semiconductor materials.
Unfortunately, I don't have the code for the tree anymore, or I would share it. But my limited coding ability made the code fairly simple, but long, as it only used on/off (HIGH/LOW) commands. I had to layout each circuit on a piece of paper and figure out which one to turn on first, then next, and next, etc. to come up with the patterns I wanted. The system executes complex "Rainbow" and "Spiral" patterns through deterministic digitalWrite sequences, using precision delay() increments (e.g., 60ms) to maintain visual fluid motion. An example would be:
int delay1 = 60;
int delay2 = 500;
int delay3 = 60;
// the setup function runs once when you press reset or power the board
void setup() {
 pinMode(2, OUTPUT); //white 1
 pinMode(3, OUTPUT); //white 2
 pinMode(4, OUTPUT); //white 3
 pinMode(5, OUTPUT); //red 1
 pinMode(6, OUTPUT); //red 2
 pinMode(7, OUTPUT); //red 3
}
// the loop function runs over and over again forever
void loop() {
 digitalWrite(5, LOW);
 digitalWrite(6, LOW);
 digitalWrite(7, LOW);
 digitalWrite(2, LOW);
 delay(delay1);
 digitalWrite(3, LOW);
 digitalWrite(2, HIGH);
 delay(delay1);
 digitalWrite(4, LOW);
 digitalWrite(3, HIGH);
 delay(delay1);
 digitalWrite(2, LOW);
 digitalWrite(4, HIGH);
 delay(delay1);
 digitalWrite(3, LOW);
 digitalWrite(2, HIGH);
 delay(delay1);
 digitalWrite(4, LOW);
 digitalWrite(3, HIGH);
 delay(delay1);
 digitalWrite(2, LOW);
 digitalWrite(4, HIGH);
 delay(delay1);
 digitalWrite(3, LOW);
 digitalWrite(2, HIGH);
 delay(delay1);
 digitalWrite(4, LOW);
 digitalWrite(3, HIGH);
 delay(delay1);
 digitalWrite(2, LOW);
 digitalWrite(4, HIGH);
 delay(delay1);
}
Simple, but time consuming to write. Someone may have a better way of coding and/or wiring this project, but this is what my abilities allowed me to do at the time.
Conclusion
This project represents a deep dive into integrated hardware design. By mastering a custom transistor switchboard and dual-MCU orchestration, it's possible to create a robust, professional-grade visual installation that pushes beyond the basic limits of a single Arduino.
I hope you enjoyed reading this as much as I enjoyed making it, and that it inspires you to make a project of your own. I have yet to see any other examples of projects like this, so have nothing else to compare its wiring and coding to. Maybe with this someone will get inspired and show me up! :)