ต้องการเชื่อมต่อเซ็นเซอร์ Arduino ของคุณเข้ากับ Raspberry Pi หรือไม่? คู่มือนี้จะทำหน้าที่เป็นวิธีง่ายๆ สำหรับผู้เริ่มต้น ผมเพิ่งเริ่มใช้งาน Arduino ดังนั้นจึงอยากสร้างบางอย่างที่ทุกคนสามารถทำตามให้เสร็จได้ภายในเวลาอันสั้น
เริ่มต้นใช้งาน
- สร้างบัญชีฟรีสำหรับ Ubidots-http://ubidots.com
- รวบรวมอุปกรณ์และวัสดุที่จำเป็นทั้งหมด
การตั้งค่า Raspberry Pi
- ตรวจสอบให้แน่ใจว่า Pi เชื่อมต่ออินเทอร์เน็ตผ่าน WiFi หรือ Ethernet
- ใน Terminal ให้รัน "
sudo apt-get update" และ "sudo apt-get upgrade"
- ติดตั้ง Pyserial "
pip install pyserial"
- ทำตามคำแนะนำเหล่านี้เพื่อติดตั้งไลบรารี Python ของ Ubidots บน Raspberry Pi ของคุณ: https://github.com/ubidots/ubidots-python
- ติดตั้ง Arduino IDE บน Raspberry Pi ของคุณ
การตั้งค่าบอร์ด
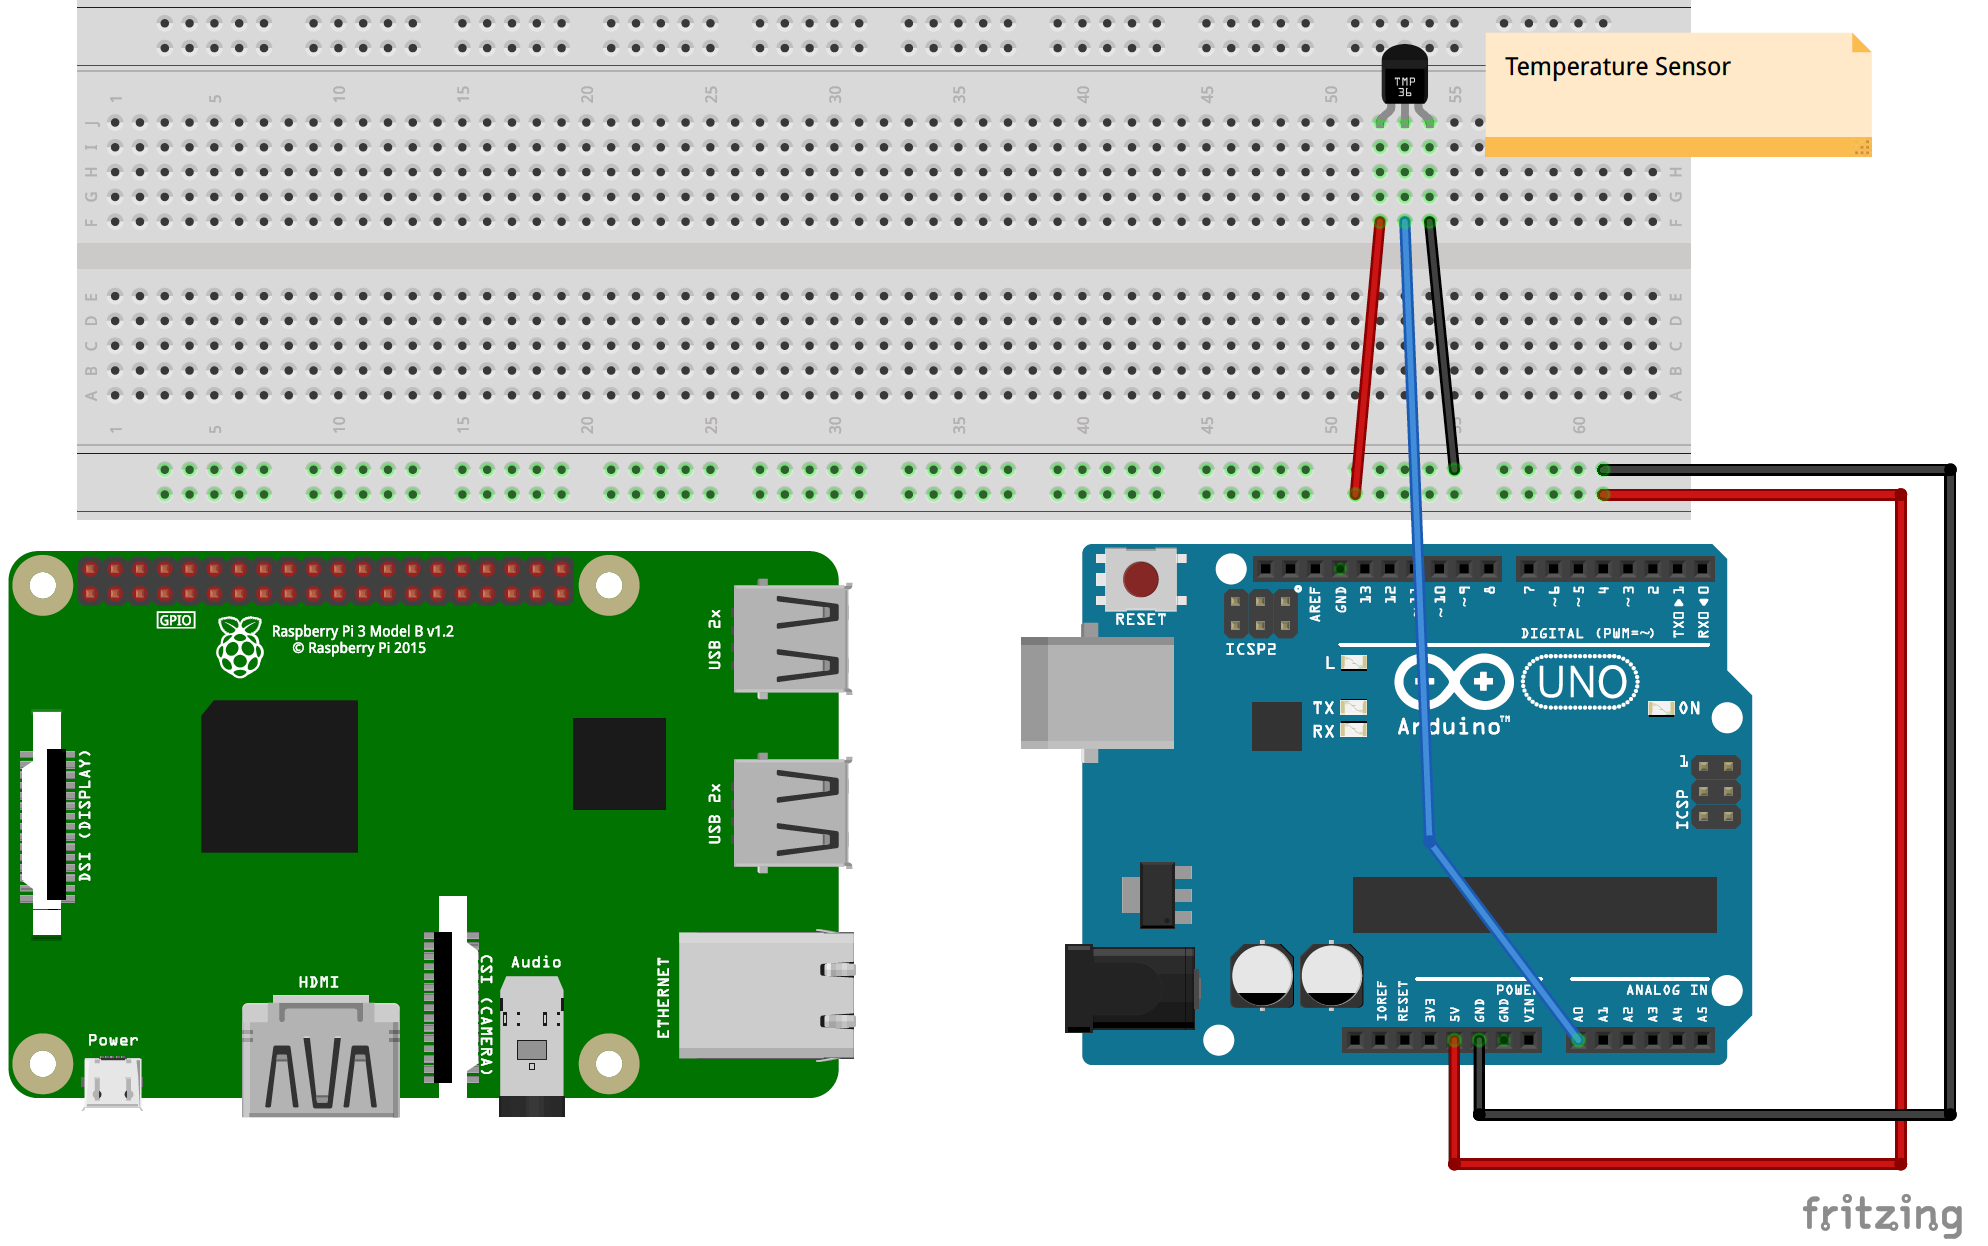
- สำหรับตัวอย่างนี้ ผมใช้ Arduino Uno R3 ทำตามไดอะแกรม Fritzing ที่ให้มาสำหรับการตั้งค่า Breadboard
- เสียบสาย USB จาก Arduino เข้ากับ Raspberry Pi
- คัดลอก Arduino sketch ไปยัง IDE และอัปโหลดไปยังบอร์ด
- เปิด Python 2.7 IDLE และคัดลอกไฟล์ที่ให้มา กด F5 เพื่อรัน (ต้องบันทึกก่อน)
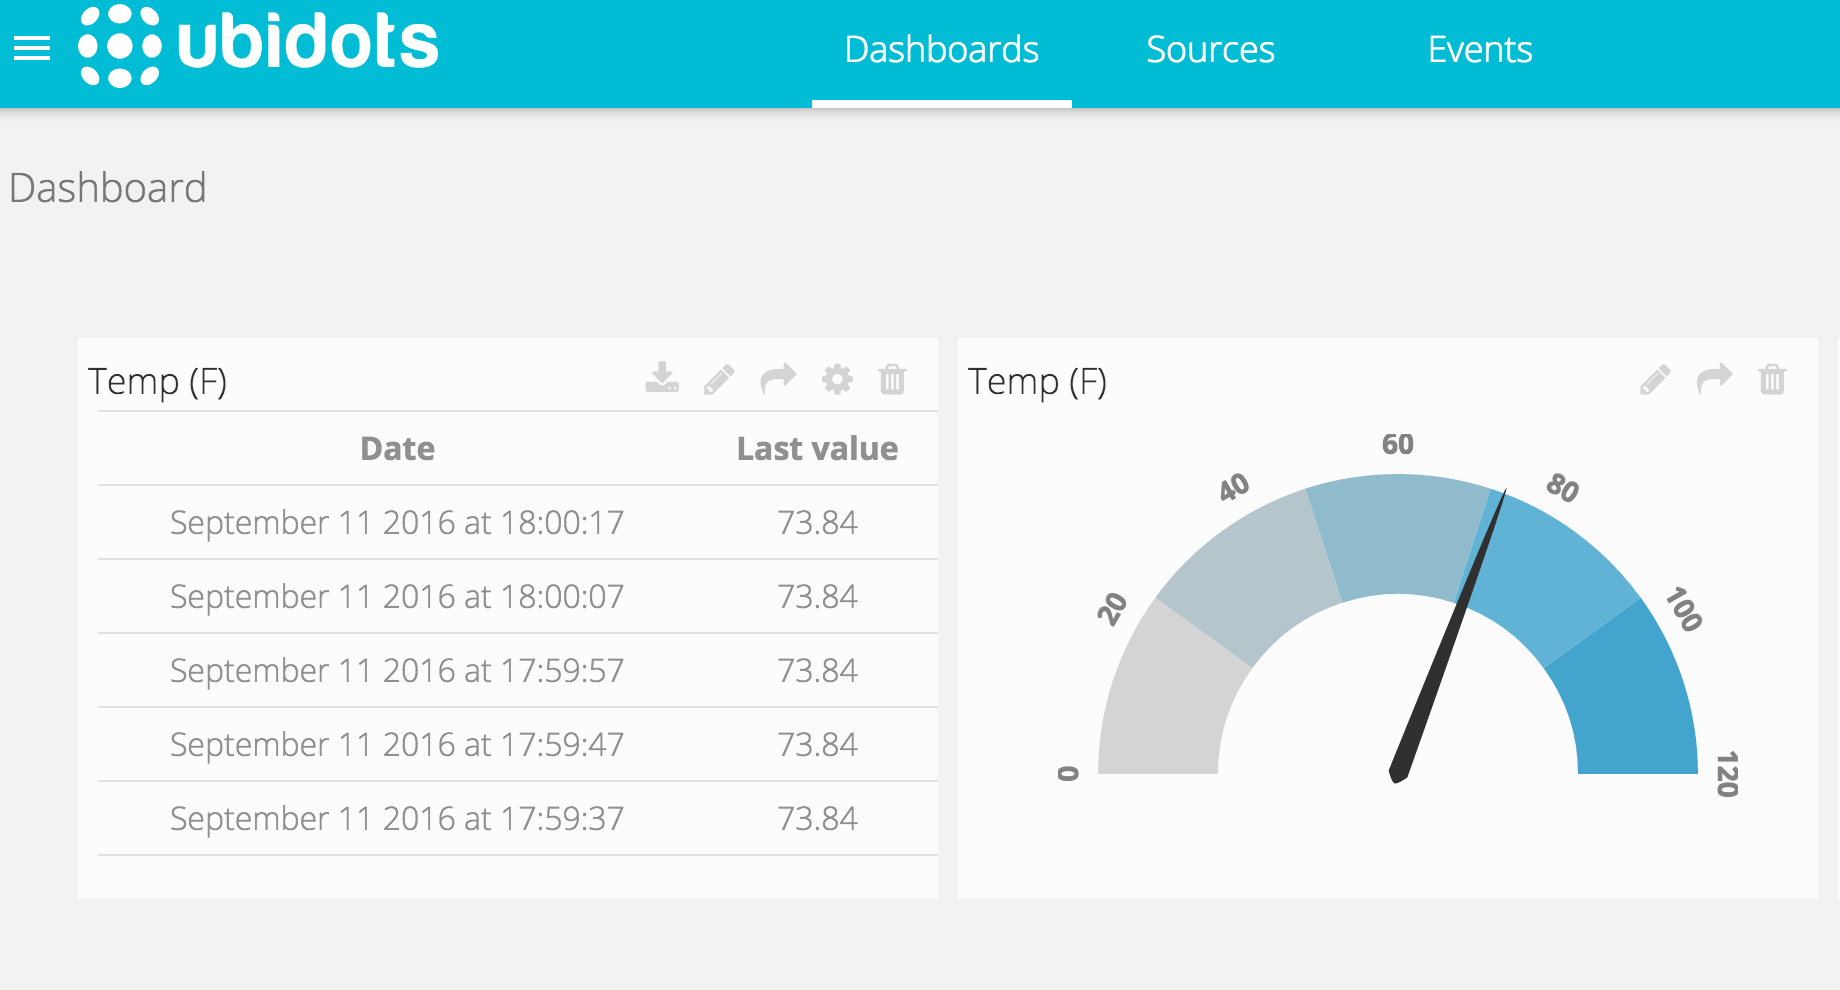
คุณจะเห็นค่าที่อ่านได้ใหม่ทุกๆ 10 วินาที (ค่าเริ่มต้น สามารถเปลี่ยนแปลงได้ใน Arduino) สร้าง Dashboard ของคุณใน Ubidots เพื่อแสดงข้อมูลในรูปแบบที่คุณต้องการ
รายละเอียดทางเทคนิคเพิ่มเติม
Heterogeneous Cloud Gateway
โปรเจกต์นี้สร้าง IoT gateway ระดับมืออาชีพโดยการรวมการตรวจจับแบบเฉพาะจุดของ Arduino เข้ากับการประมวลผลระดับสูงของ Raspberry Pi และ Ubidots Cloud
- I2C Master-Slave Pipeline: Arduino ทำหน้าที่เป็น Sensor Node เฉพาะ (เก็บข้อมูล analog เช่น แสง หรือ ความชื้นในดิน) โดยจะส่งข้อมูลที่ประมวลผลแล้วไปยัง Raspberry Pi ผ่านลิงก์ I2C
- Python Cloud Scripting: Raspberry Pi รันสคริปต์ Python ที่รวบรวมข้อมูลและใช้ REST API ที่ปลอดภัยเพื่ออัปโหลดไปยัง Ubidots Dashboard
การแสดงผลทั่วโลก
- Ubidots Dashboarding: มี Web Console แบบเรียลไทม์พร้อมเกจ, แผนที่ และกราฟประวัติ ให้โซลูชัน "End-to-End" ระดับมืออาชีพสำหรับการตรวจสอบอุตสาหกรรมระยะไกล