ชื่อโปรเจกต์: Email 3G/GPRS Camera
ผมขอแนะนำวิธีเชื่อมต่อ UART JPEG Camera VC0706 เข้ากับ Arduino Uno, ถ่ายภาพ, บันทึกลงใน micro SD card และส่งรูปภาพนี้ไปยัง Email โดยใช้ 3G/GPRS shield พื้นฐานของบทความนี้มาจาก บทความอื่น ที่อธิบายขั้นตอนคล้ายกันแต่ใช้แพลตฟอร์มต่างกัน (Arduino M0) ดังนั้น สิ่งที่เราต้องมีคือ:
- Arduino UNO
- MicroSD card breakout board (https://www.adafruit.com/product/254)
- MicroSD card
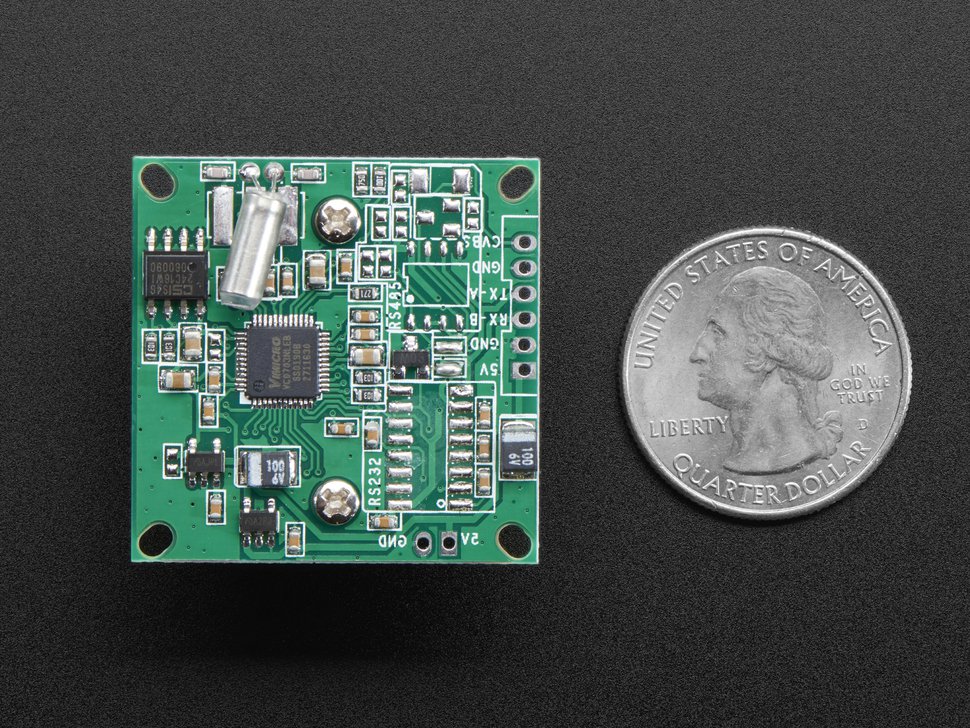
- TTL Serial JPEG Camera VC0706 (https://www.adafruit.com/product/397 หรือ https://www.itead.cc/vc0706-uart-camera-supports-jpeg.html)
- 3G/GPRS/GSM shield (http://www.tinyosshop.com/3g-gprs-gsm-shield-for-arduino-sim5320e หรือ https://www.tindie.com/products/DeltaIn/3ggps-sim5320e-arduino-shield-european-version/)
- Chip resistor (1206) 2.2 kOhm และ 3.3 kOhm
- สายไฟ, หัวแร้ง ฯลฯ
แผนภาพบล็อก

การตั้งค่ากล้อง (ฮาร์ดแวร์)
ในขั้นตอนแรก จำเป็นต้องเชื่อมต่อ UART JPEG camera VC0706 และ micro SD card เข้ากับ Arduino Uno เพื่อตรวจสอบการทำงานของกล้องและการบันทึกลงใน micro SD card
Micro SD card adapter เชื่อมต่อตามที่แสดงใน Figure 2

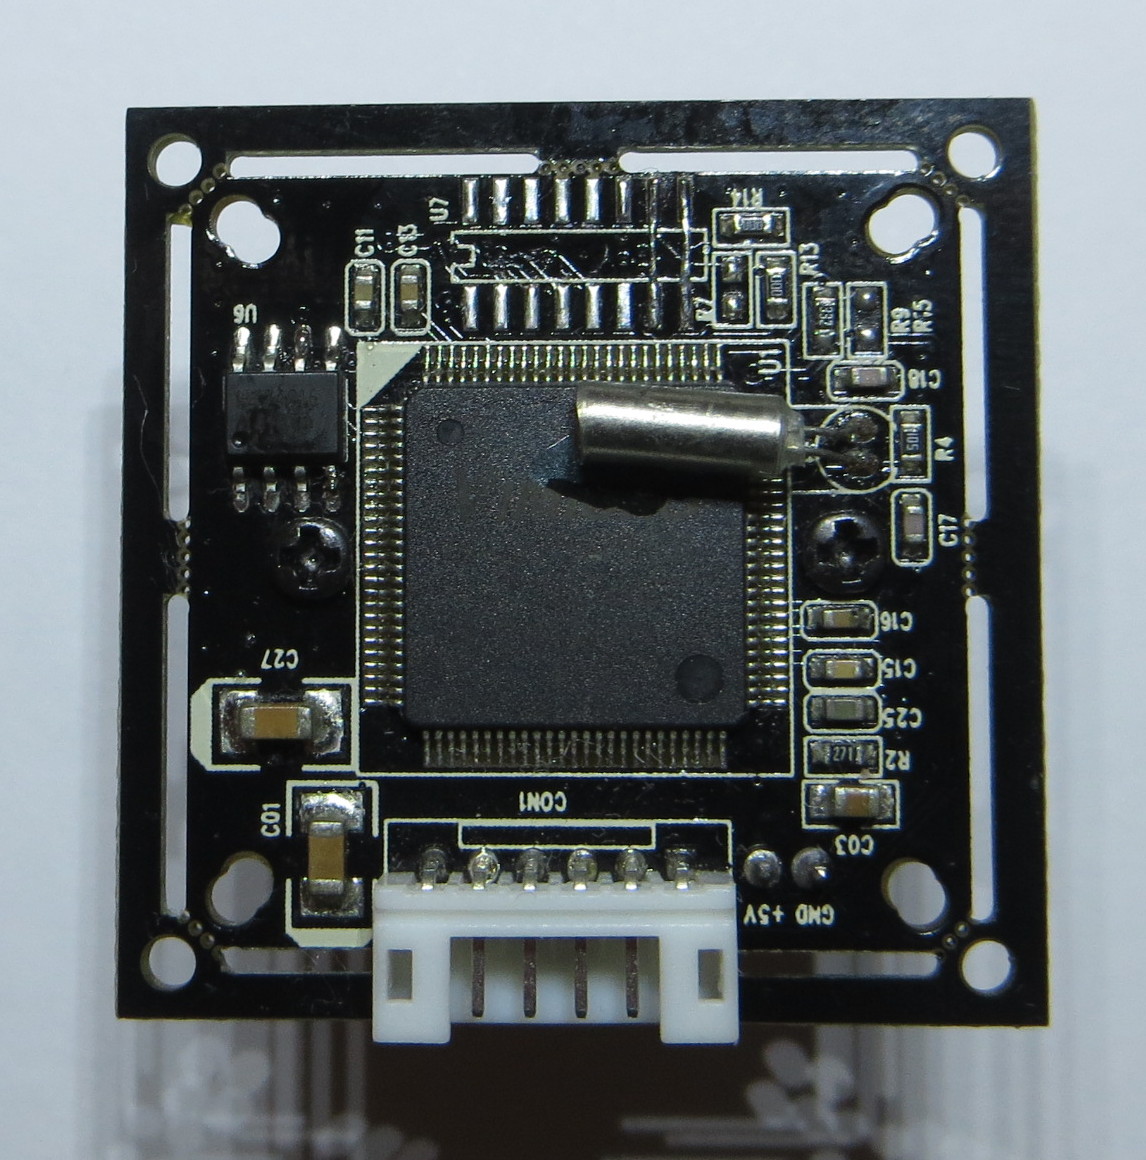
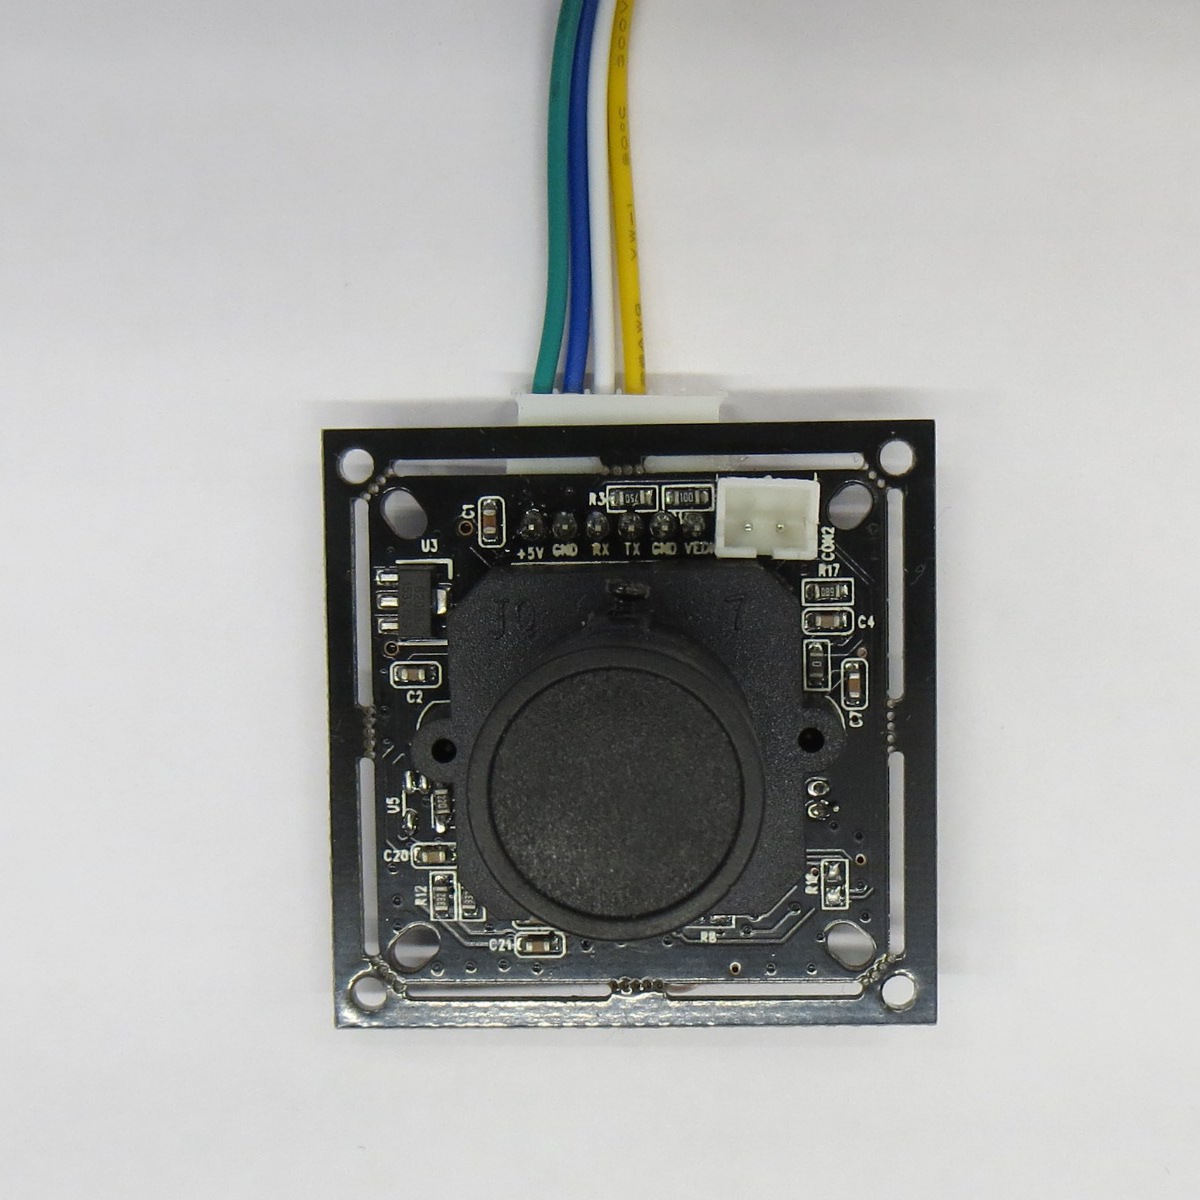
โปรดให้ความสนใจเป็นพิเศษกับกล้องของคุณ มีอย่างน้อยสองตัวเลือก กล้องรุ่นแรก (www.adafruit.com/product/397) สามารถเชื่อมต่อกับ Arduino UNO ได้โดยไม่ต้องดัดแปลง

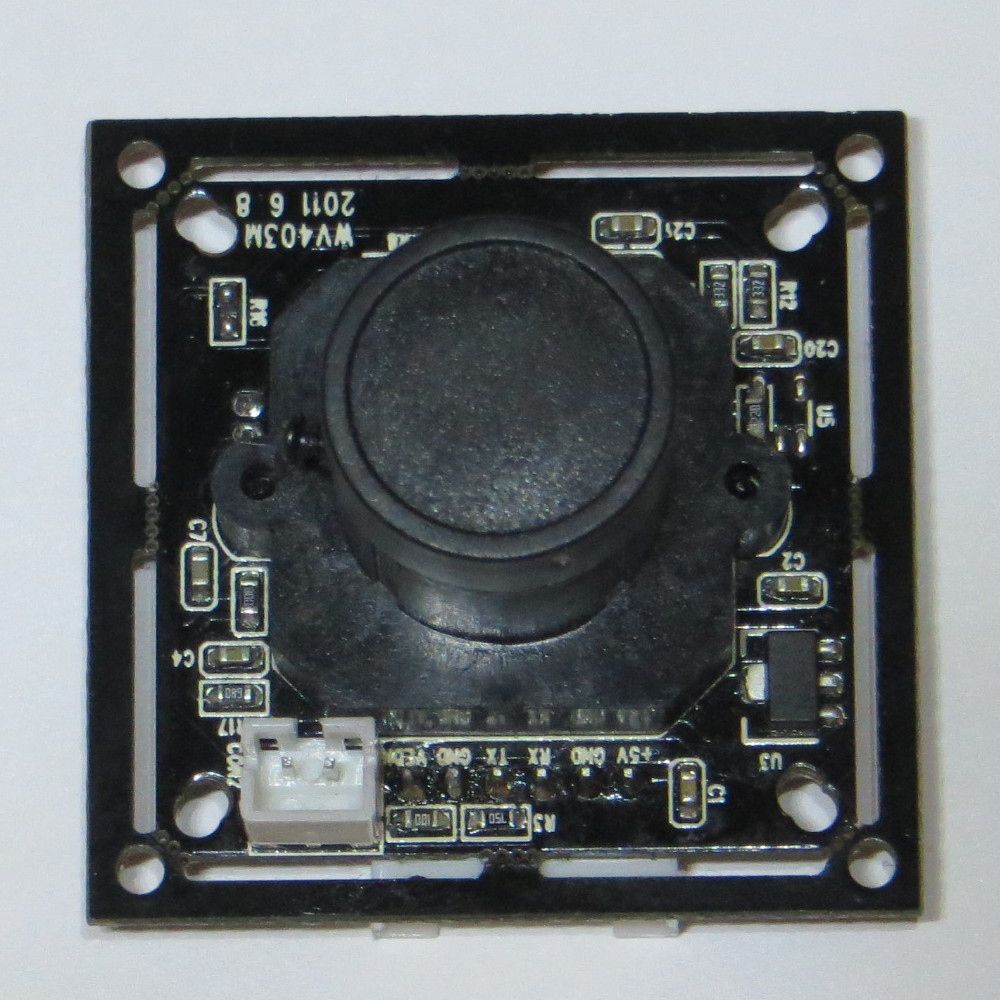
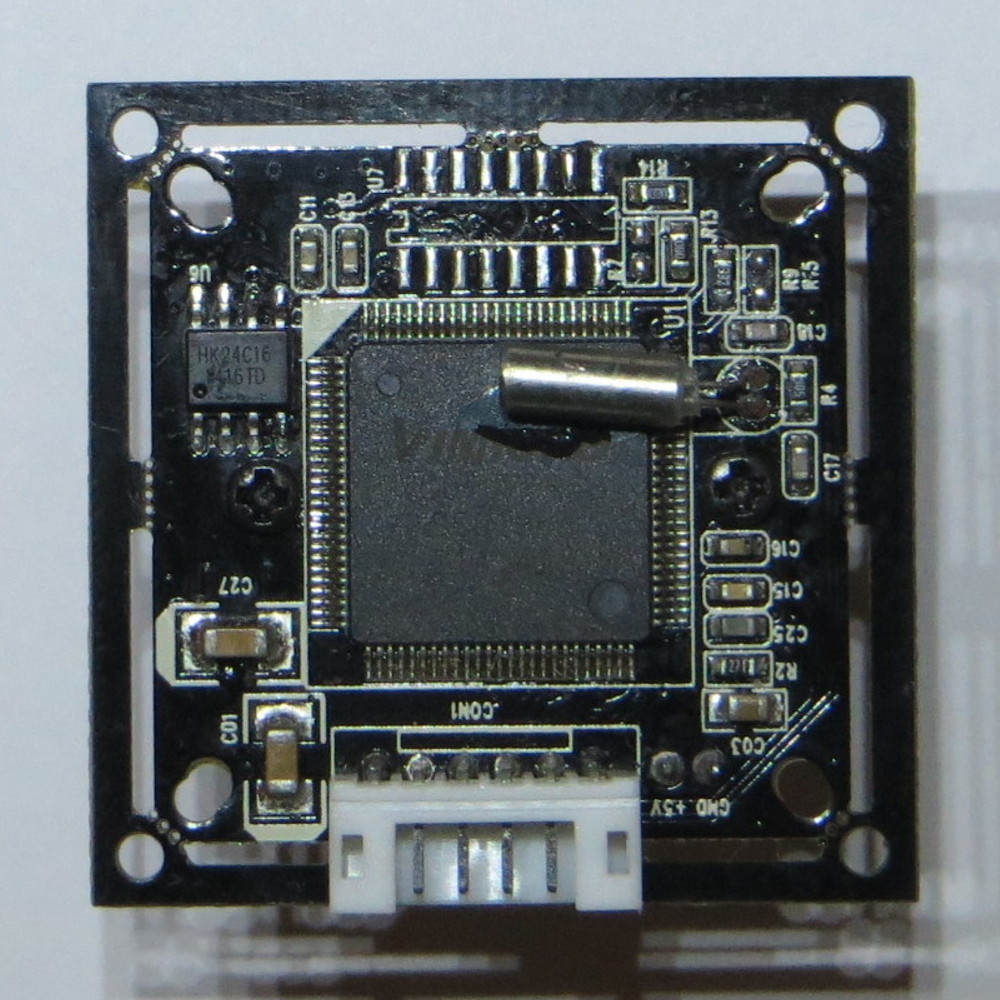
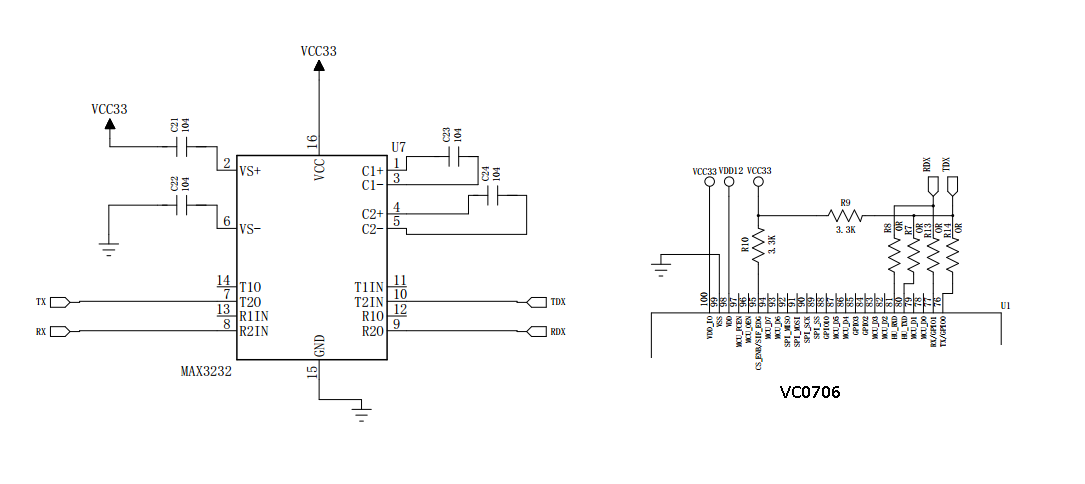
กล้องอีกแบบหนึ่งคือแบบที่มีไดรเวอร์ RS-232 MAX3232
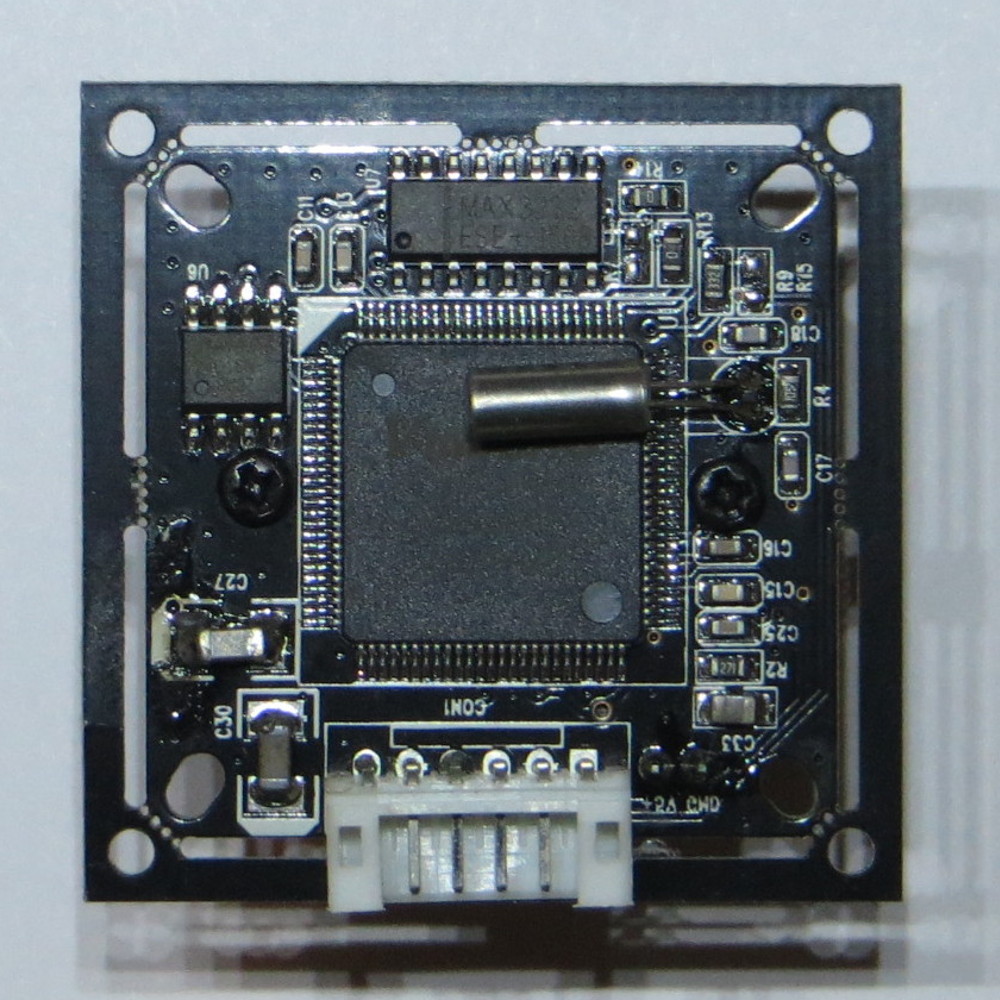
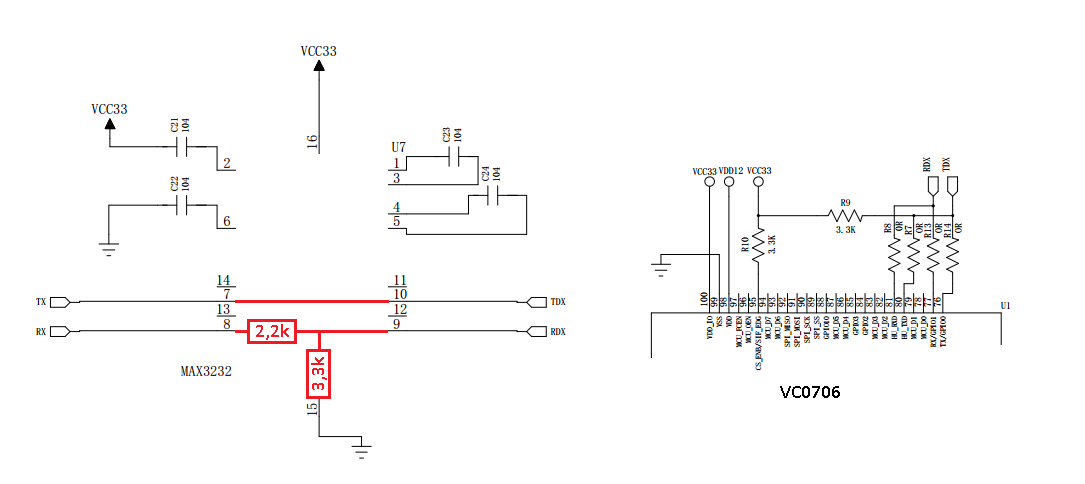
จำเป็นต้องถอดบัดกรี MAX3232 chip (RS-232 driver) ออก และบัดกรี jumper ระหว่างแพดสัมผัสของขา 7 และ 10 ที่ตรงกันของ chip — ขาเหล่านี้มีหน้าที่สำหรับเอาต์พุต TX ของกล้อง คุณสามารถบัดกรี jumper แบบเดียวกันระหว่างแพด 8 และ 9 ได้ — กล้องก็จะทำงาน (Figure 8)
อย่างไรก็ตาม จะถูกต้องกว่าหากลดความกว้างของสัญญาณ RX (อินพุตกล้อง) ให้มีค่าไม่เกิน 3.3 V โดยใช้ตัวต้านทานสองตัว (voltage divider) ดังที่แสดงใน Figure 10

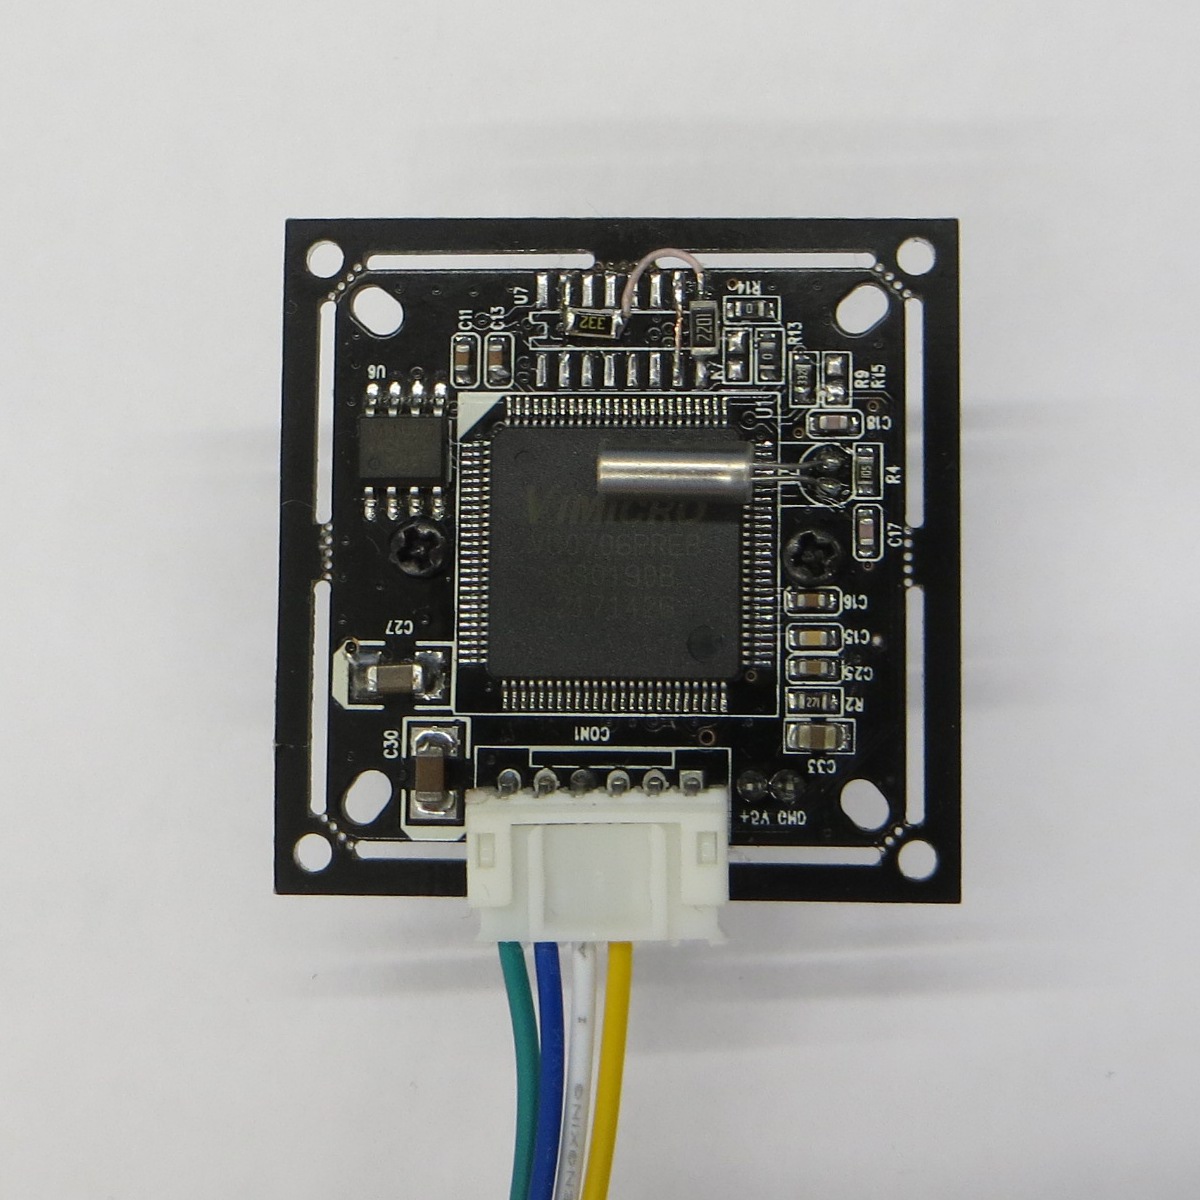
ดังนั้น เราต้องเชื่อมต่อกล้องตามที่แสดงใน Figure 2 ผลลัพธ์ที่ได้ควรมีลักษณะดังนี้ (Figure 14) Micro SD card จะต้องฟอร์แมตเป็น FAT32 อย่าลืมเชื่อมต่อสาย USB

ถึงเวลาตรวจสอบการทำงานของกล้องและการบันทึกลงใน micro SD ก่อนการใช้งานครั้งแรก จำเป็นต้องติดตั้งไลบรารีเพิ่มเติม
การตั้งค่าซอฟต์แวร์
การตั้งโปรแกรมทำผ่าน Arduino IDE ไลบรารีเพิ่มเติม (สำหรับทั้งโปรเจกต์):
การเริ่มต้นครั้งแรก
เรียกใช้ Arduino IDE, สร้าง sketch ชื่อ CameraTest.ino:
#include "SoftwareSerial.h"
#include
//use software serial
SoftwareSerial cameraconnection(2,3);//Rx, Tx
VC0706 cam = VC0706(&cameraconnection);
//use hardware serial
//VC0706 cam = VC0706(&Serial);
void setup()
{
Serial.begin(115200);
Serial.println("VC0706 Camera Snapshot Test ...");
if (!SD.begin(SS_SD)) {
Serial.println("SD Card init failed...");
return;
}
if(true == cameraInit()){
snapShot();
}else{
Serial.println("camera init error...");
}
}
void loop()
{
//nothing to do
}
bool cameraInit()
{
cam.begin(BaudRate_38400);
char *reply = cam.getVersion();
if (reply == 0) {
Serial.println("Failed to get version");
return false;
} else {
Serial.println("version:");
Serial.println("-----------------");
Serial.println(reply);
Serial.println("-----------------");
return true;
}
}
void snapShot()
{
Serial.println("Snap in 3 secs...");
delay(3000);