เริ่มต้นใช้งาน p5.ble.js ด้วย Arduino Nano 33 BLE
BLE คืออะไร?
BLE (Bluetooth Low Energy) จัดการการสื่อสารไร้สายระหว่าง hardware และ software โดยใช้พลังงานต่ำ เป็นเครื่องมือที่มีประโยชน์มากในการสร้างอุปกรณ์สมาร์ทโฮม, wearables และโปรเจกต์ IoT ทุกชนิด อย่างไรก็ตาม การสร้าง app ที่กำหนดเองเพื่อสื่อสารกับอุปกรณ์อาจทำให้ผู้เริ่มต้นสับสนและรู้สึกท้าทาย
p5.ble.js คืออะไร?
p5.ble.js เป็น JavaScript library ที่ช่วยให้สามารถสื่อสารระหว่างอุปกรณ์ BLE และ p5 sketches ได้ มันใช้ Web Bluetooth API และเปลี่ยนการตั้งค่าที่ซับซ้อนให้เป็นฟังก์ชันง่ายๆ หลายฟังก์ชัน สามารถช่วยคุณสร้าง web app ที่กำหนดเองซึ่งทำงานร่วมกับวงจรที่รองรับ BLE ของคุณได้
เกี่ยวกับบทช่วยสอนนี้
บทช่วยสอนนี้จะแนะนำคุณตลอดตัวอย่างที่แสดงฟังก์ชันพื้นฐานบางอย่างของ p5.ble.js ได้แก่ read, write และ subscribe เมื่อทำตามบทช่วยสอนนี้ คุณจะสามารถทำให้ Arduino Nano 33 BLE ของคุณสื่อสารกับ web app ที่ทำงานบน Chrome browser ได้
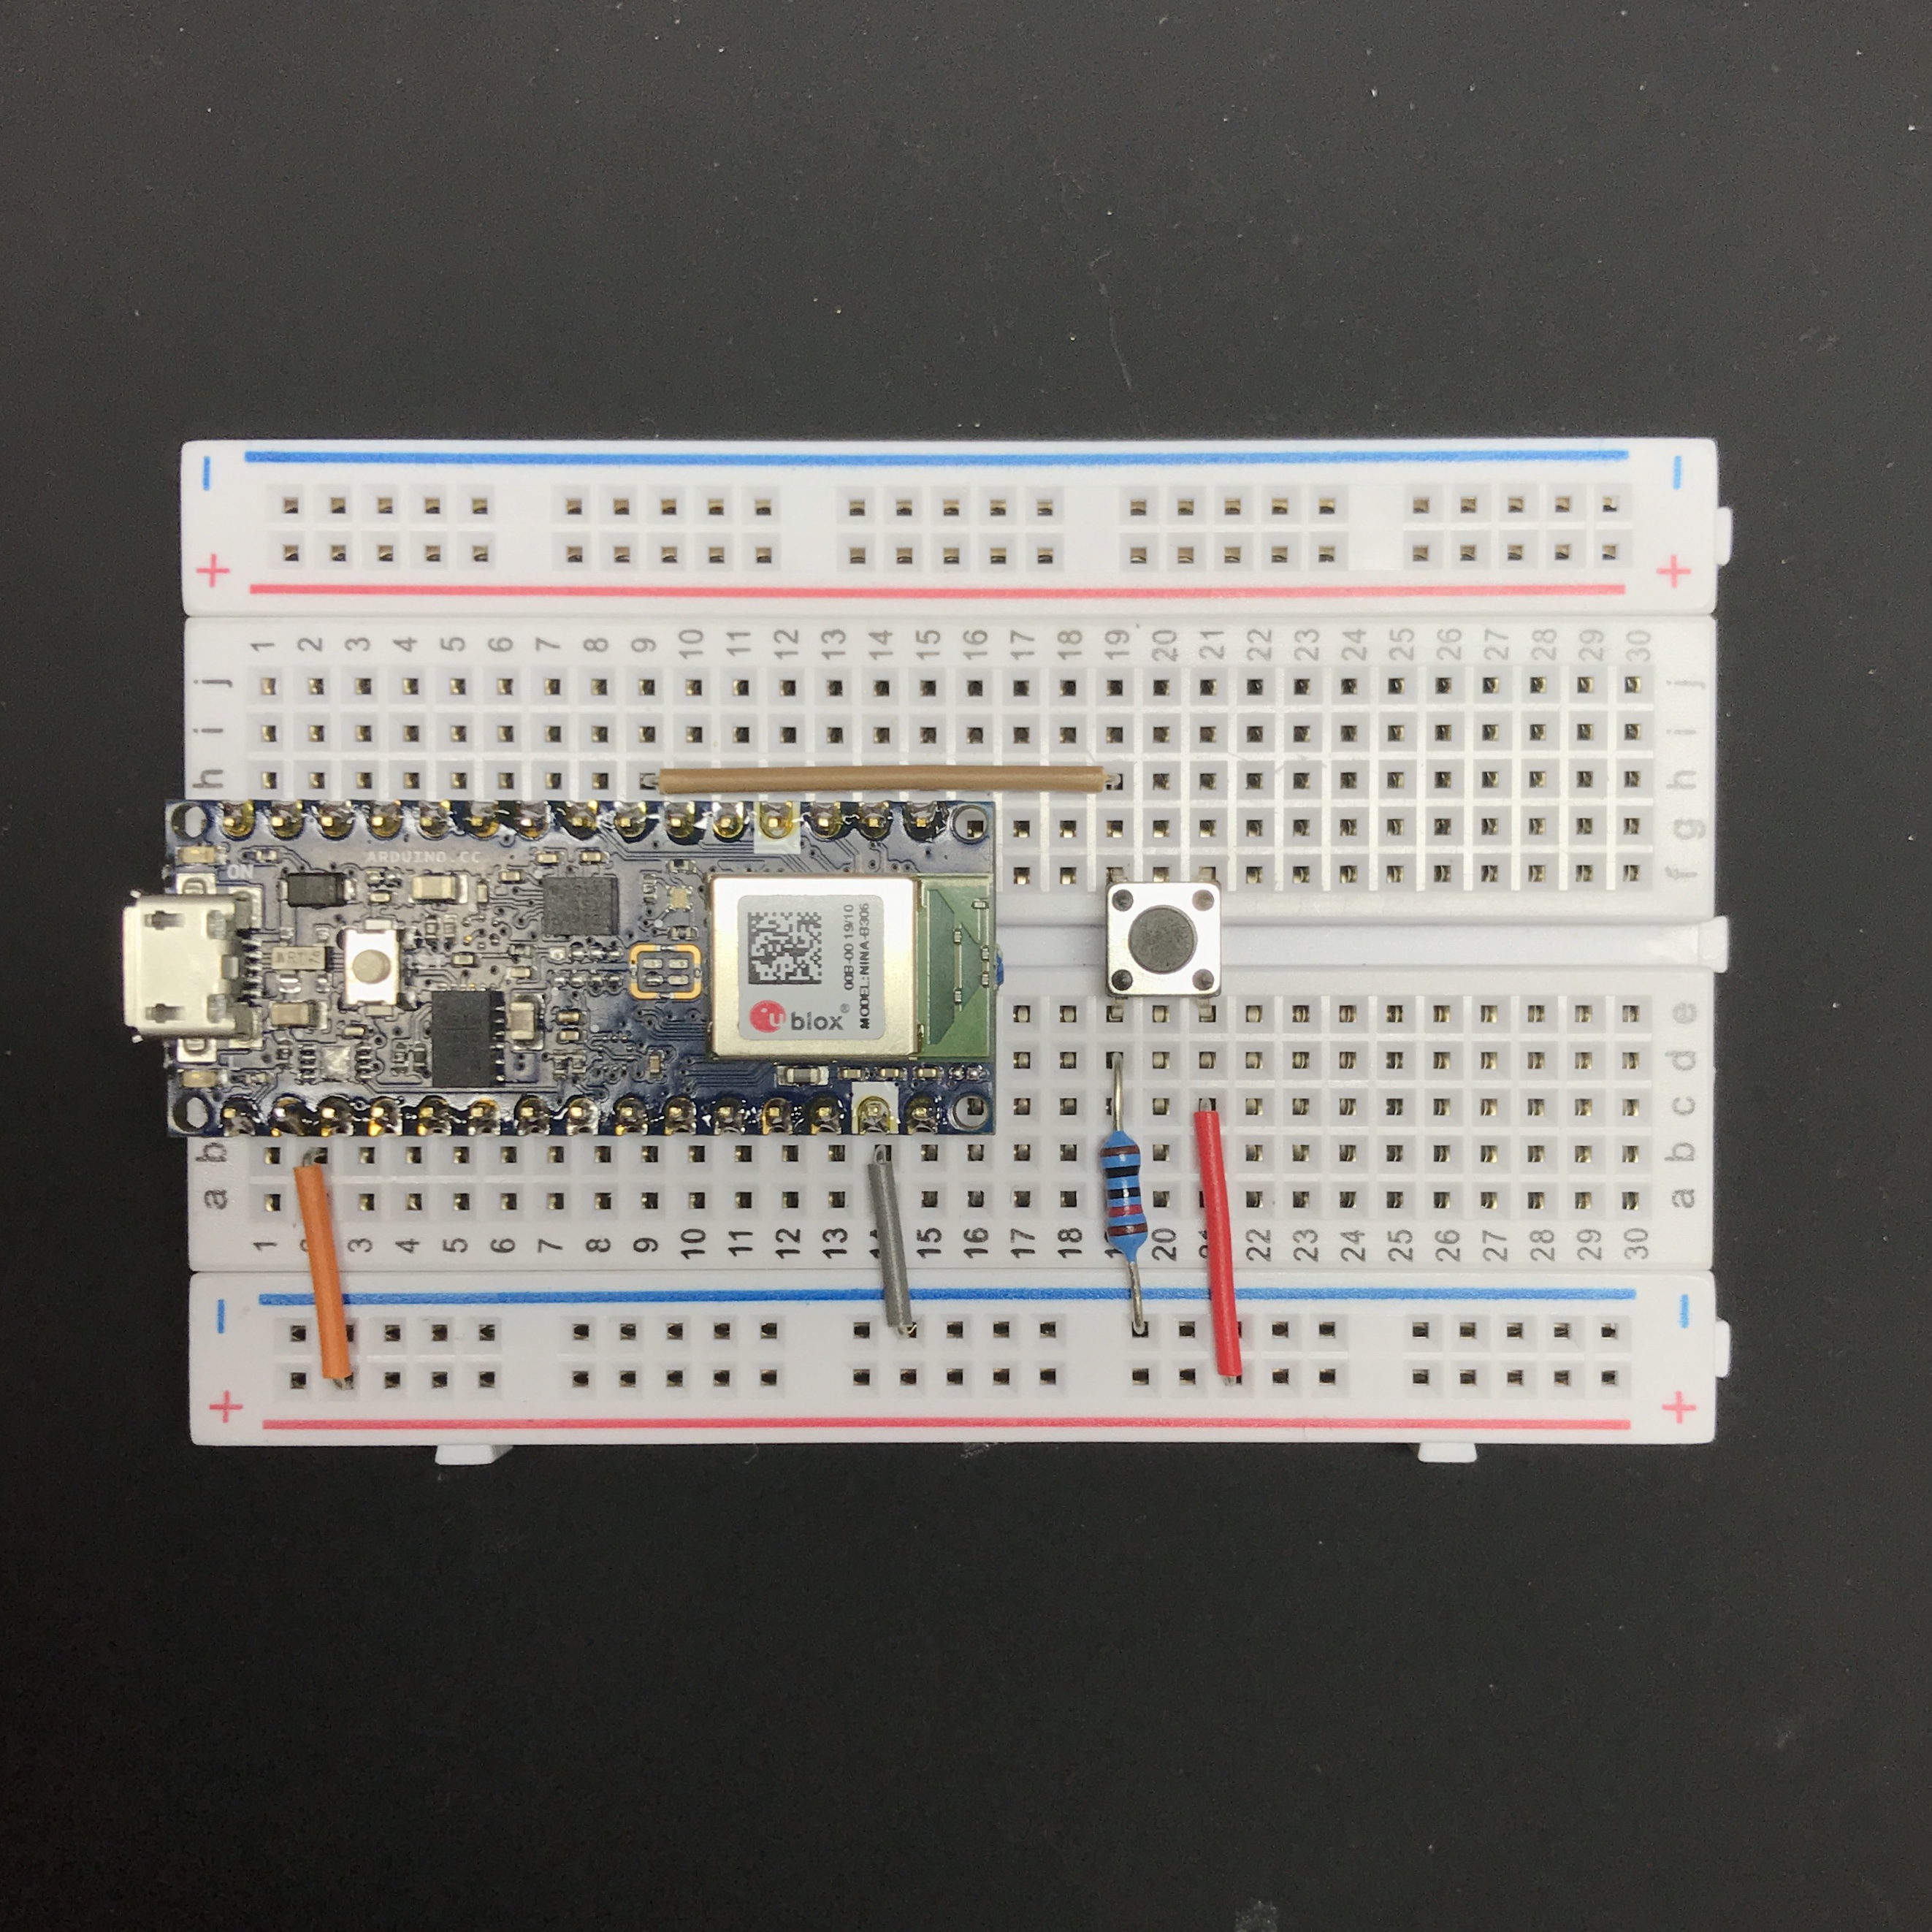
ขั้นตอนที่ 1: ประกอบวงจร
Arduino Nano 33 BLE หรือ Arduino Nano 33 BLE Sense อาจไม่ได้มาพร้อมกับ header pin ที่บัดกรีไว้ คุณจะต้องบัดกรี header pin เหล่านั้น การใช้ breadboard สามารถช่วยคุณจัดแนว header pin ได้
จากนั้น ต่อสาย button เข้ากับ digital pin 4
ขั้นตอนที่ 2: ติดตั้ง Libraries
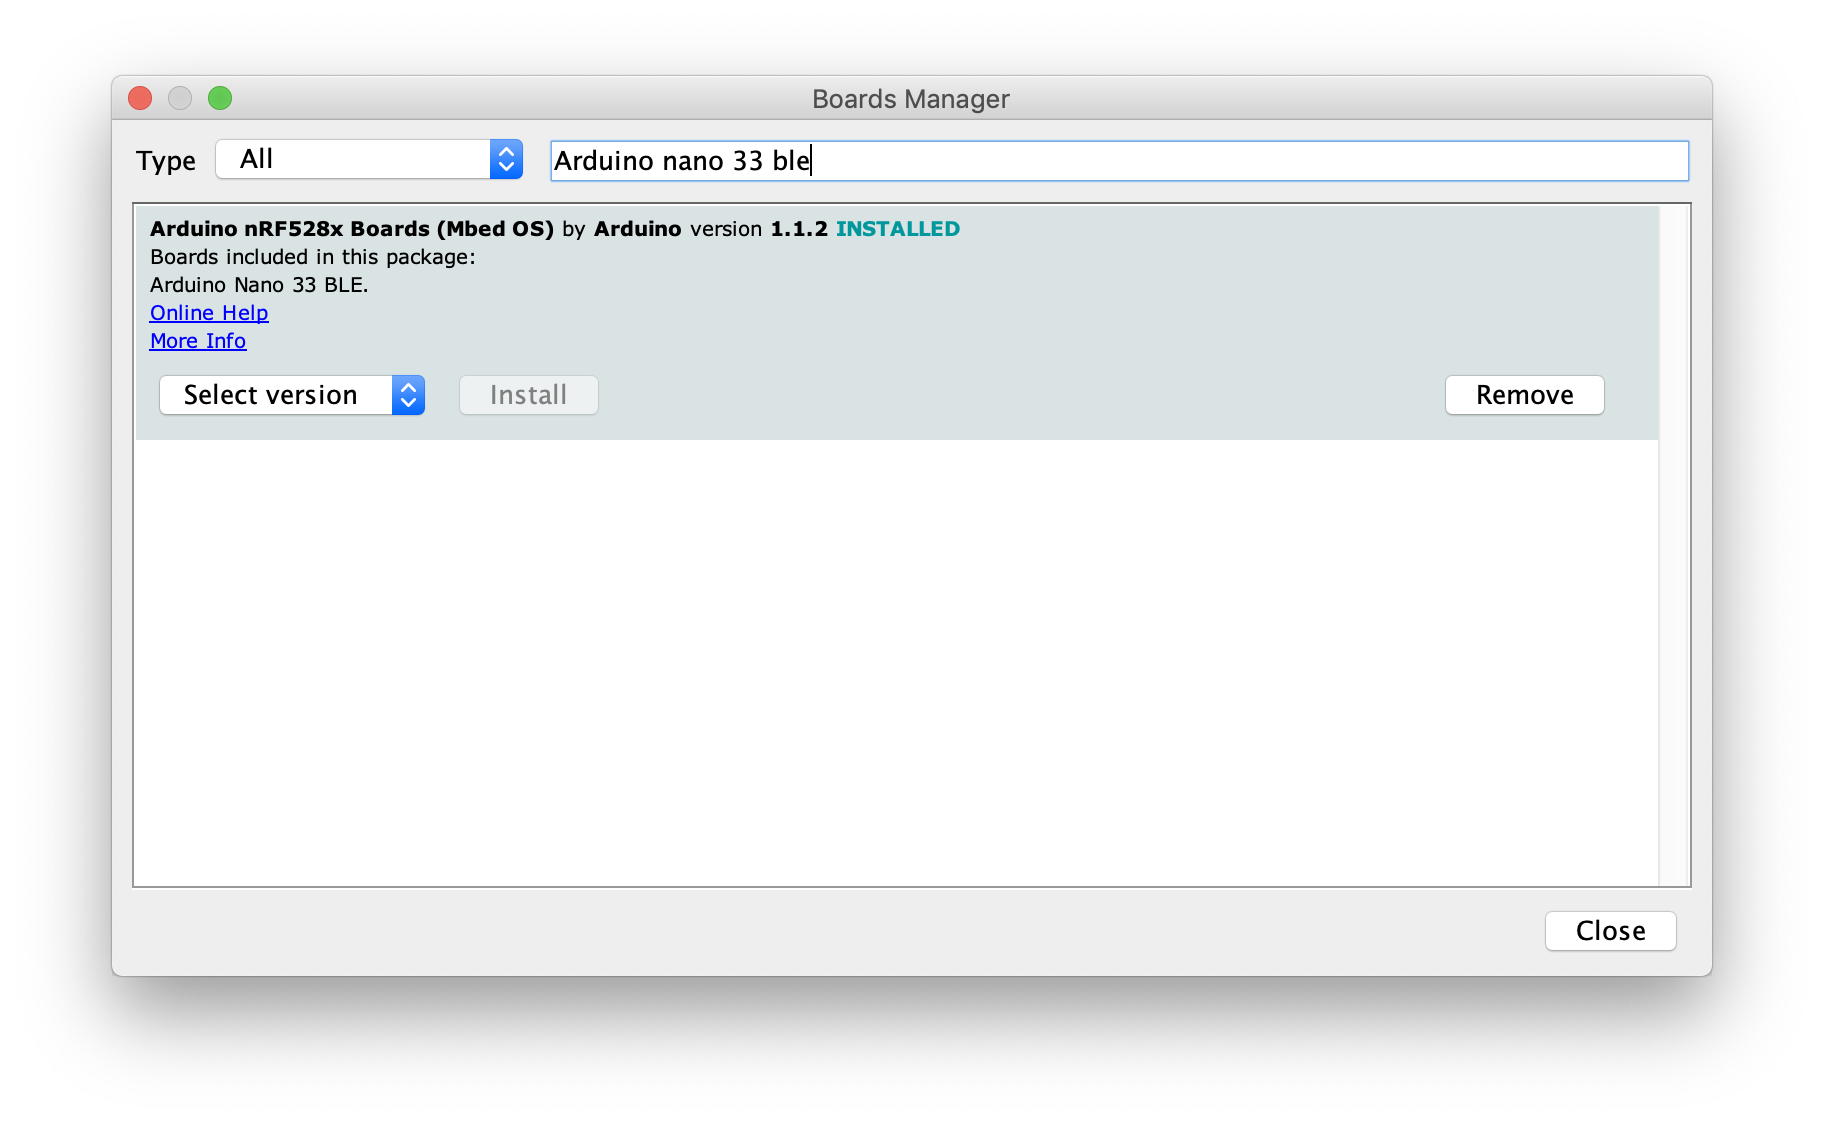
ในการ program Arduino Nano 33 BLE เราจำเป็นต้องติดตั้ง library ที่เกี่ยวข้อง ไปที่ Tools >> Boards >> Boards Manager ค้นหา Arduino Nano 33 BLE คลิก install (หรือ update หากคุณเคยติดตั้งมาก่อนแล้ว)
หลังจากติดตั้งแล้ว ให้ไปที่ Tools >> Boards เลือก Arduino Nano 33 BLE
หมายเหตุ: Arduino Nano 33 BLE และ Arduino Nano 33 BLE Sense ใช้การตั้งค่า board เดียวกัน Arduino Nano IoT ใช้การตั้งค่าที่แตกต่างกัน โปรดตรวจสอบชื่อ Arduino ของคุณอีกครั้งก่อนที่จะ program
จากนั้น ไปที่ Tools >> Manage Libraries ค้นหา ArduinoBLE คลิก install (หรือ update หากคุณเคยติดตั้งมาก่อนแล้ว)
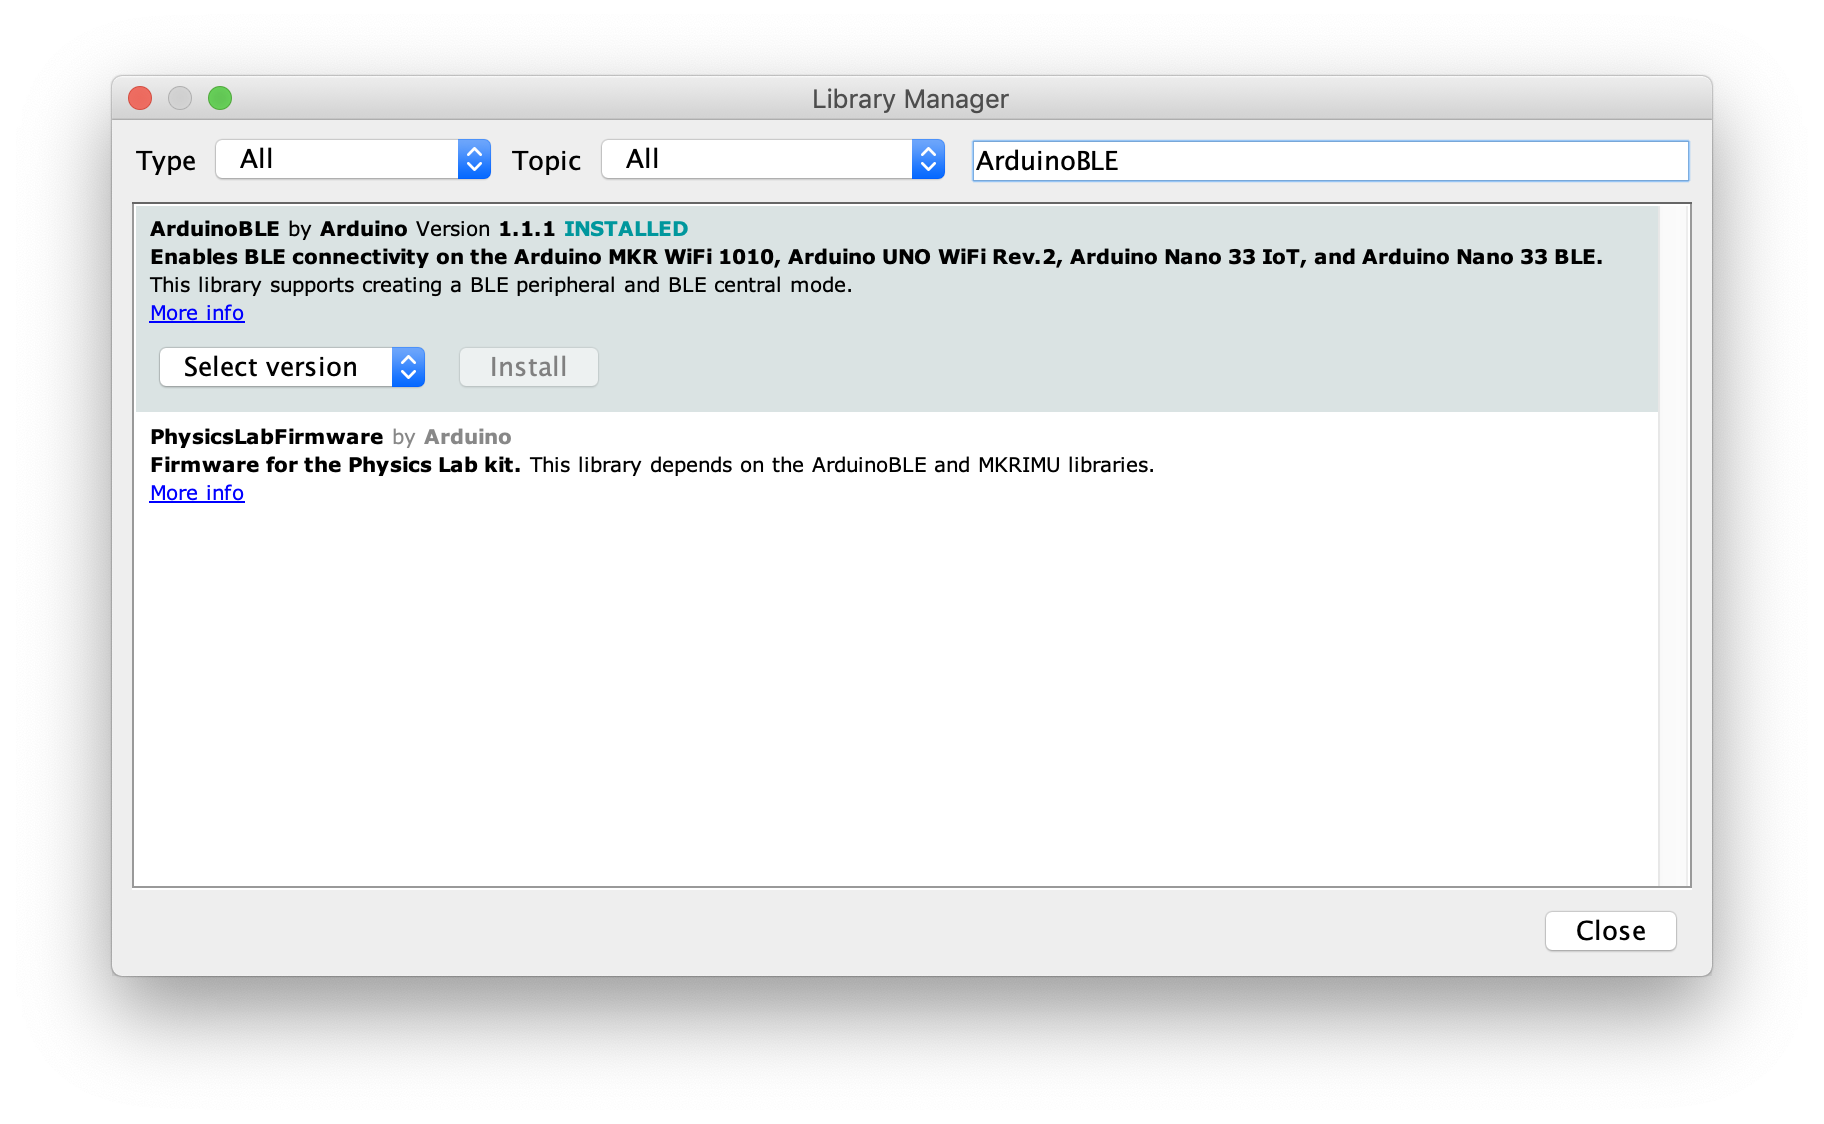
จากนั้น เราก็พร้อมที่จะ program Arduino Nano 33 BLE แล้ว
ขั้นตอนที่ 3: Program Arduino
ในบทช่วยสอนนี้ เราจะใช้ตัวอย่าง sketch ไปที่ File >> Examples >> ArduinoBLE >> Peripheral เปิดตัวอย่าง ButtonLED
Verify sketch และ program
หลังจาก program เสร็จแล้ว ให้เปิด Serial Monitor คุณควรจะเห็นข้อความ "Bluetooth device active, waiting for connections..."
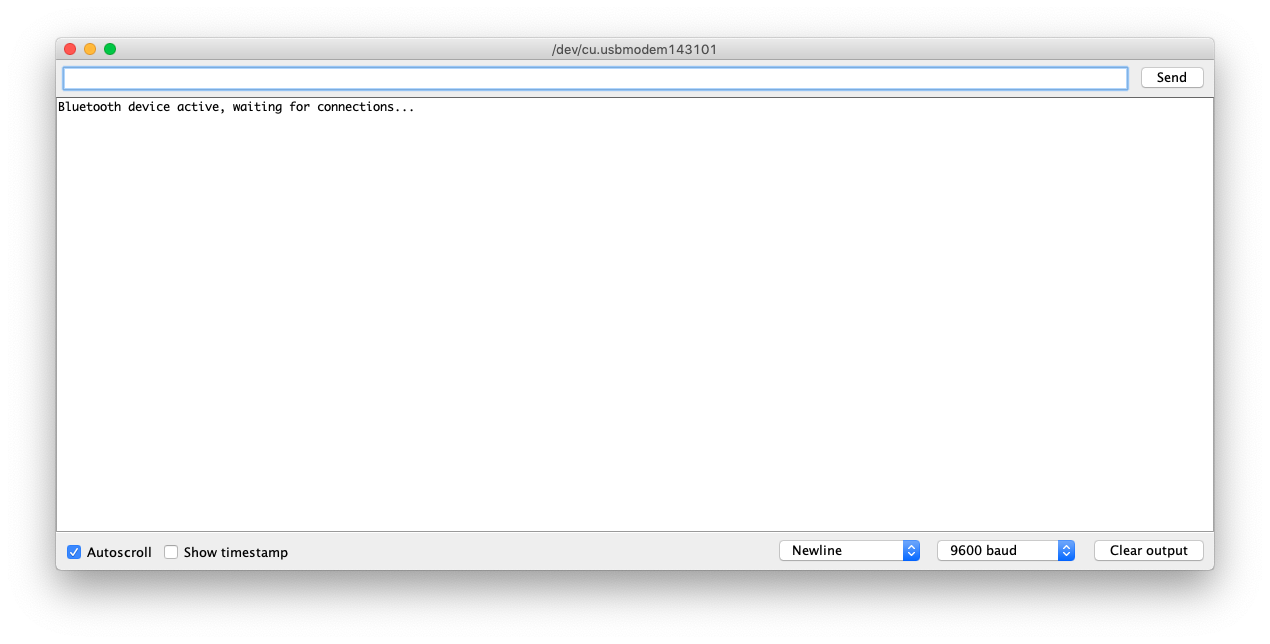
หากคุณกด button บน breadboard คุณควรจะเห็น LED บน board สว่างขึ้น และมีข้อความ "LED on" พิมพ์อยู่ใน Serial Monitor นี่เป็นการตรวจสอบว่าวงจรของคุณต่อสายถูกต้อง หากคุณไม่เห็น LED หรือข้อความดังกล่าว ให้ตรวจสอบการต่อสายของคุณ
ขั้นตอนที่ 4: เพิ่ม p5.ble.js library
เปิด p5.js Editor ใน Chrome browser คลิกไอคอนรูป arrow เพื่อเปิดไฟล์ index.html วางโค้ดบรรทัดต่อไปนี้ตามที่ระบุไว้ด้านล่าง
<script src="https://unpkg.com/p5ble@0.0.4/dist/p5.ble.js" type="text/javascript"></script>
ขั้นตอนที่ 5: การ program p5
อันดับแรก เราจะประกาศ UUID ของ services และ characteristics สิ่งเหล่านี้คือตัวระบุที่ไม่ซ้ำกันสำหรับ characteristics ใน Arduino sketch ของเรา
const serviceUuid = "19b10010-e8f2-537e-4f6c-d104768a1214";
const characteristicsUUID = {
 led:"19b10011-e8f2-537e-4f6c-d104768a1214",
 button:"19b10012-e8f2-537e-4f6c-d104768a1214"
}
จากนั้น เราจะต้องสร้าง instance ของ BLE object และ characteristics ใน p5 sketch ของเรา
let buttonCharacteristic;
let ledCharacteristic;
let myBLE;
ถัดไป เราจะสร้าง global variable เพื่อเก็บค่าที่อ่านได้จาก button
let buttonValue = 0;ภายใน setup function เราจะเริ่มต้น BLE object และปุ่ม interface
function setup() {
 createCanvas(400, 400);
 myBLE = new p5ble();
 createCanvas(600, 400);
 background("#FFF");
 const connectButton = createButton('Connect and Start Notifications')
 connectButton.mousePressed(connectAndStartNotify);
 const toggleButton = createButton('Toggle');
 toggleButton.position(15, 15);
 toggleButton.mousePressed(toggleLED);
}
จากนั้น เราจะประกาศ callback functions ที่สอดคล้องกับการทำงานแต่ละอย่าง: เมื่อ connectButton ถูกกด, connectAndStartNotify function จะถูกเรียกใช้งาน เมื่อ toggleButton ถูกกด, toggleLED function จะถูกเรียกใช้งาน
function connectAndStartNotify() {
 myBLE.connect(serviceUuid, gotCharacteristics);
}
function gotCharacteristics(error, characteristics)
 if (error) console.log('error: ', error);
 console.log(characteristics[1].uuid);
 for(let i = 0; i < characteristics.length;i++){
   if(characteristics[i].uuid == characteristicsUUID.button){
     buttonCharacteristic = characteristics[i];
     myBLE.startNotifications(buttonCharacteristic, handleButton);
   }else if(characteristics[i].uuid == characteristicsUUID.led){
     ledCharacteristic = characteristics[i];
   }else{
     console.log("nothing");
   }
 }
function handleButton(data) {
 console.log('Button: ', data);
 buttonValue = Number(data);
}
function toggleLED(){
 myBLE.read(ledCharacteristic, handleLED);
}
function handleLED(error, data){
 if (error) console.log('error: ', error);
 console.log('LED: ', data);
 myBLE.write(ledCharacteristic, !data);
}
จากนั้น ภายใน draw function เราจะใช้ buttonValue เพื่อวาดสี่เหลี่ยม
function draw() {
  noStroke();
 if(buttonValue>0){
   fill(color(200, 200, 200));
 }else{
   fill(color(100, 200, 200));
 }
 rect(15, 40, 60, 60);
}