Main push button article: Using push buttons with Arduino
Main switch button article: Using switch buttons with Arduino
Let's speak about push buttons, the wiring and how to implement the code for this circuit elements in Arduino. Push buttons connect two points in a circuit when you press them. That means that logic state of the circuit change when you press and keep pressed the button. Switch buttons instead maintain the state without the need to keep the button pressed. That means that logic state of the circuit change every time you press the button.
Wiring schema
This example demonstrates the use of a button with Arduino Nano using internal pull-up resistor. That means that we will have a default HIGH value and LOW value when the button is turned ON.
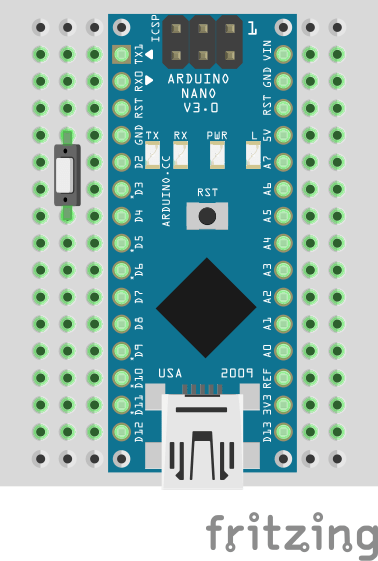
Note: the button pin can be connected to Arduino Nano D4 or any other digital input pin.
Arduino code for push button
We've defined a struct (called button) to represent the state of the button. The serial monitor will output that state in real time.
#define BUTTON_PIN 4

struct button {
  byte pressed = 0;
};

button button;

void setup()
{
  pinMode(BUTTON_PIN, INPUT_PULLUP);

  Serial.begin(115200);
}

void loop()
{
  button.pressed = isButtonPressed(BUTTON_PIN);

  if (button.pressed) {
    Serial.println("Button pressed");
  } else {
    Serial.println("Button not pressed");
  }
}

bool isButtonPressed(int pin)
{
  return digitalRead(pin) == 0;
}
Arduino code for switch button
We've defined a struct (called toggle) to represent the state of the switch. The serial monitor will output that state in real time.
#define TOGGLE_PIN 4

struct toggle {
  byte on = 0;
};

toggle toggle;

void setup()
{
  pinMode(TOGGLE_PIN, INPUT_PULLUP);

  Serial.begin(115200);
}

void loop()
{
  toggle.on = isToggleOn(TOGGLE_PIN);

  if (toggle.on) {
    Serial.println("Toggle ON");
  } else {
    Serial.println("Toggle OFF");
  }
}

bool isToggleOn(int pin)
{
  return digitalRead(pin) == 0;
}
Note: we use toggle to define the button because switch is reserved word and may cause conflicts.
🛠️ เจาะลึกเบื้องหลังการทำงาน (Deep Dive / Technical Analysis)
Pushing a button seems incredibly simple until you connect one to an Arduino and realize it behaves like an insane random number generator. The Using Buttons with Arduino project is the essential foundational lesson in electrical "Floating States," teaching programmers why raw C++ logic fails without basic physical electronics knowledge.
The Floating Pin Crisis
If you connect a button directly between 5V and Pin 2, the Arduino will read HIGH when you press it.
- The Phantom Signal: But what happens when you let go? The wire is connected to nothing. It acts as a tiny radio antenna.
- The Arduino's processor is so sensitive it will pick up the static electricity from your skin or the 60Hz hum from a nearby wall outlet. Pin 2 will violently fluctuate between
HIGHandLOWthousands of times a second, crashing your entire software!
The Pull-Down Resistor (Forcing Logic)
You must mechanically force the Pin to choose a state.
- You wire a 10k Ohm Resistor from
Pin 2straight down toGND. - When the button is NOT pressed, any stray static electricity is harmlessly sucked down through the resistor into the ground.
Pin 2definitively readsLOW. - When you press the button, 5V power rushes in. Electricity always takes the path of least resistance. It chooses
Pin 2instead of fighting the massive 10K resistor!Pin 2definitively readsHIGH.
The Software Shortcut (INPUT_PULLUP)
Breadboarding physical resistors is tedious. Modern ATmega chips have microscopic resistors built into the silicon itself!
- Instead of using
pinMode(btnPin, INPUT);, you write:pinMode(btnPin, INPUT_PULLUP); - This activates an invisible 20K Ohm internal resistor connecting
Pin 2to5V. - The Flipped Logic: Now, the button must be wired to
GND. - Unpressed =
HIGH. Pressed =LOW! This completely changes how you write your code, but saves infinite space on your circuit board!
Essential Input Hardware
- Arduino Uno/Nano.
- Tactile Push Buttons.
- 10k Ohm Resistors (Color bands: Brown, Black, Orange).
- LEDs to visually confirm the
digitalRead()boolean state.