Intermediate
A Simple Light Follower
This lesson aims to show how to make a simple light follower made of cardboard using a microservo.

This lesson aims to show how to make a simple light follower made of cardboard using a microservo.
Project Supporter Team
Posted by
The choice to go up or down in order to follow the light is done in a very simple way. There are four LDR two up and two down. Arduino reads the analog value of all LDR, if the average of the two upper values is greater than the two lower the light is up so the angle of the microservo is incremented otherwise decremented.
Since the average is not a fixed number, as you can see in the code, a threshold is used. In this way the angle is changed if and only if the two averages are widely different.
const int threshold = 50;
[.....]
down_average = (A0_val + A1_val)/2;
  up_average = (A2_val + A3_val)/2;
  diff = abs(up_average-down_average);
  if ((up_average > down_average) && (diff > threshold))
    {
     if (val < 180) //if different from max val
       {
       val++;
       myservo.write(val);
       }
    }
  if((down_average > up_average) && (diff > threshold))
    {
    if (val > 0) //if different from min val
      {
      val--;
      myservo.write(val);
      }
    }
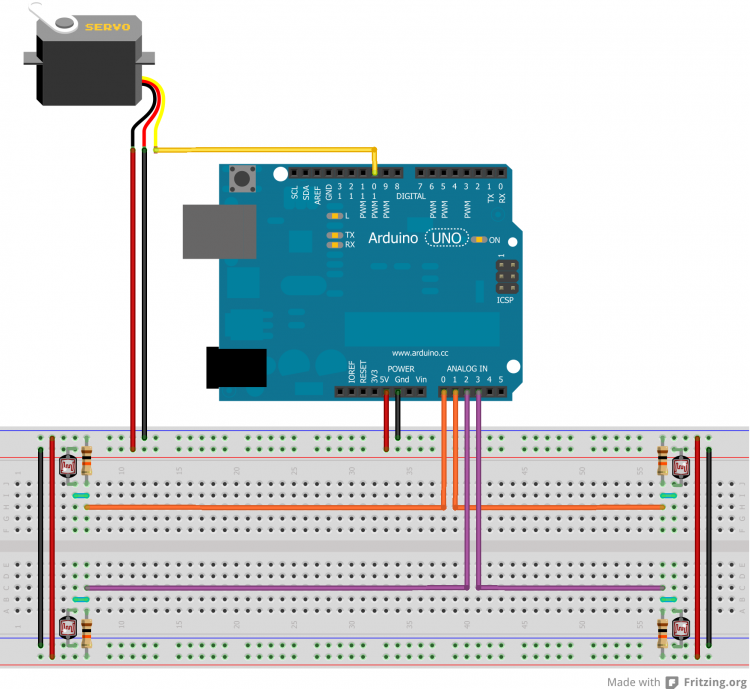
Make the circuit below!
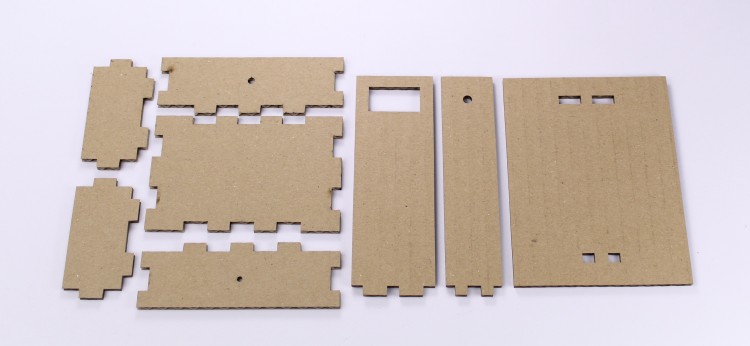
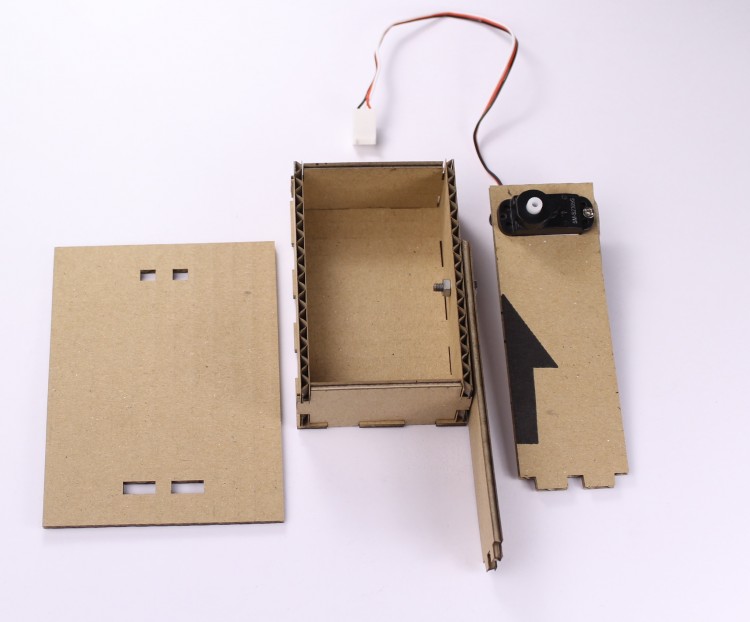
Download the attached file, print it, glue it on the cardboard and cut all the pieces for yours light follower. You should obtain something like this.
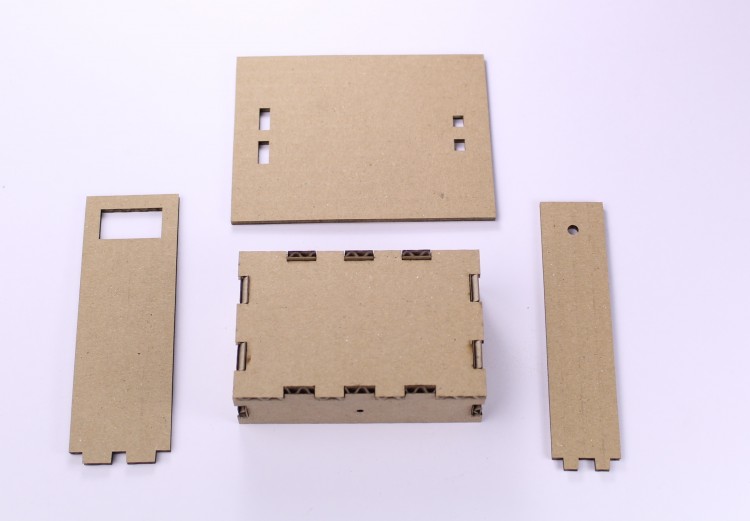
Mount the breadboard base in this way. Glue it if necessary.
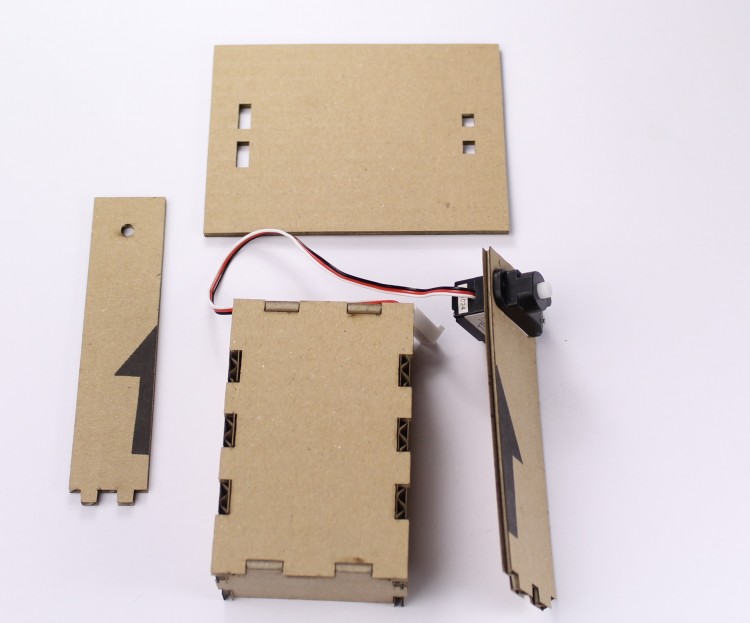
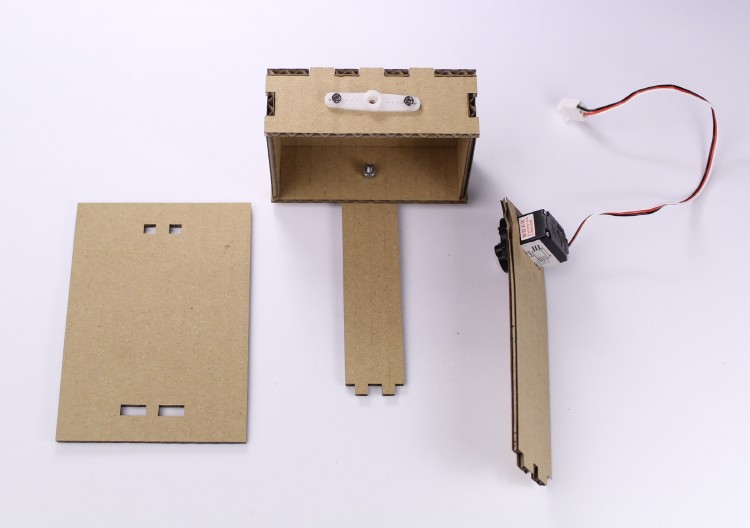
Mount the servo like below. Screw it for more stability.
Mount the bracket in this way.
Mount the servo gear. Screw it in this way.
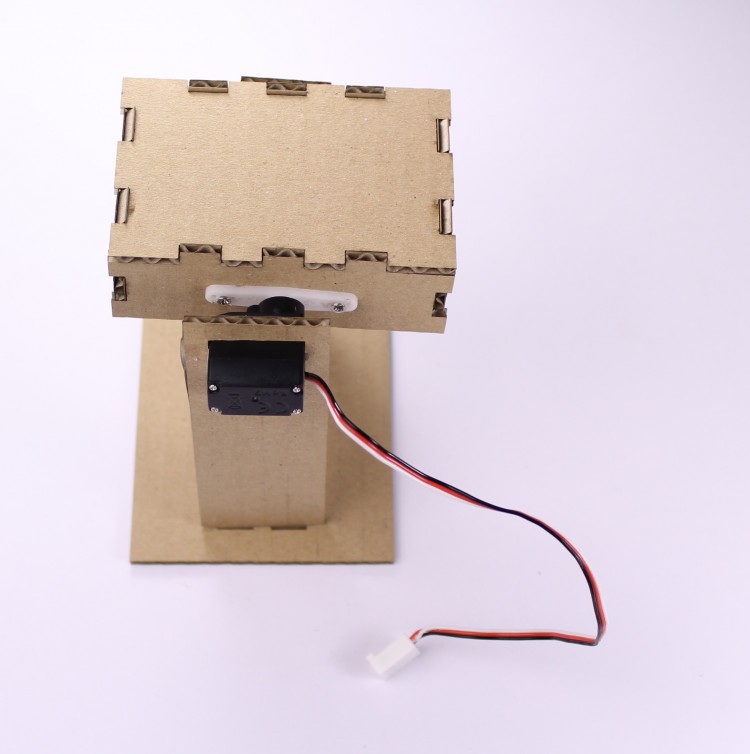
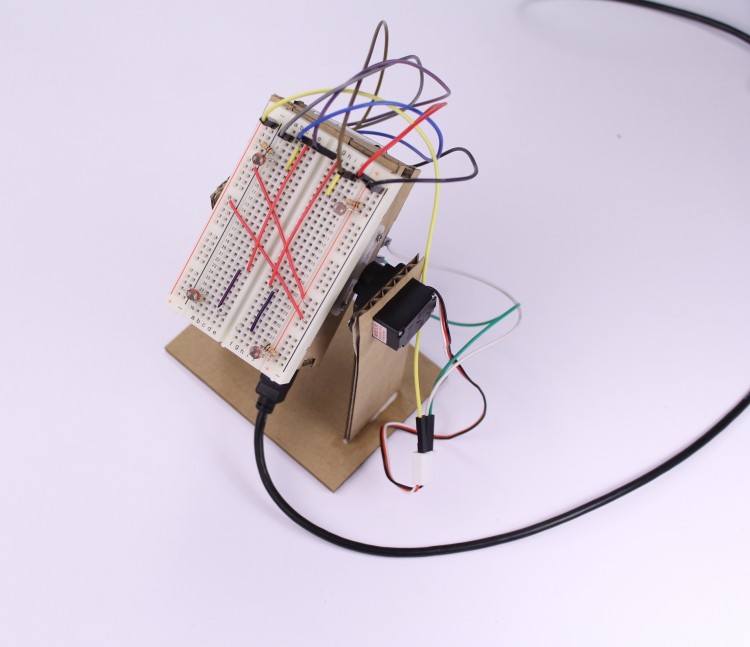
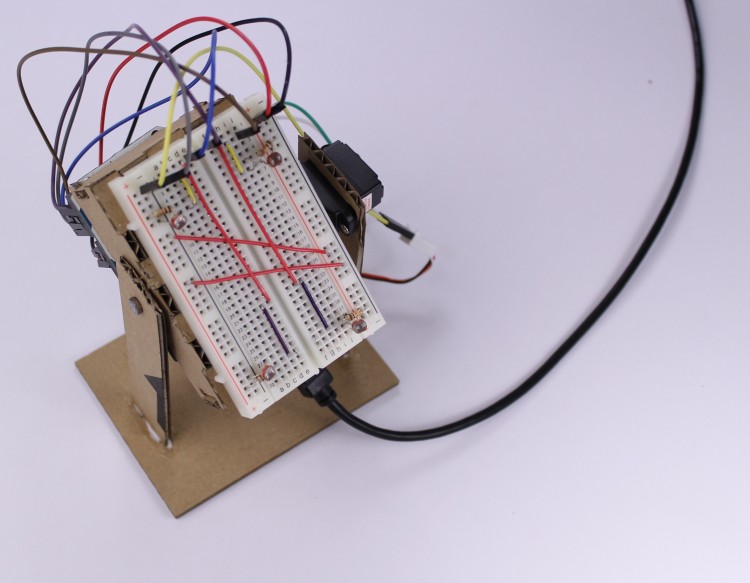
Put all together. You should obtain something like this
Glue the breadboard on the base. You can use the biadhesive tape of the breadboard.
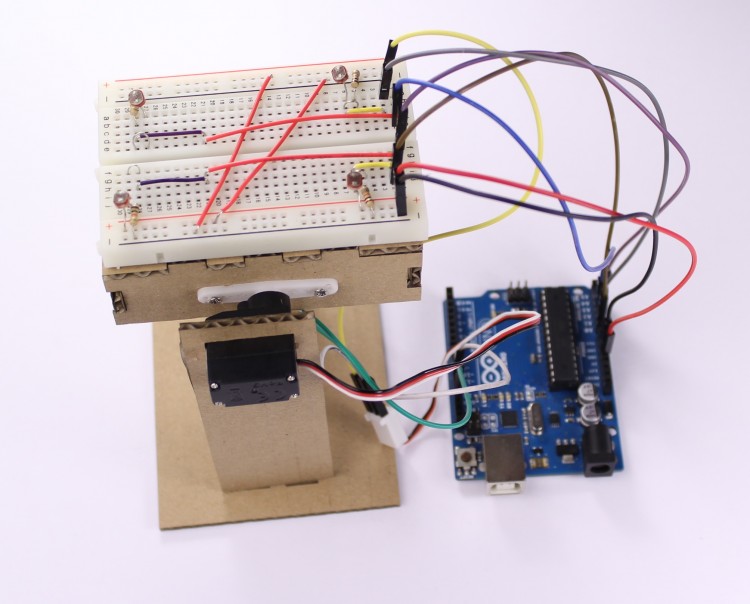
Screw Arduino on the back of the base.
Well done. Now you have all the necessary. Download the code on your Arduino and enjoy with your light follower!
Support to get the Source Code for this project
Project estimate
The long estimate form has moved to a separate page so this project page stays clean.
รีวิวจากคนใช้งานจริง
ถ้าเคยสั่งงาน เคยอ่านหน้านี้แล้วได้ประโยชน์ หรือมีข้อเสนอแนะ ฝากรีวิวไว้ได้เลย
ยังไม่มีรีวิวบนหน้านี้ ถ้าเคยใช้งานหรือมีข้อเสนอแนะ เขียนเป็นคนแรกได้เลย
